
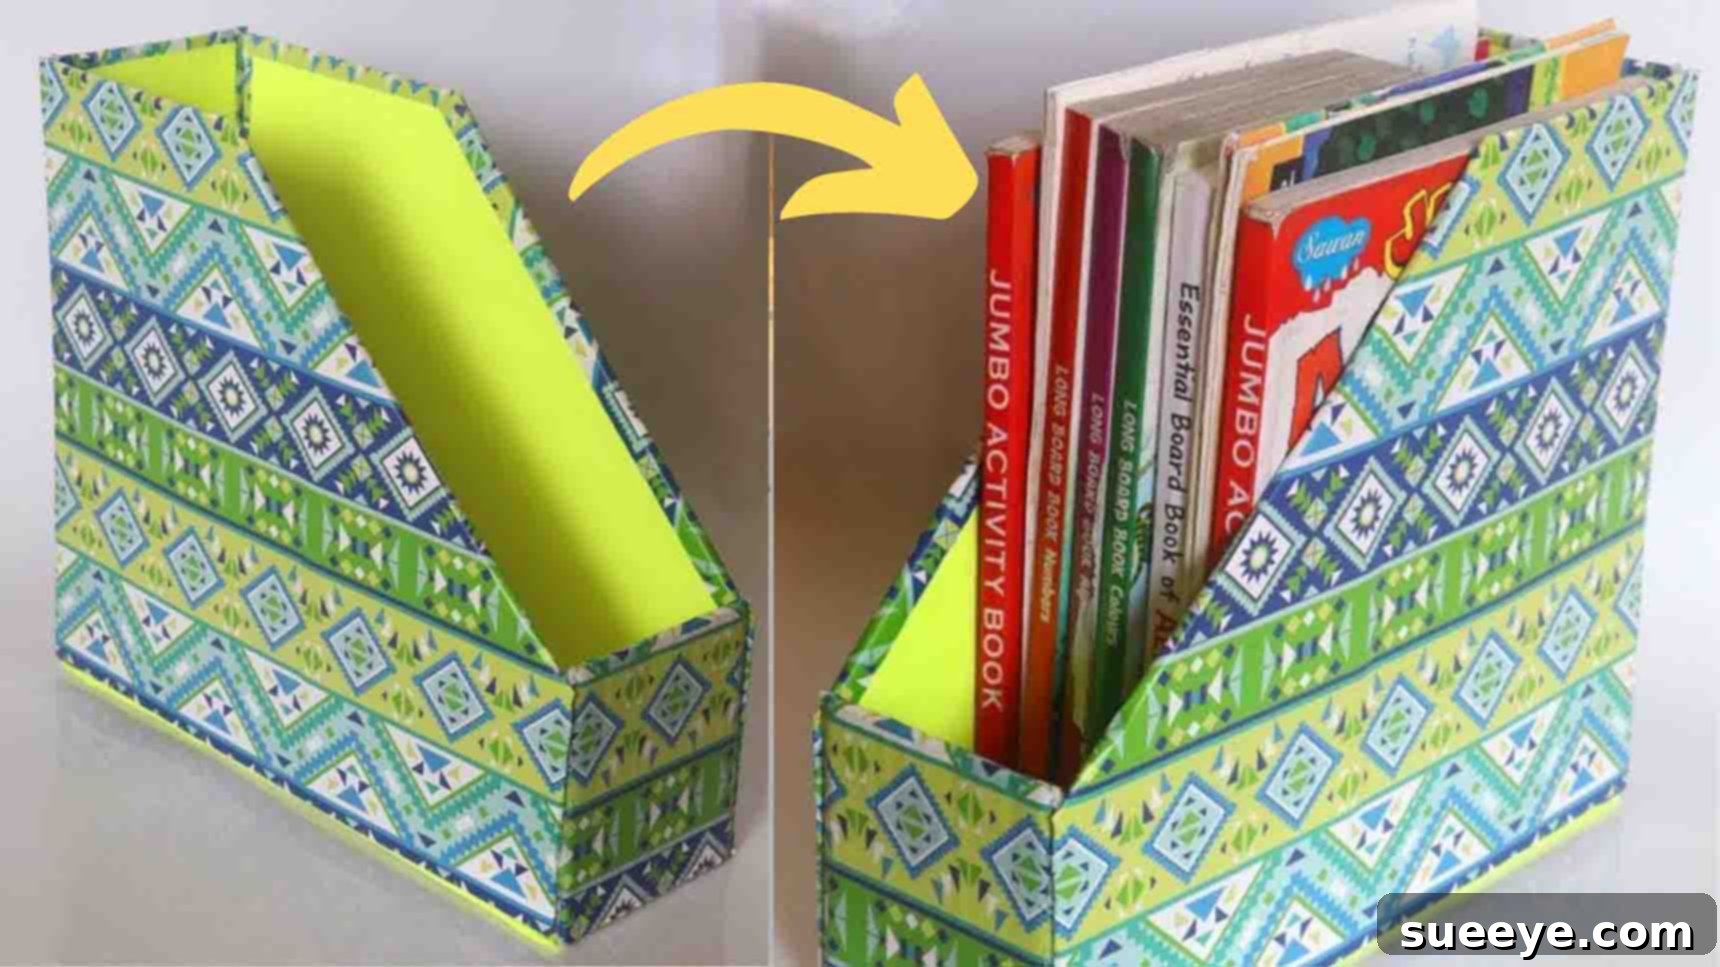
Craft Your Perfect Workspace: The Ultimate DIY Cardboard Desk Organizer Guide
Are you looking for an ingenious way to manage desk clutter while embracing sustainable living? Look no further! This detailed guide will walk you through creating a fantastic DIY desk organizer from recycled cardboard. Say goodbye to scattered pens, forgotten notepads, and tangled cables. Not only is this project incredibly satisfying, but it also offers a practical, eco-friendly solution for a tidier and more productive workspace. Inspired by creative ideas like those shared by The Little Crafties on YouTube, this easy weekend DIY is perfect for anyone keen on upcycling and adding a personal touch to their home office, study area, or craft station. Get ready to transform ordinary cardboard into an extraordinary organizational tool!
Why Choose a DIY Cardboard Desk Organizer?
In today’s fast-paced world, maintaining an organized workspace is crucial for productivity and mental clarity. A cluttered desk can lead to increased stress, missed deadlines, and a general feeling of disarray. While countless desk organizers are available for purchase, opting for a DIY cardboard solution offers a unique blend of benefits that commercial products simply can’t match:
- Eco-Friendly & Sustainable: By repurposing cardboard boxes, you’re actively contributing to waste reduction and promoting a greener lifestyle. It’s a fantastic way to give new life to materials that would otherwise end up in landfills.
- Cost-Effective: Why spend money on new organizers when you likely have all the primary materials at home? This project is incredibly budget-friendly, making efficient organization accessible to everyone.
- Fully Customizable: Unlike store-bought options, your DIY organizer can be tailored precisely to your needs and aesthetic preferences. Choose your favorite wrapping paper, paint colors, or decorative elements to create a piece that truly reflects your style.
- Boosts Creativity & Skill: Engaging in DIY projects is a wonderful way to unleash your inner crafter, develop practical skills, and experience the immense satisfaction of creating something functional and beautiful with your own hands.
- Enhances Workspace Productivity: A designated spot for every item means less time searching and more time focusing on your tasks. An organized desk fosters a sense of calm and efficiency, helping you stay on track.
Materials You’ll Need for Your Eco-Friendly Organizer
Before diving into the crafting process, gather all your materials to ensure a smooth and enjoyable experience. Most of these items are likely already in your home or easily accessible at a local craft store.
- Sturdy Cardboard: The foundation of your organizer. Collect clean, strong cardboard boxes from recent deliveries or packaging. The thicker the cardboard, the more durable your organizer will be.
- Wrapping Paper or Decorative Paper: This is where your personality shines! Choose patterns, colors, or textures that complement your room decor. You can also use paint, fabric, or even old magazine cutouts for a unique look.
- Pencil: For precise marking of all your measurements.
- Scale or Ruler: Essential for accurate measuring and straight lines, ensuring your cuts are perfect for a professional finish.
- Scissors or Craft Cutter: A sharp pair of scissors will work for most cuts, but a craft cutter (utility knife) with a cutting mat is highly recommended for cleaner, straighter edges and intricate details. Always exercise caution when using sharp tools.
- Paper Glue (PVA Glue or Craft Glue): Ideal for smoothly attaching the wrapping paper to the cardboard, preventing wrinkles and ensuring a neat finish.
- Hot Glue Gun and Glue Sticks: Your best friend for quick and strong assembly. Hot glue creates immediate bonds, making the construction process fast and efficient. Ensure you have enough glue sticks on hand.
Step-by-Step Guide: Crafting Your Custom Desk Organizer
Let’s turn those simple cardboard pieces into a fantastic, multi-compartment desk organizer. Follow these detailed steps for a successful and satisfying crafting experience.
Step 1: Prepare and Cut Your Cardboard Pieces with Precision
Accuracy is key in this stage. Take your time to measure and cut each piece carefully to ensure a sturdy and well-fitting organizer. We’ll be creating pieces that form a stylish organizer with varied compartment heights for optimal storage.
- The Slanted Back Panel: Begin by cutting a piece of cardboard to a width of 30 cm and a length of 28 cm. This will form the main back support of your organizer. On one of the 30 cm sides (the top), mark a point 13 cm from one corner. On the opposite 30 cm side (the bottom), mark a point 11 cm from the same corresponding corner. Draw a diagonal line connecting these two points and carefully cut along this line. This creates the signature slanted design, providing varying height compartments.
- The Base Panel: Cut a rectangular piece measuring 30 cm x 10 cm. This will serve as the sturdy foundation for your organizer.
- The Full Side Panel: Cut a rectangle that is 28 cm x 10 cm. This piece will form one of the tall side walls of your organizer.
- The Shorter Side Panel / Internal Divider: Cut a piece measuring 11 cm x 10 cm. While the original referred to this as a “square,” these dimensions make it a small rectangle perfectly suited for an internal divider or a shorter side compartment.
Pro Tip: When using a craft cutter, always use a self-healing cutting mat underneath to protect your work surface. Make several light passes with the blade rather than trying to cut through in one go, especially with thick cardboard. This ensures cleaner cuts and greater safety.
Step 2: Decorate Your Cardboard Panels for a Personalized Touch
Now comes the fun part: adding personality to your organizer! Covering your cardboard pieces with decorative paper not only makes them look beautiful but also adds an extra layer of durability. You can choose to cover both sides or just the visible ones.
- Outer Covering: Select your preferred wrapping paper or decorative paper. Lay each cardboard piece flat on the back of the paper, trace its outline, and cut the paper, leaving a small margin (about 1-2 cm) around the edges. Apply a thin, even layer of paper glue to the cardboard surface. Carefully position the decorative paper onto the cardboard, smoothing out any bubbles or wrinkles from the center outwards.
- Inner Lining: For a clean and refined finish on the inside of your organizer, use solid-colored paper (such as construction paper, scrapbook paper, or even painted paper). Repeat the gluing process, but this time, cut the paper precisely to the dimensions of the cardboard pieces, as you won’t be wrapping edges. This creates a neat contrast and a polished interior.
Allow the glue to dry completely for a few hours or overnight, especially if you used a water-based paper glue. This prevents warping and ensures a secure bond before assembly.
Step 3: Assemble the Main Structure of Your Organizer
With your decorated pieces ready, it’s time to bring your desk organizer to life. The hot glue gun is ideal here for quick and strong bonds. Work carefully but efficiently, as hot glue sets fast.
- Attach the Base to the Back: Take your decorated Slanted Back Panel (30 cm x 28 cm). Apply a generous line of hot glue along the 30 cm bottom edge. Carefully position and press the 30 cm side of your Base Panel (30 cm x 10 cm) onto this glued edge, ensuring it forms a sturdy 90-degree angle with the back panel. Hold firmly until the glue sets.
- Add the First Side Panel: Now, take your Full Side Panel (28 cm x 10 cm). Apply hot glue along one 28 cm edge of this panel. Align this edge with the side of your Slanted Back Panel and the side of the Base Panel. Press firmly to create a strong corner. This forms the tallest side of your organizer.
- Integrate the Shorter Side / Internal Divider: Next, take your Shorter Side Panel / Internal Divider (11 cm x 10 cm). This piece can function as a short side wall or an internal divider to create multiple compartments. Apply hot glue to one 11 cm edge and one 10 cm edge. Position it either along the open side of the base, creating a shorter compartment, or internally to divide the larger space. For a design similar to the example image, attach it to the base at a certain distance from the full side panel, ensuring it’s perpendicular to both the base and the back panel.
- Complete the Structure: For a fully enclosed organizer (recommended for stability and more storage), you’ll need another Full Side Panel (28 cm x 10 cm). If you only cut one in Step 1, now is the time to cut and decorate a second one. Apply hot glue along the remaining open side edges of the Base Panel and Slanted Back Panel, and attach this second Full Side Panel on the opposite side of the first. This creates a robust, box-like structure with the internal divider.
Always ensure your panels are straight and flush before the hot glue completely hardens. Minor adjustments can often be made within the first few seconds of application.
Step 4: Add Final Touches and Reinforce for Durability
Once the main structure is assembled, take a moment to inspect all joints. You can add extra lines of hot glue along the inside seams for added reinforcement, especially in areas that will bear more weight. Allow all glue to cool and set completely before placing items in your organizer.
Your eco-friendly and customized desk organizer is now complete! Fill it with your pens, pencils, notebooks, sticky notes, and other office essentials. Enjoy the satisfaction of having a neatly organized and personalized workspace.
Unleash Your Creativity: Customization Ideas for Your DIY Organizer
One of the greatest joys of crafting your own desk organizer is the endless possibilities for personalization. Make it truly yours and ensure it perfectly complements your unique style and needs.
- Themed Decor: Match your organizer to your room’s theme. Use whimsical papers for a child’s desk, elegant patterns for a sophisticated home office, or vibrant colors for a creative studio.
- Compartment Variety: Don’t limit yourself to the basic compartments. You can add smaller internal dividers for tiny items like paperclips, pushpins, or USB drives. Consider adding a small box-like compartment on top for quick access items.
- Labeling: For ultimate organization, add labels to each compartment. You can hand-write them on cardstock, print them out, or use a label maker. This is especially helpful if your organizer has many sections.
- Embellishments: Elevate your organizer with decorative elements. Attach buttons, ribbons, fabric scraps, sequins, or even small charms. You can also paint details, draw patterns, or add quotes using stencils.
- Protective Coating: For added durability and easy cleaning, consider applying a clear sealant or Mod Podge over your decorated surfaces. This can protect the paper from spills and wear and tear.
- Integrated Features: Get creative with features! Add a small hook to the side for headphones, a slot for your tablet, or even a charging station by carefully cutting a hole for cables.
Tips for Success and Longevity
To ensure your DIY cardboard desk organizer stands the test of time and serves its purpose effectively, keep these practical tips in mind:
- Choose Quality Cardboard: The sturdiness of your organizer directly depends on the quality of your cardboard. Opt for thick, corrugated cardboard boxes rather than flimsy cereal boxes.
- Measure, Mark, and Cut Accurately: Precision during the measuring and cutting phases is paramount. Even slight discrepancies can lead to crooked joints and a less professional finish. Double-check all measurements before cutting.
- Use Adequate Glue: Don’t be shy with the hot glue during assembly, but also avoid excessive amounts that might squeeze out and create a messy look. Aim for consistent, strong beads along all joining edges.
- Allow Drying Time: If using paper glue for decorating, allow ample drying time. Rushing this step can lead to wrinkles, bubbles, or weak adhesion of your decorative papers.
- Reinforce Joints: For areas that might experience more stress or hold heavier items, consider adding extra strips of cardboard glued along the inner seams for enhanced reinforcement.
- Avoid Overloading: While cardboard is sturdy, it has its limits. Avoid placing excessively heavy items in your organizer to prevent it from collapsing or warping over time.
- Regular Maintenance: Dust your organizer regularly to keep it looking fresh. If you’ve used a protective sealant, you can gently wipe it with a damp cloth.
The Ripple Effect: Benefits Beyond a Tidy Desk
Creating this DIY cardboard desk organizer is more than just a craft project; it’s an investment in a better lifestyle. The benefits extend far beyond a mere tidy desk:
- Increased Productivity: A well-organized workspace minimizes distractions and maximizes focus, allowing you to complete tasks more efficiently.
- Reduced Stress: Visual clutter can contribute to mental stress. A clean and orderly desk promotes a sense of calm and control.
- Creative Expression: Engaging in hands-on projects stimulates creativity and offers a valuable break from screen time.
- Environmental Impact: By choosing to recycle and upcycle, you become an active participant in environmental conservation, reducing demand for new products and minimizing waste.
- Sense of Accomplishment: There’s a unique pride that comes with creating something useful and beautiful with your own hands. This sense of accomplishment can boost your confidence and inspire further DIY endeavors.
Ready to Transform Your Workspace?
This super easy DIY desk organizer tutorial offers a fantastic opportunity to declutter your workspace, express your creativity, and contribute to a more sustainable planet. By following these simple steps, you can create a functional and aesthetically pleasing storage solution tailored to your exact needs. So, gather your cardboard, unleash your imagination, and get ready to enjoy a more organized, productive, and inspiring environment. Share your amazing creations with us – we’d love to see how you’ve personalized your eco-friendly desk organizers!