
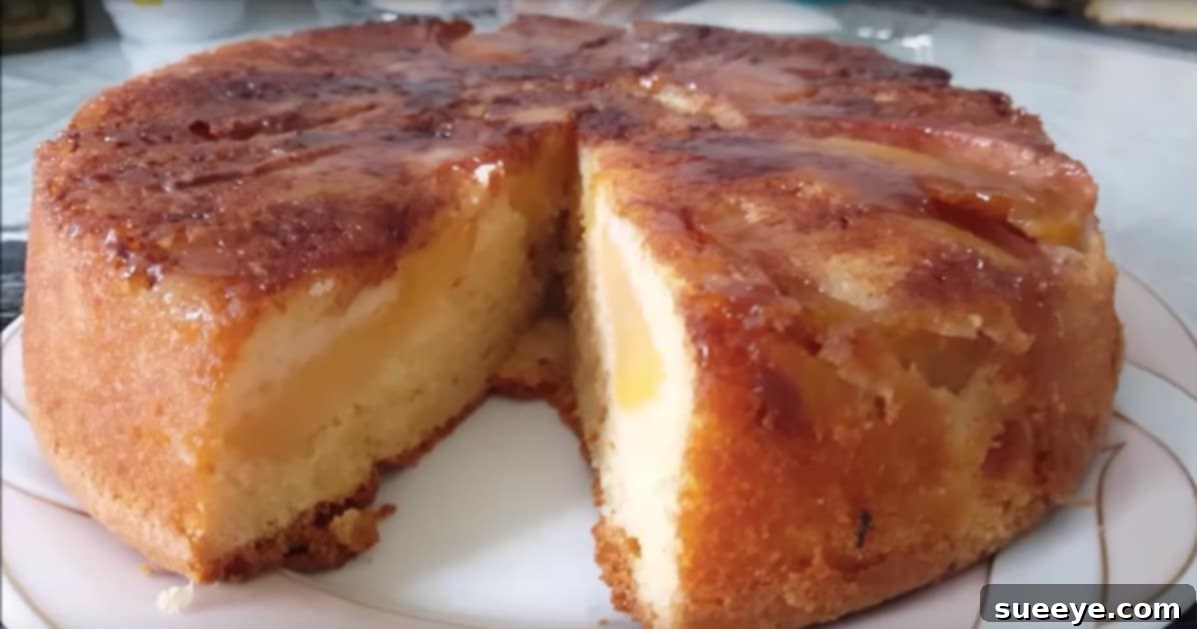
There’s something truly magical about an apple upside-down cake. It’s a classic dessert that effortlessly combines the warm, comforting flavors of cinnamon-spiced apples with a tender, moist cake, all topped with a glistening, buttery caramel glaze. Forget complicated baking projects; this delightful apple upside-down cake is incredibly easy to master, requiring just a few simple steps to achieve a show-stopping result. Whether you’re a seasoned baker or a complete novice, this recipe guarantees a dessert that looks impressive and tastes even better. Prepare to impress your family and friends – and yourself – with this foolproof method for creating a truly unforgettable apple treat.
The inspiration for this particular recipe came from a heartfelt desire to celebrate someone very special. Just last week, it was my mother’s birthday, and after years of her lovingly baking cakes for me on my special day, I wanted to return the gesture with something unique and personal. I had recently overheard her mentioning her fondness for apple-flavored desserts, and an apple upside-down cake immediately came to mind as the perfect surprise. Armed with enthusiasm and a shopping list, I headed to the grocery store that morning to gather all the necessary ingredients. The process of making the cake was surprisingly simple, demanding minimal effort or advanced baking skills. In less than an hour, the delightful aroma of warm, spiced apples and freshly baked cake filled my kitchen. Later that day, when I presented the cake to my mom, her eyes lit up with joy. She absolutely adored it and immediately asked for the recipe, which I was thrilled to share. This experience solidified my belief that this recipe is not only delicious but also incredibly rewarding to make.
Why Choose This Easy Apple Upside-Down Cake Recipe?
Among countless dessert options, the apple upside-down cake stands out for several compelling reasons. Its charming, rustic appearance, with perfectly arranged apple slices forming a beautiful mosaic on top, is undeniably appealing. But beyond its visual charm, this cake offers a symphony of flavors and textures. The apples, softened and caramelized, provide a wonderful tartness and chewiness that beautifully contrasts with the light, fluffy cake base. It’s a dessert that evokes nostalgia, a taste of home, and the warmth of comfort food, making it an ideal choice for family gatherings, special occasions, or simply a cozy evening treat. What makes this particular recipe exceptional is its simplicity without compromising on flavor. We’ve streamlined the steps to ensure that even those new to baking can achieve professional-quality results with ease, establishing it as one of the best easy apple upside-down cake recipes available.
Essential Ingredients for Your Perfect Apple Upside-Down Cake
Creating a truly magnificent apple upside-down cake begins with selecting the right ingredients. Each component plays a vital role in achieving the desired texture, flavor, and caramelized topping that makes this dessert so beloved. Here’s a detailed look at what you’ll need and why:
- Apples (3-4 medium-sized): The star of the show! For upside-down cakes, firm, slightly tart apples that hold their shape well during baking are ideal. Granny Smith, Honeycrisp, Fuji, or Braeburn varieties are excellent choices. Their natural tartness balances the sweetness of the sugar, creating a more complex flavor profile. Ensure they are peeled, cored, and sliced evenly to ensure consistent cooking and an attractive top layer, making them perfect for homemade apple cake.
- All-Purpose Flour (250g / approximately 2 cups): The structural backbone of our cake. All-purpose flour provides the necessary gluten development for a tender crumb. Sifting it with the baking powder ensures a lighter texture.
- Baking Powder (10g / approximately 2 teaspoons): Our leavening agent. Baking powder reacts with moisture and heat to produce carbon dioxide gas, which creates air pockets in the batter, resulting in a light and airy cake texture.
- Granulated Sugar (250g / approximately 1 ¼ cups): Sweetness and tenderizer for the cake batter. It also contributes to the cake’s golden-brown crust.
- Unsalted Butter, melted (125g / approximately ½ cup + 2 tablespoons): Used in two crucial places. A portion is melted for the caramel base, providing richness and helping the brown sugar create that gorgeous, sticky topping. The remaining melted butter is incorporated into the cake batter, contributing moisture and a rich flavor. Using unsalted butter allows you to control the salt content in the recipe.
- Large Eggs (2): Act as an emulsifier, binding the ingredients together, adding richness, and contributing to the cake’s structure and moisture. Ensure they are at room temperature for better incorporation into the batter.
- Milk (approximately ½ cup, or as needed for consistency): Adds moisture to the cake, helping to create a tender and soft crumb. Whole milk is generally recommended for richer flavor, but any milk will work.
- Vanilla Extract (1-2 teaspoons): A classic flavor enhancer that complements the apples and spices beautifully, adding depth and warmth to the cake.
- Brown Sugar (½ cup, packed): Essential for the luscious caramel topping. When combined with melted butter and cinnamon, it creates a rich, sticky, and deeply flavorful glaze that coats the apples. Light or dark brown sugar can be used; dark brown sugar will yield a deeper molasses flavor.
- Ground Cinnamon (1-2 teaspoons): The perfect spice pairing for apples. It infuses the apples and the caramel layer with its characteristic warmth and aromatic sweetness, making the cake incredibly inviting.
Step-by-Step Guide to Baking Your Irresistible Apple Upside-Down Cake
Follow these meticulously detailed steps to ensure your apple upside-down cake turns out perfectly every time. Precision and care in each stage will yield a truly magnificent dessert, making this process easy and enjoyable.
Step 1: Prepare the Caramelized Apple Base
The foundation of any great upside-down cake is its fruit layer. This step sets the stage for the beautiful presentation and the rich, sticky topping.
- Preheat Oven: Begin by preheating your oven to 180°C (350°F). This ensures the oven is at the correct temperature when your cake is ready to bake, leading to even cooking and a perfect apple upside-down cake.
- Prepare Your Pan: Select a 9-inch round baking pan. For best results, lightly grease the bottom and sides of the pan. You may also line the bottom with parchment paper, especially if you’re worried about sticking, though a well-greased pan often suffices for this simple apple dessert.
- Create the Caramel Layer: In a small bowl, melt approximately 3-4 tablespoons of the specified melted butter. Pour this melted butter directly into the bottom of your prepared baking pan, ensuring it covers the entire surface.
- Add Brown Sugar and Cinnamon: Evenly sprinkle about ½ cup of packed brown sugar over the melted butter. Then, generously sprinkle 1-2 teaspoons of ground cinnamon over the brown sugar. This combination will melt down to form a rich, spiced caramel sauce during baking.
- Arrange the Apples: Carefully arrange your peeled, cored, and thinly sliced apple pieces (about ¼-inch thick) on top of the brown sugar mixture. Start from the outer edge of the pan, overlapping the slices slightly in a concentric pattern to create an attractive design. Continue inward until the entire bottom of the pan is completely covered with a single, snug layer of apple slices. Don’t worry if there are small gaps; they will fill in as the apples soften. This is key to a beautiful upside-down cake presentation.
Step 2: Prepare the Fluffy Cake Batter
While the apple base is ready, it’s time to whip up the tender cake batter that will sit atop our beautiful fruit arrangement. The key here is to mix until just combined, avoiding overmixing to ensure a light and airy cake texture.
- Combine Dry Ingredients: In a medium-sized bowl, whisk together the 250g all-purpose flour and 10g baking powder. Set aside. Sifting these ingredients together can help create a lighter cake.
- Cream Butter and Sugar: In a large mixing bowl, cream together the remaining 125g melted butter (ensure it’s cooled slightly) and 250g granulated sugar until light and fluffy. This step incorporates air into the mixture, contributing to the cake’s tender texture.
- Add Eggs and Vanilla: Beat in the two large eggs, one at a time, ensuring each egg is fully incorporated before adding the next. Scrape down the sides of the bowl as needed. Stir in 1-2 teaspoons of vanilla extract.
- Alternate Wet and Dry Ingredients: Gradually add the dry ingredients (flour mixture) to the wet ingredients, alternating with small additions of milk. Begin and end with the dry ingredients. For example, add about one-third of the flour mixture, mix gently, then add about half of the milk, mix, then another third of flour, remaining milk, and finally the last third of flour. Mix only until just combined and no streaks of flour remain. Overmixing can develop the gluten too much, leading to a tough cake.
- Pour Batter Over Apples: Carefully and evenly pour the prepared cake batter over the arranged apple slices in your baking pan. Use a spatula to gently spread the batter to the edges, ensuring the apples are completely covered. Be careful not to disturb the apple arrangement too much.
Step 3: Bake, Cool, and the Grand Reveal
The final steps involve transforming your ingredients into a golden-brown masterpiece and then presenting it for everyone to admire. These apple upside-down cake tips are crucial for the perfect finish.
- Bake the Cake: Place the baking pan into your preheated oven (180°C / 350°F). Bake for approximately 40-50 minutes. The baking time can vary slightly depending on your oven.
- Check for Doneness: To test if the cake is done, insert a clean toothpick or a thin skewer into the center of the cake (avoiding the apples). If it comes out clean or with a few moist crumbs attached, the cake is ready. If it comes out with wet batter, continue baking for a few more minutes and retest.
- Initial Cooling: Once baked, carefully remove the cake from the oven. Allow it to cool in the pan on a wire rack for about 10-15 minutes. This crucial cooling period allows the caramel to set slightly but remain fluid enough to detach from the pan. If you cool it too long, the caramel might harden and stick; if you flip it too soon, the cake might break.
- The Flip: After the initial cooling, place a large serving plate (larger than your cake pan) upside down over the cake pan. Using oven mitts and a steady hand, carefully and confidently flip the cake pan and plate together. Gently lift the cake pan away, revealing your perfectly caramelized apple upside-down cake. If any apple slices stick to the pan, carefully re-arrange them onto the cake.
- Final Cooling and Serve: Allow the cake to cool completely on the serving plate before slicing and serving, or serve it slightly warm for an extra comforting treat.
Pro Tips for the Best Apple Upside-Down Cake
Elevate your baking game with these additional tips to ensure your apple upside-down cake is nothing short of perfection. These insider tips will help you master the art of making the best apple upside-down cake.
- Choose the Right Apples: As mentioned, firm and slightly tart apples like Granny Smith, Honeycrisp, or Fuji are best. Avoid mushy varieties like Red Delicious, as they will break down too much during baking.
- Even Apple Slices: Aim for uniform ¼-inch thick slices. This ensures they cook evenly and create a beautiful, cohesive pattern when flipped. A mandoline slicer can achieve this perfectly, but a steady hand and a sharp knife work too.
- Don’t Overmix the Batter: Overmixing develops gluten, leading to a tough, dry cake. Mix only until the ingredients are just combined and no streaks of flour remain. This is crucial for a tender homemade apple cake.
- Grease Your Pan Well: A thoroughly greased pan (and possibly parchment paper lining the bottom) is crucial for a clean release. The last thing you want is a beautiful cake stuck to the pan!
- The Perfect Flip: The 10-15 minute cooling time before flipping is vital. Too hot, and the cake might fall apart. Too cool, and the caramel will harden and stick. Be confident and swift when inverting the cake onto your serving plate.
- Serving Suggestions: This cake is phenomenal on its own, but it truly shines when served warm with a scoop of vanilla bean ice cream, a dollop of freshly whipped cream, or a drizzle of extra caramel sauce.
- Storage: Store leftover cake, covered, at room temperature for up to 2 days, or in the refrigerator for up to 4 days. Reheat individual slices gently in the microwave or oven for that fresh-baked taste.
Variations and Customizations
While the classic apple upside-down cake is perfect as is, feel free to get creative and customize it to your liking, exploring new simple apple dessert ideas.
- Add Nuts: Toast and sprinkle a handful of chopped pecans or walnuts over the caramel layer before adding the apples for an extra crunch and nutty flavor.
- Spice It Up: Enhance the spice profile with a pinch of nutmeg, allspice, or cardamom in addition to cinnamon.
- Boozy Apples: For an adult twist, lightly sauté the apple slices in a tablespoon of butter with a splash of brandy or rum before arranging them in the pan.
- Lemon Zest: A touch of lemon zest in the batter can brighten the flavors and add a subtle citrusy note that complements the apples beautifully.
- Other Fruits: Don’t limit yourself to apples! This method works wonderfully with pineapple rings (the traditional upside-down cake), pears, peaches, or even a mix of berries.
A Dessert That Tells a Story
Baking this apple upside-down cake is more than just following a recipe; it’s about creating an experience. The process, from preparing the sweet, spiced apple base to pouring the velvety batter, culminates in a stunning dessert that not only delights the taste buds but also warms the heart. It’s a testament to the fact that some of the most impressive culinary creations can be achieved with relative ease and simple, wholesome ingredients. My mother’s reaction to this cake was a cherished memory, underscoring the power of homemade treats to convey love and appreciation. I wholeheartedly recommend you try this recipe. Its delightful flavors, beautiful presentation, and straightforward approach make it a guaranteed success for any occasion or simply as a comforting indulgence, proving it’s one of the best apple upside-down cake recipes around.
For those who prefer a visual guide on how to make apple upside-down cake, be sure to check out the accompanying video tutorial below, which provides a comprehensive step-by-step demonstration of this fantastic apple upside-down cake recipe. Happy baking!