
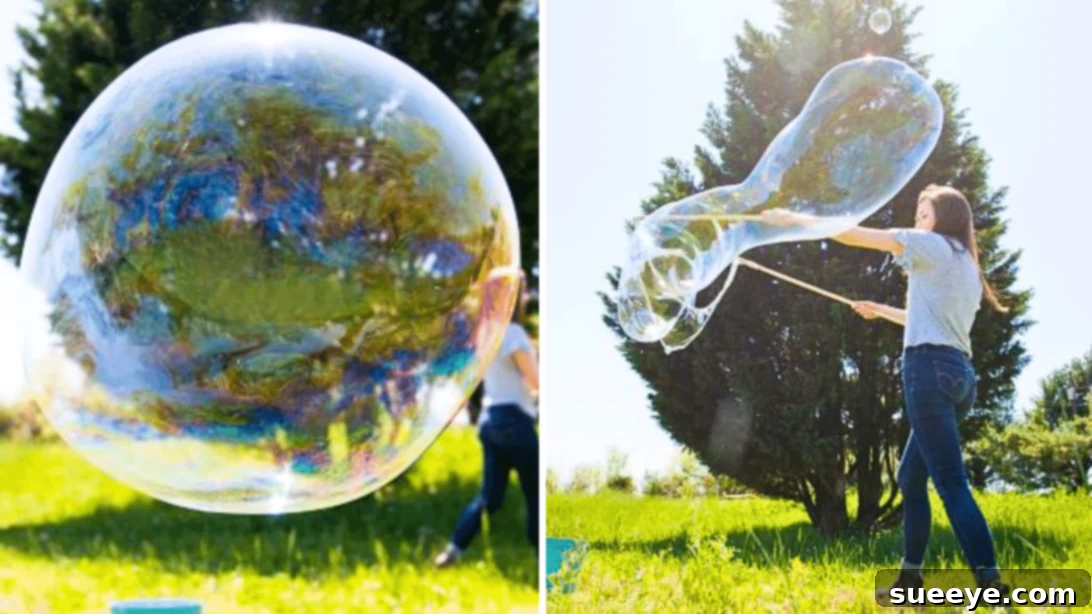
Craft the Ultimate DIY Giant Bubble Wand for Endless Outdoor Fun
There’s something truly magical about bubbles. Their iridescent shimmer, delicate forms, and the way they float effortlessly through the air captivate not just children but adults too. When these bubbles grow to an enormous size, the enchantment amplifies, transforming any ordinary backyard into a whimsical wonderland. As someone who cherishes quality time with my nieces and nephews, I’m always on the lookout for engaging outdoor activities that spark joy and creativity. We’ve explored everything from elaborate obstacle courses, expertly installed by my sister in our backyard, to thrilling slip ‘n slides, but the quest for new and exciting adventures never ends.
That’s why, in my search for more captivating outdoor fun, I stumbled upon an incredible video tutorial by HGTV on YouTube. This tutorial promised to reveal the secrets to making a DIY giant bubble wand, and it immediately caught my eye. The idea of crafting colossal, shimmering bubbles that could amaze and delight seemed like the perfect project. Not only did it deliver on its promise, causing endless giggles and bursts of laughter, but it also proved to be surprisingly simple to construct. This isn’t just a craft; it’s an experience that offers hours of mesmerising entertainment, making it an absolute must-try for families looking to add a sprinkle of wonder to their outdoor playtime.
Why Giant Bubbles Are the Ultimate Outdoor Activity
Beyond the sheer visual spectacle, giant bubbles offer a myriad of benefits that make them an ideal choice for outdoor entertainment:
- Sensory Engagement: The vibrant colours, the delicate touch, and the gentle pop of a bubble provide rich sensory experiences for children of all ages, promoting exploration and discovery.
- Physical Activity: Chasing, popping, and creating bubbles encourages kids to run, jump, and move their bodies, turning playtime into an active workout.
- Fosters Creativity and Imagination: Giant bubbles inspire imaginative play, from pretending to catch clouds to envisioning magical worlds within the shimmering spheres.
- Promotes Family Bonding: Crafting the wand and solution together, then blowing bubbles as a group, creates wonderful opportunities for shared experiences and lasting memories.
- Affordable & Accessible Fun: Unlike many expensive toys or complex setups, a giant bubble wand can be made with readily available, inexpensive materials, offering high-value entertainment on a budget.
- Stress Relief for All Ages: There’s a calming, almost meditative quality to watching large bubbles drift and burst. It’s a simple pleasure that can help unwind after a long day.
- Perfect for Any Occasion: Whether it’s a birthday party, a casual backyard playdate, a community event, or just a sunny afternoon, giant bubbles are always a crowd-pleaser.
Gather Your Materials: What You’ll Need
Making your own giant bubble wand and solution is simpler than you might think. Most of the materials can be found at your local hardware store or grocery store. Here’s a detailed list to ensure you have everything on hand before you begin this exciting project.
For the Giant Bubble Wand:
- 2 Dowels: Opt for sturdy wooden dowels, each approximately 2 feet (60cm) long and 1/2 to 3/4 inch (1-2cm) in diameter. These will serve as the handles for your bubble wand.
- Drill: A standard electric drill is necessary for creating the holes in your dowels.
- 3/8-inch Drill Bit: This specific size bit will ensure the eye bolts fit snugly into the dowels.
- 2 Eye Bolts: Choose 3/8-inch eye bolts. These will be screwed into the dowels and act as attachment points for the ropes.
- Cotton Rope: You’ll need two lengths of cotton rope.
- One piece approximately 3 feet (90cm) long, 1/4 inch (0.6cm) thick. This will form the top part of your bubble loop.
- One piece approximately 5 feet (150cm) long, 1/4 inch (0.6cm) thick. This longer piece will form the larger, lower part of your bubble loop and hold the washers.
- Washers: A handful of small metal washers. These are crucial for adding weight to the bottom rope, allowing it to dip deeper into the solution and stretch the bubble film effectively.
For the Ultimate Giant Bubble Solution:
- 2 Cups of Dish Soap: High-quality, original formula dish soap (like Dawn or Fairy) is recommended for the best results. Avoid “ultra-concentrated” or “antibacterial” varieties, as they can sometimes interfere with bubble strength.
- 4 Tablespoons of Cornstarch: This ingredient helps to stabilize the bubble film, making your giant bubbles stronger and less prone to popping prematurely.
- 5 Tablespoons of Glycerin: Glycerin is a key ingredient for increasing the elasticity and longevity of your bubbles. It helps the bubble film retain moisture, preventing it from drying out and bursting.
- ½ Gallon of Distilled Water: Using distilled water is important as it lacks the minerals found in tap water, which can interfere with the bubble solution’s effectiveness and cause bubbles to pop more easily.
- Large Container or Bowl: You’ll need a container large enough to mix and store the solution, ideally with a lid for overnight resting.
Step-by-Step Guide: How to Make Your Giant Bubble Wand
Part 1: Constructing the Giant Bubble Wand
This part involves a few simple steps to assemble the framework for your magnificent bubbles. Always ensure adult supervision when using power tools.
- Prepare the Dowels: Take each of your two wooden dowels. At one end of each dowel, carefully drill a pilot hole using your 3/8-inch drill bit. Make sure the hole is deep enough to accommodate the threaded part of the eye bolt securely.
- Install the Eye Bolts: Once the holes are drilled, screw one eye bolt into each dowel until it is firmly seated. These eye bolts will be the connection points for your ropes, forming the bubble-making loop. Set the assembled dowels aside.
- Attach the Ropes: Now, take your 3-foot-long cotton rope. Tie one end of this rope securely to the eye bolt of the first dowel, and the other end to the eye bolt of the second dowel. This forms the upper segment of your bubble loop.
- Add Washers to the Longer Rope: Take your 5-foot-long cotton rope. Before tying it, thread a few washers onto this rope. These washers will add necessary weight, helping the rope to sink into the bubble solution and maintain tension, which is crucial for forming large bubble films. Distribute the washers evenly along the central portion of the rope.
- Complete the Wand Loop: Tie each end of the 5-foot rope (with the washers) to the same eye bolts where the shorter rope is attached. You should now have two dowels acting as handles, connected by two lengths of rope – one shorter at the top, and one longer (with washers) at the bottom – forming a large, adjustable loop. Your giant bubble wand is now ready for action! Set it aside while you prepare the magical solution.
Part 2: Crafting the Perfect Giant Bubble Solution
The secret to truly spectacular giant bubbles lies in the solution. This recipe is designed to create a strong, durable film that won’t pop at the slightest breeze. Patience is key here, especially allowing the solution to rest.
- Combine Dry Ingredients: In your large container or bowl, start by adding 4 tablespoons of cornstarch. This helps prevent clumping when liquids are added.
- Add Liquids: Pour in 2 cups of your chosen dish soap and 5 tablespoons of glycerin. These are the core ingredients that give bubbles their strength and flexibility.
- Introduce Distilled Water: Gently pour in half a gallon of distilled water. It’s crucial to use distilled water because the minerals in tap water can weaken the bubble film and cause premature popping.
- Mix Thoroughly (But Gently!): Stir all the ingredients together very well, but avoid creating excessive foam or bubbles during the mixing process. The goal is to dissolve the cornstarch and thoroughly combine all components without incorporating too much air.
- Allow to Rest Overnight: This step is critical for the solution to reach its full potential. Cover the container and allow the solution to sit undisturbed overnight (or for at least several hours). This resting period allows the cornstarch to fully dissolve and the ingredients to integrate, resulting in a much stronger and more effective bubble solution.
- Final Stir Before Use: Before you’re ready to create bubbles, give the solution one final, gentle stir to ensure everything is well mixed, especially if some cornstarch has settled at the bottom.
Part 3: Mastering the Art of Giant Bubble Blowing
Once your wand is assembled and your solution has rested, it’s time for the real fun! Here’s how to use your giant bubble wand for maximum effect:
- Dip the Wand: Hold the two dowels close together and carefully dip the entire rope loop into the bubble solution. Ensure both the shorter and longer ropes, along with the washers, are fully submerged and coated with the solution.
- Lift and Separate: Gently lift the wand out of the solution. You should see a shimmering film stretching between the ropes. Slowly and steadily pull the two dowel rods apart. As you do this, a magnificent, large bubble will begin to form in the opening created by the ropes.
- Release the Bubble: Once the bubble has reached your desired size, or you feel it’s about to detach, gently bring the two dowel rods back together. This action “closes” the loop, releasing the giant bubble into the air to drift and dance.
- Experiment and Enjoy: Practice makes perfect! Experiment with the speed at which you pull the rods apart, the angle of the wand, and the gentleness of your movements. A slight breeze can help carry the bubbles, but strong winds can make them difficult to form.
Tips for Achieving the Best Giant Bubbles
To truly maximise your giant bubble-blowing experience, consider these expert tips:
- Choose the Right Weather: Overcast, humid days with little to no wind are ideal. High humidity prevents the bubble film from drying out too quickly, and a gentle breeze (rather than strong wind) can help carry your bubbles without popping them.
- Patience is Key: Don’t rush the process. Slow, deliberate movements when dipping, separating, and closing the wand will yield better, larger, and more stable bubbles.
- Experiment with Rope Lengths: While the given dimensions are a great starting point, feel free to experiment with slightly different rope lengths to find what works best for you and the size of bubbles you want to create.
- Keep it Clean: Ensure your wand and solution container are clean before use. Any residue can contaminate the solution and weaken the bubbles.
- Re-dip Regularly: For consistent results, re-dip your wand into the solution after every few bubbles to ensure it’s fully coated.
- Store Solution Properly: Leftover solution can be stored in an airtight container in a cool, dark place. It often gets even better after a few days!
Safety Considerations for DIY Projects
While making a giant bubble wand is a fun and generally safe activity, it’s important to keep a few safety points in mind, especially when involving children:
- Adult Supervision: Always have adult supervision when using power tools like drills.
- Non-Toxic Ingredients: All ingredients in the bubble solution are non-toxic, but the solution is not meant for consumption. Remind children not to drink the bubble liquid.
- Slippery Surfaces: Bubble solution can make surfaces slippery. Be mindful of where you’re blowing bubbles to prevent slips and falls, especially on patios or decks.
- Eye Protection: While not strictly necessary for bubble blowing, wearing eye protection during the drilling phase of wand construction is always a good practice.
Expand Your Outdoor Fun Beyond Bubbles
The joy of DIY outdoor activities doesn’t stop with giant bubbles. If you loved creating this project, you might also enjoy exploring other ways to make your backyard a hub of adventure. For instance, if you’re looking for another splash-tastic way to beat the summer heat, consider learning How to Make an Outdoor DIY Slip ‘n Slide. These kinds of projects encourage creativity, physical activity, and provide fantastic opportunities for family bonding.
Conclusion: Unleash the Magic of Giant Bubbles
Creating a DIY giant bubble wand is more than just a craft project; it’s an invitation to experience wonder, joy, and collective laughter. It’s a simple, inexpensive way to transform an ordinary day into an extraordinary memory, perfect for families, parties, or just a delightful afternoon under the sun. The simplicity of the materials combined with the awe-inspiring results makes this a truly rewarding endeavor. So, gather your supplies, follow these easy steps, and prepare to be amazed as you unleash your very own colossal, shimmering bubbles into the sky. Get ready for boundless fun and unforgettable moments!
*All image credit belongs to HGTV via YouTube. Follow and subscribe to their channel for more inspiring DIY projects!