
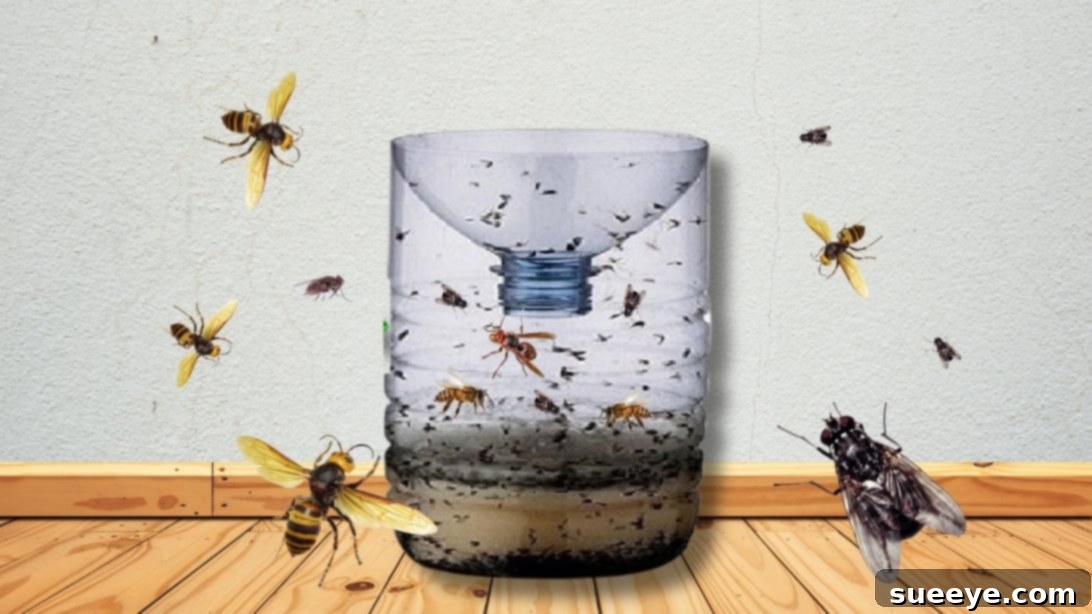
Eliminate Annoying Pests: How to Make an Effective DIY Hornet and Fly Trap
Are buzzing flies and aggressive hornets making your home and outdoor spaces unbearable? These persistent pests can not only be a nuisance but also pose health risks and ruin your peace of mind. While commercial pest control solutions exist, many are expensive, use harsh chemicals, or simply aren’t as effective as promised. What if there was a simple, cost-effective, and surprisingly powerful method to reclaim your space?
Look no further! Inspired by the ingenious hacks from Mr. Invento’s YouTube channel, we’re going to show you how to construct an incredibly effective pest trap using just a few common household items. This DIY solution is not only easy to assemble but also targets a variety of flying insects, including hornets, wasps, common houseflies, fruit flies, and can even help manage ant populations. Say goodbye to irritating buzzes and painful stings, and say hello to a more serene environment!
Ready to transform a simple plastic bottle into a formidable weapon against unwelcome visitors? Let’s gather your materials and get started on this practical home improvement project that promises tangible results.
Materials You’ll Need: Building Your DIY Pest Trap
Before diving into the construction process, ensure you have all the necessary components. The beauty of this trap lies in its accessibility; most of these items are likely already in your kitchen or recycling bin. Gathering them upfront will make the building process smooth and efficient.
- Small Empty Plastic Bottle: A standard 1-liter or 2-liter PET soda or water bottle works perfectly. Opt for a clear bottle if possible, as it allows you to monitor the trap’s effectiveness and contents. The bottle’s sturdy plastic is ideal for cutting and holding the bait.
- Four Teaspoons of Sugar: Regular granulated sugar will serve as a primary attractant. Its sweetness is irresistible to many insects, drawing them into the trap.
- One Teaspoon of Honey: Honey not only adds another layer of sweetness but also contributes to the bait’s stickiness and aroma, making it even more appealing to pests.
- Water: The base for your attractive liquid bait. It dilutes the sugars and provides a medium for the trap to function.
- Exacto Knife or Sharp Scissors: Essential for precisely cutting the plastic bottle. An Exacto knife offers more precision, while sharp scissors are a safe and common alternative. Always prioritize safety when handling sharp tools.
- Transparent Tape: Crucial for sealing the two parts of your trap together securely. Transparent tape ensures visibility and creates an airtight seal, preventing any clever insects from finding an escape route.
Having these materials ready will streamline the process, allowing you to quickly move from preparation to deployment of your homemade pest solution.
Step-by-Step Guide: Crafting Your Effective Hornet and Fly Trap
Creating this pest trap is remarkably straightforward, requiring no complex tools or advanced DIY skills. Follow these clear instructions carefully to build a highly effective device that will help you regain control over your living spaces.
Step 1: Preparing Your Plastic Bottle
The foundation of your trap is the plastic bottle itself. Proper preparation ensures both safety during construction and optimal function of the final product.
Begin by thoroughly cleaning your small empty plastic bottle and removing any labels. A clean, clear bottle allows you to observe the bait and the trap’s activity. Hold the bottom part of the bottle firmly with one hand. Using an Exacto knife or a pair of sharp scissors, carefully cut the top section of the bottle, approximately one-third of the way down from the neck. The goal is to create two distinct parts: a larger bottom section that will hold the bait, and a smaller top section (including the bottleneck) that will serve as an inverted funnel.
Safety Tip: When using sharp blades or scissors, always cut away from your body and consider wearing protective gloves. Place the bottle on a stable surface for better control. After the initial cut, take a moment to straighten the edges of both the top and bottom parts using your sharp scissors. Smooth edges will ensure a better seal later and prevent any accidental cuts while handling the finished trap.
Step 2: Crafting the Irresistible Bait Solution
The success of your trap hinges on the appeal of its bait. This sweet concoction is designed to lure a wide range of flying pests effectively.
Take the larger bottom section of your plastic bottle. Carefully pour water into it until it reaches approximately one-third of its capacity. This amount provides sufficient volume for the bait while leaving enough space for trapped insects. Next, add about four teaspoons of sugar and one teaspoon of honey to the water. Sugar provides immediate sweetness, while honey contributes a deeper, more complex aroma that many insects find irresistible. The sticky nature of honey also adds to the bait’s effectiveness once pests enter the trap.
Using a spoon or a stirring stick, thoroughly mix the sugar and honey into the water until both are completely dissolved and well combined. A consistent mixture ensures that the sweet attractant is evenly distributed throughout the liquid, maximizing its luring power. The goal is to create a syrupy, sweet solution that is potent enough to attract pests from a distance.
Step 3: Assembling Your Ingenious Trap
Now it’s time to bring the two prepared bottle sections together to form the functional trap. This step creates the one-way entry system that makes this design so effective.
First, remove the bottle cap from the top section that you cut earlier. This opening will serve as the entry point for the pests. Next, invert this top section and insert it into the bottom part of the bottle, much like a funnel. The cut edge of the top piece should fit snugly inside the rim of the bottom piece.
Critical Detail: Ensure that the narrow neck of the inverted funnel does not touch the surface of the bait solution. There should be a small gap between the funnel’s opening and the liquid. This gap is vital; it allows insects to enter and reach the bait, but once inside, they struggle to find their way back through the narrow opening and out of the trap, especially if their wings become wet or sticky. If the neck touches the water, it provides an easier escape route for some pests.
Once the top section is correctly positioned, use transparent tape to securely fasten the top edge of the inverted funnel to the outer rim of the bottom bottle section. Wrap the tape around the entire circumference, ensuring there are absolutely no gaps. A tight seal is paramount to prevent insects from escaping once they’ve entered and to maintain the integrity of the trap. This creates a secure, inescapable chamber for the trapped pests.
Step 4: Strategic Placement for Maximum Effectiveness
With your trap fully assembled, the final step is to place it in locations where it can do the most good. Thoughtful placement significantly increases your chances of success.
Identify areas around your house, garden, patio, or even indoors where you frequently observe hornets, flies, or other flying pests. Common hotspots include near outdoor dining areas, barbecue spots, compost bins, garbage cans, fruit trees, entryways, or windows. For fruit flies, placing a trap near fruit bowls or kitchen sinks can be highly effective. If you’re dealing with ants, placing it near their trails or entry points can also yield positive results, as they are attracted to the sweet bait.
Consider these tips for optimal placement:
- Outdoor Use: Hang or place the trap in a slightly shaded area, away from direct sunlight, which can cause the bait to evaporate too quickly or ferment too rapidly. Avoid windy spots, as strong gusts can knock the trap over.
- Indoor Use: Place traps discreetly in corners or near problem areas. Ensure they are out of reach of children and pets.
- Multiple Traps: For larger areas or more severe infestations, consider making and deploying multiple traps to cover a wider range.
Check your traps regularly. Once full of insects or if the bait has evaporated or become too diluted, simply empty, clean, and refill the trap with a fresh solution. Consistent maintenance will ensure your DIY pest control remains highly effective throughout pest season.
Why Choose This DIY Hornet and Fly Trap?
While many commercial options exist, this homemade trap offers several compelling advantages:
- Cost-Effective: You’re using readily available and inexpensive materials, saving you money compared to buying specialized traps or hiring pest control services.
- Eco-Friendly: This method avoids the use of harsh chemical insecticides, making it safer for your family, pets, and the environment. It relies on natural attractants.
- Simple to Make: No complicated instructions or tools. Anyone can assemble this trap in minutes.
- Highly Effective: The sugar and honey bait, combined with the inverted funnel design, creates a powerful lure and a challenging escape route for a variety of flying insects.
- Versatile Pest Control: Beyond hornets and flies, this trap can also catch wasps, yellow jackets, fruit flies, and even some ants, providing broad-spectrum pest management.
- Reusable: The trap can be easily emptied, cleaned, and refilled, offering a sustainable solution throughout pest season.
Pro Tips for Maximizing Your Trap’s Effectiveness
To get the best possible results from your homemade pest trap, consider these additional tips:
- Enhance the Bait: For added potency, especially for wasps and hornets, you can add a tiny piece of overripe fruit (like a banana peel) or a splash of apple cider vinegar to the bait solution. A drop of dish soap can also be added; it breaks the water’s surface tension, causing insects to drown faster.
- Regular Monitoring: Check your traps every few days. A full trap is a successful trap, but it also means it’s time to clean and refresh the bait. Stagnant, old bait can become less effective or even start to smell unpleasant.
- Seasonal Timing: Deploy your traps early in the spring to catch queen wasps and hornets before they establish large nests. Continue to use them throughout summer and early fall when pest activity is at its peak.
- Experiment with Placement: If one spot isn’t yielding results, try moving the trap to a different location. Pests might have specific flight paths or foraging areas you haven’t yet discovered.
- Group Traps: For larger properties or severe infestations, setting up several traps at strategic points can significantly improve your overall pest management strategy.
Important Safety Considerations
While this DIY trap is generally safe, it’s crucial to keep a few safety points in mind:
- Sharp Tools: Always exercise extreme caution when using Exacto knives or sharp scissors. Keep them out of reach of children.
- Handling Trapped Pests: Be mindful when emptying traps containing live hornets or wasps. They can still sting. It’s best to wait until they are deceased or to wear protective gear. A common method is to tightly seal the trap and place it in a freezer for a few hours before emptying.
- Placement for Children and Pets: Ensure traps are placed where curious children or pets cannot easily access them, especially if they contain live insects or a sugary solution that could attract them.
Reclaim Your Space: A Simple, Effective Solution
Dealing with buzzing flies and menacing hornets doesn’t have to be a frustrating, expensive, or chemical-laden ordeal. This simple yet highly effective DIY trap, inspired by the practical innovations of Mr. Invento, offers a brilliant solution. With minimal materials and a few minutes of your time, you can create a powerful defense against a variety of common household and garden pests.
By following these detailed steps, you’ll not only achieve a more peaceful environment but also gain the satisfaction of a successful DIY project. So, next time you spot an unwelcome guest, remember that a solution is just a plastic bottle away!
For more ingenious DIY tips and practical inventions that can simplify your life, be sure to visit Mr. Invento’s channel on YouTube. He offers a wealth of tutorials on simple yet effective solutions, covering everything from home hacks to basic electronics. You might just find your next favorite DIY project there!