
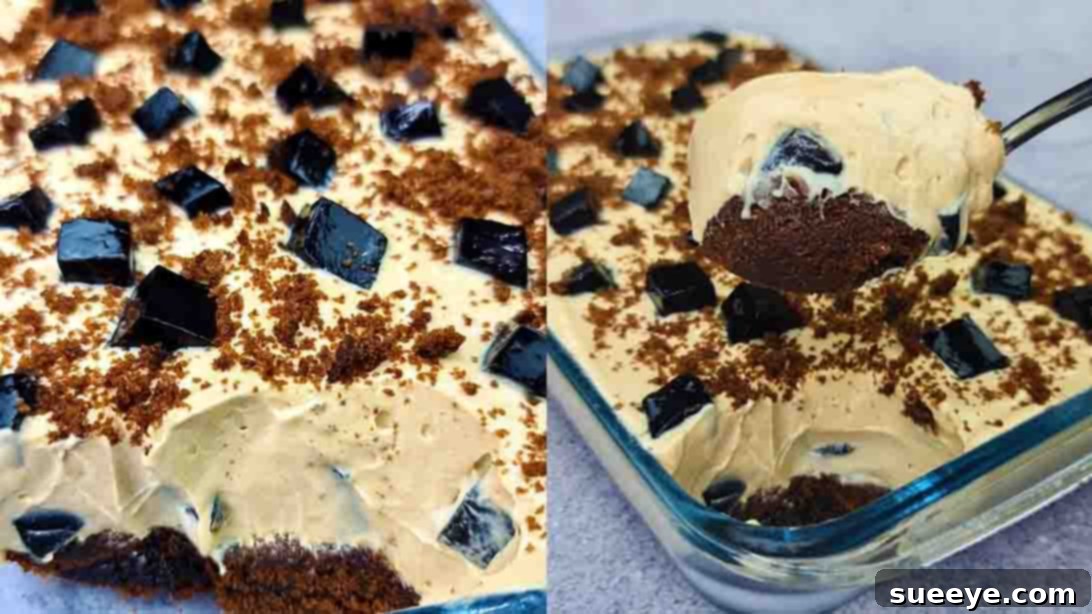
The Ultimate No-Bake Coffee Jelly Cake: Your New Favorite Easy Dessert
For every coffee enthusiast with a sweet tooth, there’s a dessert that perfectly marries these two passions. And if you’re searching for a treat that delivers on rich coffee flavor, effortless preparation, and stunning presentation, look no further than this incredible No-Bake Coffee Jelly Cake. Inspired by the brilliant recipe from FOODIY REYNA on Youtube, this dessert is a game-changer. It’s truly one of the most delightful no-bake creations we’ve ever tasted, elevated by its irresistible coffee infusion.
Imagine layers of moist chocolate cake, rich coffee-infused cream, and delightful coffee jelly cubes, all coming together in a chilled, decadent dessert without ever needing to turn on your oven. This recipe is not just delicious; it’s incredibly simple to make, requires only a handful of readily available ingredients, and can be prepared ahead of time, making it ideal for busy schedules or entertaining guests. Whether you’re hosting a dinner party, planning a potluck, or simply craving a satisfying sweet treat, this no-bake coffee jelly cake is guaranteed to impress your family and friends. Dive into this guide to learn the step-by-step instructions and discover why this will quickly become a staple in your dessert repertoire.
Why This No-Bake Coffee Jelly Cake is a Must-Try
This particular coffee jelly cake stands out for several compelling reasons, making it an absolute must-try for dessert lovers and coffee aficionados alike. First and foremost is its incredible ease of preparation. As a “no-bake” recipe, it eliminates the need for an oven, making it accessible to even the most novice bakers and perfect for warm weather when you want to avoid heating up your kitchen. The steps are straightforward, focusing on simple mixing and layering, rather than complex baking techniques.
Secondly, the flavor profile is exceptional. It’s a harmonious blend of coffee and chocolate, with the subtle bitterness of coffee jelly perfectly complementing the sweetness of the cream and the rich notes of chocolate cake. Each bite offers a delightful textural contrast – from the tender cake base to the jiggly jelly cubes and the velvety smooth cream. Furthermore, its make-ahead nature is a huge convenience. You can assemble this cake hours, or even a day, before you plan to serve it, allowing the flavors to meld beautifully and freeing up your time on the day of your event. It’s an inexpensive dessert that looks and tastes gourmet, making it a fantastic choice for any occasion where you want to serve something special without breaking the bank or spending hours in the kitchen.
Ingredients You’ll Need for Your Decadent Coffee Jelly Cake
Creating this magnificent no-bake coffee jelly cake requires just a few key ingredients, each playing a crucial role in developing its unique flavor and texture. Opting for good quality ingredients will enhance the overall taste, so choose your brands carefully. Here’s everything you’ll need to gather:
- 2 3/4 tablespoons black jelly powder, unflavored: This is the gelling agent for our coffee jelly. Unflavored ensures the coffee flavor shines through.
- 1/4 cup white sugar: To sweeten the jelly layer. Adjust to your preference.
- 3 1/2 cups of water: The base for preparing the jelly mixture.
- 1/2 tablespoon instant coffee powder (for jelly): For infusing the jelly with a robust coffee flavor.
- 10 – 13 pieces chocolate cake bar: These form the delicious, moist base of our cake. You can use pre-packaged snack cakes or homemade cake scraps.
- 2 cups all-purpose cream, chilled: Essential for the rich, whipped cream layer. Chilling is crucial for proper whipping.
- 1 cup condensed milk, chilled: Provides sweetness and a creamy texture to the topping. Chilling helps with consistency.
- 2 teaspoons instant coffee powder (for cream): To infuse the cream layer with an additional coffee kick, balancing the sweetness.
Step-by-Step Directions to Craft Your Perfect Coffee Jelly Cake
Let’s get started on assembling this delightful coffee jelly cake. Each step is designed to be straightforward, ensuring a beautiful and delicious result every time. Follow these instructions carefully for the best outcome.
Step 1: Preparing the Irresistible Coffee Jelly Cubes
The first and foundational layer of our coffee jelly cake is, of course, the coffee jelly itself. Begin by combining 3 1/2 cups of water, 1/4 cup of white sugar, and 2 3/4 tablespoons of unflavored black jelly powder in a small saucepan. It’s important to mix these dry ingredients with the water thoroughly *before* applying heat to prevent lumps and ensure the powder dissolves evenly. Stir continuously until you see no visible lumps of jelly powder remaining. Next, add 1/2 tablespoon of instant coffee powder to this mixture. This will infuse your jelly with that wonderful coffee aroma and taste.
Place the saucepan over medium heat and bring the mixture to a rolling boil, stirring constantly. Consistent stirring is key here to prevent the mixture from sticking to the bottom of the pan and to ensure all the ingredients are fully dissolved. Once the mixture reaches a boil and the jelly powder is completely dissolved, remove the saucepan from the heat immediately. Carefully transfer the hot jelly mixture into a shallow container or dish. A shallow container will allow the jelly to set more quickly and evenly. Let it cool down to room temperature, then place it in the refrigerator to chill and set completely until it is firm enough to cut. This usually takes about 1 to 2 hours, depending on the thickness of your jelly. Once firm, use a knife to cut the jelly into small, bite-sized cubes. Set these vibrant coffee jelly cubes aside, as they will be incorporated into our creamy topping.
While your jelly is chilling, prepare your cake base. Arrange the chocolate cake bars evenly at the bottom of your chosen casserole dish or serving container. Ensure they form a single, solid layer to act as the foundation for the creamy coffee goodness that will follow. If there are small gaps, you can gently press and mold smaller pieces of cake to fill them. This creates a uniform and delicious base.
Step 2: Assembling the Creamy Layers and Chilling for Perfection
With your coffee jelly cubes ready and your cake base in place, it’s time to prepare the luxurious coffee cream topping that brings this dessert to life. In a large mixing bowl, pour 2 cups of chilled all-purpose cream. It is absolutely crucial that your cream is well-chilled; this will ensure it whips up properly and holds its volume. Using an electric mixer, beat the cream on medium-high speed until it becomes light, fluffy, and approximately doubles in volume. It should form soft peaks – don’t overbeat it into stiff peaks, as we want a smooth, pourable consistency.
Once the cream is whipped, gently fold in 1 cup of chilled condensed milk and 2 teaspoons of instant coffee powder. The condensed milk adds a beautiful sweetness and creamy richness, while the extra instant coffee powder intensifies the coffee flavor in the cream layer. Mix these ingredients thoroughly until they are fully combined and the coffee powder is completely dissolved, leaving no gritty texture. Be careful not to deflate the whipped cream too much during this process; a gentle folding motion is best.
Now for the star of the show: add the prepared coffee jelly cubes into your coffee cream mixture. Gently fold the jelly cubes into the cream until they are evenly distributed. This ensures that every spoonful of your cake will have that delightful burst of coffee jelly. Carefully spoon this luscious coffee-jelly-cream mixture over the chocolate cake bar base in your casserole dish. Using a spatula, spread the mixture nicely and evenly, ensuring it covers the entire cake layer from edge to edge. For an extra visual appeal and an additional textural element, you can optionally sprinkle a few more coffee jelly cubes on top of the cream layer before chilling.
Finally, cover your casserole dish with plastic wrap or a lid. Place it in the refrigerator and chill for a minimum of three to four hours before serving. Ideally, chilling it overnight will allow all the flavors to fully meld together and the cream layer to firm up perfectly, resulting in a more cohesive and satisfying dessert experience. When ready to serve, slice the cake into generous portions and prepare to indulge!
Expert Tips for a Flawless No-Bake Coffee Jelly Cake
Achieving a perfect no-bake coffee jelly cake is simple, but a few expert tips can elevate your results from good to absolutely outstanding. Pay attention to these details for the best possible dessert:
- Chill Your Cream Properly: This is arguably the most crucial step for the cream layer. Ensure your all-purpose cream (and even your mixing bowl and beaters!) are thoroughly chilled before you start whipping. Cold cream whips up faster, holds its volume better, and creates a more stable, airy texture.
- Dissolve Jelly Powder Completely: When preparing the coffee jelly, take your time to stir the jelly powder, sugar, and water until absolutely no lumps remain before heating. This prevents grainy jelly.
- Don’t Over-Boil the Jelly: Once the jelly mixture comes to a boil and the powder is dissolved, remove it from the heat. Prolonged boiling can sometimes affect the gelling properties.
- Even Cake Base: Create a smooth, even base with your chocolate cake bars. This ensures that each slice of the finished cake has a consistent foundation and looks aesthetically pleasing.
- Gentle Folding: When combining the whipped cream, condensed milk, coffee, and jelly cubes, use a gentle folding technique rather than vigorous stirring. This preserves the air in the whipped cream, keeping the topping light and fluffy.
- Adequate Chilling Time: Do not rush the chilling process. The minimum of three to four hours is essential for the cream layer to firm up and for the flavors to fully meld. Chilling overnight is even better for optimal texture and taste.
- Taste and Adjust: Feel free to adjust the amount of sugar in the jelly or the coffee powder in the cream to match your preferred level of sweetness and coffee intensity.
- Clean Slicing: For clean slices, use a sharp knife and wipe it clean with a warm, damp cloth between each cut. This will prevent the layers from smudging.
Creative Variations and Customizations for Your Coffee Jelly Cake
While the classic no-bake coffee jelly cake is exquisite on its own, there are many ways to customize it and make it uniquely yours. Don’t be afraid to experiment with these delicious variations:
- Different Cake Bases: Instead of chocolate cake bars, try using plain vanilla sponge cake, coffee-flavored cake, graham cracker crust, or even crushed chocolate cookies (like Oreos mixed with melted butter) for a different textural and flavor profile.
- Add a Chocolate Drizzle: A simple drizzle of melted chocolate or chocolate syrup over the top just before serving can add an extra layer of decadence and visual appeal.
- Cocoa Powder Boost: For an even richer chocolate flavor, you can lightly dust the top with cocoa powder or mix a tablespoon of cocoa powder into the cream layer.
- Liqueur Infusion: For an adult version, add a splash of coffee liqueur (like Kahlúa), rum, or brandy to the cream mixture or brush it lightly over the cake base.
- Nutty Topping: Sprinkle chopped roasted nuts (like pecans, walnuts, or almonds) on top for added crunch and flavor.
- Dairy-Free Option: To make this dessert dairy-free, use coconut cream (chilled overnight) instead of all-purpose cream, and a dairy-free condensed milk alternative. Ensure your cake base is also dairy-free.
- Espresso Powder: For a stronger coffee kick, use high-quality espresso powder instead of instant coffee powder.
- Fruit Garnish: While coffee and fruit are not always paired, a few fresh berries (like raspberries or blueberries) can add a pop of color and a tart counterpoint to the richness.
Serving and Storage Suggestions
Once your no-bake coffee jelly cake is perfectly chilled and set, it’s ready to be enjoyed! For the best presentation, use a wide, flat spatula to carefully lift individual slices onto serving plates. Garnish options are simple yet elegant: a light dusting of cocoa powder, a few extra coffee beans for decoration (not for eating!), or a small dollop of plain whipped cream can enhance its appeal.
This dessert is best served cold, straight from the refrigerator. It pairs wonderfully with a fresh cup of coffee or a glass of cold milk. Store any leftovers in an airtight container in the refrigerator. When properly stored, the coffee jelly cake will remain fresh and delicious for up to 3-4 days. While it can theoretically be frozen, the texture of the jelly may become slightly watery upon thawing, so it’s generally recommended to enjoy it fresh and chilled.
Frequently Asked Questions (FAQ) About No-Bake Coffee Jelly Cake
Here are some common questions about making and enjoying this delicious no-bake coffee jelly cake:
- Can I use any type of instant coffee? Yes, you can use your preferred brand of instant coffee. The strength of the coffee flavor will depend on the type you choose, so adjust to taste. Espresso powder can also be used for a more intense coffee flavor.
- What if my jelly doesn’t set? This usually happens if there isn’t enough jelly powder, or if the mixture wasn’t brought to a sufficient boil. Ensure you follow the measurements precisely and boil the mixture until the powder is fully dissolved. Make sure your jelly powder is also fresh.
- Can I make this dessert ahead of time? Absolutely! This is one of the best aspects of this no-bake cake. You can prepare it a day in advance, allowing the flavors to meld and the cake to set perfectly. Just keep it well-covered in the refrigerator.
- Can I substitute the chocolate cake bars? Yes, as mentioned in the variations section, you can use other types of cake (vanilla, coffee flavored) or even a cookie crust.
- How can I make it less sweet? You can reduce the amount of sugar in the jelly and/or condensed milk in the cream. Taste the cream mixture before adding the jelly to ensure it meets your sweetness preference.
- My cream isn’t whipping. What went wrong? The most common reasons are that the cream wasn’t cold enough, the bowl or beaters weren’t chilled, or you’re using a cream with a low-fat content (ensure it’s all-purpose or heavy cream).
No-Bake Coffee Jelly Cake Recipe: A Delight for Coffee Lovers
In conclusion, this no-bake coffee jelly cake is a testament to how simple ingredients and straightforward steps can create an incredibly satisfying and elegant dessert. It’s a celebration of coffee and cream, offering a symphony of textures and flavors that will tantalize your taste buds. Perfect for any occasion, from casual family gatherings to more formal celebrations, its ease of preparation and make-ahead convenience make it an ideal choice for anyone looking to impress without the stress.
So, gather your ingredients, follow these easy steps, and prepare to delight in this wonderfully chilled, coffee-infused masterpiece. Don’t forget to share your creation and enjoy every heavenly bite! This recipe from FOODIY REYNA truly is a gem worth discovering.