
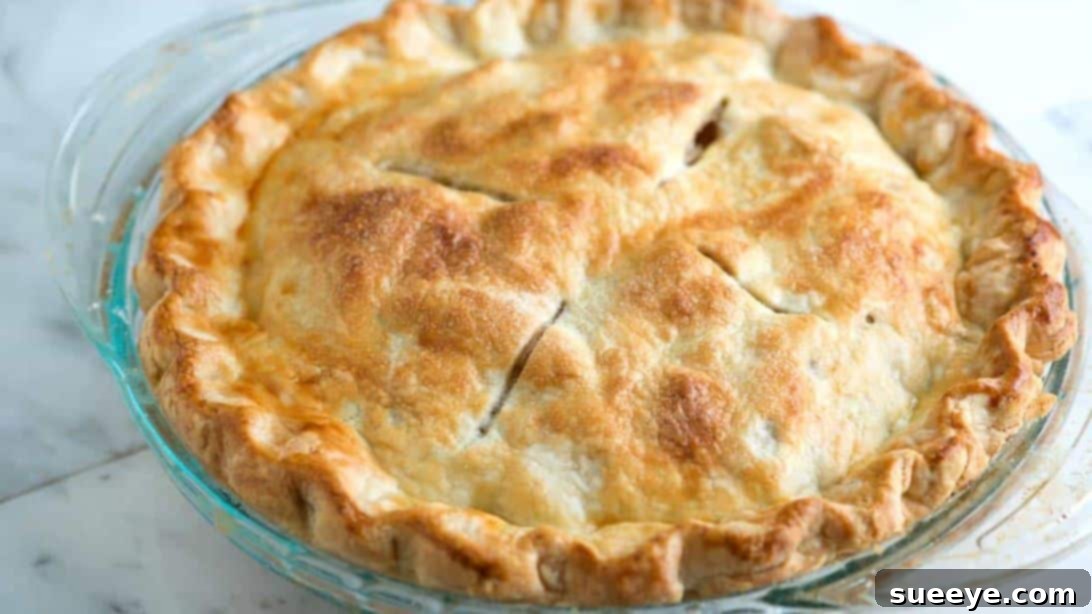
The foundation of every truly exceptional pie lies in its crust. A beautifully golden, irresistibly flaky, and perfectly tender pie crust can elevate any filling from good to unforgettable. If you’ve ever dreamed of crafting pies that garner rave reviews and leave everyone asking for your secret, then mastering the art of the perfect pie crust is your first and most crucial step. Forget store-bought shortcuts; making the best flaky butter pie crust from scratch is not only surprisingly simple but also incredibly rewarding, requiring just five fundamental ingredients and a few key techniques.
Imagine the delightful crunch of a buttery shell giving way to a rich, flavorful filling. This isn’t just a dream – it’s an achievable reality with our foolproof method. This comprehensive guide will walk you through everything you need to know, ensuring that even beginner bakers can achieve a professional-quality crust that will undoubtedly impress everyone at your table.
RELATED: How to Make Perfect Pie Dough and Crust
Dive deep into the secret of making a truly perfect pie crust. We’ll explore the essential steps that lead to that coveted flakiness and rich butter flavor, inspired by expert techniques often showcased in video tutorials like those from Inspired Taste on YouTube. This recipe is designed to be straightforward and easy to follow, empowering home cooks to create masterpieces with confidence. Whether you’re planning a classic apple pie, a savory quiche, or a decadent chocolate cream pie, this versatile crust is your ideal companion. Plus, for those busy occasions or when hosting a party, you can even prepare this dough ahead of time, making your baking process smoother and stress-free.
Why Homemade Flaky Butter Pie Crust Is a Game-Changer
There’s a distinct difference between a pie made with a store-bought crust and one featuring a homemade flaky butter crust. The homemade version offers unparalleled flavor depth, a richer aroma, and a superior texture that simply cannot be replicated by pre-made alternatives. Butter, with its high fat content and delicate flavor, creates distinct layers that separate during baking, resulting in that desirable flakiness. Unlike hydrogenated fats found in many commercial crusts, real butter provides a clean, decadent taste that complements any pie filling without overpowering it. Furthermore, controlling the ingredients yourself means avoiding unnecessary additives and preservatives, ensuring a purer, more wholesome product for you and your loved ones.
The Science Behind the Flakiness
Achieving a truly flaky crust is less about magic and more about understanding a bit of kitchen science. The key lies in the interaction between cold butter, flour, and ice water. When cold butter is cut into the flour, it creates tiny pockets of fat. As the pie bakes, the water content in these butter pieces turns to steam, which then pushes apart the layers of dough, creating those distinctive, airy flakes. Keeping the butter and water exceptionally cold is crucial because it prevents the butter from fully integrating with the flour, ensuring these pockets remain intact. It also minimizes gluten development, which can lead to a tough crust. The less you handle the dough, the better, as excessive warmth from your hands can melt the butter, and overworking the dough can develop gluten, both detrimental to flakiness.
Essential Ingredients for Your Flaky Butter Pie Crust:
Crafting this perfect crust requires only a handful of ingredients, each playing a vital role:
- 2½ cups of all-purpose flour: The structure of your crust. All-purpose flour strikes the right balance between protein content for structure and tenderness.
- 1 tsp of Kosher salt or ½ tsp of fine sea salt: Essential for flavor balance, enhancing the sweetness in fruit pies or bringing out the richness in savory ones.
- 1 tbsp of sugar, optional: Adds a subtle sweetness and helps with browning, giving your crust a beautiful golden hue. Adjust or omit based on your pie filling.
- 1 cup of unsalted butter, very cold: This is the star! Unsalted butter allows you to control the salt content, and its extreme coldness is paramount for achieving that signature flakiness. Cut it into small pieces for easier incorporation.
- 4-8 tbsp of ice water: The binding agent. Using ice water ensures the butter remains cold and helps to bring the dough together without overworking it or developing too much gluten.
How to Make a Flaky Butter Pie Crust: A Detailed Guide
Follow these steps carefully to ensure a truly magnificent pie crust. Remember, patience and keeping things cold are your best allies.
Step 1: Preparing the Base in Your Food Processor
Begin by adding 1½ cups of the all-purpose flour into your food processor. This initial portion helps create a foundational mixture. Next, add the kosher or fine sea salt and the optional sugar. Pulse these dry ingredients together for a few seconds until they are well combined. This ensures an even distribution of flavor throughout the crust. Now, take your very cold unsalted butter, which you should have already cut into small, ½-inch cubes. Add these cold butter pieces to the flour mixture in the food processor. Pulse the mixture in short bursts, typically for about 15 seconds in total. The goal here is to cut the butter into the flour until it resembles coarse crumbs with some larger, pea-sized pieces of butter still visible. Avoid over-processing; you don’t want a smooth paste, but rather a shaggy, sandy texture. The larger butter pieces are what will create those wonderful flaky layers.
Step 2: Incorporating Remaining Flour and Initial Hydration
Carefully scrape down the sides of the food processor bowl with a spatula to ensure all ingredients are incorporated. Then, pour in the remaining 1 cup of all-purpose flour. Continue to pulse the mixture briefly, about 4 to 5 times. This additional flour helps prevent the dough from becoming too dense and promotes better flakiness by coating more of the butter pieces. Pulse just until the new flour is evenly combined and the mixture maintains its desired crumbly texture. Transfer this flour and butter mixture into a large mixing bowl. Now, it’s time to add the crucial ice water. Start by adding 4 tablespoons of ice water (ensure there are actual ice cubes in the water you’re measuring from, but don’t add the ice cubes themselves). Using a rubber spatula or your hands, gently fold the water into the mixture. The goal is to bring the dough together without overworking it. You want just enough water to hydrate the flour and bind the dough, but not so much that it becomes sticky or develops too much gluten.
Step 3: Checking for Proper Dough Consistency
This step is critical for ensuring your dough has the perfect hydration level. Take a small portion of the dough and gently pinch it between your fingers. If the dough holds together easily and doesn’t crumble, then you’ve reached the ideal consistency. If, however, the dough still feels too dry and crumbly, and doesn’t hold its shape when pinched, add 2 to 4 more tablespoons of ice water, one tablespoon at a time. After each addition, gently fold and press the dough together again, then re-test. It’s important to add water incrementally, as too much water can make the crust tough and difficult to roll. You’re looking for a dough that is just cohesive enough to hold together, but still feels slightly crumbly and cool to the touch. This delicate balance ensures maximum flakiness.
Step 4: Shaping and Chilling the Dough
Once your dough has reached the correct consistency, transfer it to a clean, lightly floured surface. Gently gather the dough and press it together to form a cohesive ball. Avoid kneading or working the dough excessively, as this will develop gluten and make your crust tough. Once formed, divide the dough ball in half. Each half will form one pie crust. Shape each half into a flat disk, about 1-inch thick. This disk shape makes rolling out the dough much easier later on. Tightly wrap each dough disk in plastic wrap, ensuring it’s completely sealed to prevent drying out. Place the wrapped dough disks in the refrigerator. Allowing the dough to chill is a critical step that cannot be skipped. It gives the gluten a chance to relax, making the dough easier to roll, and more importantly, it re-solidifies the butter, which is essential for achieving that flaky texture. Chill the dough for at least 1 hour, or ideally, for 2 hours. You can even prepare the dough up to 2 days in advance, keeping it stored in the refrigerator until ready to use.
Step 5: Rolling Out and Final Chill Before Baking
When you’re ready to bake your pie, remove one dough disk from the refrigerator. Allow it to sit at room temperature for about 5 to 10 minutes. This slight warming makes the dough more pliable and easier to roll without cracking, but don’t let it get too warm. Lightly flour your work surface and your rolling pin. Begin rolling the dough from the center outwards, rotating the dough frequently and adding a touch more flour if it starts to stick. Aim for a 12-inch circle, ensuring it’s evenly thick (about 1/8 to 1/4 inch). Carefully transfer the rolled-out dough into your pie plate. Gently ease it into the bottom and sides without stretching it, which can cause it to shrink during baking. Trim the edges or crimp them as desired. Once the dough is in the pie plate, place it back in the refrigerator for at least 20 minutes, or even in the freezer for 5 to 10 minutes. This final chill is vital; it prevents the butter from melting too quickly when it hits the hot oven, which can lead to a soggy crust or excessive shrinkage. Your pie crust is now perfectly prepped and ready for your favorite filling and baking!
Essential Tips for Pie Crust Perfection
- Keep Everything Cold: This cannot be stressed enough. Cold butter and ice water are non-negotiable for flakiness. You can even chill your flour and mixing bowl for 15-20 minutes before starting.
- Work Quickly and Minimally: The less you handle the dough, the better. Overworking develops gluten, leading to a tough crust, and warm hands can melt the butter.
- Don’t Over-Hydrate: Add water sparingly. Too much water makes the dough sticky and tough. It’s easier to add more water than to fix an overly wet dough.
- Chill Adequately: The chilling steps are crucial. They allow gluten to relax and butter to re-solidify, making the dough easier to handle and preventing shrinkage during baking.
- Roll Evenly: Aim for a consistent thickness when rolling to ensure even baking. Rotate the dough often to prevent sticking and ensure a round shape.
- Avoid Stretching: When transferring to the pie plate, gently ease the dough in rather than stretching it. Stretching can cause the crust to shrink back significantly during baking.
Troubleshooting Common Pie Crust Problems
Even seasoned bakers encounter issues sometimes. Here’s how to tackle common pie crust dilemmas:
- Tough Crust: This is usually a sign of overworking the dough, which develops too much gluten, or adding too much water. Remember to handle minimally and add water gradually.
- Shrinking Crust: Often caused by stretching the dough into the pie plate or insufficient chilling time. Always let the dough rest and chill thoroughly.
- Soggy Bottom: Can happen with very wet fillings or if the crust wasn’t adequately chilled before baking. Blind baking (pre-baking) the crust for 10-15 minutes before adding the filling can help, especially for custard or fruit pies.
- Cracking Dough: This typically means the dough is too cold or too dry. Let cold dough sit at room temperature for 5-10 minutes before rolling. If it’s too dry, you might need to add a tiny bit more ice water and gently work it in.
The Versatility of This Flaky Butter Crust
This incredible flaky butter crust isn’t just for one type of pie. Its rich flavor and tender texture make it suitable for a wide array of sweet and savory creations:
- Sweet Pies: Perfect for classic fruit pies like apple, cherry, or peach. It also excels with custard pies such as pumpkin, pecan, or chocolate silk. The subtle sweetness from the optional sugar complements these fillings beautifully.
- Savory Pies: Don’t limit yourself to desserts! This crust makes a magnificent base for quiches, chicken pot pies, or savory tarts. Simply omit the sugar for a truly savory application.
Storage and Make-Ahead Tips
One of the best features of this recipe is its make-ahead potential, perfect for busy schedules or holiday baking:
- Refrigerating Raw Dough: As mentioned in Step 4, the raw dough disks can be tightly wrapped in plastic and stored in the refrigerator for up to 2 days. This allows you to prep ahead and assemble your pie when convenient.
- Freezing Raw Dough: For longer storage, wrap the dough disks first in plastic wrap, then in aluminum foil, and freeze for up to 3 months. Thaw overnight in the refrigerator before rolling out.
- Freezing Baked Pie Shells: You can also blind bake pie shells, let them cool completely, then wrap them tightly and freeze for up to a month. This is a fantastic time-saver for quick pie assembly.
Easy Flaky Butter Pie Crust Recipe: Your Path to Pie Perfection
By following this detailed guide, you’re not just making a pie crust; you’re mastering an essential baking skill that will serve you for years to come. The effort of a homemade flaky butter pie crust is always worth it, transforming a simple dessert into an extraordinary experience. Embrace the process, keep your ingredients cold, and don’t be afraid to practice. Soon, you’ll be creating pies that are the envy of every gathering, all thanks to your perfectly flaky, buttery, and utterly delicious homemade crust!
*All image credit belongs to Inspired Taste via YouTube. Follow and subscribe to her channel for more!