
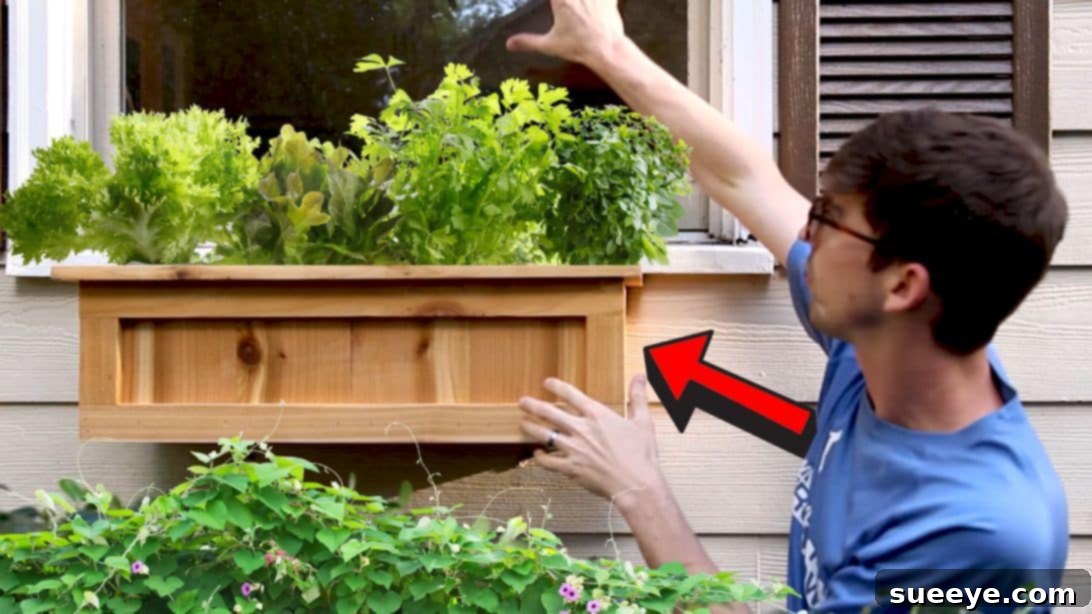
DIY Window Planter Box: Cultivate Your Own Indoor Herb Garden
There’s an undeniable joy that comes from cooking with fresh herbs, and many aspire to have their own herb garden. However, limited outdoor space often turns this dream into a challenge. If you find yourself in this situation, a DIY window planter box offers an elegant and practical solution. Imagine snipping fresh basil or rosemary right from your kitchen window – a delightful luxury made possible with a simple, rewarding project.
Inspired by the straightforward and effective tutorial from Make or Break Shop, this guide will walk you through creating your very own window planter box. It’s perfect for adding a touch of green to your home, enhancing your culinary adventures, and embracing a fulfilling DIY endeavor. Get ready to transform your kitchen window into a vibrant, living garden!
Why Choose a DIY Window Planter Box?
Opting for a DIY window planter box comes with a multitude of benefits, making it an excellent project for homeowners and apartment dwellers alike:
- Space-Saving Solution: Ideal for small homes, apartments, or anyone without a traditional garden space. It utilizes vertical space effectively, turning a simple window into a productive growing area.
- Fresh Herbs at Your Fingertips: Enjoy the convenience of having culinary herbs like basil, mint, oregano, and chives just steps away from your cooking station. No more last-minute runs to the grocery store for wilted herbs!
- Aesthetic Appeal: A beautifully crafted window box filled with lush greenery or vibrant flowers adds natural beauty and charm to your home’s interior and exterior. It can enhance your kitchen’s decor and create a welcoming ambiance.
- Cost-Effective: Building your own planter box is often more economical than purchasing a pre-made one, especially when you consider the quality and customization options.
- Customization and Personalization: Design your planter box to perfectly match your home’s style and the specific dimensions of your window. You can choose the type of wood, finish, and even the plants you grow.
- Improved Air Quality: Indoor plants naturally help purify the air, contributing to a healthier living environment.
- Therapeutic Hobby: Engaging in gardening, even on a small scale, can be incredibly relaxing and rewarding. There’s a unique satisfaction in growing something with your own hands.
Selecting the Right Location and Plants
Before you even pick up a saw, it’s crucial to consider where your window planter box will live and what you intend to grow. The success of your indoor garden hinges on these initial decisions:
- Sunlight Exposure: Most herbs and small flowering plants require ample sunlight. A south-facing window typically provides the most direct and prolonged light throughout the day, making it ideal. East-facing windows offer good morning sun, while west-facing windows provide strong afternoon light. North-facing windows generally receive less direct sunlight and might be better suited for shade-tolerant plants.
- Window Type and Size: Measure your window opening carefully to ensure your planter box will fit comfortably without obstructing the window’s function. Consider how the planter will attach to the wall or window sill securely.
- Plant Choices:
- Herbs: Basil, oregano, thyme, rosemary, mint, parsley, chives, and cilantro are excellent choices for window boxes. Select varieties that enjoy similar light and watering conditions.
- Small Vegetables: Think about growing microgreens, lettuce, spinach, or even small chili peppers if your window gets enough sun.
- Flowers: Small, compact flowers like impatiens, petunias, or violas can add a splash of color.
- Succulents: For lower light conditions or less frequent watering, various succulents and cacti can thrive in a window box, though they might require a different soil mix.
- Drainage: Ensure your planter insert has drainage holes to prevent root rot. If it doesn’t, you’ll need to drill some yourself or add a layer of pebbles at the bottom. The design of this window box specifically accommodates a separate planter insert, which is key for proper drainage and easy maintenance.
Materials You’ll Need
Gathering all your materials beforehand will ensure a smooth and efficient building process. The dimensions listed are based on a standard planter container, so always measure your specific insert first and adjust accordingly.
- Planter Insert: This is the plastic or metal container that will hold your soil and plants. Its dimensions dictate the size of your wooden planter box.
- 5 Pieces of Fence Pickets: Cedar fence pickets are an excellent choice due to cedar’s natural resistance to moisture and rot, making it ideal for outdoor or high-humidity environments like a window box.
- 2 Pieces of 1x4x6 Cedar Board: These will form the main structural frames of your box. Cedar is lightweight, durable, and aesthetically pleasing.
- Wood Glue: A strong, waterproof wood glue is essential for creating durable joints that will withstand moisture and the weight of your plants.
- Brad Nails: Used in conjunction with wood glue, brad nails provide immediate holding power while the glue dries, ensuring tight, secure connections.
- Sandpaper: Various grits (e.g., 80-grit for rough shaping, 120-grit for smoothing, 220-grit for a fine finish) will be needed for preparing surfaces and refining the final product.
- Decking Screws (3-inch): These robust, weather-resistant screws are crucial for securely mounting your finished planter box to the wall.
- Potting Soil: Choose a high-quality potting mix suitable for the type of plants you intend to grow. Look for mixes with good drainage and nutrient content.
- Plants: Your chosen herbs, flowers, or small vegetables.
- Wood Sealer or Exterior Paint: Essential for protecting your finished wooden box from moisture, UV rays, and general wear and tear, extending its lifespan.
Essential Tools for the Job
Having the right tools will make this DIY project much more manageable and enjoyable. Ensure all tools are in good working order and you’re familiar with their safe operation.
- Miter Saw: Crucial for making precise, angled cuts (especially for the decorative lip) and straight cuts on your wood pieces.
- Brad Nailer: Speeds up the assembly process significantly and creates clean, professional-looking joints.
- Drill/Driver: For pre-drilling holes and driving screws, particularly for mounting the box.
- Measuring Tape: Accuracy is key in woodworking, so a reliable measuring tape is indispensable.
- Pencil: For marking cut lines and drilling points.
- Safety Glasses: Always protect your eyes when cutting, drilling, and nailing.
- Ear Protection: Recommended when using power tools like saws and nailers.
- Clamps: Essential for holding glued pieces together while the adhesive sets, ensuring strong bonds.
- Sanding Block or Orbital Sander: For smoothing rough edges and preparing the wood for finishing.
Detailed Step-by-Step Instructions for Building Your Window Planter Box
Follow these instructions carefully, paying close attention to measurements and safety, to construct a sturdy and attractive window planter box.
Step 1: Prepare Your Wood for the Frame
Begin by preparing your cedar fence planks. These will form the inner lining and some structural elements of your box. Using your miter saw, carefully cut the cedar fence planks into 1-inch thick pieces. These thinner strips will be used to create the side walls and internal supports that hold the planter insert in place. Precision here is important for a snug fit later on.
Step 2: Measure and Cut the Base Frames
This step is critical for ensuring your planter insert fits perfectly. First, measure the exact dimensions (length and width) of your planter insert. Now, cut two identical base frames from your 1x4x6 cedar boards. For each dimension, add 1 inch to the measurement of your planter insert. This extra inch accounts for the thickness of the pickets that will be attached to the inside of the frame, effectively creating a recess for the insert. These two frames will serve as the top and bottom supports of your planter box, providing structural integrity.
Pro Tip: Double-check your measurements before making any cuts. “Measure twice, cut once” is a golden rule in woodworking.
Step 3: Assemble the Base Frames
With your frame pieces cut, it’s time for assembly. Apply a generous, even layer of waterproof wood glue to the ends of the cedar board pieces that form each frame. Carefully align the pieces to form a perfect rectangle, ensuring all corners are square. Use your brad nailer to secure the joints with brad nails. The nails provide immediate stability while the wood glue dries, creating a strong, lasting bond. Repeat this process for both the top and bottom frames.
Step 4: Create and Attach the Wooden Pickets
Now, prepare the wooden pickets that will form the side walls of your planter box. Cut these pickets down to size, making sure they are long enough to leave a 1/2-inch gap at the bottom of the box and a 1/4-inch gap at the top. The 1/2-inch gap at the bottom is crucial for allowing drainage and air circulation around the planter insert, while the 1/4-inch gap at the top will allow the lip of your flower container to extend slightly above the frame, making it easy to remove and providing a clean finish. Split the total remaining length evenly between the two sides of the frame. Attach these pickets to the inside of the base frames using wood glue and brad nails, ensuring they are evenly spaced and flush with the edges.
Step 5: Install the Vertical Supports
With the side pickets in place, it’s time to add vertical supports. These pieces will connect the top and bottom frames and provide additional rigidity to the entire structure. Cut the vertical supports to the appropriate length, ensuring they fit snugly between the top and bottom frames. Glue them into place, butt-joining them against each other at the corners to create clean, strong connections. Use brad nails to secure them while the glue dries.
Step 6: Attach the Top Frame
Carefully place the second frame (the one you prepared in Step 2) on top of the vertical supports. Ensure it aligns perfectly with the pickets and supports below. Apply wood glue to the top edges of the vertical supports and the interior pickets where the frame will sit. Secure the top frame in place using brad nails, ensuring a strong connection that ties the entire structure together.
Step 7: Install the Bottom Supports for the Planter Insert
Measure the internal width of the bottom section of your assembled box. Cut two pickets of this exact size. These pieces will sit horizontally across the bottom frame, creating a shelf for your planter insert to rest on. Glue and nail these bottom supports into place, ensuring they are level and capable of holding the weight of your filled planter insert.
Step 8: Construct the Decorative Lip
To give your window box a polished and professional finish, create a decorative lip around the top edge. Cut a strip of wood the same width as the pieces used for your main frame. Measure the perimeter of your box to determine the total length needed for the lip. For seamless corners, cut the ends of these strips at a 45-degree angle using your miter saw, creating mitered joints that fit together perfectly. Attach these lip pieces around the top perimeter of your box with wood glue and brad nails, ensuring clean, tight corners.
Step 9: Sand and Apply Protective Coating
Now, it’s time for the finishing touches. Thoroughly sand the entire planter box, starting with a coarser grit (like 80 or 120) to smooth out any rough edges or imperfections, and then moving to a finer grit (like 220) for a silky-smooth finish. Once sanded, wipe away all dust. Apply a generous and even coat of a high-quality wood sealer or exterior-grade paint. This coating is crucial for protecting the wood from moisture, preventing rot, and enhancing its durability. If painting, you may need multiple coats, sanding lightly between each. Allow ample drying time.
Step 10: Securely Mount Your Planter Box
This is the final and most critical step – mounting your planter box securely to the wall. Safety is paramount here. First, cut a scrap piece of picket that fits snugly inside the back frame of your planter box. This piece will act as a cleat for mounting. Using a stud finder, locate the wall studs behind your window. Drill the scrap picket directly into these wall studs using appropriate screws, ensuring it is perfectly level and firmly attached. Next, carefully position your finished planter box against this mounted picket. From the inside of the planter box, drill two 3-inch decking screws through the back of the planter box and into the scrap picket, ensuring a robust and stable attachment. This method prevents visible screws from the front and provides maximum support for your planter.
Safety Note: If studs are not accessible, use heavy-duty wall anchors suitable for the weight of your filled planter box. Always test the stability before filling with soil and plants.
Planting Your Window Box: Bringing It to Life
With your beautiful new planter box securely mounted, it’s time to add the green! This step is where your vision truly comes to life.
- Prepare the Planter Insert: Ensure your planter insert has adequate drainage holes. If not, drill a few 1/4-inch holes in the bottom to prevent waterlogging, which can lead to root rot. You can also add a layer of gravel or broken pottery shards at the bottom of the insert for improved drainage, though this is not strictly necessary if holes are present.
- Choose the Right Potting Mix: Select a high-quality potting mix that is formulated for containers and suitable for your chosen plants. Most herbs and flowering plants thrive in a well-draining, nutrient-rich soil mix. Avoid using garden soil, as it can compact in containers and lack proper drainage.
- Fill the Insert: Fill your planter insert with the potting mix, leaving about an inch or two of space from the top. Gently moisten the soil before planting.
- Plant Your Herbs/Flowers: Carefully remove your plants from their nursery pots. Gently loosen any circling roots. Arrange your plants in the insert according to your desired design, considering their mature size and light requirements. Plant them at the same depth they were in their original containers.
- Water Thoroughly: After planting, water your new garden thoroughly until water drains from the bottom of the insert. This helps settle the soil around the roots.
- Place in the Window Box: Carefully place the filled planter insert into your newly built wooden window box. The design ensures a perfect fit, allowing the lip of the insert to rest comfortably on the edges, making it easy to remove for cleaning or replanting.
Ongoing Maintenance for a Thriving Window Garden
To keep your window garden flourishing, consistent care is essential. Here are some key maintenance tips:
- Watering: Check the soil moisture daily. Water when the top inch of soil feels dry to the touch. The frequency will depend on the plant type, humidity, and sunlight exposure. Ensure proper drainage to avoid soggy soil.
- Fertilizing: Most potting mixes contain nutrients for a few weeks. After that, feed your plants with a balanced liquid fertilizer every 2-4 weeks during the growing season (spring and summer). Follow product instructions carefully.
- Pruning and Harvesting: Regularly prune your herbs and deadhead spent flowers. This encourages bushier growth, prevents plants from going to seed too early, and allows for continuous harvesting. For herbs, snip off the top leaves to promote side growth.
- Pest and Disease Management: Inspect your plants regularly for signs of pests (like aphids or spider mites) or diseases. Address any issues promptly with organic pest control methods or appropriate treatments. Good air circulation and proper watering can prevent many problems.
- Rotation and Sunlight: If some plants appear to be stretching towards the light, rotate your planter box every few days to ensure all sides receive adequate sunlight.
- Winter Care: For perennial herbs, you might need to adjust watering in winter (less frequent) or even bring the entire planter to a warmer spot if temperatures drop significantly. For annuals, you’ll need to replant each spring.
- Cleaning the Box: Periodically remove the planter insert and clean the inside of the wooden box to prevent mold or mildew buildup.
Embrace Your Green Thumb
Building your own DIY window planter box is more than just a woodworking project; it’s an invitation to bring the beauty and benefits of nature directly into your home. From the satisfying process of construction to the joy of harvesting your own fresh ingredients, this project offers a rewarding experience for any aspiring gardener.
Not only will your new window box enhance your culinary adventures and brighten your living space, but it also stands as a testament to your creativity and craftsmanship. So, gather your materials, follow these steps, and get ready to enjoy the simple pleasure of an indoor herb garden right in your kitchen window. Happy gardening!