
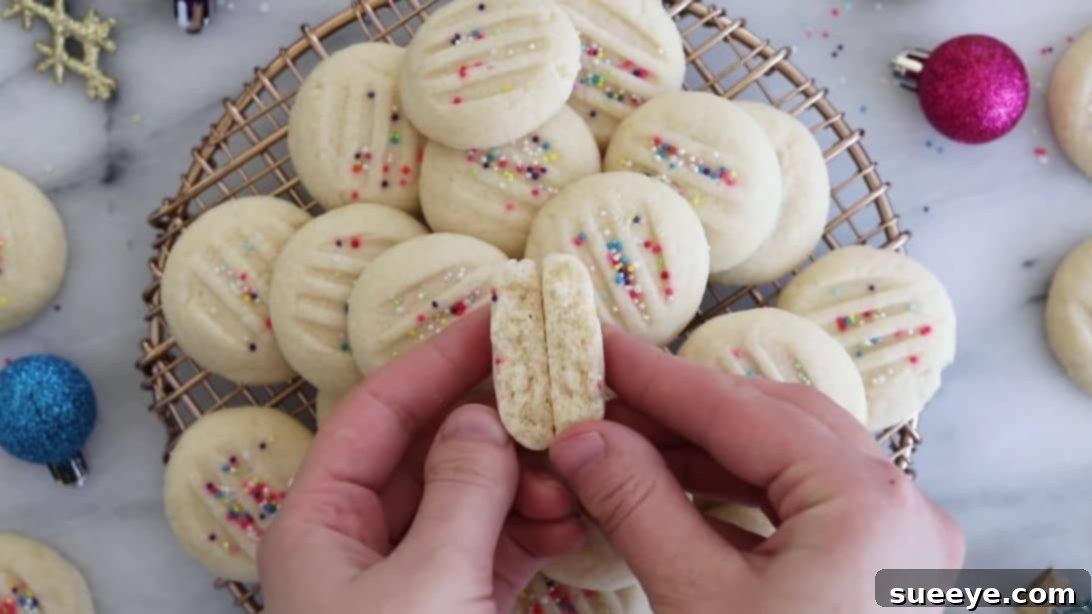
There’s something truly magical about a batch of homemade cookies, especially during the holidays. Among the myriad of festive treats, whipped shortbread cookies hold a special place in many hearts. These delectable delights are a staple in my family’s holiday gatherings, almost a non-negotiable part of our celebratory spread. Their incredible melt-in-your-mouth texture, rich buttery flavor, and effortless elegance make them an instant favorite. Beyond their undeniable taste, they are surprisingly simple to prepare and offer a fantastic canvas for creative, festive decorations using various sprinkles or glazes, transforming a simple cookie into a visual masterpiece. This comprehensive guide will walk you through crafting the perfect batch of these classic cookies, ensuring every bite is a moment of pure bliss. Prepare to delight your loved ones with this timeless recipe, inspired by expert bakers who make deliciousness seem utterly effortless.
Whipped shortbread cookies aren’t just easy; they’re an experience. They capture the essence of old-fashioned baking with a modern twist of simplicity. The “whipped” aspect refers to the creaming process of butter and sugar, which incorporates air, resulting in a lighter, more tender crumb than traditional shortbread. This technique elevates the cookie from merely good to absolutely irresistible, making it a perfect companion for a cup of tea, a festive party platter, or a thoughtful homemade gift.
What Makes Whipped Shortbread Special?
Unlike other shortbread varieties, whipped shortbread boasts an incredibly delicate, almost ethereal texture that truly melts in your mouth. This distinct characteristic comes from the intensive creaming of butter and powdered sugar, which aerates the mixture, creating a light and tender dough. The addition of cornstarch further enhances this tenderness, preventing the cookies from becoming too dense or crumbly. The result is a profoundly buttery cookie that’s both rich and surprisingly light, with a subtle sweetness that never overpowers. It’s a testament to simple ingredients coming together in a magical way to create something extraordinary.
The Essential Ingredients for Perfect Whipped Shortbread
Crafting exceptional whipped shortbread begins with understanding the role of each ingredient. Quality matters here, as the simplicity of the recipe allows each flavor to shine through. Gather your tools and ingredients, ensuring they are at the correct temperature for optimal results.
Ingredients:
- 1 cup (2 sticks) Unsalted Butter, softened: The star of the show! Unsalted butter allows you to control the overall saltiness of your cookies. It’s crucial for the butter to be properly softened (but not melted) so it can cream effectively with the sugar, incorporating air and creating that signature light texture. Room temperature butter should yield to gentle pressure.
- ¾ cup Powdered Sugar (Confectioners’ Sugar): Unlike granulated sugar, powdered sugar dissolves seamlessly into the butter, contributing to the cookie’s smooth, melt-in-your-mouth texture without any grittiness. It also helps in creating a lighter, more delicate crumb.
- 1 tsp Vanilla Extract: A classic flavor enhancer that adds warmth and depth to the buttery base. For the best flavor, opt for pure vanilla extract. You can also experiment with other extracts like almond or peppermint for seasonal variations.
- ¾ tsp Salt: A small but mighty ingredient that balances the sweetness and elevates the rich flavor of the butter. Don’t skip it, even if you think it’s just a pinch!
- 2 cups All-Purpose Flour: Provides the essential structure for the cookies. Ensure you measure your flour correctly, preferably by weight if you have a kitchen scale, or by spooning it into the measuring cup and leveling it off, rather than scooping directly from the bag, which can compact it and lead to too much flour.
- 2 tbsp Cornstarch: This is the secret weapon for unbelievably tender shortbread! Cornstarch interferes with gluten development in the flour, resulting in a more delicate, crumbly (in a good way!) texture that truly melts away in your mouth.
- Nonpareils, Jimmies, or Colored Sanding Sugar (optional): These add a festive touch and a bit of crunch. Feel free to get creative with your decorations based on the occasion.
Tools You’ll Need:
- Stand mixer with a paddle attachment, or an electric hand mixer
- Large mixing bowls
- Measuring cups and spoons
- Whisk
- Rubber spatula
- Baking sheets
- Parchment paper
- Small cookie scoop (optional, but helpful for uniformity)
- Fork (for flattening and creating a pattern)
Mastering the Whipped Shortbread: Step-by-Step Directions
Follow these detailed steps to achieve perfect whipped shortbread cookies that are sure to impress.
Step 1: Creaming the Butter and Sugar to Perfection
In the bowl of a stand mixer fitted with the paddle attachment, or using a large bowl and an electric hand mixer, combine the softened unsalted butter and powdered sugar. Begin mixing on low speed until the sugar is just incorporated, then increase to medium-high. Beat the mixture for at least 5 minutes. If you’re using a hand mixer, you might need to beat for 7-10 minutes. This extensive creaming process is crucial for achieving the “whipped” texture; it incorporates air into the butter and sugar, lightening its color and transforming it into a fluffy, creamy, almost cloud-like consistency. Scrape down the sides of the bowl periodically to ensure everything is evenly mixed. Once light and airy, add the vanilla extract and salt. Continue mixing on medium speed for another minute until these additions are fully combined and the mixture is fragrant.
Step 2: Incorporating the Dry Ingredients
In a separate medium-sized bowl, whisk together the all-purpose flour and cornstarch until they are thoroughly combined. This step ensures an even distribution of the cornstarch, which is key to the shortbread’s tenderness. With your mixer speed turned down to medium-low, gradually add the flour mixture to the wet ingredients, about half a cup at a time. Mix only until the flour is just combined and no streaks remain. It’s absolutely essential not to overmix the dough once the flour is added, as this can develop the gluten and result in tough, chewy cookies instead of the desired tender, crumbly texture. The dough should come together as a soft, pliable consistency.
Step 3: Shaping and Decorating
Preheat your oven to 325°F (160°C). Line two baking sheets with parchment paper. Scoop the cookie dough in tablespoon-sized portions. For consistent sizing, a small cookie scoop works wonders. Roll each portion gently between your palms to form a smooth ball. Place these dough balls on the prepared baking sheets, ensuring they are spaced about 1 to 2 inches apart to allow for slight spreading. Using the tines of a fork, gently flatten each cookie dough ball slightly, creating a traditional crosshatch pattern. This not only gives them a classic shortbread look but also helps them bake evenly. If desired, immediately sprinkle your chosen nonpareils, jimmies, or colored sanding sugar onto the flattened cookies. Press them gently to help them adhere to the dough.
Step 4: Baking to Perfection and Cooling
Bake the cookies in your preheated 325°F (160°C) oven for about 12 to 15 minutes. Baking times can vary slightly depending on your oven, so keep an eye on them. The cookies are done when the edges are just barely golden, and the centers still look pale but set. They should not be heavily browned; the beauty of shortbread lies in its light color. Once baked, remove the baking sheets from the oven and allow the cookies to cool completely on the sheets before attempting to transfer them. Whipped shortbread cookies are very delicate when warm and can break easily. As they cool, they will firm up, making them easier to handle. Once fully cooled, they are ready to be enjoyed or stored.
Troubleshooting Common Whipped Shortbread Issues
Even with a simple recipe, sometimes things don’t go exactly as planned. Here are some common issues and how to resolve them:
- Cookies Spreading Too Much: This often happens if your butter was too warm, or if you over-creamed it, incorporating too much air and causing it to collapse in the oven. Ensure your butter is just softened, not greasy or oily. Chilling the shaped dough for 15-20 minutes before baking can also help.
- Cookies Are Tough: Overmixing the flour is the primary culprit here. Mix only until the flour is just combined. Avoid using high speed once the flour is added.
- Cookies Are Dry or Crumbly (too much): This could be due to too much flour (measured incorrectly) or not enough butter/liquid. Ensure accurate measurements and proper butter consistency.
- Cookies Don’t Hold Their Shape: Again, butter temperature is key. If the dough is too warm or soft, it won’t hold its shape. A quick chill can often rectify this.
Creative Variations & Customizations
While the classic whipped shortbread is perfect as is, it’s also wonderfully versatile! Here are some ideas to add your personal touch:
- Flavor Infusions:
- Citrus Zest: Add 1-2 teaspoons of finely grated lemon, orange, or lime zest to the butter mixture for a bright, refreshing flavor.
- Almond Extract: Substitute half of the vanilla extract with almond extract for a delicate, nutty aroma.
- Chocolate Lover’s: Fold in ½ cup of mini chocolate chips or finely chopped dark chocolate during the dry ingredient incorporation step.
- Peppermint Twist: For a festive touch, add ¼ to ½ teaspoon of peppermint extract and optionally drizzle with melted chocolate and crushed candy canes after baking.
- Topping Transformations:
- Chocolate Drizzle: Melt some chocolate chips or baking chocolate and drizzle over cooled cookies for an elegant finish.
- Glaze It: A simple glaze made from powdered sugar and a touch of milk or lemon juice can add extra sweetness and shine.
- Nuts About It: Press finely chopped pecans, walnuts, or pistachios onto the cookie dough before baking for added texture and flavor.
- Dipped Cookies: Dip half of the cooled cookie into melted chocolate and sprinkle with more festive decor.
- Shaping Fun:
- Cookie Cutters: Chill the dough for about 30 minutes, then roll it out to ½-inch thickness and cut into desired shapes. Adjust baking time slightly if shapes are very small or large.
- Piped Shortbread: For a more elegant look, you can pipe the dough into rosettes or other intricate shapes using a pastry bag fitted with a star tip. This dough is soft enough to pipe if at the right consistency.
Storage and Shelf Life
Proper storage ensures your whipped shortbread cookies remain fresh and delicious for as long as possible:
- At Room Temperature: Store cooled cookies in an airtight container at room temperature for up to 1 week. Placing a piece of parchment paper between layers can prevent sticking.
- Refrigeration: While not strictly necessary, refrigerating can extend their freshness slightly. Store in an airtight container for up to 2 weeks.
- Freezing Baked Cookies: These cookies freeze beautifully! Place cooled cookies in a single layer on a baking sheet and freeze until solid. Transfer to a freezer-safe bag or container, separating layers with parchment paper. Freeze for up to 2-3 months. Thaw at room temperature before serving.
- Freezing Dough: You can also freeze the raw dough. Roll into a log, wrap tightly in plastic wrap, and then in foil. Freeze for up to 1 month. Thaw in the refrigerator, slice, and bake as directed.
Serving Suggestions
Whipped shortbread cookies are incredibly versatile and can be enjoyed in many ways:
- Classic Pairing: Serve with a warm cup of coffee, tea, or hot cocoa for a comforting treat.
- Holiday Platters: They are an essential addition to any holiday cookie assortment, adding elegance and buttery goodness.
- Homemade Gifts: Package them beautifully in tins or cello bags tied with a ribbon for thoughtful homemade gifts that are always appreciated.
- Dessert Companion: Enjoy alongside fresh fruit, a scoop of ice cream, or a dollop of whipped cream for a simple yet satisfying dessert.
This recipe for whipped shortbread cookies is more than just a list of steps; it’s an invitation to create joy and tradition in your kitchen. With their tender texture, rich butter flavor, and the ability to customize them for any occasion, these cookies are truly a culinary delight. They prove that sometimes, the simplest recipes yield the most profound pleasure. So, gather your ingredients, fire up your mixer, and prepare to fill your home with the comforting aroma of freshly baked whipped shortbread. Your family and friends will thank you for bringing this classic, melt-in-your-mouth magic to your next gathering!