
Mastering the Art of Sharpening Scissors: A Pro Guide to Restoring Dull Blades at Home
For any dedicated crafter, seamstress, or DIY enthusiast, a sharp pair of scissors is an indispensable tool. Yet, we all know the frustration of dull blades that snag, bend, and tear rather than cut cleanly. While the immediate urge might be to discard old scissors and buy new ones, there’s a more sustainable, satisfying, and cost-effective solution: learning how to sharpen them like a pro. This skill not only saves you money but also allows you to preserve cherished tools, like that antique pair passed down through generations.
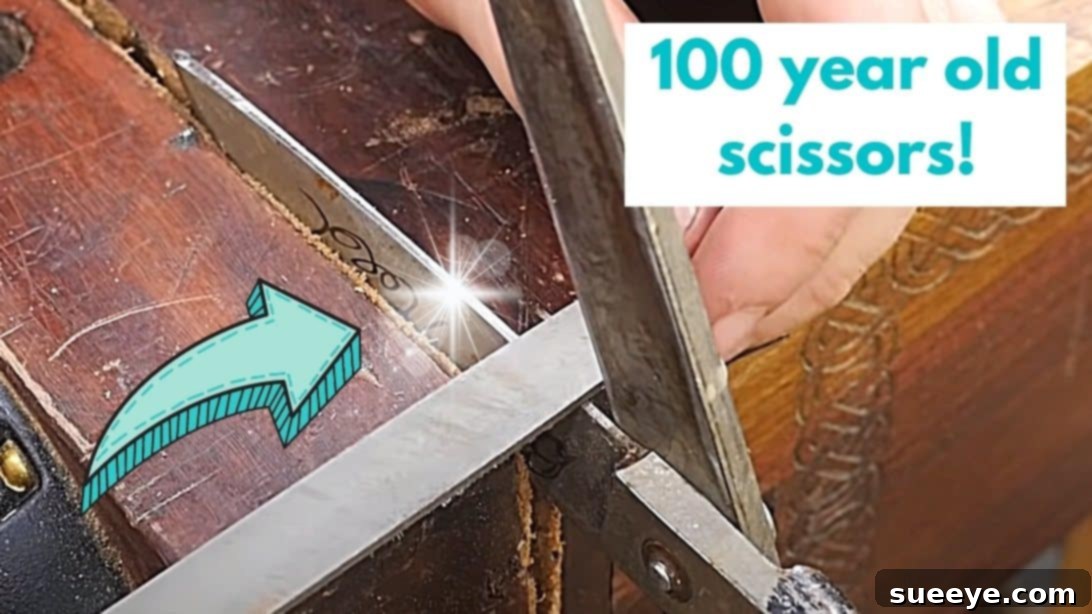
At our home, we treasure a remarkable 60-year-old pair of fabric scissors that belonged to my grandmother. She used them tirelessly for all her intricate sewing projects, creating countless memories with every snip. Despite their age and extensive use, these shears are still of exceptional quality, but time and wear have certainly dulled their once razor-sharp edges. Instead of consigning them to a drawer or replacing them, we discovered an incredible video tutorial by Wood By Wright. This master craftsman demonstrates a straightforward yet highly effective method to restore even the dullest scissors to their former glory. If you, like me, believe in preserving the history and utility of your tools, and want to achieve consistently crisp cuts, then this detailed guide on how to sharpen scissors at home is for you. Let’s transform those struggling shears into precision instruments once again!
Why Sharpen Your Scissors? The Benefits of a Keen Edge
Beyond the obvious benefit of improved cutting performance, regularly sharpening your scissors offers a multitude of advantages. Dull scissors require more force to cut, leading to hand fatigue and imprecise results. This can be particularly frustrating for intricate craftwork or precise fabric cutting. A sharp blade, on the other hand, glides through materials effortlessly, creating clean, professional-looking edges with minimal effort.
Furthermore, sharpening extends the lifespan of your tools. Rather than contributing to landfill waste, you’re embracing a sustainable approach by maintaining and restoring your existing equipment. It’s also significantly more economical to invest a little time in sharpening than to repeatedly purchase new pairs. For heirloom tools, like my grandmother’s scissors, sharpening is a way to honor their history and ensure they continue to be useful for years to come. It’s about respect for craftsmanship and a nod to generations past. Understanding the anatomy of a scissor blade – how its two bevels meet to create a cutting edge – reveals that proper sharpening involves carefully restoring these angles, removing microscopic burrs, and polishing the surface for optimal function.
Essential Materials for Sharpening Scissors
Achieving a professional-level sharpness at home doesn’t require an arsenal of specialized tools. With just a few key items, you can effectively sharpen your scissors. Here’s what you’ll need:
- Diamond Plate (1200 Grit): This is your primary sharpening tool. A 1200-grit diamond plate is ideal because it’s fine enough to create a very sharp edge without being overly abrasive. Diamond plates are excellent for sharpening steel due to the hardness of diamonds, and they maintain their flatness over time, which is crucial for consistent results. You might also consider a coarser grit (e.g., 400-600) if your scissors are extremely dull or have nicks, followed by the 1200-grit for refinement.
- Diamond Paddle (Optional, but Recommended for Finishing): A diamond paddle, typically a finer grit than your main plate, is fantastic for honing and polishing the very edge of the blade. It helps remove the tiny burr created during sharpening, resulting in a truly razor-sharp finish and a smoother cut. If you want that extra “bite” and refinement, don’t skip this step.
- File: A fine-toothed file can be incredibly useful, especially for achieving a consistent bevel angle. It offers more control for some users, particularly when working on slightly thicker or more resistant blades. It’s an excellent alternative or complement to the diamond plate for the bevel sharpening process.
Before you begin, ensure your scissors are clean and free of any adhesive residue, lint, or grime. A quick wipe-down with rubbing alcohol can prepare the blades for optimal sharpening.
Step-by-Step Directions: Sharpening Scissors Like a Professional
Sharpening scissors involves two primary areas: the back (flat side) of the blade and the bevel (cutting edge). We’ll tackle each systematically, followed by addressing any looseness in the pivot.
1. Preparing Your Workspace and Ensuring Safety
Always work on a stable surface. Consider wearing gloves to protect your hands from accidental slips. Ensure your sharpening tools are clean. When handling sharp edges, even dull ones, caution is paramount.
2. Sharpening the Back of the Blade (The Flat Side)
The back of the blade, which is the flat side that rests against the other blade, plays a critical role in how cleanly your scissors cut. It must be perfectly flat and free of burrs for the scissors to close tightly and cut efficiently. This initial step sets the foundation for a truly sharp edge.
- Prepare Your Diamond Plate: Begin by lightly wetting your 1200-grit diamond plate with a little water. Water acts as a lubricant, reducing friction and helping to carry away the tiny metal particles (swarf) removed during the sharpening process. This keeps your plate from loading up and ensures a smoother, more effective sharpening action.
- The Stroking Motion: Open your scissors completely. Take one blade and lay its flat back surface flat against the wetted diamond plate. The goal here is to keep the blade perfectly flat – do not angle it. With consistent, light pressure, gently stroke the entire length of the blade back and forth across the diamond plate. Focus on maintaining that flat contact.
- Observe the Progress: After a few strokes, you’ll start to notice a dark, grayish liquid forming on the plate. This “black stuff” is the steel particles being removed from the blade, indicating that the sharpening action is indeed taking place. This process effectively flattens any microscopic imperfections or burrs that may have developed on the back of the blade.
- Check the Edge: Carefully examine the cutting edge of the blade. You should see some shiny areas starting to appear. This “shine” indicates where the burr, a tiny curled-over piece of metal formed during previous use or dulling, is being removed and a crisp new edge is being established.
- Repeat for the Other Blade: Flip the scissors over and repeat the entire process for the back of the other blade, ensuring both flat surfaces are equally refined. This step is crucial for both blades to meet perfectly, allowing for a clean shearing action.
3. Sharpening the Bevel (The Cutting Edge)
The bevel is the angled part of the blade that forms the actual cutting edge. This is where the true sharpness is achieved, and maintaining the original angle is key to optimal performance.
Method A: Using the Diamond Plate for the Bevel
This method is a direct continuation of using your diamond plate and is highly effective for most scissors.
- Identify the Bevel Angle: Hold your scissors open. Carefully examine the cutting edge of one blade to identify its original bevel angle. This angle is critical to replicate. You’ll want to place the blade on the diamond plate so that this entire bevel surface makes contact.
- Gentle Stroking Motion: Lay the bevel of one scissor blade flat against your wetted diamond plate, ensuring you match the original angle precisely. With light, consistent pressure, stroke the blade along the plate, moving from the heel (near the pivot) to the tip. Imagine you are trying to “shave” a thin layer off the entire bevel.
- Forming a Burr: Continue this process, applying even pressure, until you feel a slight burr (a tiny lip of metal) forming along the very edge of the blade on the opposite side. You can feel this by gently running your fingertip *away* from the cutting edge (never towards it!). This burr indicates that you’ve removed enough material from the bevel and the two surfaces are meeting.
- Repeat for the Other Blade: Flip the scissors and repeat the exact same process for the bevel of the second blade, again focusing on maintaining its original angle and forming a consistent burr.
Method B: Using a File for the Bevel (for more precision or tougher jobs)
For those who prefer a more controlled approach, or if your scissors are particularly dull and require more aggressive material removal, using a file can be an excellent technique.
- Secure the Scissor Blade: Open your scissors and carefully secure one of the blades in a vise, making sure the bevel is easily accessible and stable. Position it so the cutting edge is facing upwards and slightly away from you. This provides stability, allowing you to focus purely on the filing motion.
- The Draw Filing Technique: Grab your fine-toothed file. Instead of filing in a single direction, you’ll use a technique called “draw filing.” This involves dragging the file forward and backward along the entire length of the bevel, with a slight, consistent movement from side to side to ensure even material removal. Maintain the original bevel angle throughout this process. The key is to use steady, controlled strokes, focusing on removing material evenly across the entire bevel.
- Check for Shininess: After several passes, carefully inspect the edge. You should observe a consistent “shininess” developing along the entire bevel. This indicates that you’ve successfully removed material and are creating a new, sharp edge. Continue draw filing until you feel a burr forming along the opposite side of the blade, similar to the diamond plate method.
- Refining with a Diamond Paddle: Once the burr is established, remove the blade from the vise. Now, grab your diamond paddle. This tool is perfect for refining and polishing the edge. Gently stroke the diamond paddle along the bevel, using light pressure, focusing on removing the burr and polishing the edge. The diamond paddle gives that ultimate finishing touch for an extra-sharp, smooth edge that glides through materials.
- Repeat for the Second Blade: Flip the scissors, secure the other blade in the vise, and repeat the draw filing and diamond paddle refining process. Ensure both blades receive equal attention to achieve a balanced, sharp cut.
4. Addressing Sloppiness: Tightening the Pivot Screw
Sometimes, scissors become “sloppy” not just because they are dull, but also because the pivot screw that holds the two blades together has loosened over time. This looseness prevents the blades from closing tightly, leading to poor cutting performance even with a sharp edge.
- Locate the Screw: Identify the screw or rivet that connects the two scissor blades. Most modern scissors have an adjustable screw.
- Tighten Carefully: Using an appropriately sized screwdriver, gently tighten the screw a little bit. The goal is to remove any excessive play between the blades without making them too stiff to open and close smoothly. Test the movement after small adjustments. You want them to feel snug but still move freely. Over-tightening can make the scissors difficult to use and may even damage the pivot mechanism.
5. Testing Your Freshly Sharpened Scissors
The moment of truth! Now that you’ve invested time in sharpening, it’s time to see the results. You’ll likely notice a significant difference immediately.
- Tissue Paper Test: A classic test for sharpness is to cut a piece of delicate tissue paper. A truly sharp pair of scissors should cut through it cleanly without snagging or folding the paper.
- Fabric Test: For fabric scissors, try cutting a thin piece of silk or chiffon. Dull scissors would typically push or chew these delicate fabrics. Sharp scissors will slice through effortlessly.
- Thread Test: Hold a single strand of thread taut and try to snip it with just the tips of your scissors. A sharp pair will cut it cleanly on the first attempt.
If your scissors pass these tests with flying colors, congratulations! You’ve successfully sharpened your scissors like a pro.
Scissor Maintenance Tips for Lasting Sharpness
To keep your newly sharpened scissors performing at their best for as long as possible, follow these simple maintenance tips:
- Clean After Use: Always wipe your scissors clean after each use, especially if you’ve cut through adhesive materials or fabric with sizing. Residue can quickly dull edges.
- Lubricate the Pivot: Periodically add a tiny drop of light machine oil to the pivot point. This helps maintain smooth action and prevents rust.
- Store Properly: Store scissors in a protective sheath or a designated holder. Avoid tossing them into a drawer with other tools where the blades can nick or get damaged.
- Use for Intended Purpose: Resist the temptation to use your fabric scissors on paper, cardboard, or anything other than fabric. Different materials require different levels of edge resilience, and using specialized scissors for general tasks will quickly dull them.
- Light Honing: For continuous optimal performance, a light honing on your diamond paddle or a very fine sharpening stone every few months (depending on usage) can refresh the edge before it becomes truly dull.
Conclusion: Embrace the Craft of Sharpening and Preserve Your Tools
Learning how to sharpen scissors is an incredibly rewarding skill that empowers you to take better care of your tools, save money, and contribute to a more sustainable lifestyle. From restoring your grandmother’s treasured fabric shears to ensuring your everyday craft scissors are always ready for action, the process is straightforward and yields impressive results. You’ll not only enjoy the precision and ease of working with truly sharp blades but also gain immense satisfaction from reviving tools that might otherwise have been discarded.
So, gather your materials, follow these detailed steps, and experience the transformative power of a perfectly sharp pair of scissors. Bid farewell to frustrating snags and imprecise cuts, and welcome a new era of effortless crafting. Your hands, your projects, and your cherished tools will thank you!