
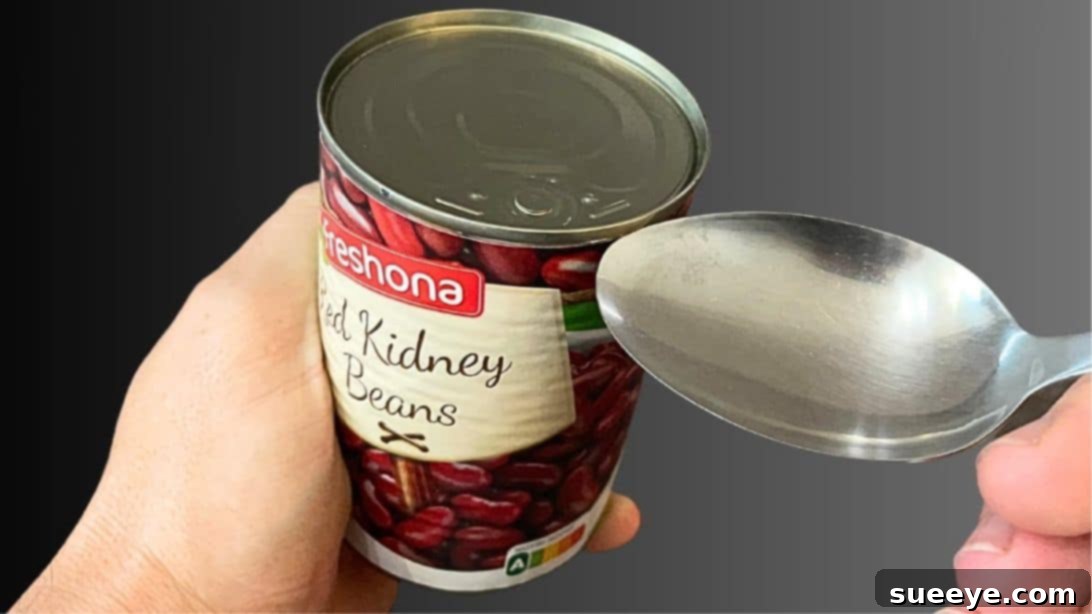
Emergency Can Opening Guide: How to Open a Can Without a Can Opener Using a Spoon or Knife
Imagine this common predicament: you’re ready to enjoy a delicious canned meal, but when you reach for your trusty can opener, it’s nowhere in sight. Perhaps you’re on a remote camping trip, experiencing an unexpected power outage, your old can opener finally gave up the ghost, or you simply forgot to pack one. Whatever the scenario, facing a sealed can with no traditional means to open it can be incredibly frustrating and even a little daunting. But don’t despair! While a dedicated can opener is always the safest and most efficient tool, there are ingenious and practical methods you can employ using common household items like a sturdy spoon or a reliable kitchen knife. This comprehensive guide will walk you through two effective, albeit cautious, techniques to access your canned goods in a pinch. Prepare to be surprised by your own resourcefulness, but remember, safety must be your top priority when attempting these alternative methods. Let’s dive into these essential survival hacks, inspired by practical demonstrations from channels like HowTo Channel on YouTube.
Why These Can Opening Hacks Are Essential Life Skills
Knowing how to open a can without a conventional opener isn’t just a party trick; it’s a valuable life skill that can prove indispensable. Here are a few scenarios where these techniques become crucial:
- Emergency Preparedness: In the event of power outages, natural disasters, or other emergencies, access to canned food can be vital. Traditional openers might be lost, broken, or simply unavailable.
- Outdoor Adventures: For campers, hikers, or picnickers, a forgotten or malfunctioning can opener can turn a planned meal into a challenge. These methods offer a quick solution in the wilderness.
- Unexpected Situations: Moving to a new place, a sudden broken appliance, or even just misplacing your opener can leave you in a bind. These hacks offer immediate relief.
- Resourcefulness and Self-Reliance: Learning these techniques builds confidence in your ability to handle everyday challenges with limited tools, fostering a sense of preparedness.
General Safety Precautions Before You Start
Before attempting any of these alternative can-opening methods, it is absolutely critical to prioritize safety. Working with thin metal edges, potential sharp points, and the possibility of tools slipping carries inherent risks. Please read and understand these precautions thoroughly before proceeding:
- Wear Protective Gloves: Always wear thick gloves – such as gardening gloves, work gloves, or even multiple layers of heavy-duty dish gloves. These are essential to protect your hands from sharp metal edges that will form on the can and lid.
- Work on a Stable, Non-Slip Surface: Use a cutting board placed on a sturdy countertop, or any other firm, non-slip surface. This prevents the can from moving unexpectedly during the process.
- Maintain a Firm Grip: Ensure both the can and your chosen tool (spoon or knife) are held firmly and securely at all times to prevent accidental slippage, which can lead to serious injury.
- Keep Fingers and Body Clear: Be acutely aware of where your fingers, hands, and other body parts are positioned. Keep them well away from the immediate area where you are working on the can’s lid.
- Exercise Patience and Deliberation: Rushing through these methods significantly increases the risk of mistakes and injuries. Take your time, focus on each step, and apply steady, controlled pressure.
- Inspect the Can’s Condition: Before opening, check that the can is not bulging, severely dented, or leaking. These signs could indicate spoiled food and potential pressure buildup, making it unsafe to open.
- Prepare for Disposal: Once opened, the can lid and the edges of the can itself will be razor-sharp. Plan for immediate, safe disposal.
Method #1: How to Open a Can with a Spoon
The spoon method is often recommended as the safer of the two primary alternatives to a can opener because a spoon’s edge is duller than a knife. This reduces the risk of deep lacerations, though caution is still paramount. This technique cleverly utilizes friction, concentrated pressure, and leverage to weaken and eventually penetrate the can’s lid, gradually peeling it open.
Materials Required for the Spoon Method:
- A can of food
- A sturdy metal spoon (preferably one you don’t mind potentially scratching or slightly bending)
- Thick protective gloves
Step-by-Step Instructions for Opening a Can with a Spoon:
- Select the Right Spoon: Choose a durable metal spoon. Avoid plastic, wood, or flimsy silverware, as these will likely bend, break, or be ineffective. A spoon with a relatively flat, strong tip on its handle works best, as this is the part you’ll initially use to pierce the can.
- Prepare Your Grip and Workstation: Put on your protective gloves. Place the can firmly on your stable, non-slip surface. Hold the can securely with one gloved hand. In your other gloved hand, grip the spoon upside down, so the tip of the handle (the end opposite the spoon’s bowl) is pointing towards the can’s lid.
- Identify the Weak Point: The lid of a can is typically crimped onto the body, forming a very thin, slightly raised seam or lip around the inner edge of the lid. This seam is the weakest part of the can’s structure and your primary target.
- Initiate the Piercing Motion: Place the very tip of the spoon’s handle directly onto this inner seam of the can lid, close to the edge. Apply significant downward pressure while rubbing the spoon back and forth rapidly in a small, concentrated area. Think of it like vigorously scrubbing a tiny spot with the spoon tip. The goal is to generate friction and stress the metal.
- Persistence is Key: Continue this rubbing and pressing motion consistently. You will gradually feel the metal of the can lid begin to thin and weaken. Eventually, a small hole will appear. This process may take a few minutes of sustained effort, as the friction and pressure work to fatigue the metal.
- Enlarge the Initial Hole: Once you’ve successfully created a small pilot hole, use the tip of the spoon to gently pry and enlarge it slightly, making it easier for the next step.
- Commence Cutting Around the Perimeter: Now, flip the spoon over so you are using the edge of the spoon’s bowl. Insert this edge into the newly formed hole. Angle the spoon so its edge rests against the inner rim of the can. Use a back-and-forth sawing or levering motion, similar to how you pierced the initial hole, to cut through the remaining metal around the perimeter of the lid.
- Work Your Way Around the Can: Slowly and carefully work your way around the entire lid, gradually cutting through the metal until it is nearly completely detached. Maintain consistent pressure and a steady motion.
- Carefully Pry Open the Lid: Once most of the lid is cut, use the spoon to carefully pry it open. Be extremely cautious of the sharp, jagged edges that will have formed. You may need to create a small leverage point by gently bending a portion of the lid upward to get a better grip with the spoon.
Method #2: How to Open a Can with a Knife
Using a knife to open a can is generally a more direct and often faster method compared to the spoon. However, it comes with significantly higher risks due to the knife’s sharp blade and the force involved. This technique relies on carefully piercing the lid and then cutting along the edges. **This method should only be attempted with extreme caution, as a last resort, and by individuals confident in their knife handling skills. If you are uncomfortable or lack proper protective gear, stick with the spoon method or seek professional help.**
Materials Required for the Knife Method:
- A can of food
- A sturdy, non-serrated kitchen knife (preferably a chef’s knife or a strong utility knife – avoid using your best knives, as the tip can be dulled or damaged)
- Thick protective gloves
- A folded towel or sturdy cloth (for additional palm protection)
Step-by-Step Instructions for Opening a Can with a Knife:
- Choose Your Knife Wisely: Select a knife with a strong, rigid, and non-flexible blade. A chef’s knife or a robust utility knife is ideal. A serrated knife is less effective for piercing and harder to control, increasing risk, so it should not be used. Do not use delicate or valuable knives, as the tip can bend or break, or the edge can dull significantly.
- Prepare for Maximum Protection: Don your thick protective gloves. For an extra layer of safety, place a neatly folded towel or a thick cloth over the palm of the hand you will use to gently pound the knife handle. This helps cushion the impact and prevents the knife from digging into your hand if it slips.
- Position the Can and Knife: Place the can on a very stable, non-slip surface, like a cutting board. Hold the can firmly with one gloved hand, keeping your fingers well clear of the top edge. In your other hand, hold the knife vertically with the sharp tip pointing directly down, positioning it along the inner edge of the can’s lid, just inside the raised rim (the weakest point).
- Pierce the First Hole with Controlled Force: With the knife tip precisely on the inner seam of the lid, use the heel of your gloved, towel-protected palm to firmly and carefully pound the top of the knife handle. Apply enough controlled force to pierce a clean hole through the can’s lid. The objective is a deliberate, controlled pierce, not a wild, uncontrolled stab. Listen for the distinct sound of the metal giving way.
- Create a Series of Holes: Carefully lift the knife out of the first hole. Move the knife a small distance (approximately half an inch to an inch) along the inner rim of the can. Repeat the pounding motion to pierce another hole. Continue this process, creating a series of closely spaced holes around the entire perimeter of the can’s lid. The closer these holes are, the easier and safer the next cutting step will be.
- Connect the Holes by Cutting the Sides: Once you have successfully created a complete ring of holes around the lid, insert the knife tip into one of the holes. Carefully angle the blade and use a gentle sawing or rocking motion to connect the holes, effectively cutting through the small metal strips between them. Be extremely careful not to let the knife slip sideways or into the contents of the can. Maintain full control over the blade at all times.
- Detach the Lid Safely: Continue connecting the holes until the lid is nearly completely detached from the can. Use the knife’s tip or the handle (avoid using your bare hands) to carefully pry the lid open. Again, be acutely aware that both the detached lid and the can’s rim will have incredibly sharp, jagged edges.
For a dynamic visual demonstration of these techniques, which can greatly clarify the manual tasks involved, consider watching the detailed video tutorial by HowTo Channel on YouTube. Seeing the methods in action can often provide valuable insights and improve your understanding of the process.
What To Do Immediately After Opening Your Can
Successfully opening a can without a traditional opener is only half the battle. Proper handling and disposal are crucial next steps to prevent injuries and ensure the food is safe to consume.
- Inspect for Metal Shavings: Carefully examine the contents of the can for any small metal shavings that might have fallen in during the opening process. While rare with careful technique, it’s a good practice to be vigilant, especially when using the knife method, as tiny fragments could be dangerous if ingested.
- Safely Remove Contents: Use a clean spoon, fork, or other utensil to scoop out the food. Avoid direct contact between your bare hands and the can’s sharp, newly exposed edges.
- Properly Dispose of Lid and Can: The detached lid and the can itself will now have razor-sharp, jagged edges. This is a significant hazard. Immediately place the lid inside the empty can, or if preferred, carefully flatten the lid and wrap it securely in several layers of newspaper or a sturdy plastic bag before discarding. This helps prevent accidental cuts to yourself, other household members, or waste handlers.
- Clean Your Tools and Workspace: Thoroughly clean any tools (spoon, knife) and your work surface immediately after use. Wash your protective gloves as well if they are reusable.
Frequently Asked Questions (FAQ) About Opening Cans Without an Opener
Is it truly safe to open a can without a can opener?
While possible, opening a can without a dedicated can opener using methods like a spoon or knife carries inherent risks, primarily from sharp metal edges, potential tool slippage, and the chance of metal fragments. It is essential to exercise extreme caution, wear robust protective gloves, and follow all instructions meticulously. These methods should be considered last resorts for emergencies or when no other option is available, never a substitute for a proper can opener.
What kind of spoon is best for the spoon method?
A sturdy, durable metal spoon is paramount. Avoid anything flimsy like plastic, wood, or lightweight aluminum spoons, as they will likely bend, break, or be ineffective. A spoon with a relatively flat and strong handle tip will provide the best leverage and friction for piercing the can lid effectively.
Can I use any knife for the knife method?
No, not all knives are suitable. You should use a sturdy, non-serrated kitchen knife with a strong, rigid, and non-flexible blade, such as a chef’s knife or a strong utility knife. Avoid using valuable or delicate knives, as their tips can be dulled, chipped, or bent during the process. Serrated knives are particularly unsuitable as they are less effective for piercing and much harder to control for this task, significantly increasing the risk of injury.
How long does it typically take to open a can with these alternative methods?
The time taken can vary significantly based on your technique, the sturdiness of your tools, the type of can, and your personal experience. The spoon method, due to its reliance on friction and steady pressure, can take anywhere from 3 to 10 minutes of consistent effort. The knife method, while potentially faster (often 1 to 5 minutes), demands even greater precision and extreme caution due to the higher inherent risk of injury.
What should I do if I accidentally cut myself during the process?
If you sustain a cut, immediately apply direct pressure to the wound with a clean cloth or sterile gauze. Elevate the injured area if possible to help control bleeding. If the cut is deep, bleeding heavily, or if you suspect it might be infected (e.g., from rusty metal), seek immediate medical attention. Always have a well-stocked first-aid kit readily available when attempting any task involving sharp objects.
Conclusion: Empowering Yourself with Essential Skills
Mastering the art of opening a can without a traditional can opener is far more than just a clever trick; it’s a valuable life skill that can prove indispensable in various unexpected situations. Whether you’re navigating the challenges of an outdoor adventure, facing an unexpected power outage, or simply dealing with a broken kitchen tool, knowing these techniques can genuinely save the day. Remember, the core principles for success are patience, precision, and, above all, paramount attention to safety. Always wear appropriate protective gear, ensure you work on a stable surface, and be acutely mindful of sharp edges and potential slippage. While these methods demand careful effort and consistent care, the satisfaction of overcoming a common household dilemma with simple tools is immense. Stay prepared, stay safe, and enjoy the reward of your resourcefulness!
*Thanks to HowTo Channel via YouTube for their inspiring video tutorial and the helpful images used as references here. If you found this comprehensive guide helpful, we encourage you to visit their channel for more practical tips and consider subscribing for future updates and valuable insights!