
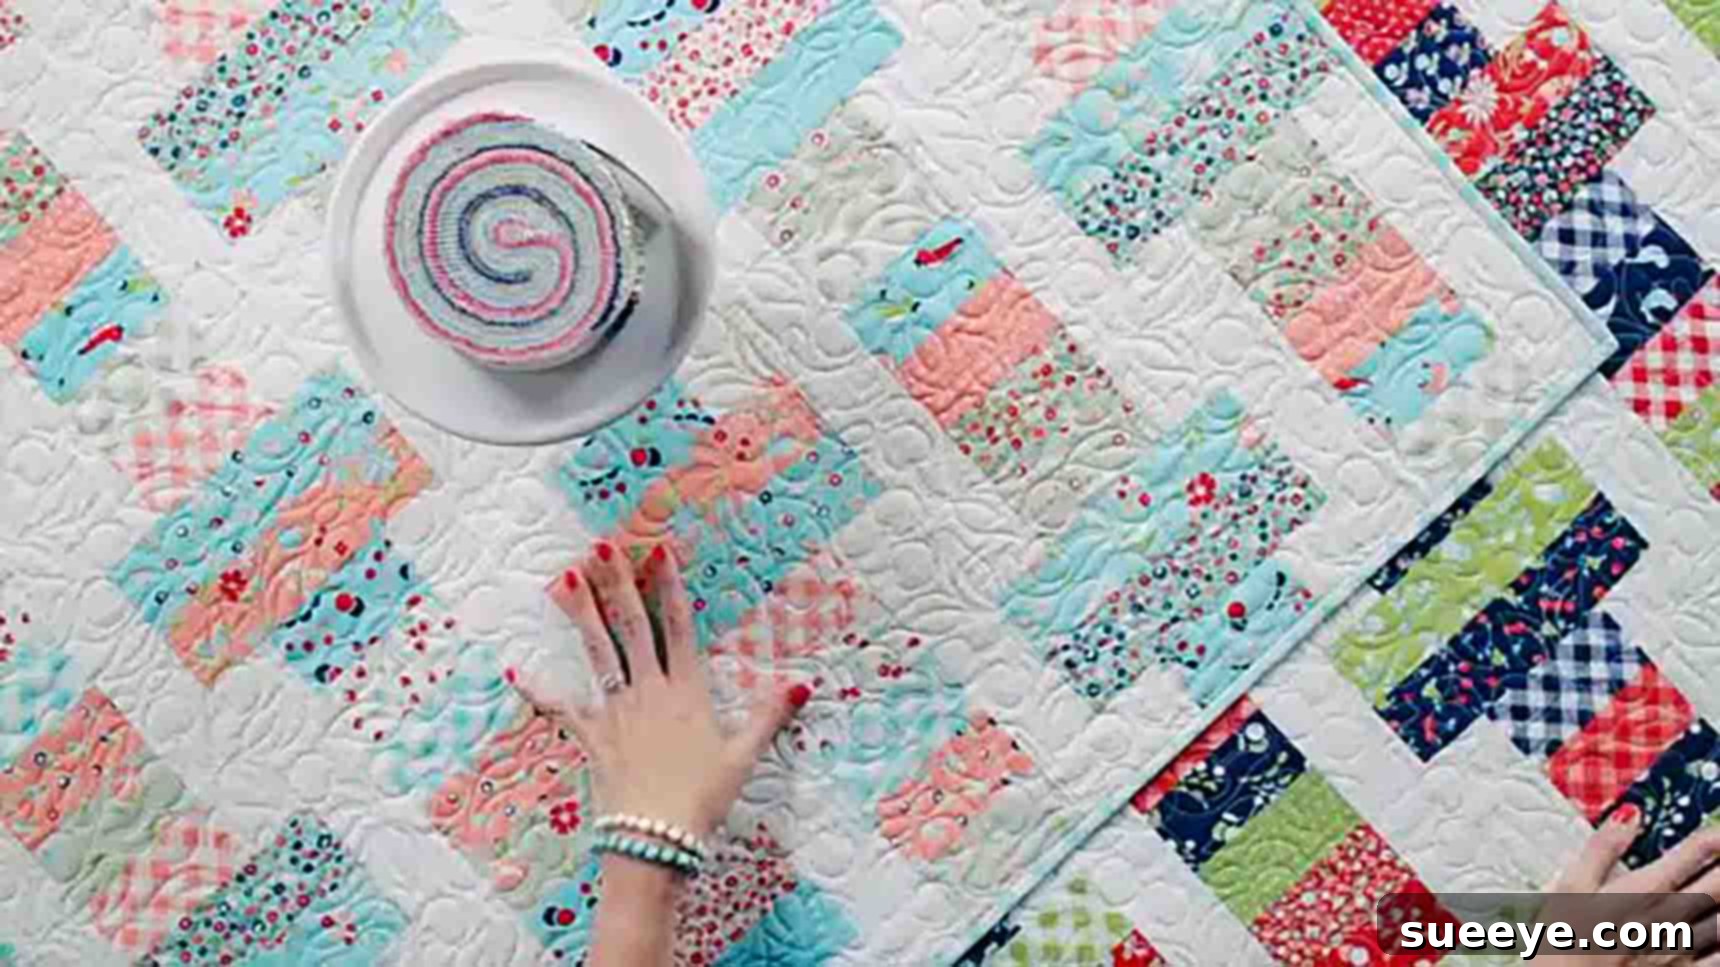
Mastering the Jelly Roll Slice Quilt: A Comprehensive Guide for Beginner Quilters
Embarking on your quilting journey can be incredibly rewarding, and there’s no better way to start than with a project that promises both ease and stunning results. For many aspiring quilters, the Jelly Roll Slice Quilt pattern from Fat Quarter Shop stands out as an absolute favorite. This design is not just a pattern; it’s a gateway to understanding fundamental quilting techniques while creating a beautiful, modern quilt top with remarkable speed and simplicity.
As someone who appreciates patterns that are accessible to beginners yet yield impressive outcomes, the Jelly Roll Slice Quilt holds a special place. It was one of the very first patterns I mastered, and to this day, it remains a cherished go-to. Whenever a quick, heartfelt gift is needed, or a charming throw for my own home is desired, this pattern delivers without fail. Its inherent simplicity belies a visually complex and gorgeous design that will impress anyone who sees it. This tutorial will guide you through every step, from selecting your fabrics to piecing your beautiful quilt, ensuring a smooth and enjoyable crafting experience.
The beauty of using jelly rolls lies in their pre-cut convenience. These bundles of 2½-inch wide fabric strips, typically 42 inches long (the width of fabric or WOF), eliminate the most time-consuming part of quilting – cutting. This allows you to jump straight into the fun part: sewing! The “slice” in the Jelly Roll Slice Quilt refers to the unique way these strips are cut and arranged to create a dynamic, segmented look that gives the illusion of intricate piecing without the complexity. Get ready to transform a stack of colorful strips into a masterpiece you’ll be proud to show off.
Essential Materials for Your Jelly Roll Slice Quilt
Before diving into the enjoyable process of cutting and sewing, it’s crucial to gather all your materials. High-quality fabrics and the right tools will not only make your quilting experience more pleasant but will also ensure a durable and beautiful finished quilt. Here’s a detailed list of what you’ll need to create your very own Jelly Roll Slice Quilt:
- One Jelly Roll: This is the star of your quilt! A standard jelly roll contains 40 pre-cut 2½-inch by WOF (Width of Fabric) strips. These coordinated fabric bundles save immense time on cutting and provide a harmonious color palette. If you don’t have a jelly roll, you can substitute with 17 individual 2½-inch by WOF strips from your stash. Choosing a jelly roll with a good variety of lights and darks will enhance the visual “slice” effect.
- 7/8 Yard Background Fabric: This fabric will provide contrast and allow your jelly roll strips to truly pop. Opt for a solid or tone-on-tone fabric that complements your jelly roll colors. A lighter background will make darker jelly roll strips stand out, while a darker background can create a more dramatic effect with lighter strips.
- 1/2 Yard Binding Fabric: The binding provides a clean, finished edge to your quilt and frames your beautiful work. Choose a fabric that harmonizes with your quilt top, either by matching one of your jelly roll colors, using your background fabric for continuity, or selecting a contrasting color for a bold statement.
- 2 3/4 Yards Backing Fabric: The backing is the bottom layer of your quilt sandwich. While it won’t be visible from the front, it’s an important design element and contributes to the quilt’s overall feel. You can use a single coordinating fabric, piece together larger scraps, or use a wide-back fabric for convenience.
- Additional Quilting Supplies: While not listed in the original, these are essential for any quilting project:
- Rotary Cutter, Mat, and Ruler: For precise and efficient cutting.
- Sewing Machine: A reliable machine with a ¼-inch presser foot is highly recommended for accurate seam allowances.
- Thread: High-quality 50wt cotton thread in a neutral color (like white, cream, or light grey) that blends with your fabrics.
- Iron and Ironing Board: Crucial for pressing seams to achieve flat, accurate blocks.
- Pins or Fabric Clips: To hold fabric pieces together securely while sewing.
- Batting: The middle layer of your quilt, providing warmth and dimension. A twin-sized batting (approximately 72″ x 90″) will likely be sufficient for this quilt.
- Safety Pins or Basting Spray: For basting your quilt sandwich (holding the layers together).
- Click here for the free downloadable pattern from Fat Quarter Shop, which includes detailed diagrams and printable instructions to complement this tutorial.
Precise Cutting: Preparing Your Fabrics for Success
Accuracy in cutting is paramount in quilting, as it directly impacts how well your pieces fit together and the overall quality of your finished quilt. Take your time with this step, ensuring all measurements are exact. For best results, use a sharp rotary cutter, a self-healing mat, and a clear acrylic ruler.
Let’s prepare your fabrics:
- From your Jelly Roll (or 17 – 2½” x WOF strips):
- Set aside fourteen 2½” strips. These will be designated as Fabric A and will form the primary striped units of your quilt. The remaining strips from your jelly roll can be saved for future projects, or if you’re using individual strips, you will have a few left over.
- Take three of the remaining 2½” strips. From these three strips, cut 24 rectangles measuring 2½” x 4½”. These are your Fabric B pieces, crucial for creating the distinctive “slice” effect within your blocks.
- From your 7/8 Yard Background Fabric:
- First, cut ten 2½” strips across the width of fabric (WOF). These strips will then be subcut for different components.
- From these ten strips, cut 26 rectangles measuring 2½” x 8½”. These pieces are your Fabric C, which will frame certain units and add structure to your blocks.
- Next, from the same background strips, cut 48 squares measuring 2½” x 2½”. These smaller squares are your Fabric D, essential for the corner elements of your slice units.
- From your 1/2 Yard Binding Fabric:
- Cut five 2½” strips across the width of fabric (WOF). These strips, labeled as Fabric E, will be sewn together to create the continuous binding for your quilt.
Double-check all your cuts before moving to the sewing machine. Having precisely cut pieces will make the piecing process much smoother and more enjoyable.
Step-by-Step Directions: Assembling Your Jelly Roll Slice Quilt
With all your fabrics precisely cut and organized, you’re ready to bring your Jelly Roll Slice Quilt to life! This section will guide you through the piecing process, building your blocks and ultimately assembling your quilt top. Remember to maintain a consistent ¼-inch seam allowance throughout the entire process for accurate results.
Step 1: Creating the Primary Strip Sets and Four-Piece Units
This initial step focuses on creating the foundational elements of your quilt blocks by sewing together your Fabric A strips and then combining them with Fabric C rectangles.
- Prepare Your Fabric A Strips: Begin by sewing four of your Fabric A strips together along their long edges. Ensure you’re using a precise ¼-inch seam allowance. Once sewn, carefully press the seams open. Pressing seams open helps to reduce bulk and creates flatter, more accurate block components, which is particularly helpful when many seams meet. You will need to create two of these four-strip sets.
- Subcut the Four-Strip Sets: From each of these two four-strip sets, cut seven 4½” x 8½” rectangles. This will yield a total of fourteen 4½” x 8½” units, each composed of four different Fabric A strips. These are your “four-piece units” that will form the core of your main blocks.
- Assemble Four-Piece Units with Fabric C: Take each of your fourteen four-piece units. On both the left and right sides of each unit, sew one Fabric C rectangle (2½” x 8½”). When sewing, align the 8½” edges. Once sewn, press the seams towards the Fabric C rectangles. This helps to maintain definition between the patterned Fabric A strips and the solid background Fabric C. You will complete thirteen of these combined units, setting aside the remaining one for later use or as a backup. These are now substantial components of your unique “slice” blocks.
Step 2: Crafting Slice Units and Assembling Slice Blocks
This step focuses on creating the distinctive “slice” components of your quilt and then combining them into full blocks. This is where the pattern truly begins to take shape, showcasing the dynamic interplay of your jelly roll fabrics and background.
- Create Fabric B & D Slice Units: Take one Fabric B rectangle (2½” x 4½”) and sew a Fabric D square (2½” x 2½”) to each end of its 2½” sides. When sewn, these will form a unit that looks like a small rectangle with a square on either side. Press the seams towards the Fabric D squares. You will need to create 24 of these “slice units.” These smaller units are essential for framing the striped sections and creating the unique visual texture of the quilt.
- Form Two-Piece Strip Sets: Next, create more strip sets using your remaining Fabric A strips. Sew two of these strips together along their long edges, just as you did in Step 1. Press the seams open. You will need three of these “two-piece strip sets.”
- Subcut Two-Piece Strip Sets: From these three two-piece strip sets, cut four 4½” x 8½” rectangles from each. This gives you a total of twelve 4½” x 8½” units. These units will serve as key components in your slice blocks. If you have any remaining strips, cut them into additional pieces as needed to make sure you have enough to create twelve units total.
- Assemble Slice Blocks: Now, you’ll combine the elements you’ve created. For each “slice block,” you will need to assemble two of your Fabric B & D slice units (from step 2.1) and one of your two-piece units (from step 2.3). Arrange them so that the two Fabric B & D units frame the two-piece unit. Sew these three components together to form a cohesive block. Make a total of 12 “slice blocks.” Pay close attention to orientation to ensure the “slice” effect is consistent.
Step 3: Laying Out and Assembling the Quilt Center
With all your individual blocks and units prepared, it’s time to bring them together to form the striking center of your Jelly Roll Slice Quilt. This is a crucial visual step where you can truly see your quilt taking shape.
- Arrange Your Quilt Blocks and Units: Refer to the pattern diagram for the precise layout (or visualize it as alternating rows of your assembled units from Step 1 and your completed Slice Blocks from Step 2). The design typically involves rows where the striped units (from Step 1) are alternated with the slice blocks (from Step 2). The original pattern creates a visually engaging mosaic by alternating these components. Imagine laying out three rows of one type of block/unit, and then two rows of the other, creating a pleasing rhythm.
- Create Rows: Once you are satisfied with your layout, carefully sew the units and blocks within each row together. Work row by row, ensuring that each seam is pressed consistently (either open or to one side, depending on which reduces bulk best for that specific seam). Using pins to align seams, especially where points meet, will greatly improve accuracy.
- Join the Rows: After all your individual rows are sewn, it’s time to join them together to form the complete quilt center. Carefully align the seams between adjacent rows, using pins generously to prevent shifting. Sew the rows together, pressing the final seams to ensure a flat and even quilt top. This careful attention to detail will result in a professional-looking finish.
Finishing Your Jelly Roll Slice Quilt: From Top to Cozy Blanket
Once your quilt center is meticulously pieced together, you’re on the home stretch! The remaining steps involve creating the quilt sandwich, quilting, and finally, binding your beautiful creation. These steps transform your pieced top into a functional and cozy quilt.
Step 4: Preparing the Quilt Sandwich
A quilt is traditionally made of three layers: the quilt top, the batting (middle layer), and the backing. Basting these layers together is critical to prevent shifting during the quilting process.
- Prepare Your Backing: If your backing fabric isn’t wide enough, you’ll need to piece it together. Typically, two lengths of your backing fabric (2¾ yards each) sewn together along the selvage edges and trimmed will create a piece large enough. Press this seam open. Ensure your backing fabric is at least 4-6 inches larger than your quilt top on all sides.
- Prepare Your Batting: Unroll your batting and let it relax. Your batting should also be 4-6 inches larger than your quilt top on all sides.
- Create the Quilt Sandwich: On a large, clean, flat surface (the floor works well!), lay down your backing fabric, wrong side up. Smooth out any wrinkles. Tape the edges down with painter’s tape to keep it taut. Next, carefully lay your batting evenly over the backing, again smoothing out any creases. Finally, center your pieced quilt top (right side up) over the batting. Take your time to ensure all layers are flat and free of wrinkles.
- Baste the Layers: Secure your quilt sandwich using your chosen basting method.
- Pin Basting: Use curved safety pins, placing them about every 4-6 inches across the entire quilt top, working from the center outwards.
- Spray Basting: Follow the manufacturer’s instructions for your basting spray. This often involves folding back sections of the quilt top and batting, spraying, and then smoothing them back into place.
Step 5: Quilting Your Masterpiece
Quilting is the process of stitching through all three layers of the quilt sandwich, which secures them together and adds texture and design. For a beginner-friendly project like the Jelly Roll Slice Quilt, simple quilting designs can be incredibly effective.
- Choose Your Quilting Method:
- Machine Quilting (Straight Line or Free Motion): Straight line quilting is excellent for beginners. You can quilt straight lines across the entire quilt, either following the seams (stitch-in-the-ditch) or creating parallel lines within your blocks. Free motion quilting offers more artistic freedom but requires more practice.
- Hand Quilting: For a traditional touch, you can hand quilt your project. This is a slower process but can be very meditative and yields a distinct look.
- Quilt Your Design: For the Jelly Roll Slice Quilt, consider quilting straight lines that emphasize the “slice” effect, perhaps parallel to the diagonal lines or within the background fabric. Start from the center of the quilt and work your way outwards to avoid pushing fabric and creating puckers.
- Trim Excess Batting and Backing: Once quilting is complete, use your rotary cutter and ruler to carefully trim the excess batting and backing, squaring up your quilt edges to match the quilt top.
Step 6: Binding Your Quilt
The binding is the final step that finishes the raw edges of your quilt, providing a durable and attractive frame. It’s also an opportunity to add a pop of color or a subtle coordinating finish.
- Prepare Your Binding Strips (Fabric E): Take your five 2½” x WOF (Fabric E) strips. Sew them together end-to-end using a diagonal seam (this creates less bulk than a straight seam). Press the seams open. Then, press the entire long strip in half lengthwise, wrong sides together, to create a folded strip.
- Attach Binding to Quilt: Start at the middle of one side of your quilt. Place the raw edge of your folded binding strip flush with the raw edge of your quilt top. Leave a tail of about 8-10 inches. Sew the binding to the quilt top using a ¼-inch seam allowance. When you reach a corner, stop ¼ inch from the edge, backstitch, remove the quilt, and miter the corner before continuing to the next side.
- Finish the Binding: When you’ve sewn along all four sides and are approaching your starting point, stop about 10-12 inches before the start. Join the two binding tails together with a diagonal seam to create a continuous loop. Trim excess and press the seam open. Then, finish sewing the binding to the quilt top.
- Hand or Machine Stitch Binding: Fold the binding over to the back of the quilt, encasing the raw edges. You can then hand stitch the binding to the backing fabric for a clean, invisible finish, or machine stitch it from the front, catching the binding on the back.
Your Finished Jelly Roll Slice Quilt: A Triumph for Any Quilter!
Congratulations! You have successfully completed your beautiful Jelly Roll Slice Quilt. From carefully selecting your jelly roll to making the final stitches on your binding, you’ve navigated all the essential steps of quilt making. This project is a testament to how simple techniques, when combined thoughtfully, can create a visually dynamic and sophisticated quilt. The “slice” effect provides a modern aesthetic that is both engaging and versatile, perfect for any home decor or as a cherished gift.
This pattern is a perfect stepping stone for beginners, building confidence in cutting accuracy, consistent seam allowances, and block assembly. The convenience of pre-cut jelly rolls streamlines the process, allowing you to focus on the joy of creation rather than the tediousness of initial preparation. Don’t be afraid to experiment with different jelly roll combinations in future projects – the possibilities for color and pattern variation are endless!
Now, take a moment to admire your hard work. Snuggle up with your new quilt, display it proudly, or present it as a thoughtful handmade gift. The skills you’ve honed with the Jelly Roll Slice Quilt will serve you well as you continue your quilting adventures. Happy quilting, and may your next project be just as fulfilling!