
How To Fix A Squeaky Bed: The Ultimate Guide to Restful Sleep
There are few things as disruptive to a peaceful night’s sleep as the incessant creaks and groans of a squeaky bed. Each movement, every turn, is met with an annoying symphony of noise that can prevent you from truly relaxing and falling into deep slumber. Beyond the immediate irritation, a noisy bed can impact your overall sleep quality, affect your mood, and even strain relationships if your partner is constantly disturbed. The good news is that most squeaky bed issues are easily fixable with a bit of investigation and some simple DIY techniques. Inspired by helpful resources like the tutorial by Fix It With Zim on YouTube, we’ve compiled a comprehensive guide to help you silence your noisy bed once and for all.
Our goal is to help you achieve a quiet, comfortable sleeping environment where you can drift off to dreamland without interruption. Whether your bed frame is made of wood, metal, or a combination of materials, and regardless of its age, the causes of squeaking are often quite similar and involve friction or loose connections. Let’s delve into understanding why beds squeak and, more importantly, how to permanently put an end to those irritating nocturnal noises. With the right approach, you can restore peace and quiet to your bedroom and enjoy the uninterrupted sleep you deserve.
Understanding Why Your Bed Squeaks: Common Culprits
Before you can effectively fix a squeaky bed, it’s crucial to understand the common culprits behind the noise. Squeaks are almost always a result of friction or movement between two components that shouldn’t be rubbing together or aren’t securely fastened. Identifying the source is the first and most important step in resolving the issue. Here are the primary reasons beds develop those irritating sounds:
- Loose Connections: Over time, screws, bolts, and other fasteners that hold your bed frame together can loosen due to daily use, body movement, and the natural settling of materials. This creates tiny gaps and allows components to shift and rub against each other, generating a squeak.
- Friction Between Materials: This is a very common cause. When wood rubs against wood, metal against metal, or even a bed component against the wall or floor, friction creates noise. This is especially prevalent in bed frames with wooden slats where the slats meet the side rails.
- Worn or Damaged Components: Older beds are particularly susceptible to this. Worn-out wooden slats, fatigued springs within a box spring, or deteriorated wood joints that no longer fit snugly can all contribute to persistent squeaking.
- Uneven Weight Distribution: If your bed frame is not perfectly level, or if certain areas consistently bear more weight than others, it can create stress points. This uneven pressure leads to movement and friction, resulting in squeaks.
- Mattress or Box Spring Issues: Surprisingly, the problem isn’t always the bed frame. Sometimes, the internal components of your mattress (though less common) or, more frequently, your box spring can be the primary source of noise.
The Initial Diagnosis: Pinpointing the Source of the Squeak
Identifying exactly where the squeak originates is the most critical first step in finding a lasting solution. A systematic and patient approach will save you time and effort in the long run. You might even discover that there are multiple sources contributing to your bed’s noisiness!
Step 1: Strip Your Bed Down to the Frame
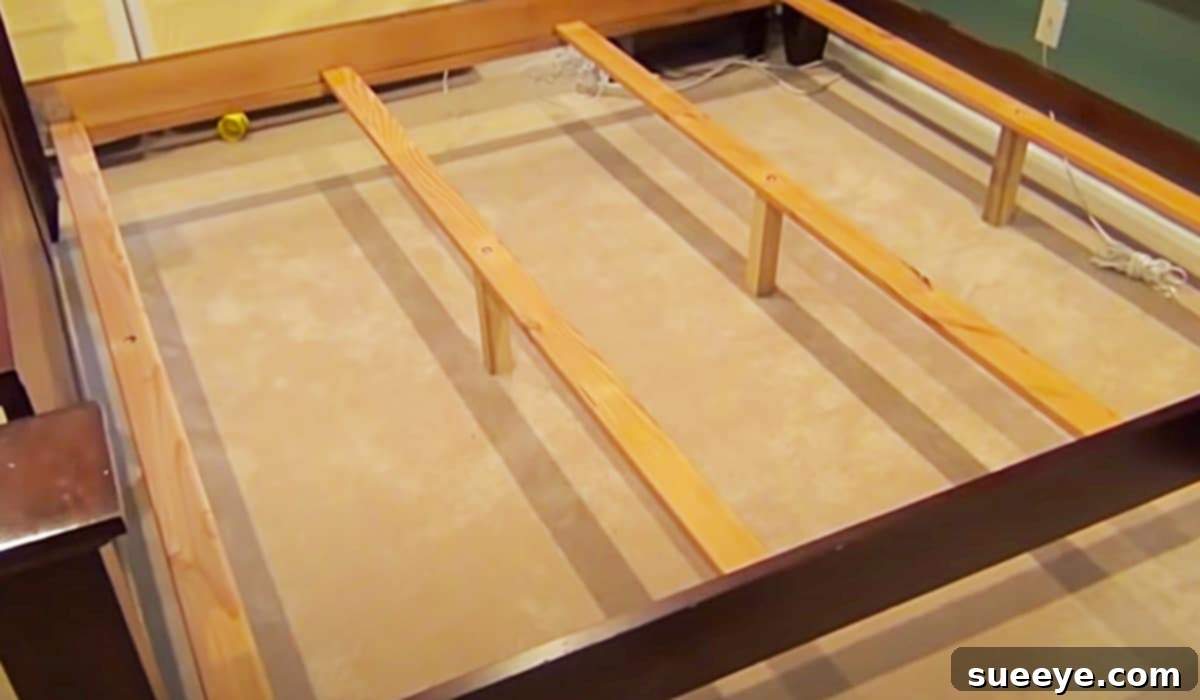
Begin by completely stripping your bed down to its bare components. Remove all bedding, pillows, and especially the mattress and box spring (if you use one). Place them safely aside, leaning them against a wall or moving them to another room. This allows you to isolate the bed frame and test each part individually without the added weight or interference of the bedding.
Step 2: Systematically Test Each Component
Once your bed is disassembled, you can begin the detective work to pinpoint the squeak. It’s best to perform these tests in a quiet room so you can clearly hear any sounds.
- Test the Box Spring: If you use a box spring, place it directly on a flat, even surface on the floor. Lie on it, shift your weight, and listen carefully. Press down on different sections. If the squeaking persists while it’s on the floor, your box spring is very likely the problem. Note that older box springs are prone to internal spring fatigue and issues with their wooden frames.
- Test the Bed Frame (Without Box Spring or Mattress): Once you’ve ruled out the box spring (or if your bed doesn’t use one), move on to the bed frame itself. Press down firmly on different parts of the frame – the side rails, the headboard, the footboard, and especially the individual slats. Pay close attention to the corner joints where pieces connect and where the slats meet the frame. Having a friend help can be invaluable; they can press down on one section while you listen closely near another.
- Test with Mattress (and Box Spring if applicable) Re-added: If you still can’t find the primary source, reassemble the bed one layer at a time. First, carefully place the box spring back onto the frame (if applicable) and test by applying pressure and listening. Then, add the mattress and repeat the testing process. Sometimes, the added weight of the mattress or box spring exacerbates a subtle frame issue that wasn’t apparent when the frame was bare.
Listen Carefully and Precisely: Try to identify the exact location of the squeak. Is it coming from a specific corner? A particular slat that moves? A joint where the headboard attaches to the side rails? The more precise you are in locating the noise, the easier and more effective your fix will be.
Common Squeak Sources and Effective DIY Solutions
Once you’ve narrowed down the source of the squeak, it’s time to apply the right fix. Here are the most common issues and detailed instructions on how to resolve them, helping you achieve that much-desired quiet sleep environment:
1. Loose Screws, Bolts, and Fasteners (The Most Common Culprit)
This is arguably the number one cause of bed squeaks. Over time, the constant pressure, movement, and settling on a bed can cause the screws and bolts that hold the frame together to loosen. This creates minuscule gaps, allowing parts of the frame to rub against each other with every shift in weight.
Solution: Tighten Everything Up!
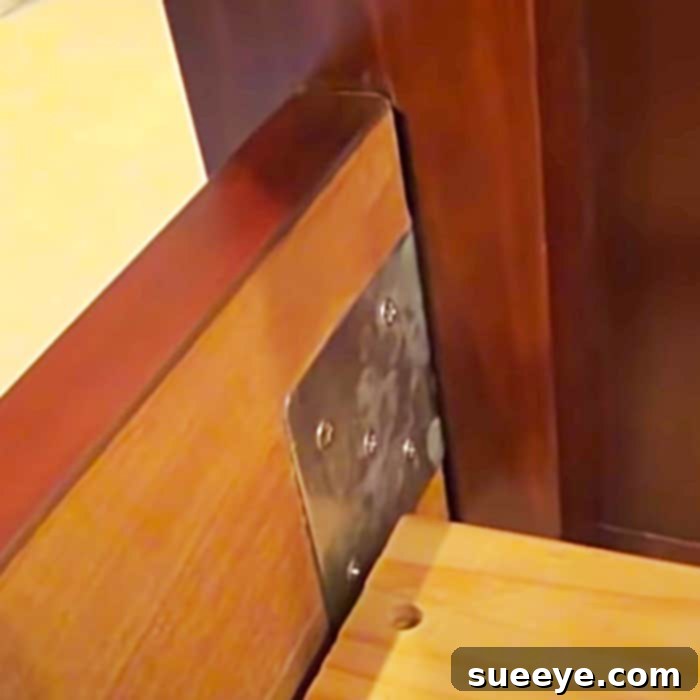
- Inspect All Connections: Begin by thoroughly inspecting every visible screw, bolt, and connecting hardware on your entire bed frame. This includes the main side rails, the headboard, the footboard, and any central support beams.
- Use the Right Tools: Gather the appropriate tools. You’ll likely need a Phillips head screwdriver, a flathead screwdriver, and an adjustable wrench or a set of wrenches for any bolts. A drill with the proper screwdriver bit can significantly speed up the tightening process, but be cautious with power tools.
- Tighten Firmly and Carefully: Turn each screw or bolt clockwise until it is snug and secure. Be very careful not to overtighten, especially with wooden frames, as this can strip the screw holes in the wood or even crack the frame itself. For metal frames, ensure bolts are tight but not strained.
- Add Lubrication (Recommended for Stubborn Cases): For screws or joints that seem particularly stubborn or prone to loosening, you can apply a small amount of lubricant. WD-40, silicone spray, or even a simple bar of soap or candle wax can be squirted or rubbed directly into the screw holes or along the threads of bolts before tightening. This reduces friction and can help prevent future loosening.
- Consider Washers: If a bolt repeatedly comes loose, adding a lock washer or a rubber washer can provide extra grip and cushioning. This helps to keep the connection secure and absorb slight movements that might otherwise cause squeaking.
2. Friction Between Wood Components (Slats, Frame Joints)
When wooden components rub directly against each other, it often produces that classic creaking sound. This is particularly common where bed slats rest on the side rails of the bed frame or at the main corner joints where the headboard, footboard, and side rails connect.
Solution: Reduce Friction with Felt, Wax, or Cork
This is where anti-friction materials become essential. If simply tightening fasteners doesn’t fully resolve the issue, friction between wood parts is almost certainly at play. You may need to temporarily remove the side rails or lift the slats to access these crucial contact points.
- Self-Adhesive Felt Strips or Pads: These are incredibly effective and widely available at any local hardware store, craft store, or online.
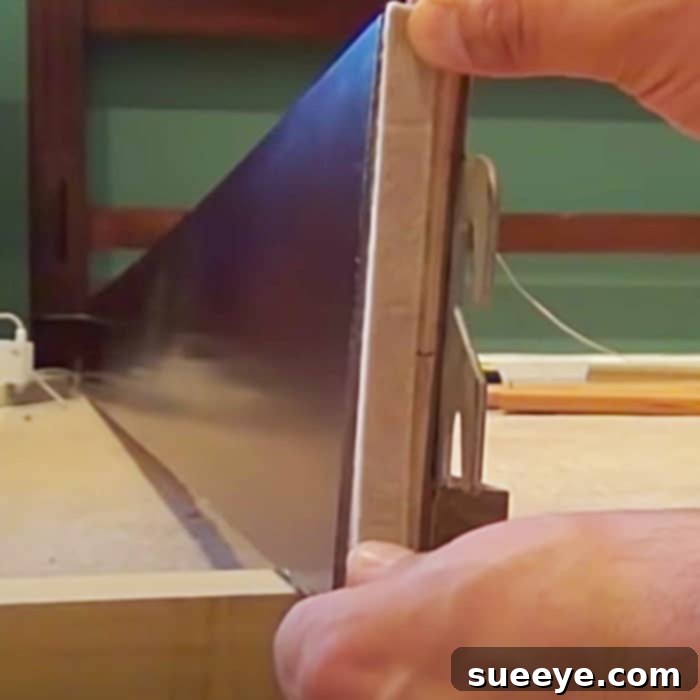
- Application on Slats: Carefully lift each slat. Apply thin, self-adhesive felt strips to the ends of each slat where they make direct contact with the bed frame’s side rails. This creates a soft, absorbent barrier that eliminates wood-on-wood rubbing and dampens vibrations.
- Application on Frame Joints: If the corner joints are still squeaking, you might need to carefully disassemble them. Apply small felt strips or pads to the mating surfaces of the wood before reassembling the joint.
- Paraffin Wax or Candle Wax: For a quick, easy, and cost-effective fix, rub a block of paraffin wax (or even a simple household candle) along the edges of the slats and the inside edges of the frame where they meet. The wax acts as a dry lubricant, allowing the wood to glide smoothly without generating noise.
- Cork or Rubber Shims: For larger gaps or specific persistent pressure points, small pieces of cork or thin rubber can be strategically cut and placed between rubbing wooden surfaces. These materials are excellent at absorbing shock and preventing direct contact.
3. Worn or Damaged Slats
Bed slats are essential for providing proper support to your mattress and distributing weight evenly. If your slats are old, cracked, warped, sagging, or simply don’t fit snugly, they can become a major source of squeaking or even cause your mattress to sag prematurely.
Solution: Reinforce or Replace the Slats
- Inspect Each Slat Thoroughly: Carefully examine every slat for any signs of damage such as cracks, splintering, bowing (curving under pressure), or excessive wear.
- Replace Damaged Slats: If a slat is broken, severely warped, or significantly weakened, it’s always best to replace it. You can often find replacement slats at hardware stores, lumber yards, or even cut your own from sturdy, appropriately sized wood.
- Add Extra Support: For bed frames with insufficient slat support, or if your current slats seem to be bowing under the mattress’s weight, consider adding a center support leg (or multiple legs) that runs from the middle of your slat system down to the floor. This significantly helps in distributing weight more evenly and reducing stress on individual slats.
- Ensure Proper Fit: Make sure all slats are snug within their designated spots but not so tight that they put undue pressure on the frame. If they are too loose, they will shift and squeak. If they are too tight, they can cause friction. Applying felt strips to the ends, as mentioned previously, can help ensure a snug, silent fit while allowing for minor expansion and contraction of the wood.
4. Box Spring Issues (When the Frame Isn’t to Blame)
Sometimes, the bed frame is perfectly innocent, and the box spring itself is the real noisemaker. This is particularly true for older box springs with internal coils that have fatigued, or wooden box spring frames that have weakened over time.
Solution: Isolate, Reinforce, or Replace the Box Spring
- Isolate and Test: As detailed in the diagnosis section, place your box spring directly on the floor and test it by lying on it and shifting your weight. If it squeaks independently of the bed frame, you’ve found your culprit.
- Temporary Fix (Plywood): If replacing your box spring isn’t an immediate option, placing a thin sheet of plywood (approximately ¼ to ½ inch thick) between your mattress and box spring can help distribute weight more evenly and reduce noise from fatigued internal springs. You can also try placing a sheet of plywood between the box spring and the bed frame to eliminate friction there.
- Reinforce (Limited Options): For box springs with wooden frames, you might be able to tighten loose staples or screws, or reinforce weak corners with L-brackets. However, the internal mechanisms of coil box springs are often difficult to repair DIY.
- Replace: Often, the most effective and permanent long-term solution for a persistently noisy box spring is to replace it entirely. Modern bed foundations (which are typically slatted platform bases) can be an excellent, often quieter, alternative to traditional box springs.
5. Metal Bed Frames: Specific Solutions
Metal bed frames come with their own unique set of squeaking challenges, which usually involve metal-on-metal friction, loose bolts, or even rusty joints.
Solution: Lubricate and Secure Metal Connections
- Thorough Lubrication: Apply a generous amount of silicone spray lubricant (silicone is generally better for metal-on-metal than WD-40, though WD-40 can work) to all joints, bolts, and connection points throughout the frame. Work the lubricant into the seams and moving parts.
- Tighten All Bolts: Metal frames rely heavily on tightly secured bolts for their stability. Go over every bolt with a wrench and ensure it is snug and firm. If any bolts look rusted or stripped, consider replacing them.
- Rubber or Electrical Tape Barriers: For metal parts that rub directly against each other (e.g., where side rails connect to the headboard or footboard), wrap a layer or two of heavy-duty electrical tape or use small rubber shims around the connecting pieces before reassembling. This creates a thin, flexible barrier that prevents direct metal-on-metal contact and dampens vibrations.
- Check for Rust: Rust can cause stiffness and increased friction, leading to squeaks. If you identify rusty areas, clean them as best you can with a wire brush and apply a rust-inhibiting lubricant or paint.
6. Headboard and Footboard Issues
Sometimes, the squeak isn’t from the main sleeping surface or the frame supports, but from the headboard or footboard rubbing against the wall or the main bed frame itself.
Solution: Secure and Pad Contact Points
- Tighten Attachments: Ensure your headboard and footboard are securely bolted to the bed frame. Loose connections here can cause significant movement and noise.
- Prevent Wall Contact: If the headboard rubs against the wall with every movement, place felt pads, rubber bumpers, or even a rolled-up towel between the headboard and the wall. This prevents movement, dampens sound, and protects your wall.
- Frame Contact: Similarly, if parts of the headboard or footboard rub against the main bed frame, use felt strips or small rubber shims at these specific contact points to create a friction-reducing barrier.
7. Uneven Flooring (An Often Overlooked Cause)
Believe it or not, an uneven or slightly sloped floor can cause a perfectly good bed frame to squeak! If one or more legs don’t make even contact with the floor, the bed can rock or shift slightly with movement, leading to friction and noise within the frame.
Solution: Level Your Bed for Stability
- Use Shims to Level: Place small wooden or plastic shims (available at hardware stores) under the shorter legs of the bed frame. The goal is to ensure all four legs (or more, if your bed has extra supports) make firm, even contact with the floor. You can test for wobbling by gently rocking the bed frame.
- Check Stability: Once leveled, the bed frame should feel completely stable and not wobble when you apply pressure to different corners.
- Furniture Glides: Consider using furniture glides or floor protectors under the bed legs. These can absorb minor movements, protect your flooring, and prevent noise that might arise from the bed rubbing directly on the floor.
Essential Tools and Materials You’ll Need for a Squeak-Free Bed
Having the right tools and materials on hand will make the process of fixing your squeaky bed much smoother and more efficient. Most of these items are readily available at any local hardware store or can be ordered online:
- Screwdrivers: You’ll likely need both Phillips head and flathead screwdrivers to tighten various types of screws.
- Adjustable Wrench or Wrench Set: Essential for tightening bolts on metal frames or larger wooden frame connections.
- Drill with Appropriate Bit Heads (Optional): While not strictly necessary, a power drill can significantly speed up the process of tightening multiple screws. Use with caution to avoid overtightening or stripping screws.
- WD-40 or Silicone Spray Lubricant: WD-40 is great for general lubrication and loosening stuck parts, while silicone spray is often preferred for metal-on-metal contact as it’s less messy and lasts longer.
- Self-Adhesive Felt Strips or Pads: These are critical for reducing friction between wooden components, especially slats and frame joints.
- Paraffin Wax or an Old Candle: An inexpensive and effective alternative to felt for lubricating wooden contact points.
- Small Pieces of Cork or Thin Rubber (Optional): Useful for filling larger gaps or creating custom friction-reducing shims.
- Plywood (¼ to ½ inch thick): If your box spring is the culprit, a sheet of plywood can provide temporary relief or even be a long-term solution by converting it into a platform.
- Shims (Wooden or Plastic): For leveling an uneven bed frame on a non-level floor.
- Flashlight: Extremely helpful for inspecting dark corners and underneath the bed to spot loose fasteners or friction points.
- A Helper (Optional but Recommended): Having an extra set of hands can be invaluable for testing the bed, holding components, or simply getting a different perspective on the source of the squeak.
Step-by-Step Guide to Silencing Your Bed Permanently
Ready to put an end to the noise and reclaim your peaceful sleep? Follow these consolidated steps for a comprehensive approach to fixing your squeaky bed:
- Disassemble and Thoroughly Inspect: Begin by removing all bedding, your mattress, and your box spring (if applicable). With the bed stripped down, carefully inspect the entire bed frame – every joint, every slat, every bolt – for any signs of loose connections, damaged parts, or visible wear and tear. Use your flashlight for hard-to-see areas.
- Tighten All Fasteners: Go through every single screw, bolt, and connector on your bed frame, headboard, and footboard. Using the appropriate screwdrivers or wrenches, tighten them firmly until snug. Remember to be cautious not to overtighten, especially with wooden frames, to prevent stripping or cracking.
- Address Friction Points with Precision:
- For Wooden Frames: Apply self-adhesive felt strips to the ends of all slats where they rest on the side rails. Additionally, rub paraffin wax or an old candle along these contact points for extra lubrication. If corner joints are the issue, apply felt or wax to their mating surfaces before reassembly.
- For Metal Frames: Spray silicone lubricant generously on all joints, bolt connections, and any metal parts that rub together. For persistent metal-on-metal contact, wrap a layer or two of electrical tape or place small rubber shims around the connecting pieces to create a non-metallic barrier.
- Evaluate Slats and Box Spring: If you identified any broken, cracked, or severely worn slats, replace them immediately. If your box spring was determined to be the primary source of squeaking during your initial diagnosis, consider placing a thin sheet of plywood on top of it as a temporary fix, or make plans for its replacement if it’s beyond repair.
- Level the Bed Frame: Check if your floor is uneven. If your bed wobbles or rocks, place small wooden or plastic shims under the shorter legs of the bed frame to ensure all support points make firm, even contact with the floor. A level bed is a stable bed, and a stable bed is a quiet bed.
- Reassemble and Test Thoroughly: Carefully reassemble your bed, placing the box spring (if used) and then the mattress back onto the frame. Lie down on the bed, move around, and listen intently. Pinpoint any remaining squeaks and reapply a targeted fix to those specific areas. Don’t be afraid to adjust and re-test until you achieve complete silence.
- Enjoy the Silence: With these comprehensive steps, you should now have a significantly quieter, more comfortable bed, allowing you to experience the restful sleep you’ve been craving!
Preventative Measures for a Squeak-Free Future
Once you’ve successfully fixed your squeaky bed and restored peace to your bedroom, you’ll undoubtedly want to keep it that way. Implementing a few simple preventative measures can significantly extend the life of your repair and prevent future noises from developing:
- Periodic Tightening: Make it a habit to periodically check and re-tighten all the screws and bolts on your bed frame every 6 to 12 months. This proactive maintenance can catch loose connections before they develop into full-blown squeaks.
- Regular Inspection: Briefly inspect your bed slats and frame for any new signs of wear, damage, or developing gaps whenever you change your bedding. Early detection can prevent small issues from becoming major nuisances.
- Use Floor Protectors: Ensure that all bed legs have appropriate floor protectors or furniture glides. These not only prevent damage to your flooring but also absorb minor movements and reduce potential noise from the bed rubbing directly on the floor.
- Invest in Quality: When it’s time to purchase a new bed frame, invest in one made from durable materials with solid construction and strong, well-engineered joints. A well-built frame is less likely to develop squeaks over time.
- Rotate and Flip Mattress: While primarily for mattress longevity, regularly rotating or flipping your mattress (if applicable) can also help distribute wear and tear more evenly across the bed frame, reducing stress on specific points.
Fixing a squeaky bed doesn’t have to be a daunting or frustrating task. By systematically diagnosing the problem, applying the right solutions, and maintaining your bed properly, you can transform your noisy sleeping space into a sanctuary of peace and quiet. Say goodbye to restless nights and hello to uninterrupted, blissful sleep that leaves you feeling refreshed and energized each morning!