
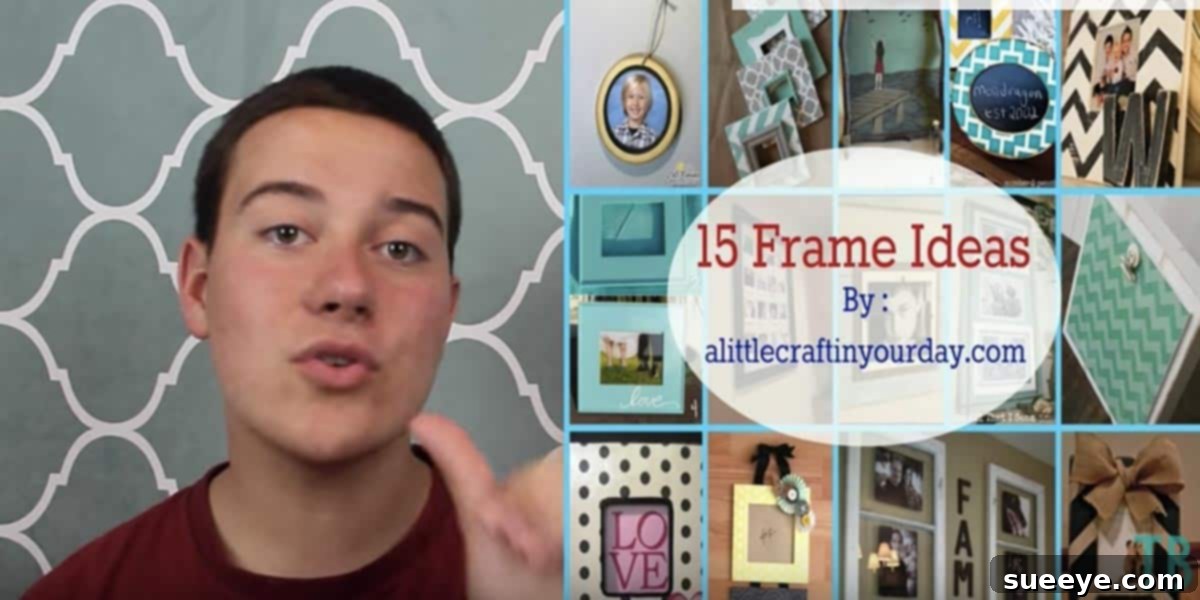
Transform Your Home: Creative DIY Picture Frame Ideas & Upcycling Projects
Are you looking around your home and spotting those dusty, forgotten picture frames tucked away in a cupboard or gathering cobwebs in the attic? Most of us have them – old frames that no longer suit our decor, or perhaps cheap finds from a thrift store that are full of potential but lack a clear purpose. Instead of letting them go to waste, imagine turning these overlooked items into stunning, personalized pieces of home decor!
The art of repurposing, also known as upcycling, is not just an eco-friendly practice; it’s also a fantastic way to unleash your creativity, save money, and infuse your living space with unique character. This comprehensive guide will dive deep into various ingenious ways to give those old frames a new lease of life, transforming them into functional art, charming displays, or thoughtful gifts. We’ll explore popular DIY trends and provide you with detailed insights to kickstart your own frame transformation projects, inspired by innovative crafters like Tanner Bell, who famously showed us how to get excited about these brilliant transformations.
Unleash Your Inner Decorator: Multi-Panel Frame Displays
One of the most captivating ideas for repurposing frames involves creating dynamic, multi-panel displays. Imagine taking three identically sized frames, perhaps 8×10 or 5×7, and assembling them into a cohesive piece of wall art. This concept, popularized by crafters, offers endless possibilities for personalization and adds a sophisticated touch to any room.
Crafting Your Multi-Frame Masterpiece: Step-by-Step
To begin, select three frames of the same dimension. While new, inexpensive frames work perfectly, don’t hesitate to scour thrift stores or garage sales for hidden gems. You might even find some fantastic deals on bulk wooden frames on platforms like Amazon if you’re planning multiple projects. Once you have your frames, clean them thoroughly and remove any existing glass or backing that won’t be used.
- Assembly: The simplest method for joining the frames is using a hot glue gun. Apply a generous bead of hot glue along the edges where the frames meet, holding them firmly in place until the glue sets. For added durability and a decorative touch, you can then wrap and glue a complementary ribbon around the joined sections. This not only reinforces the structure but also adds a beautiful accent, making the transition between frames seamless and decorative.
- Thematic Decor: This is where your creativity truly shines. You can choose to decorate each panel individually or create a cohesive theme across all three, ensuring your display perfectly matches your room’s aesthetic.
- Contrasting Papers: Select various craft papers, elegant wrapping papers, or even wallpaper samples that complement your room’s color scheme. Cut them precisely to fit the interior opening of each frame and secure them with craft glue or double-sided tape. The contrast in patterns or textures can create visual interest.
- Fabric Finishes: For a softer, more textured look, consider using fabric scraps. From elegant linen to vibrant cotton, rustic burlap, or even luxurious velvet, fabric adds depth and warmth. Simply stretch and glue the fabric tautly over the frame backing or a piece of cardboard cut to size. This can introduce a tactile dimension to your decor.
- Artistic Embellishments: Elevate your design with small floral accessories, faux succulents, decorative buttons, miniature charms, painted wooden cutouts, or even delicate stencils. These elements can be hot-glued directly onto the paper or fabric backing, creating a charming three-dimensional effect that draws the eye and adds a personal touch. Think about tiny birds, leaves, or geometric shapes for unique accents.
- Hanging Options: Once decorated, decide on your preferred hanging method. A sturdy ribbon attached to the top two corners of the central frame works beautifully for a rustic or shabby-chic look. Alternatively, discreet D-rings or sawtooth hangers can be added to the back of the entire assembled piece for a more traditional, secure wall mount.
This multi-frame display is incredibly versatile. It can serve as a captivating backdrop for a gallery wall, a standalone decorative piece in a hallway, a unique headboard accent in a bedroom, or even a personalized gift for a loved one. Imagine customizing one with their initial, favorite colors, or even small mementos that hold special meaning.
Chic & Personalized: The Chevron & Monogram Frame
Another show-stopping idea, often highlighted in DIY communities and crafting videos, is the personalized chevron frame with a distinct wooden initial. This project combines modern geometric patterns with a classic monogram, resulting in a sophisticated and highly customizable piece of decor. It’s a fantastic way to take a plain wooden frame and elevate it into a focal point, as beautifully demonstrated by many creative crafters.
Designing Your Statement Piece
To recreate this stylish look, start with a simple wooden picture frame. You can find these readily at craft stores like Michael’s or Hobby Lobby, often on sale or in multi-packs that are incredibly inexpensive. Don’t overlook the potential of a sturdy, used frame from a thrift store; a little sanding and cleaning can make it good as new and ready for a fresh coat of paint. The beauty of this project is its adaptability to various frame sizes and styles.
- Painting the Chevron Pattern:
- Preparation: Begin by lightly sanding the entire frame to create a smooth surface, then thoroughly wipe away any dust or debris. If your frame has a dark or previously varnished finish, apply a coat of primer to ensure an even, vibrant base color and better paint adhesion.
- Base Coat: Paint the entire frame with your chosen base color (e.g., crisp white, a soft cream, or a light neutral that complements your room). Allow this coat to dry completely according to the paint manufacturer’s instructions.
- Taping the Chevron: Using high-quality painter’s tape, carefully create the chevron pattern. There are numerous tutorials online to help you achieve perfectly sharp chevron lines. Essentially, you’ll tape off diagonal sections, ensuring the angles are consistent and the tape is firmly pressed down to prevent paint bleeding.
- Top Coat: Apply your contrasting color (e.g., bold black, deep navy, or a metallic accent) over the taped frame. For best results, apply thin coats, allowing each to dry partially before adding the next, which further minimizes bleeding under the tape. Once the final coat is dry to the touch, carefully and slowly peel off the tape to reveal your sharp, striking chevron pattern.
Beyond the classic chevron, consider other captivating patterns like clean stripes, playful polka dots, sophisticated ombré gradients, or even a simple solid color that perfectly matches your decor. Stencils can also be a great shortcut for intricate designs or repeatable patterns.
- Adding the Monogram:
A wooden initial adds a personal and elegant touch, making the frame truly unique. These can be purchased from most craft stores in a variety of fonts and sizes, allowing you to choose one that fits your aesthetic. You can paint the initial to match one of the frame colors, a metallic accent (like gold or silver), or leave it in its natural wood finish for a rustic appeal. Secure the initial to the center of the frame (over the glass or a decorative backing of your choice) using strong craft glue or a hot glue gun for a durable bond.
Alternatively, you could use a high-quality vinyl decal of an initial, paint the initial directly onto the backing paper, or even embroider it onto fabric stretched within the frame for a softer, more traditional feel. This personalized frame is not only a fantastic piece of wall art for your own home but also makes an incredibly thoughtful and unique gift. Imagine customizing one with the recipient’s initial and their favorite colors – it’s a gift that truly shows you care!
Beyond Photos: More Brilliant Ways to Repurpose Old Frames
The possibilities for transforming old frames extend far beyond traditional photo displays. With a little imagination and a few craft supplies, you can turn these humble objects into functional, artistic, and utterly charming pieces for every room in your home, demonstrating just how versatile they can be.
1. Chalkboard or Whiteboard Message Centers
Convert an old frame into a practical message board for your kitchen, home office, or even a child’s playroom. Remove the glass and backing, then cut a piece of hardboard or MDF (medium-density fiberboard) to fit the frame opening perfectly. Paint this insert with several coats of high-quality chalkboard paint or dry-erase paint. Once fully cured according to the product instructions, reinsert it into the frame. You now have a stylish and functional spot for grocery lists, family reminders, quick notes, or creative drawings for the kids.
2. Decorative Serving Trays
For a truly elegant upcycle, turn a sturdy, larger frame into a decorative serving tray. Find a piece of plywood or MDF that fits snugly into the back of the frame, or even opt for a mirrored glass insert for a more glamorous touch. Decorate the base with a beautiful fabric, scrapbook paper, or paint a stunning design. Attach two stylish handles to the shorter sides of the frame for easy carrying. Seal the entire surface with a clear varnish or resin for durability, especially if it’s intended for serving. This makes a beautiful piece for displaying items on a coffee table, organizing essentials on a vanity, or indeed, serving drinks with flair.
3. Clever Jewelry Organizers
Tangled necklaces and missing earrings can be a thing of the past with a DIY jewelry organizer made from an old frame. Remove the glass from a sturdy frame and consider these options:
- For earrings, staple or glue a piece of decorative metal mesh, chicken wire, or even a fine lace fabric to the back of the frame opening.
- For necklaces and bracelets, attach small decorative hooks or pegs along the bottom edge or even on the inner sides of the frame.
- Alternatively, stretch and glue a piece of cork board or padded fabric within the frame opening for pushpin storage or earring studs, creating a soft backdrop for your treasures.
Paint the frame to match your bedroom decor, and you’ve got a beautiful, functional display that keeps your accessories organized and easily accessible.
4. Entryway Key & Mail Holders
Help keep your entryway organized by transforming a medium-sized frame into a practical key and mail holder. Secure a small corkboard or a piece of decorative metal to the frame’s opening. Attach a few small hooks along the bottom edge for keys, and perhaps a small, shallow basket or shelf to the bottom for incoming mail or outgoing notes. Paint and decorate to welcome guests in style, making a functional statement right at your front door.
5. Faux Window or Mirror Decor
Create the illusion of a window or add a touch of light and space with cleverly repurposed frames. For a faux window, arrange several smaller frames together to mimic window panes, perhaps with a scenic print, a beautiful fabric, or even a mirrored backing behind them. For a stunning mirror, simply replace the original glass with a custom-cut mirror. This can brighten a dark corner, add dimension to a small room, or create an elegant focal point on any wall.
6. Seasonal and Holiday Decor
Frames are perfect for celebrating seasons and holidays throughout the year. Instead of traditional art, fill frames with:
- Christmas: Festive fabric, small ornaments, delicate fairy lights woven around the frame, or painted winter scenes.
- Halloween: Spooky silhouettes, eerie cobwebs and plastic spiders, or vintage-inspired eerie prints.
- Autumn: Pressed leaves, rustic burlap, fall-themed scrapbook paper, or small dried botanical arrangements.
Swap out the inserts as the seasons change for ever-fresh decor that keeps your home feeling festive and updated.
Sourcing Your Supplies: Where to Find Frames and Materials
Part of the joy of DIY is finding great materials without breaking the bank. Here’s where to look for your next upcycling project:
- Thrift Stores & Garage Sales: These are absolute goldmines for inexpensive frames of all shapes, sizes, and materials. Don’t be deterred by outdated finishes or minor imperfections; a little paint and creativity can work wonders!
- Craft Stores (Michael’s, Hobby Lobby, Jo-Ann Stores): Keep an eye out for sales, coupons, and clearance racks on new wooden or plastic frames. They often have multi-packs that are very budget-friendly, especially for starting multiple projects.
- Online Retailers (Amazon, Etsy, eBay): For specific sizes, types, or bulk purchases, online platforms can offer competitive pricing, particularly for plain, unfinished frames or unique craft supplies.
- Hardware Stores (Home Depot, Lowe’s): Look for materials like plywood, hardboard, specific paints, and small hardware components.
- Fabric & Stationery Stores: Perfect for decorative papers, fabric scraps, ribbons, stencils, and various embellishments.
- Dollar Stores & Discount Retailers: Often carry small, basic frames that are great for minor projects or adding to larger decorative displays without a significant investment.
Essential DIY Tools and Materials for Frame Projects
Having a well-stocked craft kit will make your frame transformations much easier and more enjoyable:
- Adhesives: A hot glue gun and plenty of glue sticks (indispensable!), strong craft glue (e.g., E6000 for heavy-duty bonds), wood glue, and double-sided tape for paper or fabric.
- Paints: Acrylic paints in various colors, spray paint (with a good quality primer built-in or separate), chalkboard paint, dry-erase paint, and a clear sealant or varnish to protect your finished work.
- Brushes & Applicators: A range of paintbrushes (flat, round, foam), sponges, and stencils for detailed designs.
- Cutting Tools: A sharp craft knife or box cutter, scissors, a metal ruler, and a self-healing cutting mat for precise cuts.
- Sanding Supplies: Fine-grit sandpaper or sanding blocks for smooth surfaces.
- Decorative Elements: An assortment of ribbons, fabric scraps, craft paper, scrapbook paper, small floral accessories, decorative buttons, beads, small wooden cutouts, hooks, metal mesh, and cork board.
- Safety Gear: Always use gloves, safety glasses, and a mask (especially when spray painting or working with strong adhesives) to protect yourself.
The Benefits of Upcycling Frames: Why DIY?
Beyond the sheer enjoyment of crafting, repurposing old frames offers a multitude of tangible benefits that extend to your wallet, your home, and the environment:
- Sustainability and Eco-Friendliness: By giving old frames a new purpose, you’re actively diverting waste from landfills and reducing the demand for new manufactured goods. It’s a small but meaningful step towards a more sustainable and responsible lifestyle.
- Cost-Effectiveness: DIY projects are almost always significantly cheaper than buying new decorative items from retail stores. You can achieve high-end, custom looks on a shoestring budget by utilizing existing materials or inexpensive finds, proving that style doesn’t have to be expensive.
- Personalization and Uniqueness: Your repurposed frames will be truly one-of-a-kind. They reflect your personal style, creativity, and taste, adding character, warmth, and a unique story to your home that mass-produced items simply cannot replicate.
- Creative Outlet and Stress Relief: Engaging in craft projects can be incredibly therapeutic and meditative. It provides a valuable creative outlet, allows you to focus and de-stress, and offers a profound sense of accomplishment and pride once a project is complete.
- Thoughtful Gift-Giving: Handmade gifts carry a special sentiment that store-bought items often lack. A personalized, upcycled frame demonstrates care, effort, and creativity, making it a cherished present for birthdays, housewarmings, weddings, or holidays.
Tips for Successful Frame Transformations
- Clean and Prepare: Always start by thoroughly cleaning and, if necessary, lightly sanding your frames. This crucial step ensures that paint, glue, and other materials adhere properly and that your finished product looks professional.
- Prime for Perfection: A coat of primer is especially crucial when painting over dark, glossy, or previously treated surfaces. It ensures even color coverage, prevents stains from bleeding through, and provides a better grip for your topcoats.
- Ventilate Properly: If using spray paints, strong adhesives, or certain varnishes, always work in a well-ventilated area, preferably outdoors, to ensure your safety and minimize fumes.
- Layer and Dry with Patience: Apply paints and glues in thin, even layers, allowing each layer to dry completely before adding the next. Rushing this process can lead to streaks, drips, or peeling. Patience truly leads to professional-looking results.
- Don’t Be Afraid to Experiment: There’s no single “right” way to repurpose a frame. Mix and match colors, textures, and ideas. Let your imagination be your guide, and don’t be afraid to try new techniques or combine different inspirations.
- Seek Inspiration: Don’t hesitate to watch videos from talented crafters, browse Pinterest, or look at craft blogs for more ideas and techniques. Visual guides, like those from creators such as Tanner Bell, can spark incredible innovation and provide step-by-step guidance.
Conclusion: Your Next DIY Adventure Awaits!
From simple makeovers to complete functional transformations, old picture frames offer a boundless canvas for your creative endeavors. We’ve explored just a few of the many ingenious ways you can repurpose these everyday items, turning them into unique wall art, practical organizers, or heartfelt gifts that add character and charm to any space.
So, the next time you stumble upon an old frame, don’t see it as clutter. See it as a blank slate, brimming with potential for a new life. Grab your craft supplies, find some inspiration (perhaps from inspiring videos showcasing brilliant ideas), and start transforming your home one beautifully upcycled frame at a time. Your personal touch will not only enhance your living space but also contribute to a more sustainable and creative world. Happy crafting!