
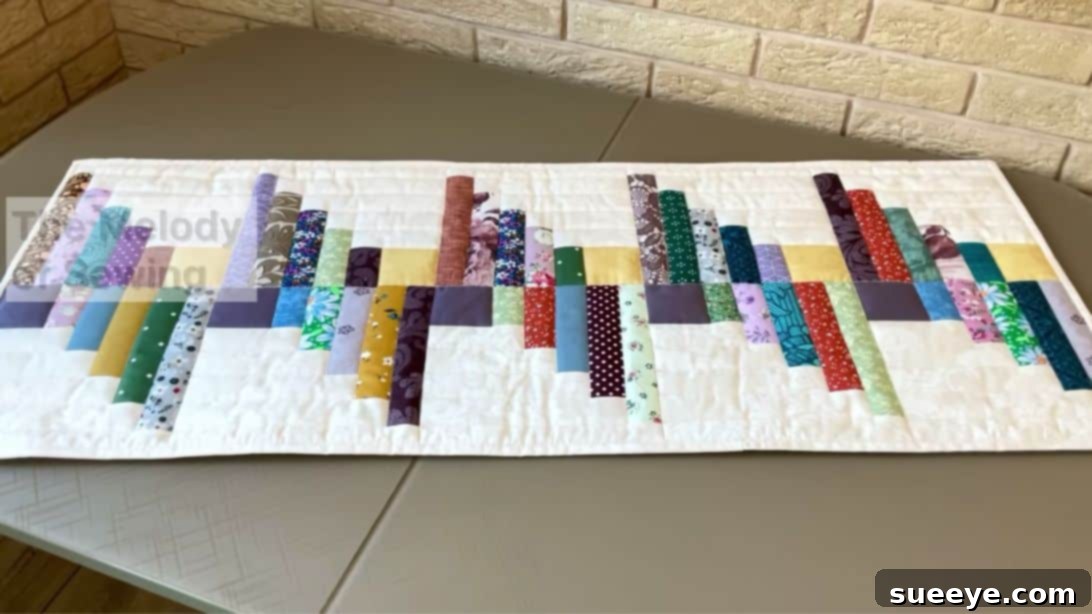
Embark on a delightful quilting journey that not only sparks your creativity but also champions sustainability. The Log Cabin quilt, a beloved classic in the quilting world, offers a fantastic way to utilize every last remnant of your fabric stash. Instead of discarding those smaller pieces, transform them into something truly beautiful and functional. This detailed guide will walk you through creating exquisite Log Cabin quilt blocks with straightforward steps, perfect for beginners and seasoned crafters alike. Whether you envision a charming table runner, a practical coaster set, or a larger decorative quilt, mastering this block opens a world of project possibilities.
RELATED: Discover how to craft a unique Twisted Log Cabin Quilt Block for an interesting variation!
Diving into a scrappy Log Cabin quilt project is a wonderfully creative and eco-conscious endeavor. It’s an ingenious method to give new life to fabric pieces that might otherwise be overlooked or considered waste. Beyond its environmental benefits, this approach is incredibly budget-friendly, allowing you to save significantly by repurposing materials rather than purchasing new ones. Prepare to unleash your inner artist and develop valuable sewing skills while creating personalized textiles for your home or as heartfelt gifts. Learn how to construct these charming quilt blocks with insights inspired by The Melody of Sewing on YouTube.
Why Choose a Scrappy Log Cabin Quilt?
The Log Cabin quilt pattern is renowned for its iconic design, featuring strips of fabric arranged around a central square, reminiscent of a log cabin with its hearth at the center. The “scrappy” element elevates this pattern, encouraging you to embrace a diverse array of fabrics, colors, and patterns, resulting in a quilt that is truly unique and tells a story through its varied textures and prints. This method is not only an excellent way to manage your fabric scraps but also a fantastic entry point into quilting for novices, as it relies on simple straight stitching and repetitive block construction.
- Sustainable Crafting: Reduce textile waste by giving new purpose to fabric offcuts.
- Cost-Effective: Save money by using materials you already own, minimizing the need for new fabric purchases.
- Unleash Creativity: Mix and match colors and patterns freely, leading to a vibrant and personalized finished product.
- Beginner-Friendly: The repetitive nature of the block construction makes it an ideal project for those new to quilting and sewing.
- Versatile Projects: Once you master the block, you can assemble them into a myriad of items, from small decorative pieces to larger quilts.
Essential Materials for Your Scrappy Log Cabin Quilt:
Before you begin, gather all your necessary tools and materials. Having everything organized will ensure a smooth and enjoyable crafting experience. The beauty of a scrappy quilt lies in its flexibility, so feel free to experiment with your fabric choices!
- 1.5″-wide strips of assorted print fabric: These will form the “logs” of your cabin. The more variety you have in prints and colors, the more dynamic your quilt will be. Aim for a good mix of lights and darks to create contrast.
- 1.5″-wide strips of background fabric: While optional for a truly scrappy look, using a consistent background fabric for some logs can provide visual continuity and unify your design. Consider neutral tones or a light color that complements your print fabrics.
- 2.5″ squares of fabric, for the center: This small square represents the “hearth” of your log cabin. A bright color like red or yellow is traditionally used to symbolize warmth, but you can choose any color that resonates with your design.
- Marking pen, pencil, or chalk: Essential for precise cutting and marking sewing lines if needed. Choose a tool that is easily visible on your fabric and will wash out or disappear.
- Ruler: A clear acrylic quilting ruler with precise measurements is invaluable for accurate cutting and trimming of your fabric strips and blocks.
- Scissors or rotary cutter and a cutting mat: While scissors work, a rotary cutter with a self-healing cutting mat will significantly speed up your fabric preparation and ensure straighter, more accurate cuts.
- Seam roller: An excellent tool for flattening seams quickly and efficiently without having to constantly go back and forth to your iron. This can save a lot of time during block construction.
- Needle and thread: Quality sewing machine thread that matches or blends with your fabrics. Have extra needles on hand in case one breaks or dulls.
- Fabric pins or clips: To hold your fabric pieces together securely before stitching, ensuring accurate seam allowances.
- Iron and ironing board, for pressing: Crucial for achieving flat, crisp seams, which are the hallmark of a well-made quilt. Pressing each seam after stitching is a non-negotiable step for professional results.
- Sewing machine: A reliable sewing machine is your best friend for quilting. Ensure it’s in good working order and has a fresh needle.
How to Make a Scrappy Log Cabin Quilt Block: Step-by-Step Tutorial
Crafting these beautiful blocks is a process of building outward from a central point. Take your time, focus on precision, and enjoy watching your scraps transform!
Step 1: Preparing Your Fabrics and Attaching the First Log
Begin by ensuring all your fabric strips and the center square are accurately cut to the specified dimensions. Precision in cutting translates directly to precision in your finished block. Take one of your 2.5″ fabric squares, which will serve as the “hearth” or center of your Log Cabin block. Next, select a 1.5″-wide strip of fabric that is slightly longer than the side of your center square. This initial strip will be your first “log.” Place the strip and the center square with their right sides facing each other, aligning one edge of the strip with one edge of the square. Using a consistent 1/4″ seam allowance, stitch them together along that aligned edge. Once stitched, gently open the fabrics and press the seam away from the center square, towards the strip, using either your iron or a seam roller. This crucial pressing step ensures your block lays flat and square.
Step 2: Building Out the Log Cabin Pattern
Now, you’ll continue building around the central square. Grab another 1.5″-wide strip of fabric. This strip should be slightly longer than the *new* combined length of your center square and the first strip you just added. Position this second strip with its right side facing the adjacent unsewn side of your patchwork, ensuring it extends slightly beyond both ends. Stitch this second log with a 1/4″ seam allowance, then press the seam open, again towards the strip. Your patchwork should now have two “logs” on adjacent sides of the center square. Repeat this process: choose a third strip that is long enough to span the next unsewn side of your growing block. Stitch it on, and press the seam. This sequential addition, always rotating around the center, creates the distinctive Log Cabin spiral effect. It’s important to continually measure your strips against the current size of your patchwork to ensure they are adequately long before stitching.
Step 3: Completing and Trimming Your Quilt Block
Continue adding 1.5″-wide fabric strips alternately to the sides of your growing patchwork, always rotating in the same direction around the center. Each new strip should be long enough to cover the entire length of the side you are attaching it to. After stitching each strip, press the seam open and towards the newly added strip for a consistently flat block. Keep a watchful eye on your seam allowance, striving for accuracy with every stitch, as this impacts the final size and squareness of your block. Once you’ve added enough strips to achieve your desired block size (for this tutorial, we are aiming for a finished 7¾” square block), it’s time for the final pressing. Lay your completed block on an ironing board and give it a thorough press with a hot iron, ensuring all seams are flat and crisp. Finally, use your quilting ruler and rotary cutter to carefully trim the block down to a precise 7¾” square. This trimming step is essential for creating perfectly square blocks that will fit together seamlessly when you assemble your larger project. Repeat these steps to create as many Log Cabin blocks as your chosen project requires.
Assembling Your Log Cabin Quilt Blocks into a Project
Once you have a collection of perfectly trimmed Log Cabin blocks, the next exciting step is to assemble them into your desired project. The arrangement of these blocks can dramatically alter the overall visual impact of your quilt, creating a variety of stunning patterns.
Arrangement Ideas:
- Traditional Layout: Place all blocks in the same orientation, creating a continuous flow of “logs.”
- Barn Raising: Rotate alternating blocks to create a diamond pattern in the center of your quilt.
- Sunshine and Shadow: Arrange blocks so that light and dark sides create dramatic contrasts and patterns.
- Pinwheel: Combine four blocks, orienting them so that their centers meet, forming a central pinwheel design.
Joining the Blocks:
To join blocks, simply place two blocks right sides together, aligning their edges and seams as precisely as possible. Pin them securely. Stitch along the edge with a 1/4″ seam allowance. Continue joining blocks into rows, and then join the rows together. Press all seams either open or to one side, consistently throughout your project, to maintain flatness.
Finishing Your Quilt Project:
For any quilt project, once your top is assembled, you’ll need to add batting and a backing fabric. Create a “quilt sandwich” by layering the backing (wrong side up), batting, and quilt top (right side up). Secure these layers with basting pins or spray. Then, machine or hand quilt through all three layers to hold them together and add texture. Finally, trim the excess batting and backing, and bind the edges of your project with a fabric binding strip for a neat and durable finish. This completes your beautiful, handmade Log Cabin quilt project.
Tips for Success in Scrappy Quilting:
- Consistent Seam Allowance: A precise 1/4-inch seam allowance is critical for blocks to fit together perfectly. Consider using a 1/4-inch presser foot if your machine has one.
- Pressing is Key: Pressing each seam after stitching is not just for neatness; it helps your blocks lie flat and square. Always press, don’t iron (which can stretch fabric).
- Chain Piecing: To speed up the process when making multiple blocks, try chain piecing. Stitch one seam, then feed the next two pieces under the needle without cutting the thread. This saves time and thread.
- Mix Your Scraps: Don’t be afraid to mix different fabric types (cotton, flannel, even some lighter weight denim) as long as they are all pre-washed and behave similarly. The variety adds character.
- Color Placement: While “scrappy” implies randomness, you can still control the overall look. Decide if you want a clear distinction between “light” and “dark” sides of your Log Cabin block, or if you prefer a more blended, harmonious feel.
- Pre-Wash Fabrics: Especially with scraps from different sources, pre-washing ensures all fabrics shrink consistently and prevents color bleeding later.
- Square Up Often: Regularly check your blocks for squareness as you add strips. Small adjustments early on prevent larger problems later.
With these simple steps and creative flexibility, you’re well on your way to transforming forgotten fabric remnants into cherished textile art. The scrappy Log Cabin quilt is more than just a sewing project; it’s a testament to resourcefulness, creativity, and the joy of handmade craftsmanship. Enjoy the process of bringing your unique vision to life!
*All images in this tutorial are credited to The Melody of Sewing via YouTube. We highly recommend visiting her channel and subscribing for more inspiring quilting tutorials and creative sewing ideas!