
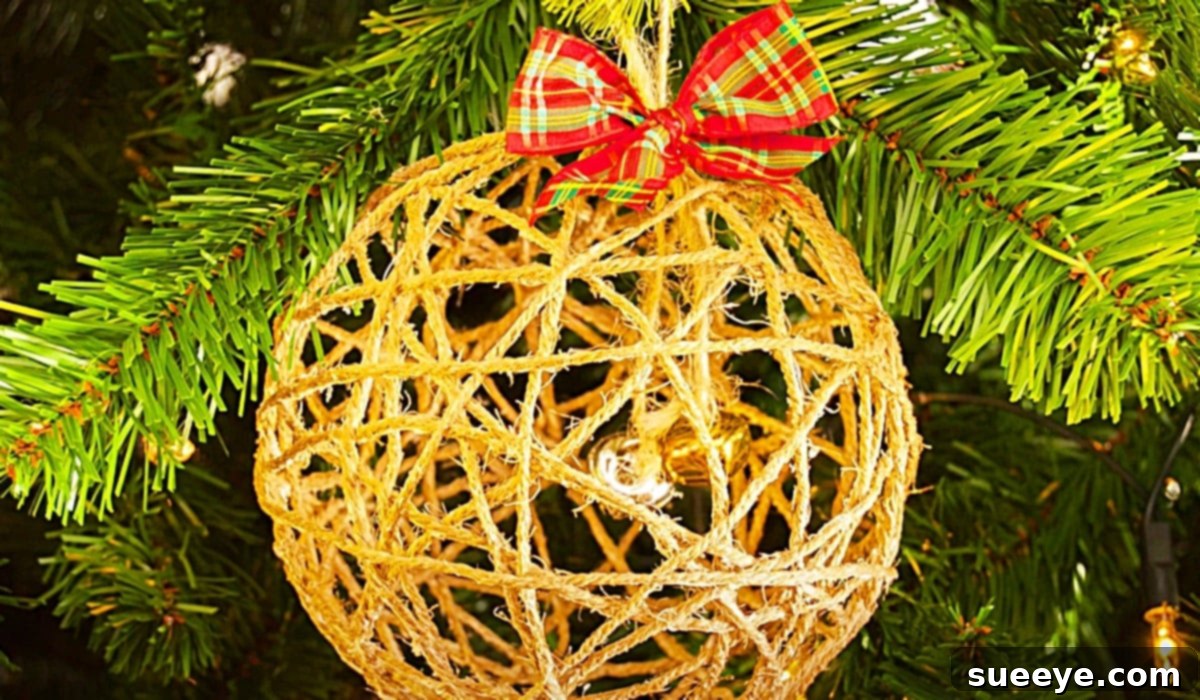
Crafting Charm: Your Guide to DIY Farmhouse Twine Christmas Ornaments
There’s a special magic in handmade Christmas decorations, a warmth that mass-produced items simply can’t replicate. The joy of creating something beautiful with your own hands, especially during the festive season, is truly unparalleled. For many, the first foray into DIY holiday decor evokes a nostalgic sense of accomplishment, much like the satisfaction of crafting a simple string ornament as a child. This guide will walk you through creating a charming and rustic farmhouse twine Christmas ornament, a project inspired by the wonderful video tutorial from Camila Rojas on YouTube. Get ready to infuse your home with personalized, rustic elegance this Christmas!
The timeless appeal of farmhouse decor, with its natural textures and cozy aesthetic, makes it a perfect choice for holiday embellishments. These DIY twine ornaments are not only incredibly easy to make but also offer a unique way to add a touch of handcrafted sophistication to your Christmas tree or festive displays. Forget complicated techniques; this project is designed for crafters of all skill levels, promising a delightful experience and stunning results.
Gather Your Supplies: Materials for Your Rustic Twine Ornaments
Before diving into the creative process, ensure you have all the necessary materials. Most of these items are readily available at craft stores or even around your home, making this a budget-friendly DIY project. Here’s what you’ll need to create your enchanting farmhouse twine Christmas ornaments:
- A Spool of Twine: This is the star of our project! You’ll need a generous amount, as it will form the main structure of your ornament. Natural jute twine offers that classic rustic look, but feel free to experiment with white cotton yarn for a softer, snowier appearance, or even colored twine for a festive pop.
- A Glass Bowl: This will serve as your mixing vessel for the glue mixture. Any old glass bowl will do, as long as it’s wide enough to comfortably submerge your twine.
- White School Glue (PVA Glue) or Mod Podge: Either of these will work perfectly as the adhesive to harden your twine. White school glue is often more economical, while Mod Podge offers a slightly more durable finish and can be found in various finishes like matte or gloss. Ensure it’s a water-based glue for easy cleanup.
- Christmas Bells: Small gold or silver bells will add a delightful jingle and a touch of traditional Christmas sparkle to your finished ornaments. You can also opt for antique bronze bells for an even more rustic feel.
- Plaid Ribbon: A festive plaid ribbon, perhaps in classic red and green, buffalo check, or a more subtle cream and brown, will provide a beautiful hanger and a decorative flourish. Choose a width that complements the size of your finished ornament.
- Balloons: Standard party balloons are essential for shaping your ornaments. The size of your balloon will determine the size of your finished twine ornament, so pick accordingly. Small to medium-sized balloons are generally best for tree ornaments.
- Hot Glue Gun and Glue Sticks: A hot glue gun is invaluable for quickly and securely attaching the decorative elements like bells and ribbon once your twine ball has dried.
Having all these items ready before you start will ensure a smooth and enjoyable crafting experience, allowing you to focus on the fun of creation.
Step-by-Step Guide: Creating Your Farmhouse Twine Christmas Ornaments
This tutorial, inspired by the creative insights of Camila Rojas, simplifies the process into a few easy and enjoyable steps. Get ready to transform simple materials into charming rustic decorations!
Step 1: Prepare Your Balloons and Glue Mixture
Begin by gently inflating your balloons to the desired size of your ornaments. Remember, the larger the balloon, the larger your finished twine ball will be. Tie off the end securely. Next, in your glass bowl, pour a generous amount of white school glue or Mod Podge. If using white school glue, you might want to add a tiny bit of water (about 1 part water to 3 parts glue) to make it a bit more pliable for soaking the twine, but ensure it’s not too watery, as this will weaken the hold.
Step 2: Soak and Wrap the Twine
Now for the fun part! Take one end of your twine and begin feeding it into the glue mixture, allowing it to soak thoroughly. Once a section is saturated, carefully start wrapping the wet twine around your inflated balloon. Ensure you wrap in various directions, creating an intricate web-like pattern. Don’t worry about perfection; the random overlapping layers are what give these ornaments their unique character. Make sure to cover the entire balloon, leaving small gaps for light to peek through, but ensuring enough twine is used to create a sturdy structure. Continue this process until your balloon is adequately covered with glue-soaked twine.
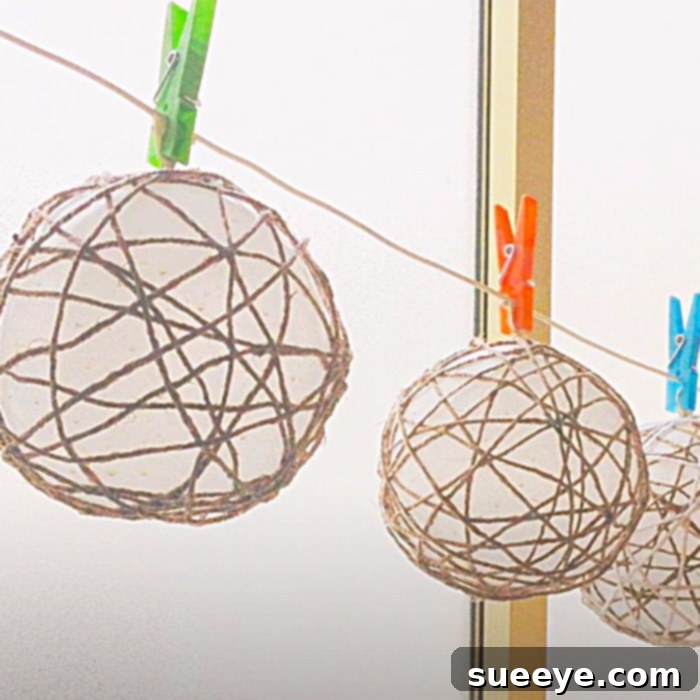
As you wrap, ensure the twine is evenly coated with glue. This saturation is crucial for the ornament to hold its shape once the balloon is removed. Aim for a balance – enough twine to create density, but not so much that it becomes too heavy or loses its delicate, airy appearance. Once you’re satisfied with the coverage, cut the twine and tuck the end securely into the wrapped layers.
Step 3: Drying and Releasing the Balloon
Once your balloon is fully wrapped, find a suitable place to hang it to dry. This could be over a sink, on a clothesline with newspaper underneath, or suspended from a hanger. The drying process is critical and can take anywhere from 12 to 24 hours, depending on the humidity and the amount of glue used. The twine needs to be completely hard and dry to the touch. Once fully cured, carefully pop the balloon with a pin. The deflated balloon should gently pull away from the hardened twine, leaving you with a beautiful, hollow twine sphere.
Step 4: Decorate Your Twine Ornament
Now comes the exciting part: adding the finishing touches! Using your hot glue gun, attach Christmas bells to various points on your twine sphere. You can cluster them together or space them out for a more subtle effect. Next, cut a length of plaid ribbon. Form a loop for hanging and secure it to the top of your twine ornament with a dab of hot glue. You can also tie a small bow and attach it near the hanging loop for an extra festive touch. Feel free to personalize further with other embellishments like small pinecones, faux berries, or even a dusting of glitter for added sparkle.
Your beautiful farmhouse twine Christmas ornament is now complete and ready to adorn your tree or become a charming part of your holiday display. This simple yet rewarding craft project brings a touch of handmade warmth and rustic elegance to any festive setting.
Why Choose Farmhouse Style for Your Christmas Decor?
Farmhouse style has captured hearts worldwide with its blend of comfort, simplicity, and timeless appeal. For Christmas decor, it offers a refreshing alternative to more opulent or modern styles. Farmhouse Christmas decorations often feature natural elements, neutral palettes, and vintage-inspired touches that evoke a sense of nostalgia and coziness. These twine ornaments perfectly embody this aesthetic, adding an organic texture and a handmade feel that complements rustic, traditional, or even minimalist Christmas themes. They create a warm, inviting atmosphere that feels authentic and deeply personal, making your holiday celebrations even more special.
The Benefits of DIY Christmas Ornaments
Engaging in DIY Christmas projects, like making these twine ornaments, offers a wealth of benefits beyond just decorating your home. Firstly, it allows for immense personalization. You can choose your twine color, ribbon style, and embellishments to perfectly match your existing decor or create a unique theme. Secondly, it’s often a more budget-friendly option compared to purchasing store-bought ornaments, especially when you need several. Thirdly, crafting can be a wonderful family activity, creating cherished memories as you work together. Finally, there’s an immense sense of pride and accomplishment in displaying something you’ve made yourself, knowing each piece tells a story and carries a personal touch.
Creative Customization Ideas for Your Twine Ornaments
While the basic twine ornament is beautiful on its own, don’t hesitate to unleash your creativity and customize it further:
- Color Variations: Instead of natural twine, use colored jute or cotton yarn in shades of red, green, silver, or gold for a different look. White yarn can create stunning “snowball” ornaments.
- Glitter and Sparkle: Before the glue fully dries, sprinkle your wet twine with fine glitter for a touch of festive shimmer.
- Natural Embellishments: Attach small dried leaves, miniature pinecones, cinnamon sticks, or dried orange slices for an earthy, aromatic touch.
- Fabric Accents: Hot glue small pieces of burlap, lace, or plaid fabric cutouts onto the finished ornament.
- Beads and Charms: Thread small wooden beads, metallic charms, or even miniature plastic snowflakes onto the twine before wrapping, or glue them onto the finished ornament.
- LED Lights: For a truly magical effect, carefully insert a small string of battery-operated fairy lights into the hollow center of a larger twine ornament once it’s dry.
Tips for Success and Troubleshooting
- Even Glue Coating: Ensure your twine is thoroughly saturated with glue. If it’s too dry, the ornament won’t hold its shape.
- Patience is Key: Don’t rush the drying process. A fully dry ornament is a sturdy ornament. If you try to pop the balloon too early, your ornament might collapse.
- Protect Your Workspace: This project can be a bit messy. Lay down newspaper or a plastic sheet to protect your surfaces from glue drips.
- Handling the Balloon: When wrapping, try not to press too hard on the balloon, especially if it’s lightly inflated, to avoid popping it prematurely.
- Balloon Not Releasing: If the balloon sticks to the twine after popping, gently loosen it with a skewer or tweezers. Sometimes rotating the ornament as the balloon deflates helps.
Care and Storage for Your Handmade Ornaments
Once the holiday season is over, you’ll want to carefully store your beautiful handmade ornaments so they can be enjoyed for years to come. Store them in a sturdy box, ideally with individual compartments or wrapped in tissue paper to prevent them from snagging or getting crushed. Keep them in a cool, dry place away from direct sunlight to preserve the integrity of the twine and glue. With proper care, these charming farmhouse twine ornaments will become treasured pieces of your family’s Christmas traditions.
Conclusion: Embrace the Joy of Handmade Holidays
Creating these farmhouse twine Christmas ornaments is more than just a craft project; it’s an opportunity to create lasting memories and infuse your home with genuine festive spirit. The simple act of making something beautiful with your own hands brings a unique satisfaction, reminiscent of childhood crafting joys. As you hang these rustic, elegant ornaments, you’ll not only be decorating your space but also celebrating the spirit of creativity and personalization. So gather your materials, embrace the process, and enjoy the magical touch of handmade charm this holiday season!