
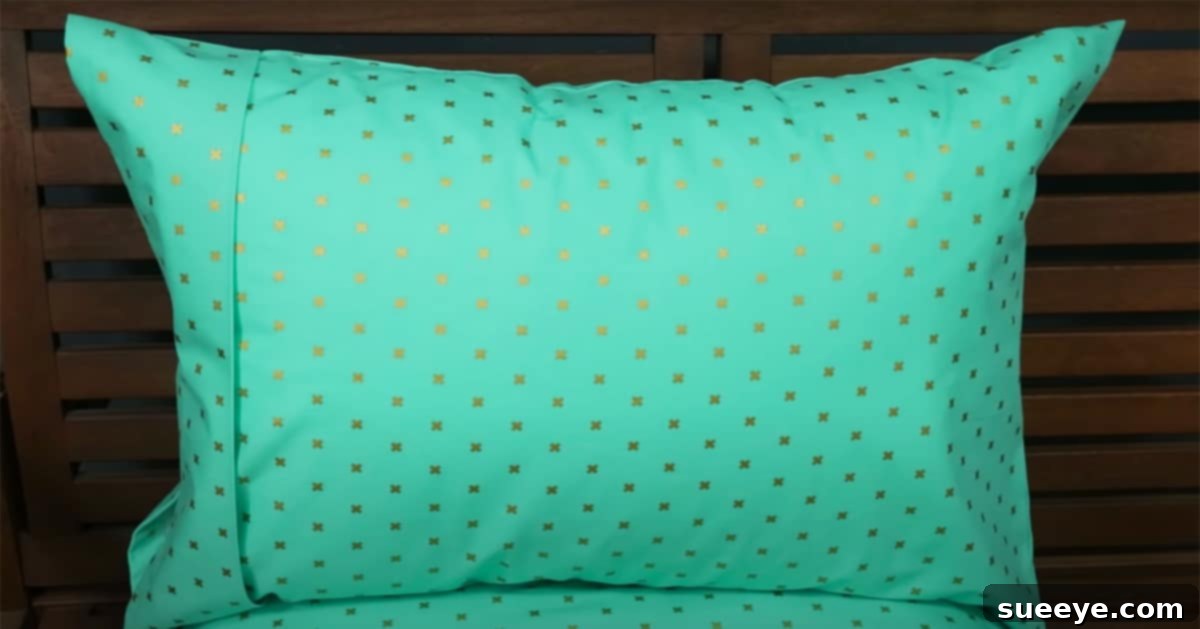
DIY Pillowcase Sewing Tutorial: Easy Steps & Free Pattern Guide
Transform your bedroom decor and express your personal style by learning how to sew a pillowcase with a free pattern guide. This comprehensive DIY sewing project, inspired by fantastic tutorials like the one from Craftsy on YouTube, makes it incredibly simple to create beautiful, custom pillowcases right in your own home. Whether you’re a seasoned sewer or just picking up your first needle and thread, this guide will walk you through the process, ensuring a smooth and enjoyable crafting experience.
Pillowcases are not just functional items; they’re an essential part of your bedding ensemble, offering comfort and a touch of elegance. The beauty of sewing your own lies in the freedom it gives you to choose any type of fabric, allowing you to perfectly match your bedsheets, explore luxurious materials like silk or satin, or simply create something truly unique. Beyond the aesthetic appeal, crafting your own pillowcases is a fantastic way to save money. Often, finding specific individual pillowcases to match unique bedding sets can be a challenge or come with a hefty price tag. This DIY approach empowers you to design and customize your own, precisely to your liking, offering both practicality and immense satisfaction.
Why Sew Your Own Pillowcases?
Embarking on a DIY pillowcase project offers a multitude of benefits that extend far beyond simply having a new cover for your pillow. Let’s explore some compelling reasons why this sewing endeavor is a worthwhile investment of your time and creativity:
- Unmatched Customization: The most significant advantage is the ability to personalize every aspect. From vibrant patterns and subtle textures to unique sizes, you are the designer. This means no more settling for limited store options or struggling to find that perfect shade to complement your existing decor.
- Cost-Effectiveness: Ready-made pillowcases, especially those made from high-quality or specialty fabrics, can be surprisingly expensive. By purchasing fabric in bulk or utilizing remnants, you can significantly reduce costs, making it an economical choice for updating your bedding.
- Material Freedom: Do you dream of sleeping on silky smooth satin, breathable linen, cozy flannel, or hypoallergenic bamboo? When you sew your own, you have complete control over the fabric choice. This allows you to select materials based on comfort, durability, aesthetic, and even specific needs like sensitive skin or hair protection.
- Unique Gifts: A handmade pillowcase is a thoughtful and personal gift. Whether for housewarmings, birthdays, or holidays, a custom-sewn pillowcase shows care and effort, making it a cherished item for friends and family.
- Skill Development: For beginners, sewing a pillowcase is an excellent foundational project. It teaches essential sewing techniques such as measuring, cutting, creating straight seams, hemming, and finishing edges – skills that are transferable to many other sewing projects.
- Sustainability: By making your own, you can choose organic fabrics, repurpose old sheets, or reduce reliance on mass-produced items, contributing to a more sustainable lifestyle.
- Therapeutic Hobby: Sewing can be a wonderfully relaxing and mindful activity. The process of creating something with your hands offers a sense of accomplishment and can be a great stress reliever.
Essential Materials for Your Pillowcase Project:
Before you begin, gather these key materials and tools. Having everything organized beforehand will make your sewing process much smoother and more enjoyable:
- Fabric: Approximately 1 1/4 yards (or about 45 inches) of cotton fabric is ideal for a standard pillowcase. However, feel free to experiment with any fabric type you desire – cotton for breathability, flannel for warmth, silk or satin for luxury, or even linen for a natural look. Pre-washing and ironing your fabric beforehand is highly recommended to prevent shrinkage after your pillowcase is made and to ensure smooth cutting and sewing.
- Fabric Chalk or Disappearing Ink Pen: Essential for marking your cutting lines and seam allowances directly onto the fabric without leaving permanent marks.
- Yardstick or Measuring Tape: For accurate measurements of your pillow and fabric. Precision here ensures a well-fitting pillowcase.
- Iron and Ironing Board: Crucial for pressing seams open or flat, creating crisp folds, and giving your finished pillowcase a professional look. Do not skip this step!
- Sewing Machine: A basic sewing machine with a straight stitch function is all you need. Ensure it’s threaded properly with an all-purpose polyester thread that matches or complements your fabric color.
- Fabric Shears: Sharp scissors specifically designed for fabric will ensure clean, precise cuts.
- Pins: To hold fabric layers together before sewing, preventing shifting.
- Thread: All-purpose polyester thread in a color that matches your fabric.
Understanding Fabric Choices for Pillowcases
The fabric you choose significantly impacts the comfort, durability, and overall feel of your pillowcase. Here’s a quick guide to popular options:
- Cotton: The most popular choice for its breathability, softness, and ease of care. Available in a vast array of colors and patterns.
- Flannel: Perfect for colder climates or cozy nights, flannel is brushed cotton that provides extra warmth and a soft, fuzzy texture.
- Silk/Satin: Luxurious and smooth, these fabrics are gentle on hair and skin, reducing friction and preventing frizz. They also offer a beautiful sheen.
- Linen: Known for its strength and breathability, linen has a natural, slightly textured feel that softens with each wash. It’s excellent for a relaxed, rustic aesthetic.
- Jersey Knit: If you prefer a stretchy, T-shirt-like feel, jersey knit can be very comfortable, though it can be trickier for beginners to sew due to its stretchiness.
Step-by-Step Directions for Sewing Your Custom Pillowcase:
This guide will walk you through the essential steps, providing enough detail for you to confidently complete your project. For a visual demonstration, remember to watch the excellent Craftsy tutorial on YouTube for full instructions and details.
Step 1: Measure Your Pillow and Cut the Fabric
Accuracy is key here. First, measure the pillow you intend to cover. A standard pillow is typically 20 inches by 26 inches. A queen is 20 by 30 inches, and a king is 20 by 36 inches. Body pillows vary widely, so measure them precisely.
- For Width: Take your pillow’s width (e.g., 20 inches) and multiply it by two (40 inches). Then, add 1 inch for seam allowances (1/2 inch on each side). So, for a 20-inch wide pillow, your fabric width should be 41 inches.
- For Length: Take your pillow’s length (e.g., 26 inches) and add 1/2 inch for the bottom seam allowance. Then, add an extra 11 inches to create a generous finished cuff or fold at the opening of the pillow. This extra length ensures a neat, professional finish that hides the pillow insert. So, for a 26-inch long pillow, your fabric length should be 26 + 0.5 + 11 = 37.5 inches.
Based on these calculations, for a standard 20×26 inch pillow, you would cut one piece of fabric measuring approximately 41 inches wide by 37.5 inches long. If you’re using directional fabric, ensure your pattern runs correctly along the length.
Step 2: Prepare the Cuff Hem for the Opening
This step creates a clean, finished edge for the pillowcase opening.
- Lay your fabric flat, wrong side up, with the longer edges running horizontally.
- Take one of the short raw edges (the 41-inch side in our example). Fold it over towards the wrong side by 1/4 inch and press firmly with your iron.
- Fold it over again, this time by 1/2 inch, and press. This double fold encloses the raw edge, creating a neat hem.
- Stitch this hem down using your sewing machine, sewing close to the inner folded edge. Backstitch at the beginning and end to secure. Repeat this for the other short edge if you want a pillowcase with two finished ends, or just one if it’s a standard single-opening pillowcase. This will be your pillowcase opening edge.
Step 3: Construct the Pillowcase Body
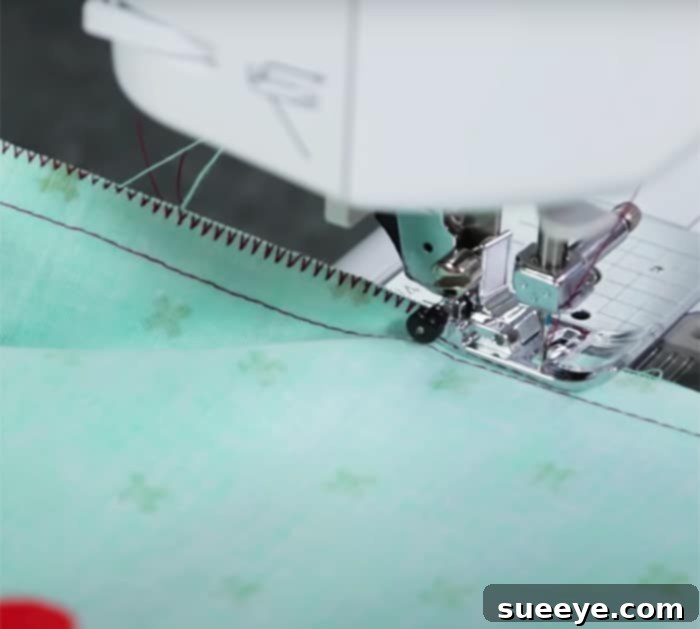
Now, we’ll bring the pillowcase shape together. The technique described here creates a very clean finish, often called the “burrito method” or “hot dog method” if you were using a separate cuff piece, but we are doing it slightly simpler by folding.
- Lay your large piece of fabric flat, right side up. Ensure the finished hemmed edge is on one of the short sides.
- Take the finished hemmed short edge and fold it down towards the bottom raw edge, making sure to align the side edges perfectly. The fold should be such that the hemmed edge sits roughly 11 inches from the bottom raw edge (this forms your cuff).
- Next, bring the bottom raw edge up and over the folded cuff, aligning it with the top raw edge of the main fabric. Essentially, you’re folding your fabric in half lengthwise, right sides together, trapping the cuff inside. The cuff should be “sandwiched” between the two main body layers. Pin extensively along both long raw edges and the single short raw edge.
- Stitch along the pinned side and bottom raw edges using a 1/2-inch seam allowance. Remember to backstitch at the beginning and end of each seam to reinforce it. Do not stitch the finished hemmed edge or the folded edge of the main fabric.
- Trim the seam allowances to 1/4 inch and clip the corners (cut diagonally across the corner, close to the stitching but not through it) to reduce bulk when you turn the pillowcase right side out.
Step 4: The Final Flourish
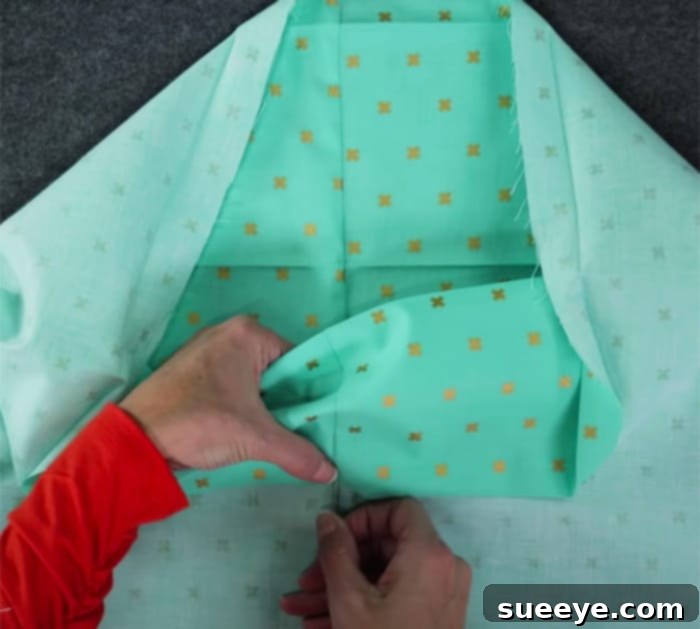
This is where your pillowcase truly comes to life!
- Carefully reach into the opening of the pillowcase and pull the outer fabric layers through the opening created by the cuff. Continue pulling until the entire pillowcase is turned right side out.
- Gently push out the corners using a point turner or a blunt object like a chopstick to ensure they are sharp and well-defined.
- Once turned, press the entire pillowcase with a warm iron. Pay special attention to the seams, pressing them flat and crisp. Also, iron the cuff section, making sure the fold is neat and even. This pressing will give your pillowcase a polished, professional finish.
- Your custom-sewn pillowcase is now complete! Insert your pillow and enjoy your personalized creation.
Tips for a Perfect Pillowcase Every Time
Even though it’s an easy sewing tutorial, a few extra tips can elevate your results:
- Pre-wash Your Fabric: Always wash and dry your fabric before cutting and sewing, especially if it’s cotton. This preshrinks the fabric, preventing your finished pillowcase from shrinking unevenly after its first wash.
- Press, Press, Press: Ironing at each stage of the sewing process is crucial. It helps your seams lay flat, creates crisp folds, and ultimately makes your stitching more accurate and your finished product more professional.
- Use Quality Thread: A good quality all-purpose polyester thread is strong and durable, ensuring your seams last through many washes.
- Seam Finishes: For extra durability and to prevent fraying, consider finishing your raw seam edges. You can use a serger if you have one, or a zigzag stitch on your regular sewing machine, or even French seams for an utterly enclosed, luxurious finish (though this adds a bit more complexity).
- Pin Generously: Don’t be shy with pins, especially when working with slippery fabrics. They help keep your fabric layers aligned and prevent shifting while you sew.
- Practice Straight Stitches: If you’re new to sewing, practice sewing straight lines on scrap fabric. Consistency in your seam allowance is key to a professional-looking pillowcase.
Creative Variations and Customization Ideas
Now that you’ve mastered the basic pillowcase, unleash your creativity! Here are some ideas to make your next pillowcase even more unique:
- Contrasting Cuffs: Instead of using the same fabric for the entire pillowcase, cut a separate strip of a complementary fabric for the 11-inch cuff. This adds a pop of color or pattern.
- Adding Trim or Piping: Sew decorative trim, ribbon, or piping into the seam where the cuff meets the main body for an elegant touch.
- Embroidery or Monograms: Personalize your pillowcase with embroidered initials, a name, or a small design before sewing the sides.
- Fabric Panels: Combine two or more different fabrics for the main body of the pillowcase. You could have a center panel and two side panels for a quilted look.
- Ruffles or Flanges: For a more elaborate design, add a ruffle along the opening or create a flange (a flat border) around the entire perimeter of the pillowcase.
Caring for Your Handmade Pillowcase
To ensure your beautiful, handmade pillowcase lasts for years, proper care is essential. Always refer to your fabric’s specific care instructions, but here are some general guidelines:
- Cotton and Flannel: Machine wash cold with like colors, tumble dry low. Remove promptly to prevent wrinkles.
- Silk and Satin: Hand wash or machine wash on a delicate cycle with a mild detergent designed for delicates. Air dry or tumble dry very low. Avoid high heat.
- Linen: Machine wash cold or warm. Linen tends to wrinkle easily, so tumble dry on low and remove while slightly damp to iron, or air dry for a more relaxed look.
Overall, it’s an incredibly rewarding and easy sewing tutorial to follow along with the step-by-step instructions. The thoroughness and detailed approach mean it won’t take long to create beautiful, functional pieces. Many sewists find themselves wanting to make a few of these, perhaps experimenting with different fabric materials and colors to add variety to their bedding collection without the expense of buying multiple pillowcases or entire bedding sets. This project truly embodies the spirit of DIY: practical, creative, and uniquely yours.