
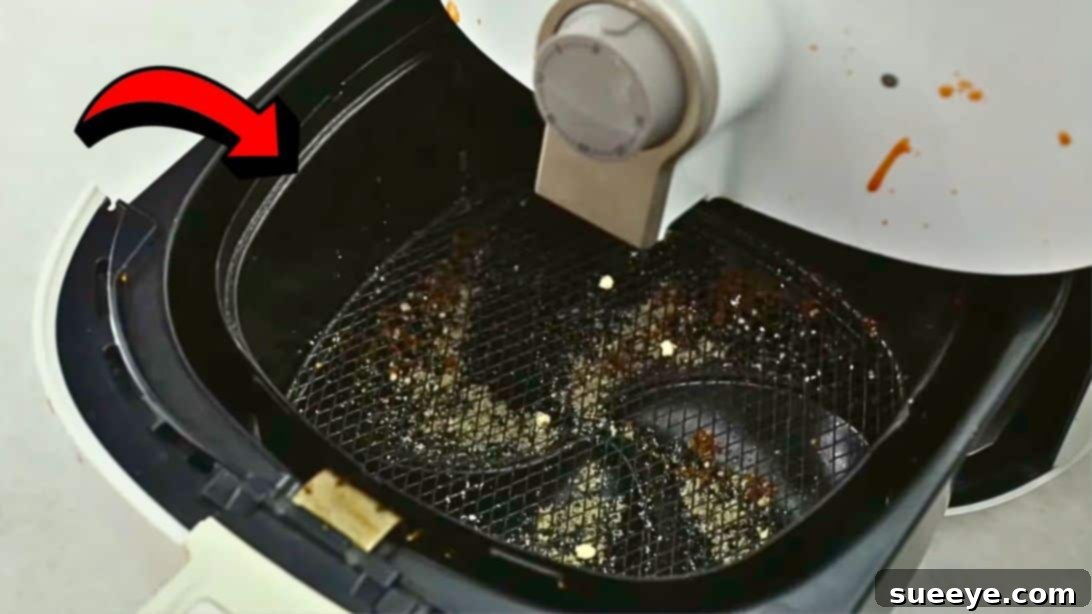
The air fryer has revolutionized home cooking, transforming the way we prepare meals by offering a healthier, quicker, and incredibly versatile alternative to traditional frying. This compact appliance can do everything from crisping up your favorite snacks to baking bread, making it an indispensable tool in any modern kitchen. Its ability to create crispy textures with significantly less oil is a major draw, contributing to healthier eating habits. However, while the air fryer makes cooking a breeze and saves considerable time and energy, especially on busy days, it can pose a challenge when it comes to cleaning. Built-up grease and food residue can stubbornly cling to its various components, impacting performance and hygiene. But fret not! Keeping your air fryer in pristine condition is simpler than you might think. This comprehensive guide will walk you through the most effective methods to clean your air fryer, ensuring it stays spotless, functions optimally, and extends its lifespan for countless delicious meals.
RELATED: Avoid Common Pitfalls: Top 12 Air Fryer Mistakes to Steer Clear Of
Maintaining a clean air fryer is not just about aesthetics; it’s crucial for several reasons that directly impact your cooking experience and the appliance’s longevity. Regular cleaning prevents the accumulation of grease and food particles, which can lead to unpleasant odors, smoke during operation, and even affect the taste of your food. A dirty heating element can also reduce the air fryer’s efficiency, leading to unevenly cooked meals and increased energy consumption. Moreover, leftover residues can become breeding grounds for bacteria, posing a health risk. While some air fryer parts are conveniently dishwasher-safe for light cleaning, especially if you’ve cooked something non-messy, a thorough manual deep clean is often necessary. If you frequently use your air fryer for a variety of meals, or if you don’t always get to clean it immediately after each use, a deep cleaning routine for the baskets, racks, heating element, and even the exterior is essential. This guide will show you how to tackle even stubborn grime and grease without excessive scrubbing, making air fryer maintenance a quick and easy task.
Your Essential Air Fryer Cleaning Arsenal
Before you begin the cleaning process, gather these simple yet effective tools. Having everything ready will make the task quicker and more efficient, ensuring you can tackle all types of food residue and grease with ease.
- Hot Water: Essential for loosening stubborn food particles and dissolving grease.
- Mild Dish Soap: A good quality dish soap is a powerful degreaser that breaks down oils and food residue effectively.
- Non-Scratch Scrubber Sponge: Crucial for cleaning non-stick surfaces without causing damage. Look for sponges specifically designed for non-stick cookware.
- Soft Cloths (Microfiber Recommended): Perfect for wiping down the exterior and drying surfaces without leaving lint or streaks.
- Small, Soft-Bristled Brush (or Old Toothbrush): Ideal for reaching into crevices, around the heating element, and other tight spots where food can hide.
- Stainless Steel Brush (Optional for Metal Racks): If your air fryer features metal racks, a stainless steel brush can be highly effective for removing heavily baked-on food without damaging the durable surface. *Use with caution and only on appropriate surfaces.*
- Baking Soda (Optional for Tough Stains/Odors): A natural abrasive and odor absorber that can be used as a paste for particularly stubborn spots or to neutralize smells.
- Vinegar (Optional for Odors/Shine): Can be used to wipe down the interior for extra shine and to combat lingering odors.
- Protective Gloves (Recommended): To protect your hands from hot water and cleaning agents.
A Step-by-Step Guide to a Sparkling Clean Air Fryer
Follow these detailed steps to thoroughly clean your air fryer, from its removable parts to its often-neglected heating element. Remember, safety first: always ensure your air fryer is unplugged and completely cool before beginning any cleaning process.
Step 1: Preparation and Disassembly
Begin by unplugging your air fryer from the power outlet and allowing it to cool down completely. This is a critical safety step. Once cooled, carefully remove all removable parts, including the basket, pan, and any racks or trays. This separation allows for easier access and more thorough cleaning of each component.
Step 2: The Power of Soaking
Fill your kitchen sink or a large basin with hot water and add a generous squirt of mild dish soap. Submerge the air fryer pan and basket completely in the soapy water. Let them soak for at least 10 to 15 minutes. This soaking time is invaluable as it helps to soften and loosen any stuck-on food, baked-on grease, and stubborn residue, making subsequent scrubbing much easier and less laborious. For extremely tough grime, you might extend the soaking time or add a tablespoon of baking soda to the water for extra cleaning power.
Step 3: Scrubbing Removable Components
After soaking, use a non-scratch scrubber sponge to gently but firmly remove all the softened food particles and grease from the pan and basket. Pay close attention to corners and edges. For intricate areas or small crevices, a small, soft-bristled brush or an old toothbrush can be very effective. If your air fryer has removable metal racks that are heavily soiled, you may carefully use a stainless steel brush, as mentioned in the “What You Need” section, to scrub away caked-on food. Always be mindful of the material; avoid abrasive scrubbers on non-stick coatings to prevent damage.
Step 4: Cleaning the Main Unit (Interior and Exterior)
While the removable parts are soaking, turn your attention to the main body of the air fryer. Begin by wiping down the exterior with a soft, damp cloth, removing any splatters, fingerprints, or dust. For the interior, including the basket base (the part that holds the basket), use a separate soft, damp cloth or sponge. For the heating element, which is often the trickiest part, ensure it’s completely cool. Gently wipe it with a soft sponge or a soft-bristled brush. **Crucially, avoid using steel wool, highly abrasive scrubbers, or harsh chemicals on the heating element or any non-stick surfaces, as these can easily scratch and damage the protective coating.** If there are stubborn spots on the heating element, a damp cloth with a tiny bit of dish soap should suffice, followed by a clean, damp wipe to remove any soap residue. Never immerse the main unit in water.
Step 5: Rinse and Thoroughly Dry
Once all parts are scrubbed clean, rinse the pan, basket, and racks under running hot water to remove all traces of soap and loosened food particles. Drying is a crucial, often overlooked step. Ensure that all components, especially the removable parts, are completely dry before reassembling the air fryer. You can air dry them on a dish rack or wipe them meticulously with a clean, dry microfibre cloth. Any residual moisture can lead to water spots, rust, or even electrical issues. Pay particular attention to crevices where water might collect.
Step 6: Reassembly and Final Touches
Once every part is thoroughly dry, carefully reassemble your air fryer. Place the basket back into the pan, and then slide the pan back into the main unit. Give the exterior a final wipe with a dry cloth for a streak-free shine. Your air fryer is now ready for its next cooking adventure, sparkling clean and performing at its best.
Advanced Tips for Air Fryer Maintenance and Troubleshooting
Tackling Stubborn Baked-On Stains and Odors
Even with regular cleaning, some residues can be particularly persistent, and odors might linger. For very stubborn baked-on stains, create a paste using baking soda and a small amount of water. Apply this paste directly to the stained area on the basket or pan, let it sit for 10-15 minutes, then scrub gently with your non-scratch sponge. The mild abrasive quality of baking soda helps lift the grime without damaging surfaces. To combat lingering food odors, especially after cooking strong-smelling foods like fish or garlic, you can wipe the interior of the air fryer with a cloth dampened with a solution of equal parts white vinegar and water. Alternatively, place a few lemon slices in the empty basket and run the air fryer at a low temperature (e.g., 250°F / 120°C) for 5-10 minutes to help neutralize smells. Always ensure the unit is empty and clean before trying this.
Preventive Measures for Easier Cleaning
Prevention is always better than cure. To minimize cleaning efforts, consider using air fryer parchment paper liners or aluminum foil (used sparingly and correctly to avoid blocking airflow) when cooking messy foods. These liners catch drips and crumbs, significantly reducing the amount of residue left on the basket and pan. Always ensure that any liners or foil do not block the air circulation or come into contact with the heating element. You can also lightly spray the basket with cooking oil before adding food to help prevent sticking.
Common Cleaning Mistakes to Avoid
To ensure the longevity of your air fryer and its non-stick coatings, be aware of these common pitfalls:
- Using Metal Utensils or Abrasive Scrubbers: These can scratch the non-stick coating on baskets and pans, leading to food sticking and potential flaking. Stick to silicone, wood, or plastic utensils, and non-scratch sponges.
- Immersing the Main Unit in Water: Never submerge the electrical components of your air fryer in water. This is a serious electrical hazard and will ruin your appliance.
- Harsh Chemicals: Avoid oven cleaners, bleach, or other strong chemical cleaners, as they can damage surfaces, leave residues, and emit harmful fumes when the air fryer is next used.
- Neglecting Immediate Cleanup: While a deep clean is for occasional use, a quick wipe-down of the basket and pan after each use, once cooled, can prevent food from hardening and becoming difficult to remove later.
The Best Way to Clean Your Air Fryer: Consistency and Care
Ultimately, the “best” way to clean your air fryer is through consistent, gentle care. Regular light cleaning after each use, combined with a thorough deep clean every week or two (depending on usage), will keep your appliance in top shape. A clean air fryer not only looks better but also performs more efficiently, cooks food more evenly, and helps extend its overall lifespan. By following these simple steps and incorporating these tips into your routine, you can enjoy the many benefits of your air fryer for years to come, knowing it’s always ready to prepare delicious and healthy meals.