
The Ultimate Mason Jar Garlic Peeling Hack: Fast, Easy, and Mess-Free
Are you tired of spending precious minutes struggling with garlic cloves, ending up with sticky fingers and a pile of stubborn skins? If so, you’re not alone. For many home cooks and professional chefs alike, peeling garlic is one of the most tedious and time-consuming tasks in the kitchen. But what if there was a simple, ingenious method that could free you from this culinary chore, allowing you to peel an entire head of garlic in mere seconds? Welcome to the world of the mason jar garlic peeling hack – a game-changer that promises to revolutionize your food preparation.
Forget about purchasing expensive pre-peeled garlic or resorting to complex gadgets. This incredibly effective technique, popularized by ingenious creators like Janine LaTullippe, leverages the power of a common household item: the humble mason jar. It’s a lifesaver for busy weeknights, large family meals, or whenever you need fresh garlic in a flash. With just a minute or two of effort, you’ll be amazed as perfectly peeled garlic cloves emerge, ready to infuse your dishes with their rich, pungent flavor.
Let’s dive into this amazing kitchen shortcut that will not only save you time but also reduce kitchen waste and encourage you to use fresh ingredients more often. Get ready to embrace the joy of effortlessly peeled garlic!
Why This Garlic Peeling Hack Is a Game Changer
Before we get into the “how,” let’s explore the compelling reasons why this mason jar method stands head and shoulders above traditional garlic peeling techniques:
- Unbeatable Speed: The most obvious benefit is the incredible speed. Instead of fumbling with individual cloves, you can peel an entire head of garlic in 30-60 seconds. This is invaluable when you’re in a rush or preparing a large meal.
- Effortless Process: There’s virtually no skill involved. If you can shake a jar, you can peel garlic with this method. It’s perfect for beginners and seasoned cooks alike.
- No Sticky Fingers: One of the biggest complaints about peeling garlic is the sticky residue and strong odor that lingers on your hands. This hack minimizes direct contact with the cloves and their juices, keeping your hands clean and fresh.
- No Special Equipment Needed: You don’t need a garlic press, a silicone peeler, or any other specialized tool. Just a standard mason jar you likely already have lying around.
- Preserves Freshness: Peeling garlic just before use ensures maximum flavor and aromatic impact in your cooking, unlike pre-peeled garlic that can lose potency.
- Eco-Friendly: By using fresh garlic and a reusable jar, you reduce the need for plastic packaging associated with store-bought pre-peeled options.
Materials You’ll Need for Instant Garlic Peeling
The beauty of this hack lies in its simplicity. You truly need minimal supplies to achieve perfectly peeled garlic every single time.
- Fresh Garlic: The star of the show! A whole head or a few individual cloves will work. Firmer, dryer garlic tends to peel slightly better than very fresh, moist varieties, but both will yield good results.
- Mason Jar: Any standard glass mason jar with a tight-fitting lid will do. The size can vary; a pint or quart jar is usually ideal, providing enough space for the garlic to move around freely. Ensure the lid seals securely to prevent any garlic escape during vigorous shaking!
- Knife: Primarily for breaking apart the garlic head, not for peeling.
- Chopping Board: For safely preparing your garlic before it goes into the jar.
Step-by-Step Guide: How to Peel Garlic with a Mason Jar
Here’s the straightforward process to master this incredible kitchen hack. Follow these simple steps, and you’ll wonder how you ever lived without it.
Step 1: Prepare Your Garlic Head
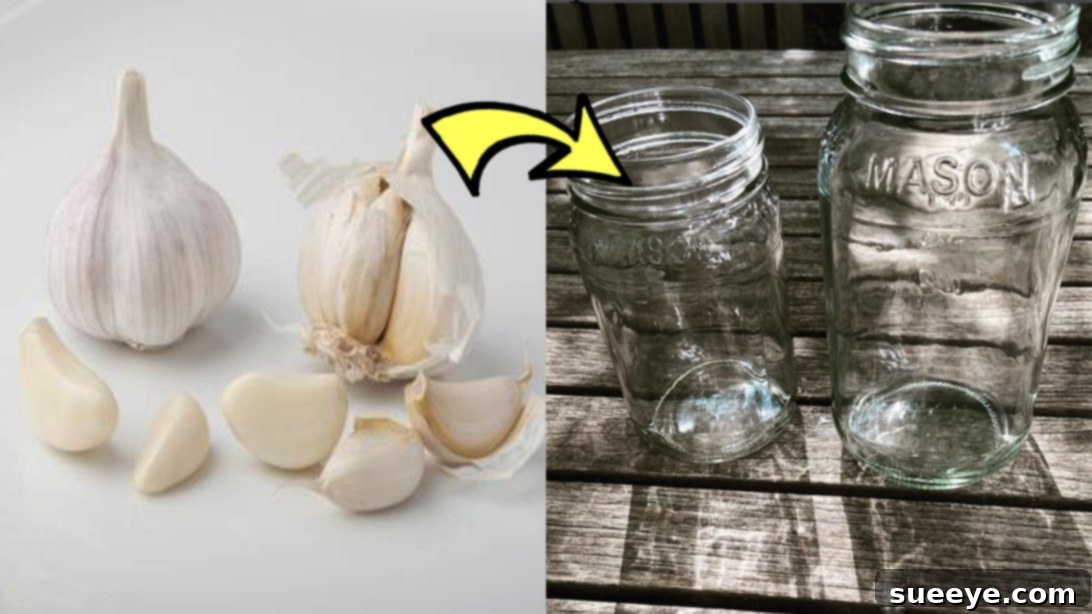
Start by taking a whole head of garlic. Using your hands, firmly break the garlic head in half, or into smaller sections. You can also use a knife to carefully slice through the middle of the head, which helps to loosen the cloves from the central stalk. The goal here is to separate the individual cloves from the main head, making them easier to fit into the jar and more susceptible to the peeling action. Don’t worry about peeling them at this stage; just get them separated.
Step 2: Load the Mason Jar
Once you have your separated garlic cloves, place them into your empty mason jar. You can put in a few cloves or an entire head’s worth, depending on the size of your jar and how much garlic you need. Make sure not to overfill the jar; the cloves need space to tumble and collide. A good rule of thumb is to fill the jar no more than halfway with cloves.
Step 3: The Vigorous Shake
Secure the lid tightly onto the mason jar. This is crucial to prevent any garlic or skins from flying out during the next step. Now, shake the jar vigorously! Imagine you’re shaking a cocktail or playing a maraca with enthusiasm. Shake it up and down, side to side, in circles – any motion that causes the garlic cloves to repeatedly hit against each other and the sides of the jar. The friction and impact will naturally loosen and remove the papery skins.
Continue shaking for approximately 30 seconds to a minute. You’ll hear the satisfying sound of the skins separating from the cloves. You might even peek through the glass to watch the magic happen.
Step 4: Reveal and Use
After about 30-60 seconds of vigorous shaking, stop and open the jar. You’ll be astonished to find perfectly peeled garlic cloves nestled among their discarded papery skins. Simply pick out the clean, skinned garlic cloves. A quick rinse under cold water can help remove any tiny bits of lingering skin. Your fresh, ready-to-use garlic is now prepared for chopping, mincing, crushing, or slicing, ready to elevate your culinary creations.
The skins can be easily discarded or even composted, depending on your local practices.
Tips for Maximizing Your Garlic Peeling Success
While this method is incredibly simple, a few pointers can ensure you achieve perfect results every time:
- Don’t Overfill: Ensure there’s plenty of space in the jar for the garlic cloves to tumble and collide. Too many cloves will reduce the effectiveness of the shaking action.
- Choose the Right Jar: Any sturdy glass jar with a secure, tight-fitting lid will work. Mason jars are ideal because of their robust construction and reliable seals.
- Age of Garlic: Slightly older, drier garlic heads tend to peel more easily than very fresh, moist garlic, as the skins are less adherent. However, the hack works well for most types of garlic.
- Hard Shake: Don’t be shy with your shaking! The more vigorously you shake, the more friction and impact will occur, leading to faster and more complete peeling.
- Remove Root End (Optional): For particularly stubborn cloves, you can slightly trim the tough root end before shaking. This sometimes helps the skin detach more easily.
- Batch Peeling: This method is fantastic for peeling large quantities of garlic in one go. If you’re planning to make a big batch of a garlic-heavy dish, or prepping for the week, this hack is your best friend.
Beyond the Peel: Storing and Using Your Fresh Garlic
Now that you have a bounty of perfectly peeled garlic, what’s next? Fresh garlic is incredibly versatile. Here are a few ideas:
- Immediate Use: Mince, crush, or slice for your favorite recipes. From stir-fries and pasta sauces to marinades and dressings, fresh garlic adds an irreplaceable depth of flavor.
- Short-Term Storage: Store peeled garlic cloves in an airtight container in the refrigerator for up to a week. For slightly longer storage, you can submerge them in olive oil (ensure they are fully covered to prevent spoilage, and store in the fridge for up to two weeks – use the infused oil for cooking!).
- Freezing for Later: For extended storage, chop or mince the peeled garlic and freeze it in small portions. You can use ice cube trays for convenient single-serving portions of garlic paste, covered with a little olive oil. Once frozen, pop them out and store them in a freezer-safe bag for months.
- Garlic Confit: Gently cook peeled garlic cloves in olive oil until soft and golden. This creates delicious, spreadable garlic and a flavorful infused oil perfect for dipping bread or cooking.
Say Goodbye to Pre-Peeled Garlic and Hello to Fresh Flavor
This simple mason jar garlic peeling hack not only saves you time and effort but also encourages you to use fresh ingredients, which inherently taste better and offer more nutritional value than their processed counterparts. The convenience of pre-peeled garlic often comes with a compromise in flavor and freshness, and sometimes even a higher price tag. By adopting this easy method, you regain control over your ingredients and elevate the taste of every dish you prepare.
Your unused mason jars, perhaps gathering dust in a cabinet, finally have a noble purpose beyond just canning! This trick transforms them into an indispensable kitchen tool, simplifying your cooking routine and making the art of fresh garlic preparation a joyous experience rather than a dreaded chore.
Share the Kitchen Magic!
Kitchen hacks that truly make a difference are worth sharing. Don’t keep this amazing mason jar garlic peeling secret to yourself! Share this invaluable trick with your friends, family, and fellow food enthusiasts. They will undoubtedly thank you for introducing them to this kitchen lifesaver. Prepare to receive praises for your newfound efficiency and culinary wisdom!
Embrace the mason jar method, unlock the full potential of fresh garlic in your cooking, and enjoy the effortless elegance it brings to your kitchen.