
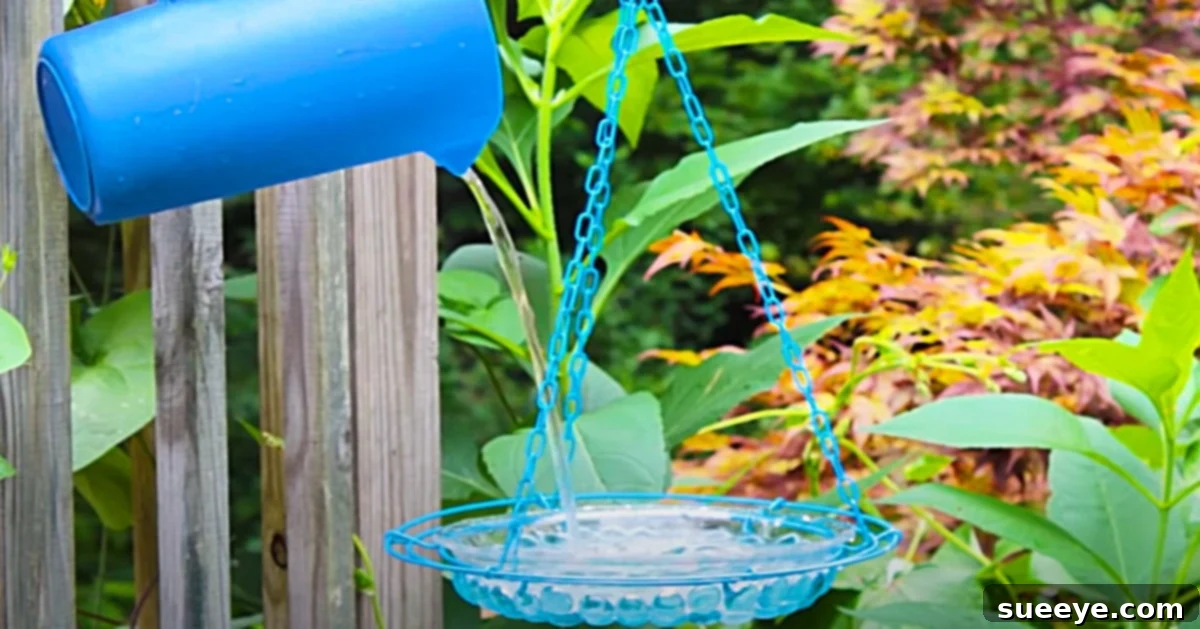
Crafting Beauty on a Budget: Your Guide to a Stunning DIY Hanging Glass Bird Bath
In the world of DIY, finding projects that combine affordability, simplicity, and breathtaking results is like striking gold. For many crafters, Dollar Tree has emerged as an indispensable treasure trove, offering an abundance of raw materials that spark creativity without breaking the bank. It’s a place where a simple shopping trip can transform into an exciting quest for inspiration, leading to remarkable home and garden accents. If you’re passionate about transforming ordinary items into extraordinary pieces, you’re in for a treat with this delightful project.
The pursuit of an easy yet impactful DIY endeavor recently led me down a rabbit hole of online tutorials. My goal was simple: discover a project using items readily available at my local Dollar Tree. What I stumbled upon was nothing short of brilliant – a captivating video tutorial for a glass hanging bird bath by Lori Blye DIY on YouTube. From the moment I saw it, I knew this was the perfect match for my crafting aspirations. The genius of this project lies in its simplicity and cost-effectiveness, requiring just a clear glass pie plate and a handful of other budget-friendly components. The excitement was immediate; these glass pie plates and saucers are among the most economical and versatile items you can find, making them ideal for a myriad of creative ventures.
As I gathered my supplies, the vision of this elegant bird bath gracing my garden filled me with anticipation. Having recently moved into a new home with a spacious yard, the desire to cultivate an inviting outdoor oasis has been a top priority. This charming DIY bird bath is not just a craft; it’s a step towards attracting beautiful feathered friends and adding a touch of personalized flair to the landscape. Its vintage aesthetic and potential for customization make it a perfect fit for any decor, especially my eclectic boho style. Let’s dive into how you can create this gorgeous piece and transform your own outdoor space into a haven for nature and beauty.
Why a DIY Hanging Glass Bird Bath is a Must-Have for Your Garden
Beyond its undeniable charm, a hanging glass bird bath offers a multitude of benefits for both your garden and the local bird population. For our avian visitors, a clean and accessible water source is vital, especially during warmer months or periods of drought. Bird baths provide essential hydration, a place for preening to maintain feather health, and a refreshing spot to cool down. By offering this simple amenity, you contribute significantly to the well-being of birds in your area, helping them thrive.
For you, the gardener and homeowner, the advantages extend beyond altruism. A beautifully crafted bird bath acts as a focal point, drawing the eye and adding an artistic element to your outdoor decor. Imagine the serene sight of various bird species flitting about, taking sips, or playfully splashing in the water – it’s a living, breathing piece of art that brings tranquility and vibrant life to your backyard. The gentle chirping and fluttering wings create a peaceful ambiance, making your garden an even more enjoyable place to relax and unwind. Furthermore, incorporating a DIY element into your garden fosters a sense of pride and personal connection to your outdoor space, turning it into a truly unique reflection of your style.
This particular hanging design offers practical benefits too. Elevating the water source can help deter ground predators like cats, providing a safer environment for birds. It also makes the bird bath more visible and accessible to birds in flight, encouraging more frequent visits. The glass material not only looks elegant but is also relatively easy to clean, ensuring a healthy water supply for your feathered guests. By choosing a Dollar Tree DIY project, you’re not just creating something beautiful; you’re also embracing sustainable crafting by repurposing affordable items into a functional and aesthetically pleasing garden accessory.
Essential Materials for Your Hanging Glass Bird Bath
One of the most appealing aspects of this project is its accessibility. Most, if not all, of the required materials can be sourced affordably, with Dollar Tree being a prime destination for many items. Before you begin, ensure you have all these components on hand:
- A 10-inch Clear Glass Pie Plate: This is the star of our show, forming the basin of your bird bath. Dollar Tree often stocks these for a dollar or slightly more, making them an incredible base for this project. Opt for a clear one to best showcase the decorative beads and the water within.
- A Pair of Pliers: While the tutorial focuses on fitting the pie plate into the wreath form, pliers might be useful for gently adjusting the wire wreath form if needed, or for any minor modifications to ensure a snug fit.
- Blue Spray Paint (Optional): The original materials list mentions “Ble spray paint,” which we’ll interpret as blue spray paint. While the tutorial focuses on the natural look of the materials, you can use this to add a personalized touch. Consider spray painting your wire wreath form a vibrant blue to complement the glass beads, or a metallic shade to enhance its look. Always ensure you’re working in a well-ventilated area when using spray paint.
- DAP Rapid Fuse All-Purpose Adhesive (or your preferred strong glue): A robust, waterproof adhesive is crucial for securing the glass beads to your pie plate, ensuring they withstand outdoor elements. DAP Rapid Fuse is an excellent choice for its quick-drying properties and strong bond. Other suitable options include E6000, Gorilla Glue Clear Grip, or any adhesive specifically designed for glass and outdoor use. Make sure it’s waterproof and capable of forming a durable bond.
- 12-inch Wire Wreath Form: This metal ring will serve as the sturdy frame that holds your glass pie plate, allowing it to hang securely. Dollar Tree frequently carries these, often for seasonal decorations, but they are perfect for this year-round project. Ensure it’s robust enough to support the weight of the glass plate and water.
- Blue and Clear Glass Beads: These decorative elements will transform a simple pie plate into a shimmering, eye-catching bird bath. The combination of blue and clear beads creates a lovely aquatic feel, but feel free to choose colors that match your garden’s aesthetic or your personal preference. Dollar Tree and other craft stores offer a wide variety of beads, often in bags that provide more than enough for this project. Consider various shapes and sizes for added texture and visual interest.
With these materials assembled, you’re ready to embark on a fun and rewarding crafting journey!
Step-by-Step Guide to Crafting Your DIY Hanging Glass Bird Bath
This project, inspired by the innovative design shared in the video tutorial for a glass hanging bird bath by Lori Blye DIY on YouTube, is wonderfully straightforward. You’ll be amazed at how quickly you can create a charming addition to your garden.
Step 1: Preparing Your Workspace and Materials
Before you begin, set up a clean, well-lit workspace. If you plan to use spray paint, ensure you’re in a well-ventilated area, preferably outdoors, and lay down newspaper or a drop cloth to protect surfaces. Gently clean your glass pie plate with soap and water to remove any dust, labels, or residues. Dry it thoroughly. This ensures optimal adhesion for your decorative beads. If you opt to spray paint your wire wreath form, do so now and allow it ample time to dry completely according to the paint manufacturer’s instructions.
Step 2: Fitting the Glass Pie Plate into the Wire Wreath Form
This is where the magic begins. Take your 12-inch wire wreath form and carefully place your 10-inch clear glass pie plate into its center. The goal is for the edges of the pie plate to rest securely on the inner circumference of the wreath form. Depending on the exact dimensions of your items, you might find a perfect fit immediately. If the pie plate feels a little loose, you can use your pliers to gently (and carefully!) bend or adjust the wire form’s inner rings to create a more snug and stable cradle for the glass. The pie plate should sit level and firmly without wobbling, as it will hold water and attract birds.
Step 3: Planning Your Bead Design
Before applying any adhesive, take a moment to arrange your blue and clear glass beads on the rim or bottom of the pie plate. Experiment with different patterns – a simple alternating design, a clustered look, or perhaps an intricate mosaic. This dry run allows you to visualize the final appearance and make any adjustments without the pressure of wet glue. Consider how the light will catch the different colors and shapes of the beads. This step ensures you achieve the aesthetic you desire.
Step 4: Adhering the Glass Beads
Once you’re satisfied with your design, it’s time to glue the beads. Working in small sections, apply a thin but consistent line or dot of your chosen all-purpose adhesive to the glass surface where you want to place the beads. Carefully press each glass bead firmly into the glue. For the best results and a clean finish, avoid using too much glue that might squeeze out from under the beads. Continue this process around the entire visible rim or bottom of the pie plate, following your planned design. Pay attention to the spacing and alignment of the beads to maintain a cohesive look.
Step 5: Curing the Adhesive and Final Touches
After all the beads are in place, it’s crucial to allow the adhesive ample time to cure completely. Refer to your adhesive’s instructions for recommended drying and curing times, which can range from a few hours to 24-72 hours for full strength. Resist the urge to move or hang your bird bath during this period to ensure the beads bond securely. Once fully cured, inspect your bird bath. If any small gaps exist between beads, you can use a fine tip to apply a tiny bit more glue for added stability, though this is usually unnecessary if enough glue was applied initially. Your beautiful hanging glass bird bath is now ready!
Personalizing Your Bird Bath and Enjoying Your Creation
The beauty of DIY lies in its potential for personalization. While the blue and clear beads offer a classic and serene look, don’t hesitate to experiment with different color palettes and bead types. Imagine vibrant reds and oranges for a fiery sun-kissed effect, or earthy greens and browns for a more natural, rustic appeal. You could even incorporate small glass gems, marbles, or mosaic pieces for unique textures and patterns. The wire wreath form itself can be adorned with ribbons, artificial leaves, or even small solar-powered lights to make your bird bath glow after dusk.
Once complete, choose the perfect spot in your garden to hang your new creation. Consider a location visible from a window or patio, allowing you to enjoy the sight of birds without disturbance. Ensure it’s hung from a sturdy branch, shepherd’s hook, or garden stand, away from direct sunlight if possible to slow water evaporation and keep the water cooler. Fill the basin with fresh, clean water daily, especially during hot weather. Regular cleaning of the bird bath is essential to prevent algae growth and ensure a healthy environment for birds. A simple scrub with a brush and water, followed by a rinse, will suffice.
This project is more than just a craft; it’s an invitation to connect with nature and enhance your outdoor living space with a touch of handmade elegance. The vintage charm of a glass pie plate combined with the glimmer of glass beads will undoubtedly turn your backyard into an outdoor oasis, perfectly complementing a wide range of decor styles, from my beloved eclectic boho to modern minimalist. Get ready to enjoy the serene beauty and lively activity your new hanging glass bird bath will bring!