
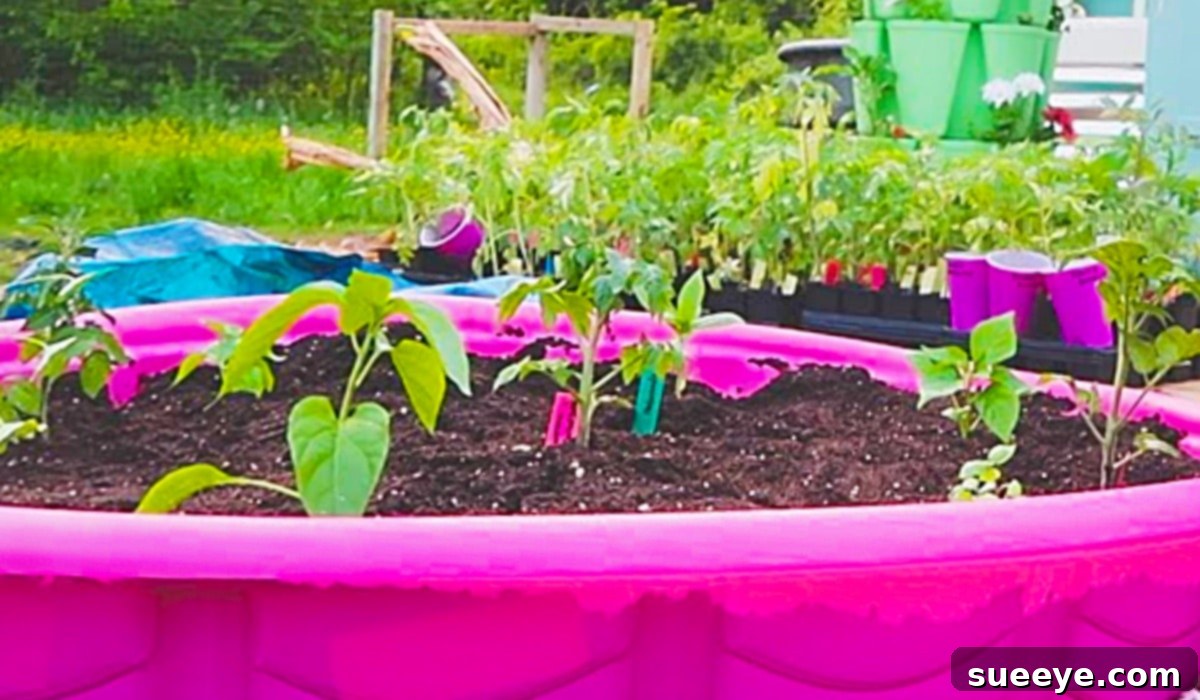
DIY Kiddie Pool Raised Garden Bed: Your Ultimate Guide to Affordable Urban Gardening
In an era where sustainability and self-sufficiency are highly valued, growing your own food has become more popular than ever. While traditional gardening methods can seem daunting or expensive, the innovative use of a simple kiddie pool offers an incredibly easy and budget-friendly solution for creating a thriving raised garden bed. This ingenious method allows you to cultivate a wide variety of vegetables, herbs, and even some fruits, right in your backyard, patio, or balcony.
We recently discovered an amazing tutorial by Roots & Refuge Farm on YouTube, showcasing how to transform an inexpensive kiddie pool into a highly effective raised garden. This simple yet brilliant approach is perfect for beginners, urban dwellers, or anyone looking to expand their growing space without breaking the bank. The versatility of a kiddie pool raised bed is truly remarkable; its circular design allows for diverse planting arrangements, from clustering herbs around the edges to dedicating the central area to larger vegetables. Furthermore, integrating a soaker hose system can create a professional-grade irrigation setup, ensuring consistent moisture and healthy plant growth.
Why Choose a Kiddie Pool for Your Raised Garden?
The concept of using a kiddie pool for gardening might sound unconventional, but it offers a multitude of benefits that make it an ideal choice for many gardeners:
- Unbeatable Affordability: Compared to traditional raised garden bed kits or constructing one from lumber, a kiddie pool is incredibly cheap. You can often find them for less than $20 at discount stores, making gardening accessible to everyone regardless of budget.
- Effortless Setup: There’s no complex assembly, cutting wood, or heavy construction required. A kiddie pool is essentially a ready-made container, significantly cutting down on setup time and effort.
- Portability and Flexibility: While full, it’s heavy, but an empty kiddie pool is lightweight and easy to move. This flexibility allows you to experiment with different sun exposures in your yard or relocate your garden if you move homes.
- Optimal for Shallow-Rooted Plants: The typical depth of a kiddie pool is ideal for a vast array of popular garden edibles, including leafy greens, herbs, radishes, and many types of peppers, allowing them to thrive without needing deep soil.
- Excellent Drainage Control: With a few simple modifications, you can create a customized drainage system, preventing waterlogging and promoting healthy root development.
- Pest Deterrence: Elevated from the ground, kiddie pool gardens can offer a slight advantage in deterring ground-dwelling pests like slugs and snails, though further measures might still be needed for other garden pests.
- Aesthetic Charm: While functional, a well-planted kiddie pool can also add a whimsical and charming touch to your outdoor space, especially when adorned with vibrant plants.
Essential Materials for Your Kiddie Pool Raised Garden:
Gathering your materials is the first exciting step in bringing your kiddie pool garden to life. Most items are readily available and won’t strain your wallet.
- A Kiddie Pool: Look for a sturdy, plastic kiddie pool. Hard plastic options are generally more durable than inflatable ones. Check your local Dollar General, Walmart, hardware stores, or even online marketplaces for cheap finds. Sizes vary, so choose one that fits your space and gardening aspirations.
- Gardening Soil: Approximately three 50-pound bags of quality potting mix or raised bed soil will typically fill a standard-sized kiddie pool. While regular garden soil can be used, a potting mix is often lighter, offers better drainage, and is formulated for container growing, providing essential nutrients for your plants.
- Your Choice of Plants and Seeds: The shallow depth of a kiddie pool is perfect for a wide variety of edibles. Consider leafy greens (lettuce, spinach, kale, Swiss chard), broccoli, cauliflower, bush beans, compact squash varieties, peppers, radishes, and a bounty of herbs (basil, cilantro, parsley, mint, thyme).
- Drill with a large bit (1/4 to 1/2 inch): For creating drainage holes.
- Optional: Soaker Hose or Drip Line: For efficient, hands-off watering.
- Optional: Cinder Blocks or Bricks: To elevate the pool for better drainage and accessibility, and to potentially help keep a soaker hose moist if used underneath.
Directions: Setting Up Your Kiddie Pool Raised Garden Step-by-Step
Creating your kiddie pool raised bed is a straightforward process that even the most novice gardener can master. Follow these simple steps to get started:
Step 1: Prepare for Drainage
Good drainage is crucial for any successful container garden. Without it, your plants’ roots can rot. Begin by drilling several holes in the bottom of your kiddie pool. Aim for 8-12 holes, spaced evenly across the bottom, using a 1/4 to 1/2 inch drill bit. This will ensure that excess water can escape freely. If you plan to elevate your pool, place cinder blocks or sturdy bricks in your desired location before adding soil, ensuring the area beneath the pool remains clear for water runoff.
Step 2: Select Your Garden Site
Choose a location that receives ample sunlight – most vegetables require at least 6-8 hours of direct sun per day. Ensure the spot is relatively level to prevent the pool from tipping once filled with heavy soil and water. Consider proximity to a water source for easy watering.
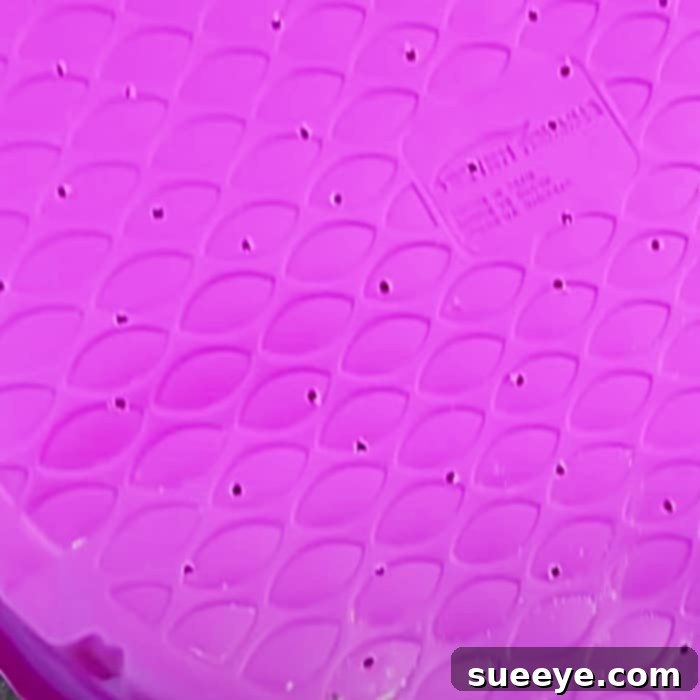
Step 3: Fill with Quality Soil
Once your drainage holes are ready and the pool is in its desired location, it’s time to add the soil. Carefully empty your bags of potting mix into the kiddie pool, filling it almost to the brim, leaving about 1-2 inches from the top rim. This allows space for watering without overflow. Break up any large clumps of soil to ensure a consistent, aerated bed for your plants. Remember, a good quality potting mix provides the ideal environment for container-grown plants, offering essential nutrients and excellent water retention while still draining well.
Step 4: Plant Your Seeds or Seedlings
Now comes the most exciting part – planting! Whether you’re starting with seeds or transplanting seedlings, arrange them according to their spacing requirements. The circular shape of the kiddie pool lends itself well to various planting patterns. You can plant in concentric circles, create small clusters, or mix and match different types of plants for a diverse harvest. Consider companion planting to maximize space and promote healthier growth. For instance, basil thrives alongside tomatoes (though tomatoes might outgrow a kiddie pool quickly), and marigolds can help deter pests from leafy greens. The sky is truly the limit when it comes to plant selection for this charming garden setup!
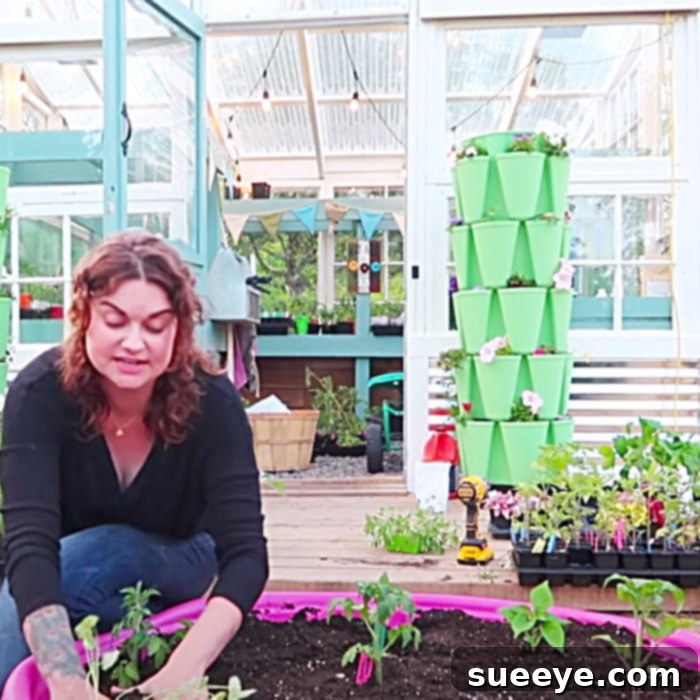
Step 5: Initial Watering and Ongoing Care
After planting, water your garden thoroughly. If you’ve chosen to install a soaker hose, lay it gently on the soil surface, weaving it around your plants. This method delivers water directly to the roots, minimizing evaporation and keeping plant leaves dry, which can reduce the risk of fungal diseases. Regularly check the soil moisture by sticking your finger about an inch or two deep; if it feels dry, it’s time to water. Consistency is key, especially during hot, dry periods.
Ideal Plants for Your Kiddie Pool Raised Garden
The relatively shallow depth of a kiddie pool makes it perfect for a range of delicious and easy-to-grow plants:
- Leafy Greens: Lettuce (loose-leaf varieties work best), spinach, kale, arugula, Swiss chard. These thrive in shallow conditions and provide continuous harvests.
- Herbs: Basil, mint (keep in a separate pot within the pool, as it can be invasive), cilantro, parsley, thyme, oregano, chives. Plant them around the edges for easy access.
- Root Vegetables (shallow varieties): Radishes, short carrots, small-sized turnips.
- Bush Vegetables: Bush beans and peas are excellent choices as they don’t require extensive trellising and produce abundant yields.
- Compact Fruiting Plants: Consider dwarf pepper varieties, cherry tomatoes (choose determinate or bush varieties), or strawberries. Ensure they get enough sunlight.
- Flowers: Edible flowers like nasturtiums or pansies can add beauty, while marigolds can help deter pests.
Tips for Maximizing Your Kiddie Pool Garden Success
- Sunlight is Key: Most vegetables need at least 6-8 hours of direct sunlight daily. Observe your chosen spot throughout the day to ensure it gets adequate sun exposure.
- Consistent Watering: Raised beds, especially shallow ones, dry out faster than in-ground gardens. Monitor soil moisture daily and water consistently, especially during hot weather.
- Nutrient Boost: As plants grow, they consume nutrients from the soil. Supplement your garden with a balanced organic liquid fertilizer every few weeks, or incorporate compost into your potting mix at the beginning of the season.
- Pest and Disease Management: Regularly inspect your plants for signs of pests or diseases. Early detection makes control much easier. Use organic pest control methods if necessary.
- Succession Planting: For continuous harvests of leafy greens and radishes, plant small batches every 2-3 weeks. As one crop finishes, you’ll have another ready to harvest.
- Consider Vertical Elements: For vining plants like cucumbers or smaller squash, incorporate a small trellis or support structure to maximize space and encourage upward growth.
More Than Just a Garden: A Lifestyle Choice
Embracing the kiddie pool raised garden bed concept is more than just a gardening hack; it’s a step towards a more sustainable and self-reliant lifestyle. It democratizes gardening, making it accessible to those with limited space, budget, or experience. The joy of harvesting your own fresh produce, knowing exactly where it came from, and sharing it with loved ones is an incredibly rewarding experience.
So, why wait? Grab an inexpensive kiddie pool and embark on your own urban gardening adventure. With minimal investment and effort, you can transform a simple plastic pool into a bountiful oasis, providing fresh, organic food right at your fingertips. Happy gardening!