
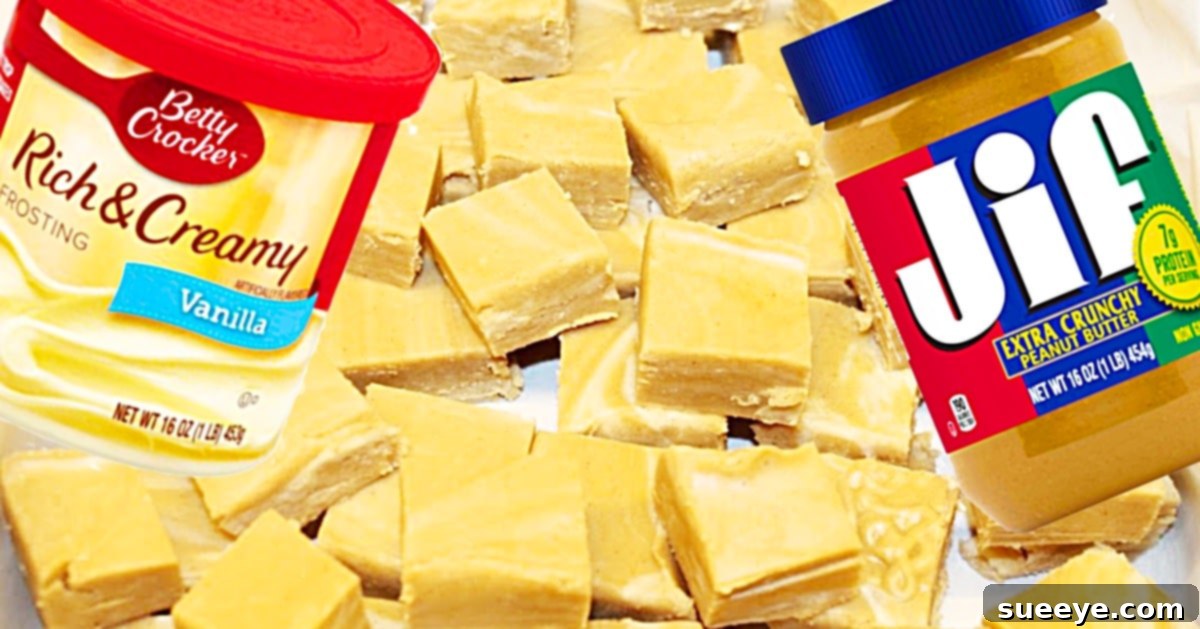
The Ultimate Guide to 2-Ingredient Peanut Butter Fudge: Quick, Easy, and Delicious Homemade Treat
Fudge holds a special place in the hearts of candy lovers worldwide. Its rich, creamy texture and intense sweetness make it an irresistible indulgence, perfect for any occasion. While many people associate fudge with complex recipes and tedious hours in the kitchen, we’re here to shatter that misconception with an unbelievably simple method for creating delicious homemade fudge. Imagine crafting a delectable confection that tastes like it came from a gourmet candy shop, yet requires only two basic ingredients and minimal effort. This isn’t just a dream; it’s the reality of the 2-ingredient peanut butter fudge.
Among the vast array of homemade candies, fudge stands out as both a classic and a versatile treat. It’s a wonderful dessert to share with loved ones, a perfect accompaniment to a cup of coffee, or an impressive handmade gift during the holidays. For years, I’ve cherished the tradition of making fudge to give to friends and family, always seeking out new and exciting recipes to add to my repertoire. When I stumbled upon this brilliant peanut butter fudge video recipe tutorial by Tami Dunn on YouTube, I instantly recognized it as a game-changer. This recipe redefines simplicity, proving that you don’t need a pantry full of ingredients or advanced culinary skills to whip up something truly extraordinary. It promises, and delivers, a truly effortless approach to one of the most beloved candies.
What makes this particular peanut butter fudge recipe so revolutionary? Its incredible simplicity. You only need two humble ingredients: a jar of your favorite peanut butter and a can of vanilla frosting. That’s it! No candy thermometer, no complicated steps, no hours of stirring over a hot stove. This minimal ingredient list not only saves time and money but also makes it an accessible recipe for anyone, regardless of their baking experience. Whether you’re a seasoned chef or a complete novice in the kitchen, this 2-ingredient wonder ensures a foolproof path to perfectly creamy, melt-in-your-mouth peanut butter fudge every single time. Prepare to be amazed by how easily you can create such a delightful treat!
Why Homemade Fudge Is Always a Win
There’s a unique charm and satisfaction that comes with homemade treats, and fudge is no exception. Beyond the sheer joy of indulging in something delicious, making fudge at home offers several compelling advantages. Firstly, it’s incredibly cost-effective compared to buying artisanal fudge from specialty stores. With just two common ingredients, you can produce a generous batch that would otherwise cost a fortune.
Secondly, homemade fudge allows for complete customization. While this 2-ingredient recipe is fantastic on its own, it also serves as a perfect base for experimentation. You can easily add various mix-ins like chocolate chips, chopped nuts, or even a sprinkle of sea salt to elevate the flavor profile. Knowing exactly what goes into your dessert also provides peace of mind, especially for those with dietary concerns or who prefer to avoid artificial additives often found in store-bought varieties.
Finally, the act of making fudge can be a wonderfully therapeutic experience. The simple process, the delightful aroma filling your kitchen, and the anticipation of a delicious outcome all contribute to a sense of accomplishment. And when you share your homemade fudge, whether as a thoughtful gift or a post-dinner treat, you’re not just sharing a dessert; you’re sharing a piece of your effort and care, making the experience even more special for everyone involved.
The Magic Behind the Two Ingredients
At first glance, the idea of making fudge with just peanut butter and frosting might seem too good to be true. However, these two ingredients are culinary powerhouses that, when combined, create a magical transformation into perfectly set fudge. Understanding their roles helps appreciate the genius of this simple recipe.
Peanut Butter: The Flavor and Fat Foundation. Peanut butter is the star of this recipe, providing not only its distinctive, beloved flavor but also crucial fats and proteins that contribute to the fudge’s texture. The oils in peanut butter, especially full-fat varieties, are essential for creating a smooth, rich mouthfeel. It also acts as a binder when cooled, giving the fudge its solid yet melt-in-your-mouth consistency. You have the flexibility to choose between creamy peanut butter for a silky finish or crunchy peanut butter if you prefer a delightful textural contrast with tiny nut pieces.
Vanilla Frosting: The Sweetener and Binder. The canned vanilla frosting might be the unsung hero here. It’s much more than just a sweet topping; it’s a pre-made mixture of sugar, fats, and emulsifiers that are perfectly balanced to provide sweetness, creaminess, and structure. When heated, the frosting melts into a smooth, thick liquid. Upon cooling, its sugars and fats recrystallize, setting the fudge and binding the peanut butter into a stable form. The vanilla flavor from the frosting also complements the peanut butter beautifully, creating a harmonious and classic taste profile. This clever use of frosting eliminates the need for granulated sugar, milk, butter, and the precise temperature monitoring typically associated with traditional fudge recipes, making the process incredibly straightforward and forgiving.
Ingredients For Peanut Butter Fudge: What You’ll Need
Gathering your ingredients for this incredibly simple recipe is perhaps the easiest part! Just two items are required to create a batch of delightful peanut butter fudge.
- 1 can of vanilla frosting (approximately 16 ounces): Standard store-bought vanilla frosting works perfectly. You can experiment with different brands, but a classic creamy vanilla flavor is recommended for the best results.
- 1 jar of peanut butter (approximately 16-18 ounces): Both creamy and crunchy peanut butter varieties can be used based on your preference. For the creamiest fudge, opt for smooth peanut butter. If you enjoy a slight bite and nutty texture, crunchy peanut butter is an excellent choice. Ensure it’s not an all-natural peanut butter that separates significantly, as this might alter the texture; a standard processed peanut butter tends to work best for consistency.
Directions: Crafting Your Easy Peanut Butter Fudge
Preparing this 2-ingredient peanut butter fudge is so simple, you’ll wonder why you haven’t tried it sooner. Follow these straightforward steps to create a batch of irresistible homemade candy.
Step 1: Prepare Your Workstation
Before you begin, ensure you have all your tools ready. You’ll need a microwave-safe mixing bowl (large enough to comfortably mix both ingredients), a spatula, and an 8×8 or 9×9 inch baking pan. Line your baking pan with parchment paper, leaving an overhang on the sides. This parchment paper sling will make it incredibly easy to lift the set fudge out of the pan for cutting later, ensuring a clean and effortless removal.
Step 2: Combine and Heat the Ingredients
Open your jar of peanut butter and scoop its entire contents into the microwave-safe mixing bowl. Next, open the can of vanilla frosting and add all of it to the same bowl. Place the bowl containing both ingredients into the microwave. Heat them on high for approximately 1 minute. The goal here is to gently melt and soften both the peanut butter and the frosting, allowing them to become pliable and easy to blend. Keep an eye on the mixture; microwave strengths vary, and you want them just melted, not boiling. If necessary, you can heat for an additional 30 seconds, stirring in between, until both components are soft and warm.
Step 3: Mix Until Smooth
Once the peanut butter and frosting are adequately melted, remove the bowl from the microwave. Using your spatula, begin to thoroughly mix the two ingredients together. Stir vigorously until the mixture is completely combined and smooth. You’ll notice the peanut butter and frosting transforming into a rich, uniform fudge batter. For a classic, consistent fudge, aim for a perfectly blended consistency where no streaks of separate ingredients are visible. However, if you prefer a subtle marbled effect, as sometimes done in the original Tami Dunn video recipe tutorial, you can stop mixing when just a few streaks remain, adding a unique visual appeal to your fudge.
Step 4: Pour and Set
Carefully pour the warm, mixed fudge batter into your prepared baking pan lined with parchment paper. Use your spatula to spread the mixture evenly across the bottom of the pan, ensuring a consistent thickness. Once smoothed, place the pan into the refrigerator. It is crucial to allow the fudge to chill for several hours, ideally a minimum of 2 to 4 hours, or even overnight for the best results. This refrigeration time is essential for the fudge to firm up completely and achieve its characteristic solid, sliceable texture. Resist the urge to cut it too soon, as it might not be fully set and could crumble.
Step 5: Slice and Serve
After the fudge has been thoroughly chilled and is firm to the touch, use the parchment paper overhang to carefully lift the entire slab of fudge out of the baking pan and place it onto a cutting board. Using a sharp knife, cut the fudge into desired squares or rectangles. For cleaner cuts, you can slightly warm your knife under hot water and wipe it dry between slices. This simple technique helps prevent the fudge from sticking and ensures neat, presentable pieces. Your delicious, homemade peanut butter fudge is now ready to be served and enjoyed!
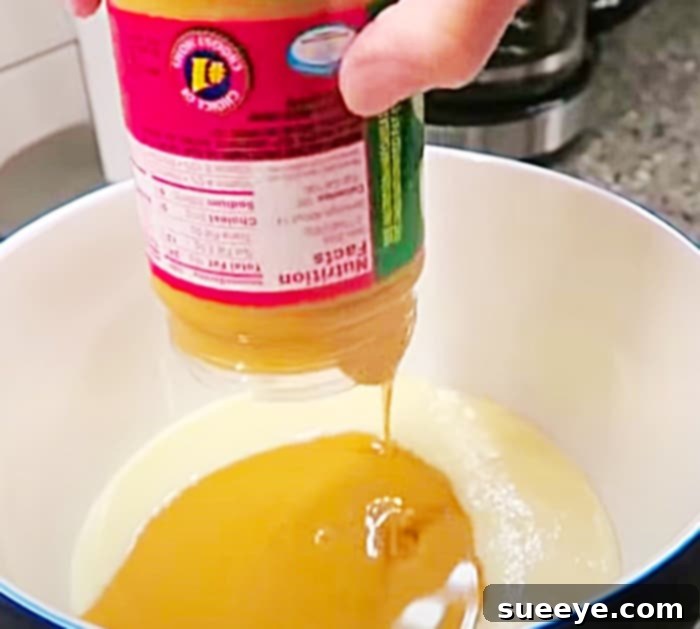
The beauty of this recipe truly lies in its incredible ease. From the moment you combine the two ingredients to the final slice, the process is streamlined and stress-free. There’s no complex chemistry, no delicate balance of temperatures – just simple, straightforward steps that yield spectacular results every single time. This is genuinely a dessert that anyone can master, offering a delightful reward for minimal effort. Once your fudge is perfectly set and cut, it’s ready to be stored or shared. You can place the squares in decorative tins for holiday gifts, arrange them on a platter for guests, or simply keep them in an airtight container for your personal enjoyment. It really is that easy and that satisfying!
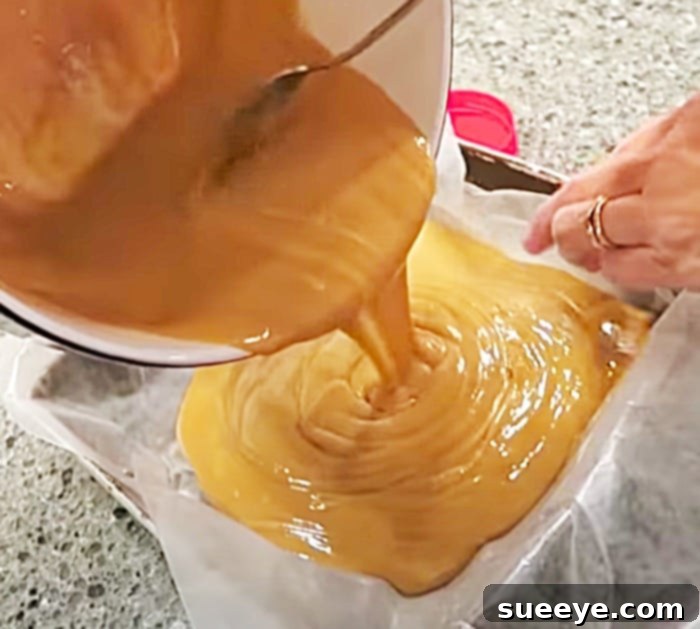
Tips for Fudge Perfection and Creative Variations
While this 2-ingredient peanut butter fudge recipe is remarkably forgiving, a few tips can help ensure your batch is absolutely perfect. Additionally, there are many ways to get creative and customize your fudge to suit different tastes.
Pro Tips for the Best Results:
- Quality of Ingredients: Although the recipe is simple, using good quality peanut butter and frosting will make a difference in the final taste. Avoid low-fat or natural peanut butter with excessive oil separation, as this can affect the texture and setting of the fudge.
- Don’t Overheat: When microwaving, heat just until the ingredients are soft and warm enough to mix. Overheating can sometimes lead to a slightly grainy texture.
- Parchment Paper is Key: Don’t skip lining your pan with parchment paper. It makes removal and cutting incredibly easy, preventing sticking and mess.
- Thorough Chilling: Patience is a virtue when it comes to setting fudge. Allow ample time for refrigeration. Rushing this step will result in soft, unset fudge that is difficult to cut.
Creative Variations to Try:
- Chocolate Drizzle: Once the fudge is set and cut, melt some chocolate chips and drizzle them over the top for a beautiful and delicious peanut butter chocolate combination.
- Mix-Ins: Fold in some mini chocolate chips, chopped peanuts, Reese’s Pieces, or even a handful of mini marshmallows into the warm fudge mixture before pouring it into the pan. This adds texture and extra flavor.
- Sea Salt Sprinkle: For a popular sweet and salty contrast, sprinkle a pinch of flaky sea salt over the top of the fudge before refrigerating it.
- Different Frosting Flavors: While vanilla is classic, you could experiment with other frosting flavors like chocolate frosting for a “Reese’s” style fudge, or even cream cheese frosting for a tangy twist (though this might slightly alter the texture).
Storage Suggestions
Proper storage ensures your homemade peanut butter fudge stays fresh and delicious for as long as possible. Store the cut fudge pieces in an airtight container. It can be kept at room temperature for up to a week, though for extended freshness and to maintain its firm texture, storing it in the refrigerator is recommended. Refrigerated fudge can last for up to two weeks. For longer storage, you can even freeze fudge for up to two months. Just be sure to wrap it tightly in plastic wrap and then place it in an airtight freezer-safe container to prevent freezer burn. Thaw it in the refrigerator or at room temperature before serving.
A Holiday Favorite and Perfect Gift
This 2-ingredient peanut butter fudge isn’t just easy; it’s also incredibly versatile and makes for a fantastic gift. During the holiday season, when time is often short but the desire to give thoughtful, homemade gifts is high, this recipe shines. Its simplicity means you can easily whip up large batches, cutting them into small, uniform squares that fit perfectly into decorative tins or cellophane bags. Imagine the delight of friends, family, and neighbors receiving a homemade gift that tastes so rich and luxurious, yet took you mere minutes to prepare. It’s a wonderful way to spread joy and deliciousness without the usual stress associated with holiday baking. This recipe truly proves that the most memorable gifts can often be the simplest to create.
Conclusion: The Easiest, Most Delicious Fudge You’ll Ever Make
In the world of homemade confections, this 2-ingredient peanut butter fudge recipe by Tami Dunn stands as a testament to the power of simplicity. It defies expectations, proving that you don’t need a lengthy ingredient list or complex techniques to create something truly delicious and impressive. From its smooth, creamy texture to its rich, classic peanut butter flavor, every bite is a delightful experience that belies the minimal effort required. I can confidently say this is one of the easiest, most delicious, and most rewarding recipes I have ever had the pleasure of making.
Whether you’re looking for a quick dessert fix, a fun baking project with the kids, or a heartfelt homemade gift, this recipe is your go-to solution. It takes the stress out of candy-making and puts pure enjoyment back in. So, next time you’re craving something sweet or need a last-minute treat, remember the magic of peanut butter and vanilla frosting. Give this incredible 2-ingredient peanut butter fudge a try, and prepare to be amazed by the deliciousness you can create with so little effort. Happy fudging!