
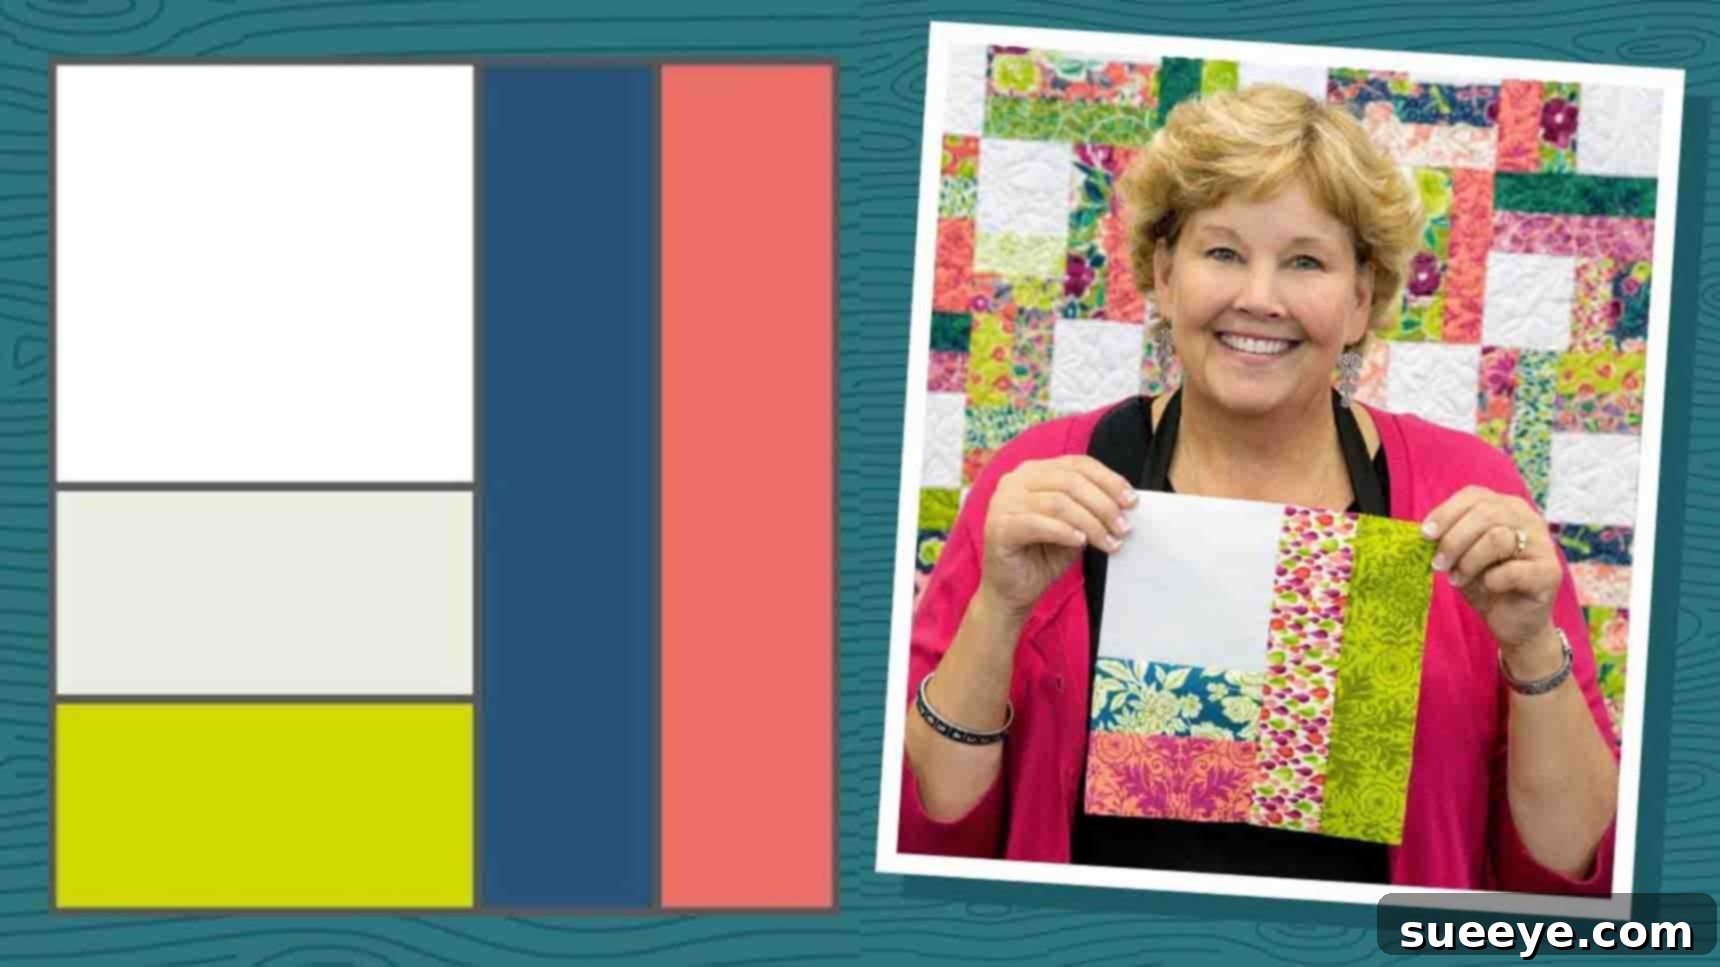
Master the Two-Step Quilt: A Quick & Easy Project for Every Quilter
Are you searching for a captivating yet wonderfully quick quilting project to brighten your weekend? Look no further! The Two-Step Quilt, a brilliant design from the acclaimed Missouri Star Quilt Company and showcased by the beloved Jenny Doan on their YouTube channel, is an absolute gem for quilters of all skill levels. This project is specifically designed to be fast, incredibly easy, and offers immense creative freedom, allowing you to play with vibrant patterns and fabric combinations. Utilizing convenient pre-cut fabrics alongside a bit of yardage, you’ll be amazed at how quickly a beautiful quilt top comes together. Whether you’re a seasoned quilter looking for instant gratification or a beginner eager to complete your first substantial project, the Two-Step Quilt promises a satisfying and enjoyable crafting experience. Dive into our comprehensive guide, where we break down the step-by-step instructions, share essential tips, and help you create a stunning quilt with ease.
Essential Materials for Your Two-Step Quilt
One of the beauties of the Two-Step Quilt is its reliance on readily available and often pre-cut materials, which significantly speeds up the preparation process. Gathering all your supplies beforehand ensures a smooth and uninterrupted creative flow. Here’s what you’ll need to embark on this exciting quilting journey:
- One Roll of 2.5″ Strips (Jelly Roll): This forms the colorful heart of your quilt. A standard jelly roll typically contains 40 strips of fabric, each 2.5 inches wide and 42 inches long. Using a pre-cut roll saves you hours of cutting and ensures all your strips are perfectly uniform, contributing to a professional finish.
- 1 & 3/4 Yards Background Fabric: This fabric will provide the crucial contrast and structure for your quilt blocks, including the inner border. Opt for a solid, a low-volume print, or a subtle blender that harmonizes with or makes your 2.5″ strips pop. This yardage will be cut into 5-inch squares that become the central elements of your “two-step” blocks.
- 1 & 3/4 Yards Outer Border Fabric: The outer border frames your quilt top, giving it a polished and complete look. Choose a fabric that complements your quilt’s overall color scheme and adds a finishing touch. This can be a continuation of your background fabric for a cohesive look or a contrasting print for added visual interest.
- 5 & 1/2 Yards Backing Fabric (for vertical seams): The backing fabric provides stability and a soft underside for your quilt. The specified yardage accounts for a typical quilt size that might require vertical seams to create a wide enough piece. When selecting, consider how it feels to the touch and how it complements the front, even if it’s only seen when flipped over.
- Basic Quilting Supplies: Don’t forget your quilting essentials! This includes a rotary cutter, cutting mat, quilting ruler (a 6″ x 24″ ruler is ideal), sewing machine, thread (neutral color recommended for piecing), fabric scissors, straight pins or wonder clips, and an iron with an ironing board for pressing seams.
Having these materials ready will set you up for a seamless and enjoyable quilting experience, allowing you to focus purely on the creative assembly.
Step-by-Step Directions to Create Your Two-Step Quilt
The beauty of the Two-Step Quilt lies in its straightforward construction, broken down into two main phases: creating the foundational strip sets and then assembling these into striking blocks. Follow these detailed instructions to bring your quilt to life.
Step 1: Preparing Your Strip Sets and Assembling the First Half of Your Blocks
This initial stage focuses on efficient strip piecing and the careful creation of the first segment of your unique quilt blocks.
- Unpack and Pair Your Strips: Begin by carefully unwrapping your roll of 2.5-inch strips. Lay them out and then match them up into pairs. Try to create visually appealing combinations, considering how the colors and patterns will interact. You’ll work with these pairs throughout this step.
- Sew Your Strip Pairs: Take each matched pair of strips and place them right sides together, aligning all raw edges. Using a consistent 1/4-inch seam allowance, sew them together along one long edge. To maximize efficiency, consider chain piecing: feed one pair after another through your sewing machine without cutting the thread between them. This saves time and thread. Continue this process until all 21 (or however many pairs you have from your jelly roll) sets of strips are sewn together.
- Press Your Strip Sets: Once all your strip pairs are sewn, it’s crucial to press the seams. For this project, pressing the seams open is often recommended as it helps reduce bulk and creates flatter blocks, contributing to a more precise finish. Carefully press each seam open using a warm iron, ensuring the fabric lies flat and smooth.
- Prepare Your Background Fabric Squares: Now, take your 1 & 3/4 yards of background fabric. From this, cut 5-inch squares. These squares will serve as the central “charm” element of your blocks, providing a crisp contrast to your colorful strip sets.
- Cut Your Strip Sets into Segments: From your pressed strip sets (each now consisting of two sewn 2.5-inch strips), cut segments that are 5 inches wide. To do this accurately, align a ruler across your strip set, ensuring your 5-inch mark is precise. You should yield several 5-inch segments from each strip set.
- Attach the First Strip Segment to Your Background Square: Take one 5-inch background fabric square. Now, select one of your 5-inch wide strip set segments. Lay the strip segment right sides together with one edge of the background square, aligning the raw edges. Sew them together using a precise 1/4-inch seam allowance.
- Press the Block Unit: After sewing, press this newly formed unit. Again, pressing the seam open or towards the darker fabric (if you prefer this method) will help create a flat and stable piece. You now have a background square with a two-strip segment attached to one side.
Step 2: Completing Your Quilt Blocks and Assembling the Quilt Top
This second step involves adding the final strip segment to complete your blocks and then thoughtfully arranging them to form your captivating quilt top.
- Prepare the Second Strip Segment: Go back to your remaining unsewn 2.5-inch strips. Before cutting, remember to trim off any selvage edges to ensure all usable fabric is 2.5 inches wide. From these strips, cut individual pieces that are 9 inches long. These will form the second, longer segment of your blocks.
- Attach the Second Strip Segment: Take one of the block units you created in Step 1 (the background square with the two-strip segment attached). Now, take one of your freshly cut 9-inch strip pieces. Lay this 9-inch strip along the *opposite* side of the background square from where the first strip segment is attached, ensuring right sides are together and raw edges are aligned. Sew them together with a consistent 1/4-inch seam allowance.
- Press and Complete Your Block: Once sewn, press this final seam open or towards the darker fabric. Congratulations! You have now completed a single Two-Step Quilt block. Repeat this process for all your background fabric squares and strip segments until you have a full collection of identical blocks.
- Lay Out Your Quilt Blocks for Design: This is where the magic happens and your quilt’s unique pattern emerges. Find a large, flat surface – a design wall, the floor, or a large table – to lay out your completed blocks. The distinctive “two-step” pattern is created by alternating the orientation of your blocks in each row.
- For the First Row: Begin by placing the first block with the short, two-strip segment at the bottom and the background fabric square at the top. The next block in the row will be placed in the opposite orientation: the background fabric square at the bottom and the short strip segment at the top. Continue this alternating pattern across the entire length of your first row.
- For Subsequent Rows: The key to the design is how the rows interact. For your second row, you will start with a block oriented *opposite* to the very first block of the first row. So, if your first row started with the short strips at the bottom, your second row will begin with the background square at the bottom. This alternating start for each subsequent row creates a captivating visual interplay of light and dark, strips and squares, forming the signature Two-Step pattern.
Spend time arranging and rearranging your blocks until you are completely satisfied with the overall design and color distribution. Take a step back and view it from a distance to catch any misplaced blocks.
- Sew Your Rows Together: Once your layout is finalized, begin sewing your blocks into rows. Take the blocks from your first row, place them right sides together, and sew them with a 1/4-inch seam allowance. Continue until all blocks in that row are joined. Repeat this for every row. Press the seams in alternate directions for adjacent rows (e.g., press seams to the left for row 1, to the right for row 2). This technique, known as “nesting” seams, helps to reduce bulk where seams meet and ensures perfectly aligned points.
- Join Your Rows to Form the Quilt Top: After all your rows are sewn and pressed, it’s time to join them. Place your first two rows right sides together, carefully aligning all seam intersections. Pin generously to hold everything in place, especially at the points where the block seams meet. Sew with a 1/4-inch seam allowance. Continue adding each subsequent row until your entire quilt top is assembled. Press these long horizontal seams, generally pressing them open for a flat finish.
Tips for Quilting Success with the Two-Step Quilt
Achieving a beautiful and professional-looking quilt doesn’t have to be daunting. Here are some invaluable tips to enhance your Two-Step Quilt journey:
- Accurate Cutting is Key: While pre-cuts save time, precision in your subsequent cuts (like the 5-inch segments from your strip sets and the 5-inch background squares) is paramount. Use a sharp rotary cutter, a non-slip ruler, and a self-healing mat to ensure all your pieces are exact. Even a slight discrepancy can throw off your entire quilt.
- Consistent Seam Allowance: A perfect 1/4-inch seam allowance is the cornerstone of accurate piecing. Practice on scrap fabric if needed. Many quilters use a 1/4-inch foot on their sewing machine or place a piece of painter’s tape on their machine bed as a guide to maintain consistency.
- Pressing Matters: Don’t underestimate the power of a good press! Pressing after each sewing step helps to set seams, keep your fabric flat, and prevent distortion. Decide whether to press seams open or to one side (often towards the darker fabric) and stick to that choice consistently throughout your project. For nesting seams, pressing alternate rows in opposite directions is incredibly helpful for alignment.
- Chain Piecing for Efficiency: As mentioned, chain piecing is a fantastic technique for speed. Sew multiple pairs or units one after another without lifting the presser foot or cutting the thread. This creates a “chain” of sewn pieces, saving time and thread.
- Use a Design Wall: A design wall (even a flannel sheet tacked to a wall) is incredibly useful for laying out your blocks and visualizing the finished quilt top. It allows you to step back, assess your color placement, and make adjustments before sewing, preventing costly unpicking later.
- Fabric Selection: Choose fabrics with good contrast. Your 2.5-inch strips will stand out against the background fabric. Consider a variety of lights, mediums, and darks within your jelly roll for added depth and interest. Don’t be afraid to mix prints and solids.
- Read Ahead: Always read through all the instructions before you begin. This gives you a clear understanding of the entire process and helps prevent surprises.
- Stay Organized: Keep your cut pieces organized, especially when you have multiple identical segments. Labeling or using small containers can prevent confusion.
Why You’ll Love Making the Two-Step Quilt
The Two-Step Quilt isn’t just another project; it’s an experience offering numerous benefits and a high degree of satisfaction:
- Incredibly Fast: True to its name, this quilt comes together in what feels like just two simple steps. It’s perfect for a weekend project or when you need a quick gift.
- Beginner-Friendly: With its reliance on straight seams and simple block construction, this is an excellent choice for new quilters to build confidence without feeling overwhelmed.
- Uses Pre-Cuts: Jelly rolls (2.5-inch strips) are a joy to work with. They eliminate extensive cutting time and offer a coordinated fabric collection, ensuring your quilt looks cohesive and professionally curated.
- Versatile Design: The Two-Step pattern is incredibly adaptable. You can easily adjust the size of the quilt by making more or fewer blocks. It looks fantastic as a lap quilt, a twin bed accent, or even scaled up for a queen-sized bed.
- Stash Buster Potential: While designed for jelly rolls, this pattern can also be a fantastic way to utilize leftover fabric strips from previous projects, helping you reduce your fabric stash in a beautiful way.
- Visually Stunning: Despite its simplicity, the alternating layout of the blocks creates a dynamic and sophisticated pattern that is sure to draw compliments. The interplay of the colorful strips and background fabric is truly captivating.
Your Next Step: Finishing Your Quilt
Once your quilt top is beautifully pieced together, the journey isn’t quite over, but the most intricate part is complete! The next phase involves preparing your quilt for use and enjoyment. You’ll need to create a “quilt sandwich” by layering your finished quilt top, a layer of batting (for warmth and dimension), and your backing fabric. These layers are then quilted together, either by hand or machine, to secure them and add texture. Finally, the raw edges of your quilt will be encased with a carefully sewn binding, giving it a durable and professional finish. This Two-Step Quilt top is the perfect canvas for exploring various quilting designs, from simple stitch-in-the-ditch to more elaborate free-motion patterns.
Two-Step Quilt With Jenny Doan Tutorial
While our detailed instructions guide you through every step, sometimes seeing the process in action makes all the difference. For a comprehensive visual walkthrough, we highly recommend watching the original tutorial by Jenny Doan from the Missouri Star Quilt Company. Her engaging teaching style and clear demonstrations provide invaluable insights and tips that complement these written instructions perfectly. Simply click the link below to be guided by one of quilting’s most beloved instructors.
Ready to turn fabric into a work of art? Gather your materials, fire up your sewing machine, and let the Two-Step Quilt project transform your weekend into a creative triumph!