
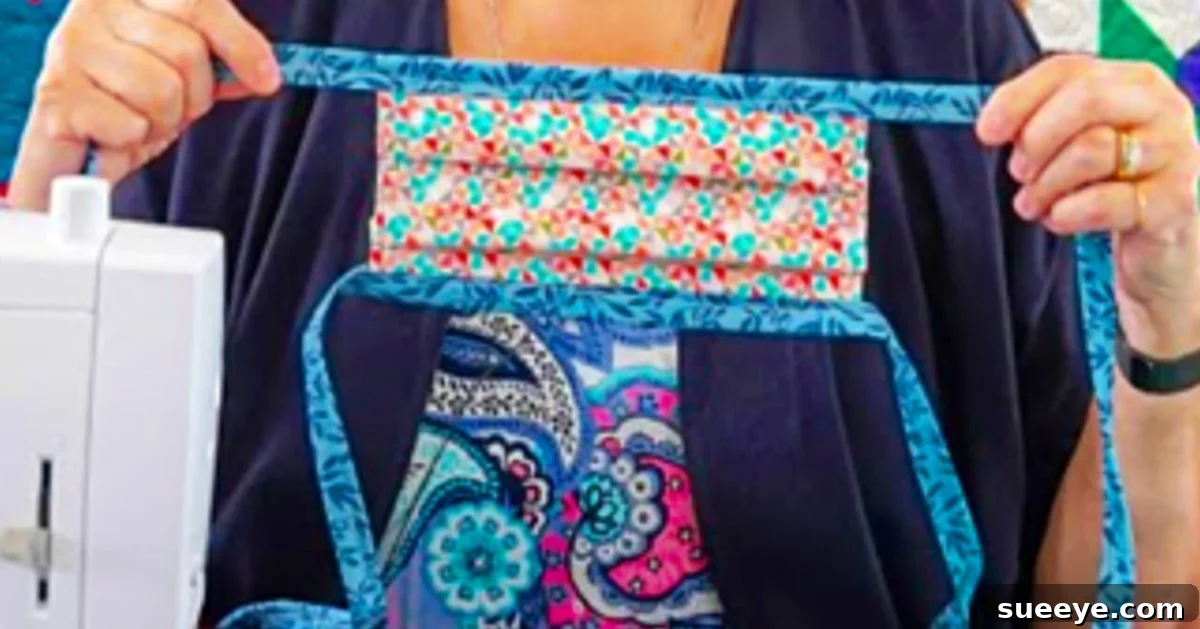
Jenny Doan’s Ultimate Guide: Crafting the Easiest Fabric Tie-Back Face Mask
In a world where personal protective equipment has become a daily necessity, the search for comfortable, effective, and reusable solutions has led many to explore DIY options. Among the brightest stars guiding this journey is Jenny Doan, a beloved quilting and sewing expert whose engaging tutorials have captivated millions on YouTube. Her straightforward approach to complex projects makes her an invaluable resource, especially when it comes to practical crafts like face masks. While countless tutorials exist for various mask styles, Jenny Doan’s easy tie-back mask stands out as perhaps the most user-friendly and highly effective design for everyday use. Its simplicity, combined with a focus on comfort and a secure fit, makes it an ideal project for both seasoned sewers and absolute beginners.
This particular fabric face mask design by Jenny Doan distinguishes itself through its ingenious yet simple construction. It primarily consists of just two rectangular pieces of fabric for the main mask body, typically measuring 9 inches by 6 inches, which are then expertly joined. What truly sets this mask apart, however, are the two lengthy fabric strips, approximately 40 inches each, that serve a dual purpose. These strips are seamlessly integrated into the mask’s design, functioning as both a clean, professional-looking binding along the top and bottom edges, and extending outwards to form the crucial tie mechanism. This tie-back feature allows for a completely customizable and snug fit, alleviating the discomfort often associated with elastic ear loops and ensuring the mask stays securely in place during wear. The beauty of this design lies in its intuitive assembly, making it a quick and rewarding project that yields a practical and comfortable reusable mask.
One of the significant advantages of crafting your own fabric face masks, especially Jenny Doan’s tie-back version, is the inherent reusability and ease of care. Unlike disposable masks that contribute to waste and require frequent replenishment, a fabric mask can be laundered and sanitized after each use, promoting sustainability and cost-effectiveness. The ability to wash these masks provides a unique opportunity for enhanced hygiene, allowing you to incorporate powerful disinfectants into your laundry routine. For instance, common household agents such as bleach or hydrogen peroxide can be safely added to your wash cycle, alongside your regular laundry detergent. Both bleach and hydrogen peroxide are renowned for their excellent disinfectant properties, capable of effectively sanitizing the fabric, removing germs, and leaving your masks not only fresh and clean but also exceptionally bright. This meticulous approach to cleaning ensures your reusable masks remain a reliable and hygienic option for extended use.
Beyond the practical benefits of reusability and sanitization, the comfort and fit of Jenny Doan’s tie-back mask are unparalleled. Many commercially available or DIY masks rely on elastic ear loops, which, while convenient, can often lead to irritation, pressure behind the ears, or a less-than-secure fit. Jenny Doan’s design, with its long fabric ties, offers a superior solution. These ties loop around the back of your head and neck, distributing pressure evenly and allowing for precise adjustments. This means you can customize the tension to achieve a very snug fit across your face without sacrificing comfort. Whether you’re wearing the mask for short errands or extended periods, the ability to tailor the fit ensures it remains comfortable and stays in place, significantly enhancing the overall wearing experience. This level of personalized fit is a game-changer for anyone seeking a more pleasant alternative to conventional mask designs.
While the primary method for constructing this durable and reusable face mask involves a sewing machine, the simplicity of Jenny Doan’s design means that even those without access to traditional sewing equipment can still participate. In a pinch, or for those new to machine sewing, fabric glue offers a viable alternative for assembling the mask components. However, for maximum durability, longevity, and a professional finish, utilizing a sewing machine is highly recommended. The secure stitching provided by a machine ensures the mask can withstand repeated washing and daily wear without compromising its integrity. Regardless of your chosen method, the straightforward steps outlined in Jenny Doan’s tutorial make this a truly accessible project for all skill levels.
A Critical Safety Note: It is paramount to understand that homemade fabric masks, including this design, are not medical-grade Personal Protective Equipment (PPE). They are not proven to protect against viruses like COVID-19 to the same extent as N95 respirators or surgical masks. My personal use of these masks, especially during times of heightened concern, has always been in conjunction with another disposable mask for an added layer of protection, or as a barrier to help reduce the spread of droplets from the wearer. For the most accurate, up-to-date, and in-depth information regarding how to protect yourself against COVID-19, including proper mask usage, social distancing, and hygiene practices, please always consult official health organizations. The CDC Website remains an authoritative resource, offering comprehensive guidelines and strategies for safe practices during public health outbreaks. Your health and safety are of utmost importance, and informed decisions based on expert advice are crucial.
Essential Materials for Your Jenny Doan Fabric Tie Face Mask
Gathering your materials before you begin will ensure a smooth and enjoyable crafting experience. Jenny Doan’s design requires just a few basic items, making it an accessible project for most home sewers.
- Two (9″ x 6″) pieces of high-quality fabric: For optimal protection and comfort, choose a tightly woven 100% cotton fabric. Quilting cottons are ideal as they are durable, breathable, and come in a vast array of patterns, allowing for personalization. Ensure your fabric is pre-washed and dried to prevent shrinkage after your mask is made.
- Two (2 1/2″ x 40″) fabric strips: These strips will form both the binding around the top and bottom of your mask and the long ties that secure it to your head. Again, 100% cotton is recommended. You can choose a contrasting color or pattern for these strips to add a decorative touch, or match them to your main mask fabric for a cohesive look.
- A sewing machine: While fabric glue can be a last resort, a sewing machine will provide the strongest, most durable seams, ensuring your mask withstands repeated washing and wear.
- Coordinating thread: Select a good quality polyester or cotton thread that matches or complements your fabric choices.
- Sharp fabric scissors: Essential for precise cutting of your fabric pieces and strips. A rotary cutter and cutting mat can also be used for even greater accuracy and speed.
- Pins or fabric clips: To hold your fabric pieces in place while sewing, ensuring accurate seams.
- An iron and ironing board: Crucial for pressing seams open or to one side, giving your mask a crisp, professional finish and making subsequent sewing steps easier.
- Measuring tape or ruler: For accurately measuring and cutting your fabric pieces.
Step-by-Step Directions: Crafting Your Easy Tie-Back Fabric Mask
Follow these detailed instructions to create your own comfortable and reusable fabric face mask, inspired by Jenny Doan’s renowned tutorial. Take your time with each step for the best results.
Step 1: Preparing Your Main Mask Body
Begin by taking your two pre-cut 9-inch by 6-inch pieces of fabric. Place them right sides together, ensuring all edges are perfectly aligned. Pin them securely along the two 9-inch sides. Using your sewing machine, sew these two longer sides together with a 1/4-inch seam allowance. This will create a tube. Once sewn, carefully press the seams open or to one side using your iron. Then, turn the fabric tube right side out and press it flat, so you have a single rectangular piece with neat, finished edges along the two long sides. This forms the main body of your mask, now measuring approximately 8.5 inches by 6 inches (depending on your seam allowance).
Step 2: Preparing the Fabric Ties/Binding Strips
Now, take your two 2 1/2-inch by 40-inch fabric strips. These will form the crucial ties and binding for your mask. To prepare them, first fold each strip in half lengthwise (hotdog style), wrong sides together, and press firmly with your iron. This creates a neat crease down the center. Then, open the strip and fold each raw edge in towards the center crease, pressing again. Finally, fold the strip in half along the original center crease, enclosing all raw edges within the fold. Press one last time. You should now have two perfectly folded strips, each approximately 5/8-inch wide, with no raw edges exposed. This technique creates a clean and professional-looking binding that will be comfortable against the skin.
Step 3: Attaching the Binding Strips and Creating Ties
Lay your prepared mask body flat. Take one of your prepared binding strips. Align the raw edge of one short side of your mask body (the 6-inch side that is still open) with the center crease of your folded binding strip. The binding strip should extend well beyond both ends of the mask body. Pin the binding strip in place along the entire length of this short side, ensuring the mask fabric is nestled securely within the fold of the binding. Repeat this process for the other short side of the mask body with the second binding strip.
Now, using your sewing machine, carefully sew along the open edge of each binding strip, securing the mask fabric inside. Stitch very close to the folded edge of the binding, all the way from one end of the 40-inch strip to the other. This single seam will attach the binding to the mask and also close the remaining raw edge of the binding strip, creating a finished tie. Repeat for both the top and bottom edges of your mask.
Step 4: Finishing the Ties
Once both binding strips are sewn onto the mask, you will have four long tie ends extending from the corners of your mask. To finish these ties neatly and prevent fraying, simply trim any excess thread. You can also choose to add a small knot at the very end of each tie, or fold the raw end inwards by about 1/4 inch and then fold again, stitching it down for an extra secure and polished finish. Your Jenny Doan fabric tie face mask is now complete!
Beyond the Tutorial: Personalization and Community Impact
This incredibly easy and effective mask design is not just a practical sewing project; it’s an opportunity for creativity and community contribution. With the basic framework mastered, you can explore various ways to personalize your masks. Experiment with different fabric patterns and colors – from whimsical prints to classic solids. Consider adding a small embroidered initial or a fabric label for a truly custom touch. You can also adjust the length of the ties slightly to perfectly suit your preferences for tying methods.
The simplicity and speed of making these masks also make them an excellent candidate for group sewing projects. Why not organize a mask-making session with friends or family? You could create a batch for your household, or even donate surplus masks to local organizations or individuals in need. In times when collective action makes a difference, providing comfortable and reusable face coverings is a tangible way to support your community. Jenny Doan’s clear instructions empower anyone to contribute to this vital effort, making a positive impact one stitch at a time. Dive into the full YouTube video tutorial by Jenny for visual guidance and additional tips to perfect your fabric face mask – you might just find your new favorite sewing project!