
How to Grow a Lemon Tree from Seeds: Your Ultimate DIY Guide to Homegrown Citrus
Imagine the delightful aroma of fresh lemon blossoms filling your home, or the satisfaction of picking a sun-ripened lemon directly from your own tree. Growing a lemon tree from a tiny seed is a surprisingly simple and deeply rewarding endeavor that brings a touch of Mediterranean charm to any space. Whether you dream of a lush indoor plant or a productive backyard tree, this comprehensive guide will equip you with all the knowledge needed to transform a humble lemon seed into a vibrant, fruit-bearing plant.
Inspired by the practical insights shared by DIY Home & Garden on YouTube, we’ve expanded upon the fundamental steps to provide an exhaustive resource. Just like the meticulous process of saving heirloom vegetable seeds, cultivating citrus from seed is an accessible project for gardeners of all levels. Lemons, in particular, are renowned for their relatively easy-to-germinate seeds, making them an excellent choice for those embarking on their first seed-starting adventure.
Why Grow Your Own Lemon Tree from Seed? The Abundant Benefits
Beyond the sheer joy of watching a plant grow from scratch, there are numerous compelling advantages to nurturing your very own lemon tree from seed:
- Access to Fresh, Organic Fruit: Enjoy chemical-free lemons whenever you need them, ensuring the purest ingredients for your culinary creations and beverages.
- Significant Cost Savings: Once established, your lemon tree can produce an abundance of fruit for many years, drastically reducing your grocery bill for this versatile citrus.
- Stunning Ornamental Value: Lemon trees boast glossy, vibrant green leaves and highly fragrant white blossoms that can brighten any room or garden. They are visually appealing and add an exotic touch.
- Natural Air Purification: As with all green plants, lemon trees contribute to a healthier indoor environment by absorbing carbon dioxide and releasing oxygen, improving air quality.
- An Engaging Educational Project: It’s a fantastic hands-on learning experience for both children and adults, fostering patience, a connection to nature, and an understanding of plant life cycles.
- Embrace Self-Sufficiency: Gain a profound sense of accomplishment and contribute to a more sustainable lifestyle by growing your own food, reducing your reliance on commercial produce.
- Unique Gift Idea: A homegrown lemon seedling or a small potted tree makes a thoughtful and personal gift for fellow gardening enthusiasts.
Choosing the Right Seeds for Successful Citrus Cultivation
The foundation of a successful lemon tree starts with selecting the right seeds. For the best germination rates and healthier plants, always choose seeds from a fresh, ripe, and preferably organic lemon. Organic fruits are less likely to have been treated with chemicals that might affect seed viability.
A key factor in seed saving is understanding pollination. While many fruits result from complex cross-pollination, several citrus varieties, including lemons, are self-pollinating. This means their seeds are more likely to “come true” to the parent plant, producing a tree with similar characteristics to the fruit you harvested them from. This inherent trait simplifies the seed-saving process significantly for home gardeners.
While lemons are an excellent starting point, this method is also highly effective for other easy-to-save citrus seeds, such as grapefruits, oranges, tangerines, clementines, and limes. Always ensure the fruit is fully mature and free from blemishes or disease to give your seeds the optimal chance of successful germination and growth.
Materials You Will Need to Grow Lemon or Other Citrus Seeds
Having all your tools ready before you begin will make the entire process smooth and enjoyable. Here’s a comprehensive list of what you’ll need for this exciting DIY project:
- A Fresh, Ripe Lemon (or other citrus fruit): The fresher the fruit, the higher the viability of its seeds. Organic is often preferred.
- A Small Paring Knife: Crucial for carefully extracting seeds and optionally for peeling the seed coat without damage.
- Several Paper Towels: Used for cleaning the seeds and for the initial germination phase in a moist environment.
- A Small Plastic Bag (e.g., zip-top sandwich bag): Creates a humid, miniature greenhouse environment essential for seed germination.
- Masking Tape or Labeling Tape: For clearly labeling your seed bag, ensuring you remember the fruit type and date.
- A Pen or Permanent Marker: To write essential information on the tape.
- A Spray Bottle (filled with water): Ideal for gently moistening paper towels and later for misting seedlings.
- Small Pots or Seed Starting Trays: Individual cells or small pots (2-4 inches diameter) are perfect for planting your sprouted seeds. Ensure they have drainage holes.
- High-Quality, Well-Draining Potting Soil: A sterile seed-starting mix or a good quality potting mix specifically formulated for citrus or general houseplants will provide the best start.
- A Warm Location: A consistent warm spot (e.g., top of a refrigerator, a warm cupboard, or a seed-starting heat mat) is vital for germination.
- A Bright Location with Indirect Sunlight: Essential for young seedlings. A south-facing window or supplemental grow lights will be necessary, especially indoors.
- Optional: Fertilizer specifically for citrus plants.
Step-by-Step Directions: Growing a Lemon Tree from Seed
This journey from seed to seedling is divided into distinct, easy-to-follow stages: seed preparation, germination, and initial planting. Adhering to these steps will significantly increase your chances of success.
Step 1: Extracting and Preparing Your Lemon Seeds
The first critical step involves carefully liberating the seeds from their fruity enclosure and preparing them for germination. The cleaner and healthier the seed, the greater its potential for life.
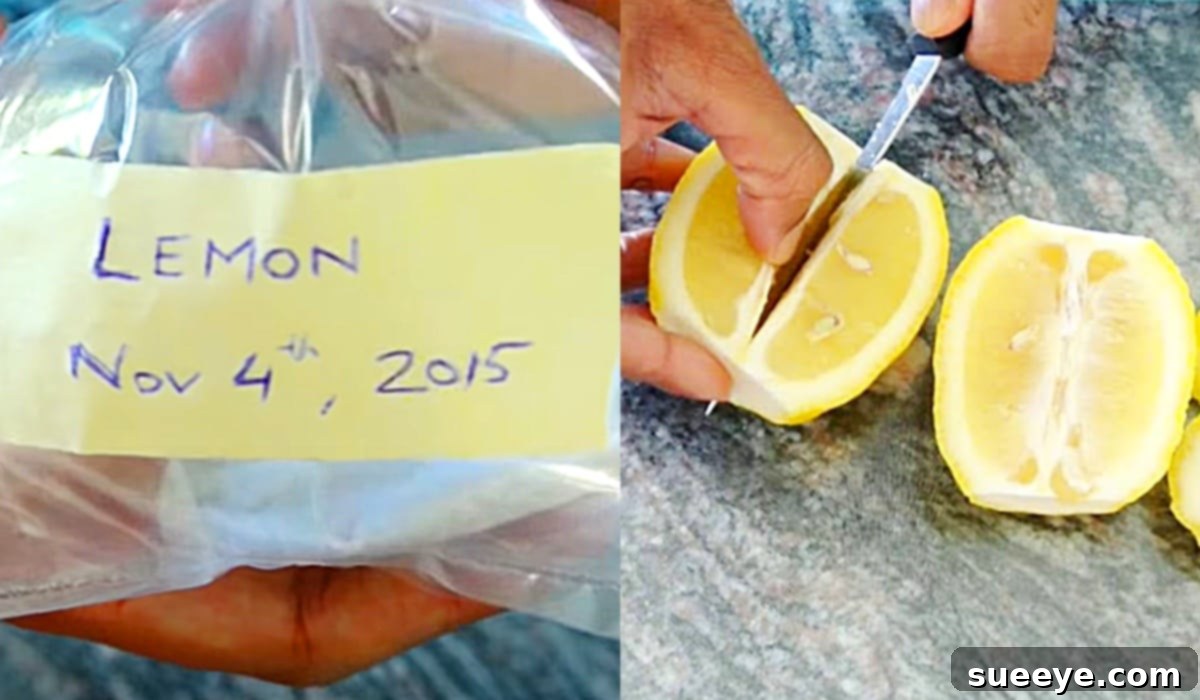
- Slice the Lemon: Using your paring knife, carefully cut the lemon in half or into quarters. This allows for easier access to the seeds without damaging them.
- Extract the Seeds: Gently pick out the seeds from the pulp. Aim to gather more seeds than you intend to plant (e.g., 5-10 seeds) to account for potential non-germination or weaker seedlings. Select seeds that appear plump and firm, discarding any that are noticeably shriveled, thin, or discolored.
- Clean the Seeds Thoroughly: Rinse the extracted seeds under cool, running water. It is crucial to remove all traces of pulp, juice, and sugary residue. This sugary coating contains germination inhibitors and can also encourage mold and fungal growth, which will hinder sprouting. Gently rub them between your fingers to ensure they are perfectly clean.
- Gently Peel the Seed Coat (Highly Recommended): This step is optional but significantly enhances and speeds up the germination process. The outer layer, or seed coat, acts as a natural dormancy mechanism. Using your small paring knife or even your fingernail, very carefully nick and peel away this whitish outer layer from each seed. Be extremely gentle to avoid damaging the delicate inner embryo. This allows water to penetrate more easily and breaks dormancy.
Step 2: Germinating the Seeds (The Moist Paper Towel Method)
The paper towel method is a highly effective and visual technique for germinating citrus seeds indoors. It allows you to monitor the sprouting process and ensures you only plant viable seeds.
- Prepare the Paper Towel: Take one sheet of paper towel and lay it flat. Using your spray bottle, lightly mist it with water until it’s evenly damp but not soaking wet or dripping.
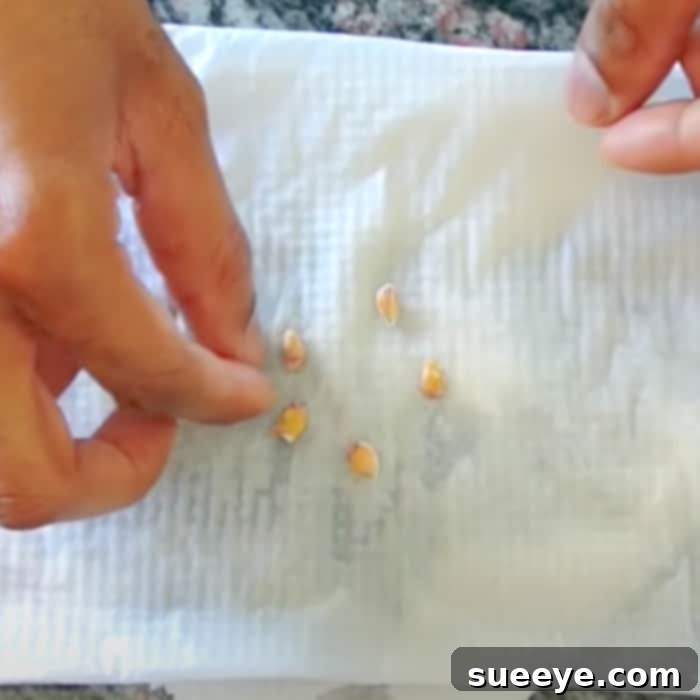
- Arrange the Seeds: Carefully place your cleaned and optionally peeled lemon seeds onto one half of the damp paper towel. Ensure there’s a small amount of space between each seed to prevent them from growing into each other.
- Fold and Roll: Fold the other half of the paper towel over the seeds. Then, gently roll or fold the entire damp paper towel into a compact, secure bundle. This creates a cozy, humid micro-environment.
- Place in Plastic Bag: Carefully slide the folded, damp paper towel containing the seeds into a small plastic zip-top bag. Seal the bag almost completely, leaving a tiny gap for minimal air exchange.
- Label the Bag: Affix a piece of masking tape to the bag and use your pen to clearly label it with “Lemon Seeds” and the current date. This is crucial for tracking progress, especially if you’re germinating multiple types of seeds.
- Store in a Warm, Dark Place: Find a consistently warm location for your bagged seeds, ideally maintaining a temperature between 70-80°F (21-27°C). Good spots include on top of a refrigerator, inside a warm cupboard, or on a specialized seed-starting heat mat. Avoid direct sunlight at this stage.
- Monitor Regularly: Check the bag every few days. The paper towel must remain consistently moist; if it appears dry, lightly mist it with water. Within 2-4 weeks, you should start seeing tiny white roots (radicles) emerging from the seeds. Some seeds might take a bit longer, so patience is key.
Step 3: Planting Your Sprouted Lemon Seeds
Once your seeds have successfully germinated and developed a small, healthy root (ideally about 1/4 to 1/2 inch long), they are ready to be transferred to soil. This is where they’ll begin their journey as seedlings.
- Prepare Pots: Fill small pots (2-4 inches in diameter) or individual cells in a seed-starting tray with a high-quality, well-draining potting soil. Using fresh, sterile potting mix helps prevent damping-off disease.
- Moisten Soil: Lightly moisten the potting mix. It should be damp, not soggy.
- Plant the Seeds: Using a pencil, a small stick, or your finger, create a small hole in the center of the soil in each pot, approximately 1/2 inch deep. Carefully pick up a sprouted seed (handle by the seed body, not the delicate root) and gently place it into the hole with the root pointing downwards.
- Cover Lightly: Lightly cover the seed with about 1/4 inch of potting soil. Do not bury it too deeply, as the seedling needs to push through to reach light.
- Water Gently: Water the newly planted seeds very gently. A spray bottle works well to moisten the surface without displacing the seeds. The goal is to settle the soil around the seed.
- Provide Warmth and Light: Place the pots in a warm location that receives abundant bright, indirect sunlight. A south-facing window is often ideal for indoor cultivation. If natural light is limited, supplement with a grow light for 12-16 hours per day to ensure strong, healthy growth.
- Maintain Consistent Moisture: Keep the soil consistently moist but never waterlogged. Allow the very top layer of soil to dry slightly before watering again. Overwatering is a common killer of young seedlings.

Caring for Your Young Lemon Tree: Nurturing for Long-Term Success
Once your lemon seedlings have emerged and begun to grow, consistent and attentive care will be essential for their development into robust trees. Remember, growing citrus from seed requires patience; it can take several years for a seed-grown tree to mature and produce fruit.
Watering and Humidity for Optimal Growth
- Consistent Soil Moisture: Lemon trees prefer consistently moist soil, but they absolutely detest having “wet feet.” Water thoroughly when the top inch or two of soil feels dry to the touch. The best way to check is by inserting your finger into the soil. Allow excess water to drain completely from the bottom of the pot.
- Crucial Drainage: Always ensure that your pots have ample drainage holes. Standing water can quickly lead to root rot, a common killer of citrus trees.
- Humidity Requirements: Citrus trees are tropical plants and thrive in high humidity. If you live in a dry climate, especially indoors, consider misting your plant regularly, placing the pot on a pebble tray filled with water (ensuring the pot doesn’t sit directly in the water), or using a small room humidifier, particularly during drier winter months.
Light and Temperature: Ideal Conditions
- Abundant Sunlight: Lemon trees are sun worshippers. They require at least 6-8 hours of direct sunlight daily to thrive. If growing indoors, a bright, south-facing window is typically the best location. During shorter winter days or in areas with less natural light, supplemental grow lights for 12-16 hours per day can make a significant difference.
- Stable Warmth: Maintain a consistent ambient temperature between 60-80°F (15-27°C). Protect your young tree from cold drafts, sudden temperature drops, and extreme heat.
- Seasonal Outdoor Exposure: Once all danger of frost has passed and night temperatures are consistently above 50°F (10°C), you can gradually acclimate your potted lemon tree to outdoor conditions for the summer. Be sure to bring it back indoors well before temperatures begin to drop in the fall.
Fertilization and Nutrition: Feeding Your Tree
- Delayed Initial Fertilization: Young seedlings do not require much fertilizer initially. Wait until they have developed at least two to three sets of true leaves before introducing nutrients.
- Citrus-Specific Fertilizer: Once ready, use a balanced fertilizer specifically formulated for citrus trees. These formulations typically contain essential macro and micronutrients like nitrogen, phosphorus, potassium, iron, zinc, and manganese, which are vital for healthy citrus growth.
- Adhere to Instructions: Always follow the package instructions for application rates and frequency. Generally, fertilize every 2-4 weeks during the active growing season (spring and summer) and reduce or completely cease fertilization during the dormant months (fall and winter).
Pruning and Shaping for Structure and Health
- Encouraging Bushier Growth: When your seedling reaches about 6-12 inches in height, you can gently pinch off the top growing tip. This encourages the plant to branch out, creating a bushier, more robust tree rather than a single, leggy stem.
- Maintenance Pruning: As your tree matures, periodically prune to remove any dead, damaged, diseased, or crossing branches. You can also prune to maintain a desirable size and shape, improving air circulation and light penetration.
- Fruiting Considerations: Be aware that lemon trees grown from seed can take a significant amount of time, often 5-10 years, to produce their first fruit. Furthermore, the fruit may not be identical to the parent fruit due to genetic variability. For quicker and true-to-type fruit production, grafted trees are usually preferred, but seed-grown trees offer a unique journey.
Potting and Transplanting: Room to Grow
- Gradual Upsizing: As your lemon tree grows, it will eventually outgrow its initial pot. Repot it into a slightly larger container (e.g., from a 4-inch pot to a 6-inch pot, then eventually larger) when you notice roots beginning to emerge from the drainage holes, or the plant becomes top-heavy and unstable.
- Ensure Excellent Drainage: Always select pots with ample drainage holes. Terracotta pots can be particularly beneficial for citrus as they are porous and allow for better air circulation to the roots, helping to prevent waterlogging.
- Fresh Potting Mix: Use fresh, well-draining potting mix specifically designed for citrus or general houseplants each time you repot to provide renewed nutrients and a healthy growing environment.
Common Challenges and Solutions for Growing Lemon Trees from Seed
Even with meticulous care, you might encounter a few common hurdles. Knowing how to identify and address these issues can be the difference between a struggling plant and a thriving lemon tree.
- Seeds Not Germinating:
- Solution: Ensure seeds are fresh, thoroughly cleaned (no pulp), and kept consistently warm and moist. The optional step of gently peeling the seed coat can significantly improve germination rates by breaking dormancy.
- Yellowing Leaves (Chlorosis):
- Solution: This is often a sign of nutrient deficiency (particularly iron), overwatering, or insufficient light. Check your watering schedule, ensure proper drainage, assess light levels, and apply a balanced citrus-specific fertilizer if nutrients are lacking.
- Leaf Drop:
- Solution: Sudden leaf drop can be triggered by abrupt changes in temperature, under- or overwatering, or pest infestations. Identify the underlying cause and adjust your care routine accordingly. Provide stable environmental conditions.
- Pest Infestations:
- Solution: Common citrus pests include spider mites, aphids, mealybugs, and scale insects. Regularly inspect your plant’s leaves (especially the undersides) and stems. Treat infestations promptly using organic options like insecticidal soap, neem oil, or horticultural oil. Isolate infested plants to prevent pests from spreading to other plants.
- No Fruit Production (or Poor Quality Fruit):
- Solution: Remember that seed-grown lemon trees can take 5-10 years to mature and produce fruit. Also, the fruit may not be exactly like the parent due to genetic variation. Ensure the tree receives adequate light, proper nutrients, and if it flowers but doesn’t set fruit, consider if it needs cross-pollination (though many lemons are self-fertile, a boost can help).
- Leggy Seedlings:
- Solution: If seedlings are tall and thin, stretching towards the light, they are not getting enough light. Move them to a brighter location or use a grow light positioned closer to the plants.
Enjoying Your Homegrown Lemon Tree: A Rewarding Journey
Growing a lemon tree from seed is truly a journey that cultivates patience, fosters a deeper connection with nature, and ultimately rewards your persistence. While it may indeed take several years to harvest your very first homegrown lemon, the profound satisfaction of nurturing a tiny seed into a beautiful, productive tree is immense. The enchanting fragrance of its blossoms, the lush, glossy green foliage, and eventually, the vibrant, tangy fruit will all serve as testaments to your dedication and green thumb.
Even if your seed-grown tree primarily serves as a stunning ornamental plant due to a longer fruiting time or variations in fruit quality, it will undoubtedly add a touch of exotic elegance and Mediterranean allure to your home or garden. So, gather your seeds, follow these detailed steps, and prepare to embark on a delightful and enriching gardening adventure. The taste of your first homegrown lemon will be worth every moment of waiting!