
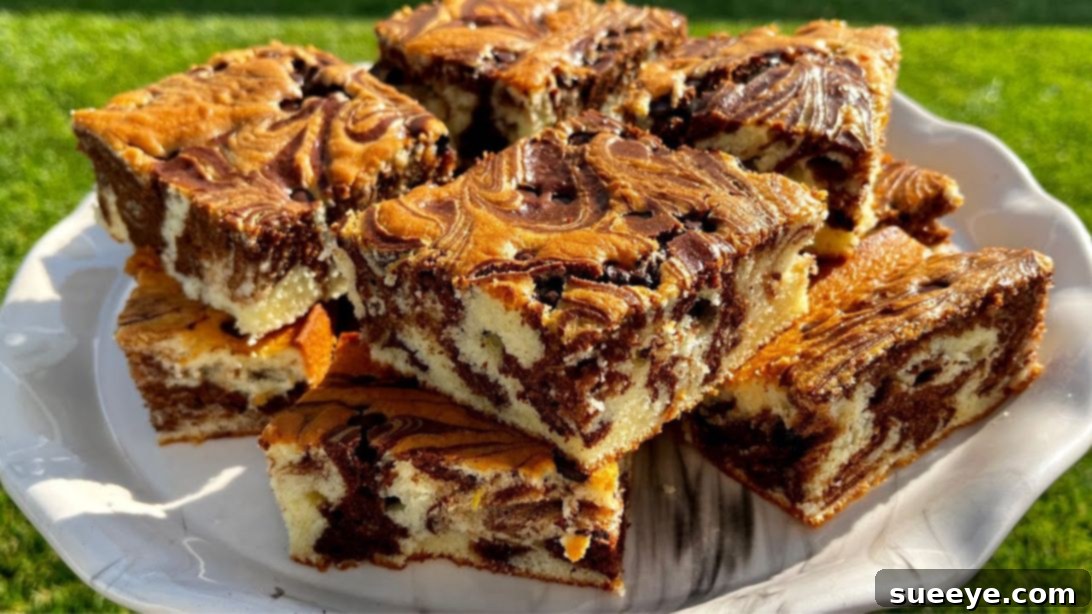
Bake the Fluffiest Grandma’s Marble Cake: An Easy & Irresistible Recipe
There’s something uniquely comforting and utterly delightful about a perfectly baked marble cake. It’s a timeless classic that evokes cherished memories, a delightful fusion of flavors and textures that dance on your palate. For me, marble cake isn’t just a dessert; it’s a go-to treat that perfectly satisfies my sweet cravings without being overly heavy. Its light, soft crumb makes it an ideal companion for a quiet afternoon coffee or a warm cup of tea.
Recently, I embarked on a baking adventure to recreate this beloved classic at home. I stumbled upon an incredible recipe – Grandma’s Marble Cake by Fatto in Casa da Alba on YouTube – and the results were nothing short of spectacular. This wasn’t just any marble cake; it was, without exaggeration, one of the fluffiest and most delicious cakes I have ever tasted. The rich chocolate swirls perfectly complemented the subtle, bright notes of fresh lemon and orange zest, creating a symphony of flavors that was simply fantastic. What’s even better? It’s incredibly easy to make, requiring only simple, readily available ingredients.
If you’re ready to fill your kitchen with the irresistible aroma of freshly baked cake and treat yourself to a slice of pure joy, then you absolutely must try this recipe. Whether you’re a seasoned baker or just starting your culinary journey, this Grandma’s Marble Cake recipe promises a rewarding and delicious experience. Read on for the full instructions, or watch the video below for a visual guide.
What Makes Marble Cake a Timeless Classic?
The charm of marble cake lies in its beautiful appearance and harmonious flavor profile. Originating in 19th-century Germany, where it was known as “Marmorkuchen,” this cake quickly gained popularity for its striking visual appeal and delicious taste. The “marbled” effect is typically created by swirling together a light vanilla (or plain) batter with a darker chocolate batter, resulting in unique, intricate patterns that make every slice a piece of art. Beyond its aesthetics, marble cake offers a delightful balance – the sweetness of chocolate, often tempered by a contrasting flavor like vanilla, coffee, or, in this exceptional recipe, a bright citrusy zest. It’s a versatile cake, perfect for birthdays, holidays, or simply as a comforting everyday treat. This particular recipe elevates the classic by incorporating the aromatic lift of lemon and orange, transforming a simple dessert into an extraordinary sensory experience.
Essential Ingredients for Your Fluffy Marble Cake
Creating this wonderfully fluffy and flavorful marble cake begins with gathering the right ingredients. The beauty of this recipe lies in its simplicity; you likely have most of these staples in your pantry already. Using fresh, quality ingredients will ensure the best possible flavor and texture for your homemade delight.
- 4 Large Eggs: Essential for structure and richness. Ensure they are at room temperature for better emulsification and a lighter batter.
- 0.3 oz (approximately 1 teaspoon) Vanilla Sugar: Provides a delicate vanilla aroma and sweetness. If you don’t have vanilla sugar, you can substitute with 1 teaspoon of pure vanilla extract and adjust the total sugar amount slightly.
- 3/4 cup (approximately 150g) Granulated Sugar: Sweetens the cake and aids in creating that beautiful foamy texture when creamed with eggs.
- 2/3 cup (approximately 160ml) Natural Yogurt: Adds incredible moisture and tenderness to the cake, contributing to its fluffy texture. Full-fat yogurt is recommended for the best results.
- 2/3 cup (approximately 160ml) Sunflower Oil: A neutral-flavored oil that keeps the cake incredibly moist and tender, often resulting in a lighter crumb than butter. Vegetable oil can also be used.
- 2 cups (approximately 250g) All-Purpose Flour: The primary dry ingredient, providing the cake’s structure. Sifting it ensures a lump-free batter.
- 2 1/4 teaspoons Baking Powder: The leavening agent responsible for the cake’s impressive rise and fluffy texture. Ensure it’s fresh for optimal activation.
- 2 tablespoons Cocoa Powder (Unsweetened): Creates the rich chocolate batter for the marble effect. Using unsweetened cocoa allows you to control the sweetness of the overall cake.
- Fresh Lemon Zest: Provides a vibrant, aromatic citrus note that brightens the entire cake. Use a fine grater to avoid the bitter white pith.
- Fresh Orange Zest: Complements the lemon and chocolate beautifully, adding another layer of fragrant citrus complexity. Again, grate only the colorful outer layer.
- Chocolate Chips (Optional, but highly recommended): For an extra burst of chocolatey goodness and a delightful textural contrast.
Step-by-Step Instructions to Bake Your Fluffy Marble Cake
Follow these detailed steps carefully, and you’ll be enjoying a slice of homemade perfection in no time. Precision in baking often leads to the most satisfying results!
Step 1: Prepare the Base Batter – A Foundation of Fluffiness
In a large mixing bowl, combine the 4 eggs, 0.3 oz (or 1 teaspoon) of vanilla sugar, and 3/4 cup of granulated sugar. Using a hand mixer, whisk these ingredients together thoroughly. Continue mixing on medium-high speed for several minutes until the mixture transforms into a pale, foamy, and smooth consistency. This crucial step incorporates air into the batter, which is essential for achieving that incredibly light and fluffy texture in your finished cake. Don’t rush this; proper aeration here sets the stage for success.
Step 2: Incorporate Liquids and Dry Ingredients
With your hand mixer still running on a lower speed, gradually add the 2/3 cup of natural yogurt and 2/3 cup of sunflower oil to the foamy egg mixture. Mix until just combined. Next, in a separate bowl, sift together the 2 cups of all-purpose flour and 2 1/4 teaspoons of baking powder. Sifting prevents lumps and ensures even distribution. Gradually add the dry ingredients to the wet mixture, mixing until just combined and smooth. Be careful not to overmix at this stage, as overmixing can lead to a tough cake. Once the batter is uniform, take approximately one-fifth to one-fourth of this mixture and transfer it to a separate, smaller bowl. Set this portion aside – it will become your delicious chocolate batter.
Step 3: Infuse with Lemon and Prepare for Baking
To the larger portion of batter remaining in the main bowl, add the finely grated lemon zest. Gently fold it in with a spatula until evenly distributed. The lemon zest adds a wonderful, bright aroma and flavor to the primary cake batter. Prepare your baking pan (a standard Bundt pan or a 9-inch round springform pan works well) by greasing it thoroughly with butter or oil and dusting it lightly with flour, ensuring the cake won’t stick. Carefully pour the lemon-infused batter into the prepared baking pan, spreading it evenly across the bottom.
Step 4: Create the Rich Chocolate-Orange Batter
Now, retrieve the reserved portion of batter you set aside earlier. Add the 2 tablespoons of unsweetened cocoa powder to this bowl. Mix thoroughly with a spatula or whisk until the cocoa is fully incorporated, and the batter is a rich, smooth brown color without any streaks of white flour. Next, add the finely grated orange zest to this chocolate mixture. Stir it in gently to distribute its fragrant notes. The combination of chocolate and orange zest is truly divine and will be a highlight of your marble cake.
Step 5: Master the Marble Swirl and Add Chocolate Chips
With both batters ready, it’s time to create the signature marble effect. Carefully drizzle spoonfuls of the chocolate-orange mixture over the lemon-infused batter already in the baking pan. You can dollop it in lines, circles, or random patterns – there’s no wrong way! Once the chocolate batter is distributed, take a skewer, a thin knife, or a butter knife. Gently swirl it through both layers of batter. Be mindful not to overmix; the goal is to create beautiful, distinct swirls, not to combine the batters completely into a single color. Finally, generously sprinkle chocolate chips over the top of the swirled batter. These will melt into luscious pockets of chocolate as the cake bakes, adding an extra layer of indulgence.
Step 6: Bake to Golden Perfection
Preheat your oven to 356 degrees Fahrenheit (approximately 180 degrees Celsius). Once preheated, carefully place your baking pan with the marbled batter into the oven. Bake for approximately 35 minutes. Baking times can vary depending on your oven, so keep an eye on it. To check for doneness, insert a wooden skewer or toothpick into the center of the cake; if it comes out clean, your cake is ready. The top should be beautifully golden brown, and the cake should spring back lightly when gently touched. Allow the cake to cool in the pan for about 10-15 minutes before carefully inverting it onto a wire rack to cool completely. This prevents it from collapsing and helps maintain its moist texture.
Tips for Baking Your Best Marble Cake Ever
Achieving a perfect marble cake is easier with a few expert tips. These suggestions will help you ensure a consistently fluffy, flavorful, and beautiful cake every time.
- Room Temperature Ingredients: Ensure your eggs and yogurt are at room temperature. This helps them incorporate more easily and evenly into the batter, creating a smoother emulsion and a lighter, airier cake.
- Don’t Overmix: While whisking the eggs and sugar is crucial for aeration, once you add the flour, mix only until just combined. Overmixing develops the gluten in the flour, leading to a tough, dense cake.
- Proper Pan Preparation: Always grease and flour your baking pan thoroughly. For intricate Bundt pans, ensuring every nook and cranny is coated is key to a clean release. A light dusting of cocoa powder instead of flour can also be used for chocolate cakes to prevent white marks.
- The Swirl Technique: For the best marble effect, use a light hand. Don’t drag your swirling tool too deeply or too many times. Just a few gentle passes are enough to create distinct, beautiful patterns without muddying the colors.
- Oven Temperature Accuracy: Ovens can vary widely. If you suspect your oven runs hot or cold, consider using an oven thermometer to ensure the temperature is accurate. This can make a significant difference in baking success.
- Cooling Patience: Resist the urge to remove the cake from the pan too soon. Letting it cool for 10-15 minutes in the pan allows it to firm up before inverting, reducing the risk of breakage. Cool completely on a wire rack to prevent sogginess.
- Zest Wisely: When zesting your lemon and orange, only grate the colorful outer layer. The white pith underneath can be bitter and will affect the flavor of your cake.
- Add-ins and Variations: Feel free to experiment! While this recipe is fantastic as is, you could try adding a hint of almond extract to the plain batter or a dash of espresso powder to the chocolate batter for different flavor dimensions.
Serving Suggestions and Storage
This Grandma’s Marble Cake is versatile and absolutely delicious, whether served warm or at room temperature. For an extra touch of indulgence, consider a light dusting of powdered sugar, a simple vanilla glaze, or even a scoop of vanilla bean ice cream. It pairs perfectly with your morning coffee, afternoon tea, or as a delightful dessert after any meal.
To keep your marble cake fresh, store it in an airtight container at room temperature for up to 3-4 days. If you need to store it longer, it can be refrigerated for up to a week, though refrigeration can sometimes alter the texture slightly. For longer storage, slices or the whole cake (well-wrapped in plastic wrap and then foil) can be frozen for up to 2-3 months. Thaw it at room temperature before serving to bring back its wonderful texture and flavor.
Grandma’s Marble Cake: A Recipe You’ll Cherish
There’s immense satisfaction in baking something from scratch, especially when the result is as spectacularly delicious and beautiful as this Grandma’s Marble Cake. This recipe, with its incredible fluffiness, rich chocolate, and bright citrus notes, is more than just a dessert; it’s an experience. It brings together simple ingredients to create a treat that feels both nostalgic and wonderfully fresh.
Whether you’re baking for a special occasion, a family gathering, or simply to enjoy a moment of sweet indulgence, this recipe is a true gem. It’s proof that sometimes, the simplest traditions yield the most extraordinary results. So, roll up your sleeves, gather your ingredients, and get ready to bake a cake that will undoubtedly become a cherished favorite in your home. Happy baking, and enjoy every single delightful slice!