
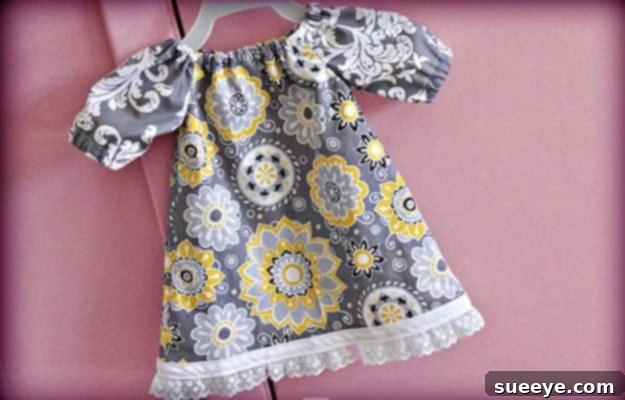
Sew Your Own Baby Dress: A Heartfelt Journey into Handmade Baby Clothes
There’s a unique warmth and connection that comes with creating something truly special for your baby with your own hands. Crafting a beautiful baby dress isn’t just about making an item of clothing; it’s about pouring your love, care, and creativity into every stitch. Even with just basic sewing knowledge, you can embark on this delightful journey to create adorable, custom-made dresses that will be cherished long after your little one outgrows them. This guide will walk you through the wonderful world of DIY baby clothes, empowering you to create stunning garments, and we’ll point you to a fantastic resource to get started.
Embrace the satisfaction of personalizing your baby’s wardrobe, ensuring comfort, quality, and a unique style that mass-produced items simply can’t match. Whether you’re a complete novice looking for an engaging first project or an experienced sewer seeking a fresh idea, making baby dresses offers immense joy and a tangible way to express your affection.
Why Choose to Sew a Baby Dress? The Benefits of Handmade
Opting to sew your baby’s clothes, especially dresses, comes with a multitude of advantages that extend beyond just cost savings. It’s an investment in quality, customization, and a personal touch that truly makes a difference. Let’s explore some compelling reasons why handmade baby dresses are so special:
-
A Touch of Unconditional Love
Each stitch you make is infused with your affection. A handmade dress is a tangible expression of your love, creating a keepsake that holds sentimental value far beyond its material worth. Imagine the stories and memories attached to a dress you meticulously crafted for a baby shower gift or your own child’s first birthday!
-
Unmatched Customization and Personal Style
Mass-produced clothes often limit your choices. When you sew, you have complete control over every detail. Select the perfect fabric pattern, choose unique embellishments, and tailor the fit to ensure maximum comfort for your baby. You can create a one-of-a-kind garment that truly reflects your taste and your baby’s budding personality.
-
Superior Quality and Durability
By choosing your own fabrics and threads, you can ensure high-quality materials free from harsh chemicals, making them gentle on your baby’s sensitive skin. Furthermore, you control the strength of the seams and the finishing touches, often resulting in a garment that withstands countless washes and vigorous playtime better than many store-bought alternatives.
-
Cost-Effectiveness in the Long Run
While the initial outlay for tools and fabric might seem like an investment, sewing your own baby clothes can be surprisingly economical. You can often find beautiful fabrics on sale or repurpose existing materials, turning them into charming new outfits without breaking the bank. This also provides an excellent opportunity to use up fabric scraps from other projects.
-
A Fulfilling Creative Outlet
For many, sewing is a therapeutic and enjoyable hobby. Making baby dresses offers a wonderful way to unwind, express your creativity, and develop new skills. The sense of accomplishment upon completing a beautiful garment is incredibly rewarding and can boost your confidence for future sewing projects.
Essential Tools and Materials: What You’ll Need to Get Started
Before you dive into cutting and stitching, it’s crucial to gather your basic sewing supplies. Don’t worry, you don’t need an elaborate setup; a few core items will be sufficient for most beginner baby dress patterns. Here’s a checklist to help you prepare:
- Sewing Machine: A basic model with straight and zig-zag stitches is usually enough. Ensure it’s in good working order and you know how to thread it and wind a bobbin.
- Fabric: Opt for soft, breathable, and washable fabrics like cotton, flannel, interlock knit, or linen blends. Consider cute prints or solid colors that are easy to work with. Always pre-wash and dry your fabric to prevent shrinkage later.
- Matching Thread: Choose good quality polyester all-purpose thread that matches or complements your fabric.
- Sharp Fabric Scissors: Dedicated fabric scissors are a must! Using them only for fabric keeps them sharp and prevents snags.
- Measuring Tape or Ruler: Essential for accurate measurements and cutting.
- Pins and Pincushion: To hold fabric pieces together securely before sewing.
- Seam Ripper: Your best friend for correcting mistakes – every sewer needs one!
- Fabric Markers or Tailor’s Chalk: For transferring pattern markings onto your fabric.
- Iron and Ironing Board: Pressing seams as you go is key to professional-looking results.
- Optional Embellishments: Buttons, snaps, ribbon, lace, or appliques if your design calls for them. Always ensure any closures are securely attached for baby safety.
Learning with “A Fate So Twisted”: Your Go-To Video Tutorial
To make your first baby dress project smooth and enjoyable, a good tutorial is invaluable. We highly recommend checking out the simple yet effective video tutorial series by A Fate So Twisted. This channel provides clear, step-by-step instructions that are perfect for beginners who want to learn how to create adorable baby dresses. Their engaging approach simplifies what might seem complex, breaking down the process into manageable, easy-to-follow segments.
Watching a video tutorial offers several advantages over static written instructions. You can:
- See the exact movements and techniques in real-time.
- Pause, rewind, and re-watch tricky sections as many times as you need.
- Gain visual clarity on how pieces fit together and how seams are finished.
- Benefit from tips and tricks shared by an experienced sewer.
A Fate So Twisted’s tutorials are renowned for their clarity and practicality, making them an excellent starting point for anyone eager to venture into sewing baby clothes. Grab your supplies, open their YouTube channel, and get ready to transform fabric into a charming garment!
Basic Sewing Techniques for Baby Clothes: Ensuring Comfort and Safety
While the video tutorial will guide you through the specific steps for your chosen dress, understanding a few general sewing principles will significantly enhance your experience and the quality of your finished product. When sewing for babies, comfort and safety are paramount.
Key Sewing Considerations for Baby Garments:
- Seam Allowances: Pay close attention to the specified seam allowances in your pattern or tutorial. Consistent seam allowances ensure your garment pieces fit together correctly and the final size is accurate.
- Finishing Seams: Raw fabric edges can fray and irritate sensitive skin. Consider finishing your seams with a zig-zag stitch, pinking shears, or a French seam for a neat, durable, and comfortable finish. French seams are particularly excellent for baby clothes as they fully enclose raw edges.
- Stitch Length: For most general sewing, a standard stitch length (around 2.5 mm) is appropriate. For gathering or temporary stitches, you might use a longer stitch.
- Secure Closures: If your dress includes buttons, snaps, or ties, ensure they are attached very securely. Buttons should be sewn on with extra reinforcement, and snaps should be firmly set to prevent them from coming loose and becoming a choking hazard. Avoid small, easily detachable embellishments.
- Pressing: Don’t skip ironing! Pressing seams open or to one side as you sew creates crisp, professional-looking finishes and helps garment pieces lay flat and true.
- Thread Trimming: Always trim all loose threads close to the fabric. Loose threads can get tangled around tiny fingers or toes, or contribute to an untidy finish.
Step-by-Step Overview: What to Expect in the Sewing Process
While each pattern has its unique sequence, making a baby dress generally follows a logical progression. Here’s a typical flow you might encounter, which “A Fate So Twisted” will demonstrate effectively:
- Preparation: Pre-wash and dry your fabric. Gather all your tools and materials. Read through the entire tutorial or pattern instructions before you begin.
- Cutting the Fabric: Lay out your pre-washed fabric smoothly. Carefully cut out all pattern pieces according to the instructions, paying close attention to grainlines and notches.
- Constructing the Bodice: This usually involves sewing the front and back bodice pieces together at the shoulders and side seams. You might also attach facings or linings at this stage.
- Adding Sleeves (if applicable): If your dress has sleeves, they are typically set into the armholes, often eased in for a smooth fit.
- Attaching the Skirt: The skirt pieces are usually sewn together at their side seams, then gathered (if the design calls for it) and attached to the bodice.
- Hemming: The bottom edge of the skirt (and sleeves, if applicable) will be hemmed. This involves folding the fabric edge twice and stitching it down for a neat finish.
- Adding Closures and Embellishments: Install snaps, buttons, or a zipper as required by the design. Add any decorative elements like trim, appliques, or bows, ensuring they are baby-safe and securely attached.
- Final Pressing: Give the entire dress a final press to smooth out any wrinkles and give it a polished, professional appearance.
Tips for Success and Enjoying Your Sewing Journey
Sewing can be a deeply satisfying craft, especially when you’re creating something beautiful for a baby. Here are a few tips to help you enjoy the process and achieve great results:
- Start Simple: Don’t try to tackle an overly complex pattern for your first project. Begin with a straightforward design, like the one from A Fate So Twisted, to build confidence and master basic techniques.
- Take Your Time: Rushing can lead to mistakes. Enjoy the process, take breaks if you feel frustrated, and remember that quality often comes from patience.
- Practice Makes Perfect: Don’t be discouraged by initial imperfections. Every stitch is a learning experience. The more you sew, the more skilled and confident you’ll become.
- Read (and Watch) Thoroughly: Before starting, go through all the instructions or watch the entire video once to understand the overall flow. Then, follow along step-by-step.
- Embrace the Seam Ripper: Mistakes happen to everyone. The seam ripper is your friend! Don’t be afraid to unpick stitches and redo a section for a better finish.
- Join a Community: Connect with other sewers online or in person. They can offer advice, encouragement, and inspiration.
Beyond the First Dress: Expanding Your Baby Wardrobe
Once you’ve successfully created your first baby dress, a whole new world of possibilities opens up! You can:
- Experiment with different fabrics and colors to create variations of the same pattern.
- Explore more complex patterns, adding details like collars, ruffles, or smocking.
- Sew matching accessories like headbands, bloomers, or booties.
- Create coordinated outfits for siblings or themed sets for special occasions.
- Transform old clothing into new baby garments, practicing sustainable sewing.
- Make thoughtful, personalized gifts for friends and family welcoming new babies.
Conclusion: Cherish Every Handmade Moment
Learning to make your own baby dress is more than just a craft; it’s a labor of love that results in a precious, personalized garment. With resources like the excellent video tutorials by A Fate So Twisted, even beginners can achieve beautiful results. You’ll not only create practical and adorable clothes but also lasting memories and a tangible representation of your devotion.
So, gather your materials, set up your sewing machine, and prepare to embark on a truly rewarding creative adventure. The perfect, handmade baby dress is just a few stitches away, ready to be filled with laughter, cuddles, and endless love. Happy sewing!