
Death by Chocolate Cake: Your Ultimate Guide to a Decadent Delight
Prepare yourself for an unparalleled chocolate experience with our Death by Chocolate Cake recipe. This isn’t just a cake; it’s a celebration of all things chocolate, designed to captivate your senses and leave you utterly satisfied. Its name isn’t an exaggeration – every bite is a rich, moist, and intensely chocolatey journey that you won’t want to end. Whether you’re planning a grand birthday bash, a festive holiday gathering, or simply craving an extraordinary dessert to brighten an ordinary day, this recipe delivers pure indulgence. Crafted with meticulous detail, this guide will walk you through creating a show-stopping cake that’s surprisingly straightforward to make. Dive into the world of rich cocoa, velvety frosting, and irresistible chocolate chips, and discover why this truly is the ultimate chocolate cake. For a visual guide, you can also watch a helpful video tutorial by Delish on YouTube to see the process in action.
Ingredients for the Ultimate Death by Chocolate Cake
Crafting a cake this magnificent begins with selecting the right ingredients. Each component plays a vital role in achieving the perfect texture, moisture, and unforgettable chocolate flavor. Using high-quality ingredients will elevate your cake from good to absolutely phenomenal.
For the Decadent Chocolate Cake Layers:
- 4 cups of all-purpose flour: The foundation of our cake, providing structure and body.
- 2 cups of granulated sugar: Sweetens the cake and contributes to its tender crumb.
- 1 cup of packed light brown sugar: Adds depth of flavor, moisture, and a subtle caramel note that complements the chocolate beautifully.
- 2¼ cups of Dutch-processed cocoa powder: Essential for a deep, dark, and intensely chocolatey flavor. Dutch processing reduces acidity, resulting in a smoother, less bitter chocolate taste.
- 3 tsp of baking soda: Works with the acidic ingredients (like buttermilk) to create lift and a tender texture.
- 3 tsp of baking powder: Provides additional leavening, ensuring a light and airy crumb.
- A pinch of kosher salt: A crucial flavor enhancer that balances the sweetness and brings out the richness of the chocolate.
- 1½ cups of unsalted butter, melted: Adds richness and moisture. Using unsalted butter gives you control over the overall salt content.
- 6 large eggs, lightly beaten: Binds the ingredients together, adds richness, and contributes to the cake’s structure and moisture.
- 2½ cups of strong black coffee: This secret ingredient deepens and intensifies the chocolate flavor without making the cake taste like coffee. Use freshly brewed, cooled coffee for best results.
- 2½ cups of buttermilk: Provides acidity that activates the baking soda, resulting in an incredibly moist and tender cake. It also adds a subtle tang that complements the rich chocolate.
- 1 tbsp of pure vanilla extract: Enhances all the other flavors, adding a warm, aromatic depth to the cake.
For the Silky Chocolate Buttercream Frosting:
This frosting is the perfect companion to the rich cake layers – smooth, creamy, and bursting with chocolate flavor.
- 3 cups of unsalted butter, softened: Ensure your butter is at room temperature for a smooth, lump-free frosting.
- 7½ cups of powdered sugar (confectioners’ sugar): Provides sweetness and structure to the frosting. Sifting it can help prevent lumps.
- 2¼ cups of unsweetened cocoa powder: Delivers intense chocolate flavor to the frosting.
- 1 tbsp of pure vanilla extract: Complements the chocolate and adds aromatic complexity.
- A pinch of kosher salt: Balances the sweetness and deepens the chocolate notes.
- ¾ cup of heavy cream, plus more if necessary: Adds creaminess and helps achieve the desired consistency. Adjust as needed for a spreadable yet firm frosting.
- 4 cups of semisweet chocolate chips, divided: Used for decorating the cake – some for pressing onto the sides and top, and some for melting and drizzling.
Step-by-Step Instructions: How to Bake and Decorate Your Death by Chocolate Cake
Baking this magnificent cake is a rewarding process. Follow these detailed instructions carefully to achieve professional-level results and an unforgettable dessert.
Step 1: Preparing Your Pans and Mixing the Cake Batter
Begin by preheating your oven to 350°F (175°C). This ensures a consistent baking temperature from the moment your cake goes in. Next, prepare three 8-inch round cake pans. Line the bottom of each pan with a circle of parchment paper, then generously grease the sides and parchment with nonstick cooking spray or butter and flour. This meticulous preparation prevents sticking and ensures your beautiful cake layers release effortlessly. Set the prepared pans aside.
In a very large mixing bowl, combine all your dry cake ingredients: all-purpose flour, granulated sugar, brown sugar, Dutch-processed cocoa powder, baking soda, baking powder, and kosher salt. Using a whisk, thoroughly combine these dry ingredients until they are uniformly distributed and any lumps are gone. This ensures an even rise and flavor throughout your cake. Create a well in the center of the dry ingredients. Now, add the melted butter, lightly beaten eggs, strong black coffee, buttermilk, and pure vanilla extract. Whisk these wet ingredients into the dry mixture, starting from the center and gradually incorporating the dry ingredients from the sides. Continue whisking until the batter is smooth, cohesive, and free of any visible lumps. Be careful not to overmix, as this can lead to a tough cake.
Step 2: Baking the Cake Layers and Preparing the Frosting
Evenly divide the rich chocolate batter among the three prepared 8-inch cake pans. Place the pans into your preheated oven and bake for approximately 35 minutes. Baking times can vary slightly depending on your oven, so keep an eye on them. To check for doneness, insert a toothpick into the center of a cake layer; if it comes out clean or with a few moist crumbs attached, the cakes are ready. Avoid opening the oven door too frequently during baking, especially in the first 20 minutes, to prevent the cakes from sinking.
Once baked, carefully remove the cake pans from the oven and place them on a wire cooling rack. Allow the cakes to cool completely in their pans for about 10-15 minutes before attempting to unmold them. This crucial step prevents the warm cakes from breaking. Once slightly cooled, carefully invert the cakes onto the wire rack, remove the parchment paper, and let them cool completely to room temperature. This can take an hour or two. Attempting to frost warm cakes will result in melted, messy frosting.
While the cake layers are cooling, prepare the luscious chocolate buttercream frosting. In another large mixing bowl, combine the softened unsalted butter, powdered sugar, unsweetened cocoa powder, pure vanilla extract, and a pinch of kosher salt. Using an electric mixer (stand mixer with paddle attachment or a hand mixer), start mixing on low speed until the ingredients are just combined. This prevents a cloud of powdered sugar from escaping! Once combined, gradually increase the speed to medium. Pour in ¾ cup of heavy cream and continue beating. Beat the frosting for several minutes, scraping down the sides of the bowl occasionally, until it becomes wonderfully creamy, light, and fluffy, reaching a medium-stiff peak consistency that holds its shape well. If the frosting is too thick, add a tiny bit more heavy cream, a teaspoon at a time. If it’s too thin, add a tablespoon of sifted powdered sugar until the desired consistency is achieved.
Step 3: Assembling and Decorating Your Masterpiece
Once your cake layers are completely cool and your frosting is ready, it’s time for assembly! To prevent your cake from sliding around, place a small dollop of frosting in the center of a cake board or serving plate. Carefully place your first cake layer on top, pressing down gently to secure it. If your cake layers have domed tops, you may want to level them with a serrated knife for a flatter, more professional look. Apply an even layer of frosting on top of the first cake layer, spreading it almost to the edges. Carefully place the second cake layer on top, aligning it perfectly, and repeat the frosting process. Finally, place the third and final cake layer on top.
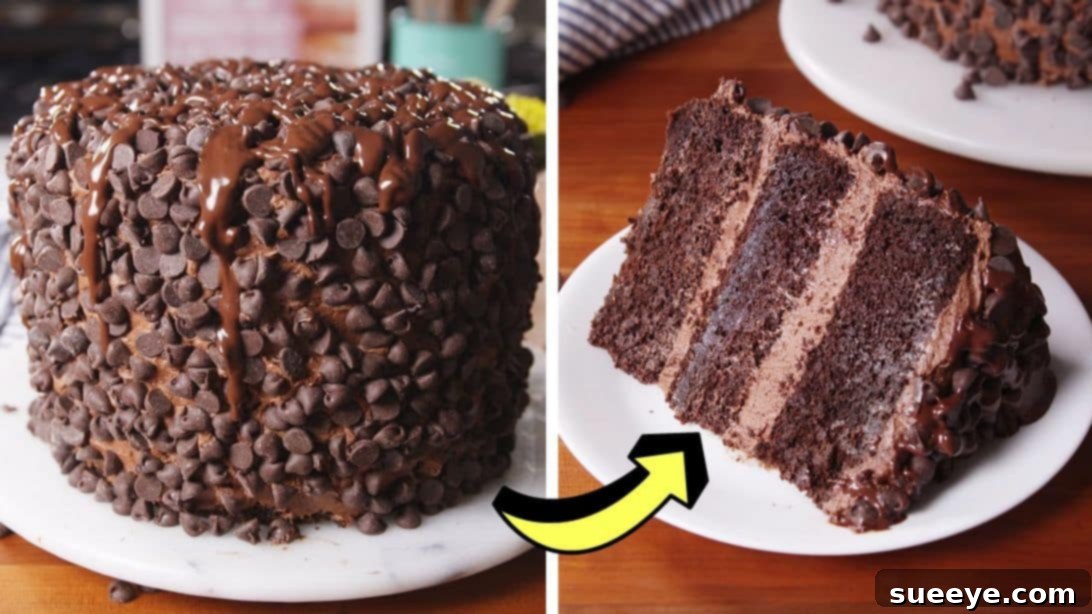
Now, use the remaining frosting to cover the entire cake – the top and all sides. Start by applying a thin “crumb coat” which traps any loose crumbs, then chill the cake for 15-20 minutes. This makes the final frosting application much cleaner. Afterward, apply a thicker, even layer of frosting, using an offset spatula or bench scraper to smooth the sides and top for a polished finish. For an extra touch of chocolate decadence and visual appeal, gently press the remaining semisweet chocolate chips around the top edge and sides of the frosted cake. You can do this by hand or by carefully tilting the cake and pressing the chips onto the sides.
For the grand finale, melt the remaining chocolate chips. You can do this in a microwave-safe bowl in 30-second intervals, stirring after each, until smooth, or using a double boiler. Once melted and slightly cooled, drizzle this glorious chocolate over the top of the cake, allowing it to elegantly drip down the sides. This not only adds more chocolate flavor but also creates a beautiful, professional finish. Serve immediately and enjoy the cheers and compliments!
Tips for Baking the Perfect Death by Chocolate Cake
Achieving bakery-quality results at home is entirely possible with a few key tips:
- Room Temperature Ingredients: This is a golden rule in baking! Ensure butter, eggs, and buttermilk are at room temperature. This allows them to emulsify better, creating a smoother, more uniform batter and a truly tender cake.
- Don’t Overmix: When combining wet and dry ingredients for the cake batter, mix just until they are combined. Overmixing develops the gluten in the flour too much, leading to a tough, dense, and dry cake.
- Quality Cocoa Powder Makes a Difference: Dutch-processed cocoa powder is highly recommended for this recipe due to its deep color and mellow, rich chocolate flavor. It contributes significantly to the “death by chocolate” experience.
- Cool Cakes Completely: This cannot be stressed enough! Attempting to frost a warm or even slightly warm cake is a recipe for disaster. The buttercream will melt, slide off, and create a messy, unappealing cake. Patience is key here.
- Level Your Cakes for Aesthetics: For a neater, more professional-looking layered cake, use a serrated knife or a dedicated cake leveler to trim any domed tops off your cooled cake layers. This creates flat surfaces for stacking.
- Master the Crumb Coat: Apply a very thin layer of frosting (often called a “crumb coat”) to your assembled cake first. This layer traps any loose crumbs. Chill the cake for 15-20 minutes after the crumb coat before applying the final, thicker layer of frosting. This technique ensures a clean, smooth, and crumb-free finish.
- Sift Powdered Sugar: For the silkiest, smoothest buttercream frosting, sift your powdered sugar before adding it to the butter mixture. This prevents any lumps and ensures a luxuriously creamy texture.
- Adjust Frosting Consistency: Frosting consistency is crucial for both ease of application and appearance. If your frosting is too stiff, add heavy cream a teaspoon at a time until it’s spreadable. If it’s too thin, add more sifted powdered sugar, a tablespoon at a time, until it reaches a medium-stiff consistency that holds its shape.
Storage and Serving Suggestions
Once assembled, this magnificent Death by Chocolate Cake is best enjoyed within 3-4 days to preserve its peak freshness and flavor. Store it in an airtight cake container at cool room temperature for up to 2 days. If you need to store it longer, or if your kitchen is particularly warm, transfer it to the refrigerator. If refrigerating, allow the cake to come to room temperature for at least an hour before serving for the best flavor and texture, as cold cake can be firm and less aromatic.
This cake is incredibly rich and flavorful, making it a showstopper all on its own. However, for an extra touch of indulgence or to complement its decadence, consider serving it with a scoop of premium vanilla bean ice cream, a dollop of freshly whipped cream, or a side of fresh raspberries or strawberries. The tartness of the berries provides a lovely contrast to the cake’s richness. A tiny sprinkle of flaky sea salt on top of each slice just before serving can also dramatically enhance and deepen the chocolate flavor, offering a gourmet touch.
Why This Death by Chocolate Cake Stands Out
What makes this specific recipe for Death by Chocolate Cake so exceptionally good and truly deserving of its legendary name? It’s the perfect harmony of several meticulously balanced elements:
- Intense Chocolate Flavor: The star of the show! The combination of a generous amount of high-quality Dutch-processed cocoa powder in both the cake layers and the frosting, coupled with the ingenious addition of strong black coffee, amplifies the chocolate notes to an extraordinary degree. The coffee doesn’t make the cake taste like coffee, but rather deepens and enriches the cocoa flavor, creating a profound, complex chocolate experience.
- Unrivaled Moisture: The secret to its incredible tenderness and moistness lies in the buttermilk. This acidic ingredient works wonders by reacting with the baking soda, resulting in an exceptionally tender crumb that practically melts in your mouth with every bite. The melted butter also contributes significantly to this luxurious, moist texture.
- Perfect Texture: Beyond just moisture, the cake boasts an ideal texture. The careful balance of both baking soda and baking powder ensures a light, airy, yet sturdy cake that holds its shape beautifully while remaining delightfully soft and yielding. It’s not dense or heavy, but perfectly substantial.
- Velvety Smooth Frosting: The chocolate buttercream frosting is a masterpiece in itself. It’s not overly sweet, striking a perfect balance that complements the rich cake layers without overpowering them. Its luxurious, creamy consistency provides a smooth, decadent counterpoint to the cake’s dense yet tender layers, making each spoonful an absolute delight.
- Irresistible Visual Appeal: From the moment it’s presented, this cake is a true showstopper. The impressive towering layers, the rich dark color of the chocolate, and the final elegant decoration with chocolate chips and a glistening drizzle make it as pleasing to the eye as it is to the palate. It looks every bit as decadent as it tastes, promising a truly memorable dessert experience.
This Death by Chocolate Cake is more than just a dessert; it’s an experience, a journey into the heart of chocolate bliss. It’s a testament to the irresistible allure of chocolate, baked into a cake that promises to be the highlight of any occasion and satisfy the deepest chocolate cravings. So gather your ingredients, follow these detailed steps, and prepare to impress everyone (including yourself!) with this truly magnificent creation.
All image credit belongs to Delish via YouTube. Follow and subscribe to their channel for more amazing recipes and tutorials!