
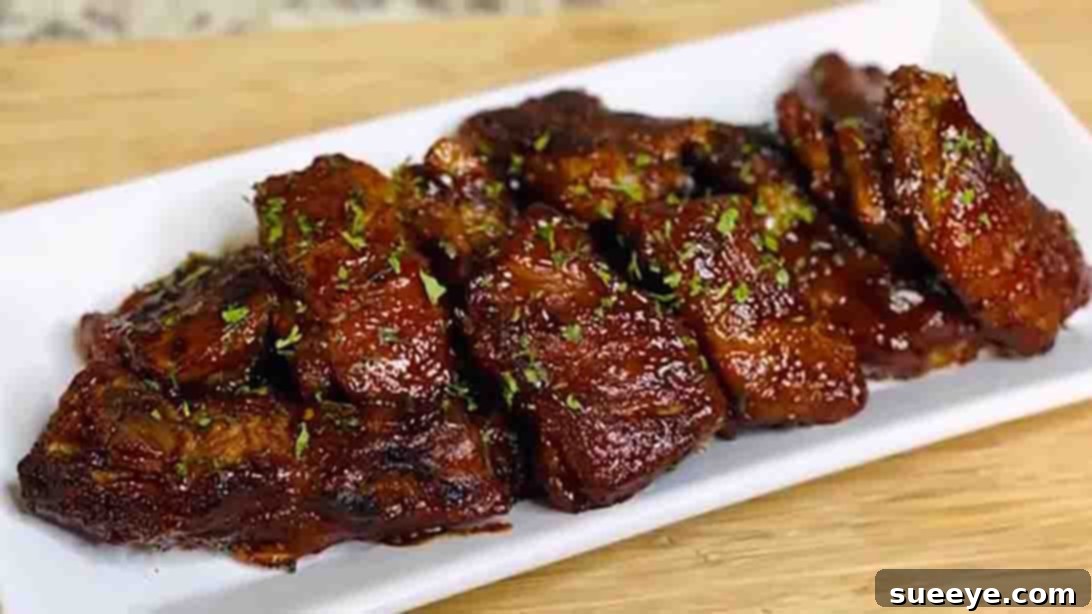
Achieve Fall-Off-The-Bone Perfection: The Ultimate Oven Baked BBQ Ribs Recipe
Craving succulent, fall-off-the-bone barbecue ribs but don’t own a grill, or simply prefer the convenience and control of your oven? You’re in luck! This incredible oven baked BBQ ribs recipe, inspired by the fantastic insights from Trice’s Tasty Eats on YouTube, is an absolute game-changer. It’s designed for anyone seeking deeply flavorful, incredibly tender ribs that taste like they spent hours in a smoker, all from the comfort of your kitchen. Forget the hassle of charcoal or gas; these baked ribs emerge perfectly cooked, boasting a savory crust and a luscious, tender interior that will impress even the most discerning BBQ enthusiasts.
This recipe provides a straightforward path to creating restaurant-quality ribs with minimal effort and maximum flavor. It eliminates the need for constant monitoring, temperature adjustments, or dealing with the unpredictable elements of outdoor cooking. Whether you’re hosting a backyard gathering, planning a cozy family dinner, or simply treating yourself to a hearty meal, this recipe delivers consistently outstanding results. It’s become a go-to favorite in many households for its simplicity, fantastic taste, and the sheer delight of perfectly cooked ribs. Get ready to transform your kitchen into a BBQ haven and discover just how easy it is to create unforgettable oven baked ribs right at home.
Why Oven-Baked Ribs Are Your Go-To for Delicious BBQ
While grilling and smoking certainly have their place in the world of barbecue, cooking ribs in the oven offers a multitude of benefits that make it a superior choice for many home cooks:
- Consistent and Controlled Heat: Unlike a grill, your oven provides a stable, uniform temperature, ensuring even cooking throughout the entire rack of ribs. This eliminates hot spots and guesswork, allowing for a more predictable and less stressful cooking experience.
- Unbeatable Tenderness: The slow, moist heat of oven baking is perfectly suited for breaking down the tough connective tissues in ribs. Wrapping the ribs in aluminum foil during baking creates a steaming environment, further enhancing their tenderness and moisture, resulting in meat that effortlessly pulls away from the bone.
- Weather-Proof Convenience: No more worrying about rain, wind, snow, or extreme heat putting a damper on your BBQ plans. You can enjoy perfectly cooked, tender BBQ ribs any time of the year, regardless of the outdoor conditions.
- Minimal Mess: While grilling can lead to grease flare-ups and messy grates, oven baking keeps the mess largely contained within your baking tray and foil. Cleanup is significantly easier, allowing you to focus on enjoying your meal.
- Accessibility for All: Not everyone has access to outdoor grilling space, specialized smoking equipment, or even an outdoor area. The oven makes gourmet BBQ ribs accessible to everyone, ensuring that no one has to miss out on this classic comfort food.
The Secret to Truly Tender, Flavorful Ribs Every Time
Achieving truly melt-in-your-mouth ribs isn’t just about throwing them in the oven. It’s a precise combination of techniques that build layers of flavor and ensure optimal tenderness. This recipe leverages a powerful dry rub, a crucial searing step, a perfect low-and-slow baking method, and a final broil to create that irresistible sticky, caramelized glaze. Each step plays a vital role in transforming humble ribs into a culinary masterpiece:
- The Dry Rub: A well-balanced dry rub forms the foundational flavor, seasoning the meat deeply before cooking.
- The Searing Step: A quick sear before baking creates a flavorful crust through the Maillard reaction, locking in juices and adding complexity.
- Low and Slow Baking: This is the heart of tenderness. Extended cooking at a moderate temperature allows collagen to break down into gelatin, making the meat incredibly succulent.
- The Foil Wrap: Trapping moisture during baking acts like a steampressure cooker, ensuring the ribs remain juicy and become exceptionally tender.
- The Broiler Finish: A final kiss under the broiler caramelizes your chosen BBQ sauce, creating that signature glossy, slightly charred, and utterly delicious exterior.
Ingredients You’ll Need:
Preparing your ingredients beforehand ensures a smooth and enjoyable cooking process. While specific brands like “Nature’s Seasoning” are mentioned, feel free to use your preferred all-purpose seasoning blend, and certainly, your favorite BBQ sauce!
- Pork Ribs: One rack (e.g., St. Louis style, baby back ribs, or spare ribs). Adjust cooking time slightly based on the thickness and type of ribs chosen.
- 2 tsp Nature’s Seasoning: Or your favorite all-purpose seasoning blend, typically containing salt, pepper, garlic, and onion.
- 1 tsp Ground Black Pepper: Freshly ground pepper offers a more vibrant aroma and sharper taste.
- 1 tsp Salt: Kosher or sea salt is recommended for better flavor distribution and control.
- 1 tsp Garlic Powder: Adds a fundamental aromatic and savory depth.
- 1 tsp Onion Powder: Complements the garlic, enhancing the savory profile of the rub.
- 1 tsp Sugar: A touch of sweetness helps balance the savory spices and aids in caramelization during the searing and broiling stages.
- 1 tsp Smoked Paprika: Crucial for imparting that authentic, deep smoky BBQ flavor, even without a smoker. Don’t confuse it with sweet or hot paprika!
- BBQ Sauce of your choice: Choose your absolute favorite – whether it’s sweet and sticky, tangy and vinegary, or bold and spicy.
- Olive Oil: A small amount is needed for searing the ribs to create a beautiful, flavorful crust.
Step-by-Step Directions to Perfect Oven Baked Ribs
Step 1: Preparation, Crafting the Dry Rub, and Searing for Flavor
The journey to perfect ribs begins with proper preparation. Start by thoroughly washing your rack of ribs under cold running water. This ensures cleanliness and prepares them for optimal seasoning adhesion. Pat them completely dry with paper towels; excess moisture can hinder the rub from sticking and prevent a good sear. While often overlooked, many seasoned cooks recommend removing the thin membrane from the bony side of the ribs. This membrane, known as the pleura, can become tough and chewy when cooked, and it prevents the delicious flavors of your rub and sauce from fully penetrating the meat. To remove it, simply slide a small knife or the handle of a spoon under the edge of the membrane on one end of the rack. Once you have a good grip, use a paper towel to hold it firmly and pull it off in one swift motion. Don’t worry if it tears; just repeat the process.
Next, it’s time to create your flavor-packed dry rub. In a small bowl, combine 2 teaspoons of Nature’s Seasoning (or your chosen all-purpose blend), 1 teaspoon of ground black pepper, 1 teaspoon of salt, 1 teaspoon of garlic powder, 1 teaspoon of onion powder, 1 teaspoon of sugar, and 1 teaspoon of smoked paprika. Mix these ingredients thoroughly until they are well combined and uniform in color. This meticulously crafted blend offers a perfect balance of savory, sweet, and smoky notes that will infuse the meat as it bakes.
Once your aromatic rub is ready, generously apply it to all sides of the ribs. Don’t be shy – really massage the mixture into the meat, ensuring every surface and crevice is thoroughly coated. This dry rub forms the foundational layer of the ribs’ incredible flavor profile. After seasoning, heat a little bit of olive oil (about 1-2 tablespoons) in a large, heavy-bottomed skillet or pan over medium-high heat. Once the oil is shimmering and just starting to smoke lightly, carefully add the ribs to the pan. Sear them on all sides until they develop a beautiful, deep golden-brown crust. Searing is a crucial step that locks in juices and builds an extra layer of complex flavor through the Maillard reaction, which creates those irresistible browned, savory bits.
Step 2: Slow Baking for Unmatched Tenderness
After the searing process, carefully transfer the browned ribs to a sturdy baking tray. This tray should be generously lined with heavy-duty aluminum foil. For maximum tenderness and to create a steaming effect, wrap the ribs completely and securely. Place another sheet of aluminum foil over them, crimping all the edges tightly to seal in all the precious moisture. This meticulous wrapping creates a mini-oven within your oven, allowing the ribs to gently steam and become incredibly tender, ensuring they don’t dry out during the long bake.
Preheat your oven to 350 degrees F (175 degrees C). Once the oven reaches the desired temperature, place the tightly foil-wrapped ribs in the oven and bake them for a full hour. This initial baking period is vital for beginning the slow process of breaking down the tough connective tissues within the meat. After the first hour, carefully remove the tray from the oven. Gently unwrap the foil just enough to expose the ribs, then use tongs to carefully flip them to ensure even cooking and tenderness on both sides. Re-wrap them tightly with the foil, making sure the seal is secure, and return them to the oven for another hour. This extended, slow baking time (two hours total) is the absolute key to achieving that coveted “fall-off-the-bone” texture that everyone loves.
Step 3: Glazing and Finishing Under the Broiler for a Perfect Crust
Once the ribs have completed their two-hour baking period, they should be exceptionally tender and fragrant. Carefully remove them from the oven and completely unwrap the foil. Discard any excess liquid in the tray if desired, or save it for a flavorful jus. Now comes the exciting part: adding that irresistible BBQ glaze! Generously brush each rib with your favorite barbecue sauce. Whether you prefer a smoky, sweet, tangy, or spicy sauce, this is where you customize the final flavor profile to your personal liking. Don’t be shy – aim for an even, luscious coating.
After saucing, adjust your oven rack to the top position and place the ribs back into the oven, this time under the broiler. Broil for about five minutes, keeping a very close eye on them. Broilers are powerful and can quickly caramelize or burn sugars in BBQ sauce, so constant vigilance is crucial. The goal is to caramelize the sauce and create a slightly sticky, glossy, and beautifully charred finish, not to burn it to a crisp. After five minutes, carefully take them out, use tongs to flip them to the other side, brush them with more BBQ sauce (if desired for an extra thick glaze), and broil for another five minutes. This two-stage broiling ensures a gorgeous, even glaze on both sides. Once perfectly glazed and caramelized, remove the ribs from the oven. Allow them to rest for a few minutes before slicing and serving. This resting period allows the juices to redistribute, ensuring maximum moisture and flavor in every bite.
Essential Tips for Oven Baked Ribs Success
To ensure your oven baked ribs turn out perfectly every single time, keep these expert tips in mind:
- Don’t Skip the Membrane Removal: This small, often-overlooked step truly makes a huge difference in the final tenderness of your ribs and allows the dry rub to penetrate the meat more effectively.
- Quality Ribs Matter: Start with good quality pork ribs. Freshness, proper marbling, and a decent meat-to-bone ratio will contribute significantly to a more flavorful and tender result.
- Season Generously and Evenly: Don’t be afraid to apply a good, even layer of the dry rub to all sides of the ribs. This is where a substantial amount of the core flavor comes from.
- Seal the Foil Tightly: A tight, secure foil seal is critical. It traps steam, which is absolutely essential for breaking down the tough fibers in the ribs and keeping them incredibly moist throughout the long baking process.
- Watch the Broiler Like a Hawk: Broilers can be incredibly powerful and can quickly burn the sugars present in BBQ sauce. Stay close to the oven and check frequently (every minute or so) to achieve perfect caramelization without charring.
- Rest Your Ribs: After removing from the oven and finishing under the broiler, let the ribs rest, lightly tented with foil, for 5-10 minutes before slicing and serving. This allows the juices to redistribute throughout the meat, ensuring maximum flavor and moisture in every bite.
Perfect Pairings: What to Serve with Your Melt-in-Your-Mouth Ribs
These incredibly flavorful oven baked BBQ ribs pair wonderfully with a variety of classic American comfort food side dishes. Here are some suggestions to complete your meal:
- Creamy Coleslaw: The cool, tangy crunch of coleslaw perfectly complements the rich, savory ribs.
- Homemade Macaroni and Cheese: A rich and cheesy mac and cheese is a timeless pairing that adds ultimate comfort.
- Sweet Cornbread or Corn on the Cob: The sweetness of corn (whether in bread form or on the cob) balances the smoky-savory flavors of the ribs.
- Baked Beans: Especially those simmered with a touch of extra BBQ sauce or bacon, baked beans are a quintessential BBQ side.
- Potato Salad or Roasted Potatoes: A creamy potato salad or crispy roasted potatoes make for a hearty and satisfying accompaniment.
- A Crisp Green Salad: For a lighter touch, a simple green salad with a vinaigrette dressing can cut through the richness of the ribs.
Frequently Asked Questions About Oven Baked Ribs
Can I prepare the ribs ahead of time?
Absolutely! You can apply the dry rub and let the ribs marinate in the refrigerator for several hours or even overnight (up to 24 hours). This extra time allows the flavors to deepen even further, resulting in a more robust taste. You can also bake the ribs (up to the point before applying sauce and broiling) and refrigerate them. When ready to serve, reheat gently in the oven, then apply sauce and broil just before serving.
What type of ribs are best for this recipe?
This recipe is highly versatile and works exceptionally well with various types of pork ribs. Baby back ribs are generally leaner and cook a bit faster, offering a tender bite. St. Louis style ribs or spare ribs are typically meatier, richer in flavor, and may require a slightly longer baking time due to their size and fat content. Choose your favorite cut, and simply adjust cooking times based on thickness.
My ribs aren’t falling off the bone. What went wrong?
If your ribs aren’t as tender as you’d like, it almost always means they needed more cooking time. Ribs benefit immensely from low and slow cooking to effectively break down the tough connective tissue. If they still feel too firm after the initial two hours, simply re-wrap them tightly in foil and return them to the oven for another 30-60 minutes. Check for tenderness every 30 minutes until they reach your desired fall-off-the-bone consistency.
Can I use a different seasoning blend or BBQ sauce?
Absolutely! The beauty of home cooking lies in its adaptability. While this recipe provides a fantastic starting point, feel free to experiment with your favorite store-bought dry rubs or create your own custom blend. Just ensure your rub has a good balance of salt, sugar, and various aromatics. Similarly, the choice of BBQ sauce is entirely yours – use whatever sauce you love most to personalize the final flavor.
Your Ultimate Oven Baked Ribs Recipe Awaits!
There you have it – a comprehensive guide to crafting the most delicious, tender, and incredibly flavorful oven baked BBQ ribs without ever firing up a grill. This recipe, inspired by the culinary wisdom of Trice’s Tasty Eats, proves that achieving barbecue perfection is entirely possible in your home kitchen. From the careful preparation and powerful dry rub to the slow, tenderizing bake and the final glossy, caramelized glaze, every step contributes to an unforgettable dining experience.
So, the next time that irresistible BBQ craving hits, don’t hesitate. Roll up your sleeves, follow these simple yet effective steps, and prepare to be amazed by the melt-in-your-mouth goodness of these oven baked ribs. They are truly a crowd-pleaser and a testament to the fact that great barbecue doesn’t always require elaborate outdoor equipment. Enjoy the process, savor the aroma, and delight in every tender bite!