
Ultimate Guide: How to Stretch Shoes That Are Too Small for Perfect Comfort
There’s nothing quite like the excitement of finding that perfect pair of shoes—the ideal style, color, and design. However, this joy can quickly turn into frustration when you realize they’re just a tad too snug, leading to discomfort, blisters, and foot pain. Many of us have faced this dilemma, and the traditional solution of taking them to a shoe repair shop can sometimes lead to disappointment, or even worse, ruined footwear. I once had a similar experience; after getting my beloved shoes stretched professionally, they came back too big, completely losing their intended fit and appeal.
The good news is that achieving a comfortable, custom fit for your tight shoes doesn’t always require professional intervention. With a few simple, effective, and safe DIY methods, you can gently stretch your shoes at home, allowing for gradual adjustments without the risk of over-stretching or damage. This comprehensive guide will walk you through various techniques, including the popular ice-bag method and the heat-and-wear approach, helping you transform uncomfortable footwear into your favorite go-to pair. Say goodbye to painful breaking-in periods and hello to lasting comfort.
Why DIY Shoe Stretching Is Your Best Bet
Before diving into the methods, it’s worth understanding why stretching your shoes at home can often be more beneficial than relying solely on professional services:
- Custom Fit: DIY methods allow you to control the stretching process gradually, tailoring the fit precisely to your foot’s unique contours. This personalized approach is often superior to a machine-stretched, generic enlargement.
- Cost-Effective: Stretching shoes at home eliminates repair shop fees, saving you money while extending the life of your footwear.
- Convenience: You can stretch your shoes at your own pace, whenever it suits you, without needing to make trips to a shop.
- Reduced Risk of Damage: Gentle, controlled home stretching techniques minimize the risk of over-stretching or damaging delicate shoe materials, a common concern with aggressive machine stretching.
- Immediate Relief: For minor tightness, a quick home remedy can provide immediate relief, making your new shoes wearable much sooner.
Method 1: The Ice Expansion Technique (The Ziplock Bag & Freezer Method)
This ingenious method utilizes the natural expansion of water as it freezes to gently stretch your shoes. It’s particularly effective for stretching the toe box and overall width.
Materials For The Ice Expansion Method:
- Two sturdy, sealable plastic ziplock bags (freezer bags work best)
- Water
- A freezer
Directions For The Ice Expansion Method:
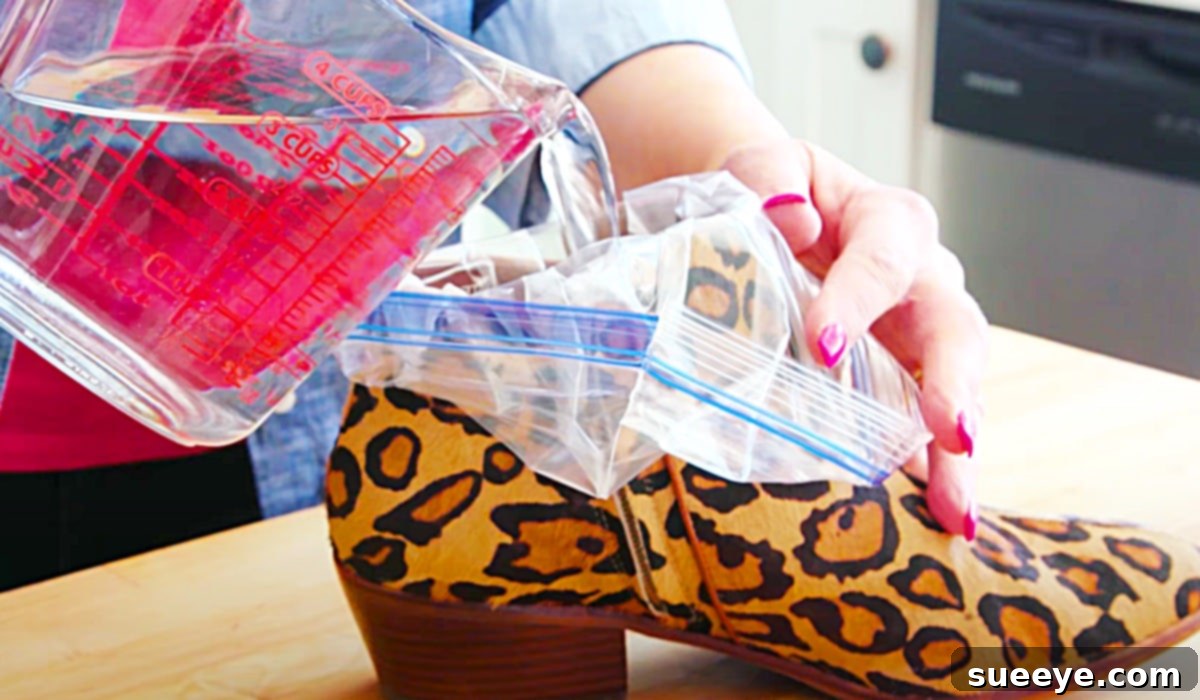
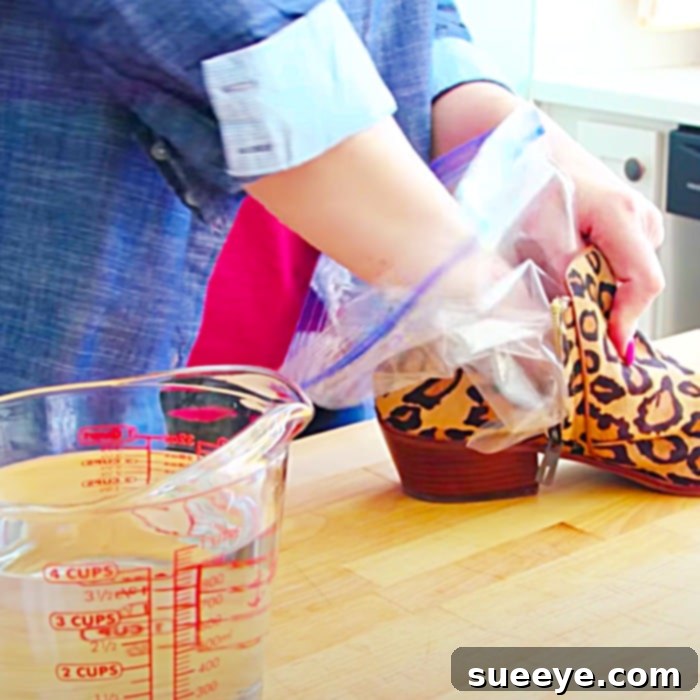
- Prepare the Ziplock Bags: Take one ziplock bag and fill it with water. You don’t need to fill it completely; roughly a quarter to a third full is usually sufficient, depending on the shoe size and the area you want to stretch. Make sure to seal the bag securely, removing as much air as possible to prevent leaks.
- Insert Into Shoes: Carefully place the sealed bag of water inside the shoe, positioning it precisely in the area that feels tight. For instance, if the toe box is the problem, push the bag all the way to the front. For overall width, ensure the bag expands across the widest part of the shoe.
- Freeze: Place the shoes, with the water-filled bags inside, into your freezer. Leave them there until the water is completely frozen, which typically takes several hours or overnight. As the water freezes, it expands, gently pushing against the inside of the shoe material.
- Thaw and Remove: Once the water is frozen solid, remove the shoes from the freezer. Allow them to sit at room temperature for about 15-20 minutes to let the ice thaw slightly. This makes it easier to remove the bags without damaging your shoes. Do not force the bags out if they are still frozen solid to the shoe interior.
- Test and Repeat (If Necessary): Carefully remove the ziplock bags. Try on your shoes. If they still feel a bit snug, you can repeat the process. Remember, gradual stretching is key to preventing damage.
Method 2: The Heat & Movement Technique (Hairdryer & Thick Socks)
This method, popularized by One Good Thing By Jillee on YouTube, uses controlled heat to make the shoe material more pliable, allowing your foot to stretch it to a custom fit.
Materials For The Heat & Movement Technique:
- A pair of thick socks
- A hairdryer
Directions For The Heat & Movement Technique:
- Prepare Your Feet: Put on the thickest pair of socks you own. If your shoes are extremely tight, you might even double up on socks.
- Wear the Shoes: Carefully put on the shoes you want to stretch over your thick socks. It might be a snug fit, but that’s precisely what you want for this method to work.
- Apply Heat: Get your hairdryer and set it to a medium heat setting. Aim the hairdryer at the tight areas of your shoes, such as the toe box, sides, or heel. Keep the hairdryer moving to avoid overheating one spot, which could damage the material.
- Wiggle and Move: While applying heat, actively wiggle your feet, flex your toes, and walk around a bit. The heat combined with your foot’s movement will help the shoe material stretch and mold to your foot’s shape.
- Cool Down: Continue this process for about 20-30 seconds on each tight spot. Once you’ve heated and wiggled, keep the shoes on your feet until they cool down completely. This allows the material to set in its new, stretched form.
- Test and Repeat: Remove the thick socks and try on the shoes with regular socks. If they are still tight, repeat the process. This method provides a remarkably custom fit that many shoe repair shops struggle to replicate.
Method 3: Using a Professional Shoe Stretcher
For a more controlled and targeted stretch, especially for specific areas like the bunion or width, a shoe stretcher tool can be an excellent investment.
Materials For Shoe Stretcher Method:
- A shoe stretcher tool (available online or at shoe stores)
- Shoe stretching spray (optional, but recommended for leather)
Directions For Shoe Stretcher Method:
- Prepare the Shoe: If using a stretching spray, apply it generously to the tight areas of the shoe, both inside and out. This helps to soften the material, making it more receptive to stretching.
- Insert the Stretcher: Insert the shoe stretcher into the shoe, ensuring it’s properly seated in the area you wish to expand.
- Apply Pressure: Turn the handle of the stretcher to gradually expand it. You’ll feel resistance as the shoe material stretches. Do not overtighten initially.
- Let it Sit: Leave the stretcher in the shoe for at least 24 to 48 hours. This allows the material ample time to adapt to its new shape without tearing.
- Check and Adjust: Remove the stretcher and try on the shoes. If they still feel tight, reinsert the stretcher and expand it a bit more, repeating the process until you achieve the desired comfort.
Method 4: The Alcohol and Water Spray Method
This method uses a simple mixture to relax the fibers of certain shoe materials, making them more pliable.
Materials For Alcohol and Water Spray Method:
- Small spray bottle
- Rubbing alcohol (isopropyl alcohol)
- Water
Directions For Alcohol and Water Spray Method:
- Mix the Solution: In a spray bottle, combine equal parts rubbing alcohol and water.
- Apply to Shoes: Lightly mist the inside of the shoes in the areas that feel tight. Be careful not to drench the shoes, especially if they are delicate materials like suede.
- Wear Them In: Immediately put on the shoes and wear them around your house for at least 30 minutes to an hour. Your foot’s natural movement will help stretch the softened material.
- Dry Naturally: Allow the shoes to air dry completely. The alcohol helps the mixture evaporate quickly, leaving no residue.
- Repeat If Needed: This method can be repeated several times until the desired stretch is achieved.
Method 5: The Simplest Approach – Wearing Them In with Thick Socks
Sometimes, the most straightforward methods are the most effective, especially for minor tightness.
Materials:
- Thick socks (or multiple pairs of regular socks)
Directions:
- Layer Up: Put on one or two pairs of thick socks.
- Wear the Shoes: Force your feet into the tight shoes.
- Walk Around: Wear the shoes around your house for a few hours each day. The constant pressure and movement from your feet will gradually stretch the material.
- Repeat: Continue this process over several days until the shoes feel comfortable with your regular socks.
Important Considerations Before You Start Stretching
To ensure successful stretching and avoid damaging your beloved footwear, keep these points in mind:
- Know Your Shoe Material:
- Leather: Leather is generally very responsive to stretching due to its natural pliability. Heat, moisture (like the alcohol spray or water bags), and mechanical stretchers work well.
- Suede: Suede is also leather but more delicate. Use stretching sprays specifically designed for suede, and be cautious with water to avoid stains. Heat should be gentle.
- Canvas/Fabric: These materials can stretch somewhat but are less elastic than leather. The thick socks and hairdryer method can work, but avoid over-saturating with water.
- Synthetic/Patent Leather: These materials are notoriously difficult to stretch because they are less breathable and flexible. While some minor stretching might be possible with the hairdryer method, significant changes are unlikely. Be very careful with heat as it can damage or melt synthetic materials.
- Rubber/Plastic: Almost impossible to stretch effectively without specialized equipment.
- Patience is Key: Gradual stretching is always better than aggressive, quick methods. Attempting to stretch shoes too much, too fast, can lead to irreversible damage like tearing, cracking, or weakening seams.
- Targeted Stretching: Identify the exact areas of tightness. Do you need more room in the toe box, across the width, or at the heel? Different methods are better suited for different areas. For instance, the ice method excels at toe box expansion, while a spot stretcher is great for bunion relief.
- Protect Delicate Details: If your shoes have delicate embellishments, be mindful when applying heat or inserting bags/stretchers.
When to Seek Professional Help
While DIY methods are highly effective for most situations, there are times when professional intervention is warranted:
- Significant Size Difference: If your shoes are more than half a size too small, home methods might not be sufficient, and a professional shoe repairer with specialized equipment can achieve a more substantial stretch.
- Delicate or Expensive Materials: For very high-end or fragile footwear, a professional might be the safest option to avoid accidental damage.
- Complex Issues: If you have specific foot conditions requiring precise modifications beyond simple stretching, a professional cobbler is better equipped.
Conclusion: Step into Comfort
Say goodbye to the agony of ill-fitting shoes and embrace the comfort you deserve. With these tried-and-true DIY shoe stretching techniques, you can easily transform tight footwear into perfectly comfortable companions. Whether you opt for the simplicity of the ice bag method, the custom fit of the hairdryer technique, or the targeted approach of a shoe stretcher, remember to proceed with patience and care. By understanding your shoe materials and applying the right method, you’ll not only save money but also extend the life and wearability of your favorite shoes. Step out confidently and comfortably in shoes that fit just right!