
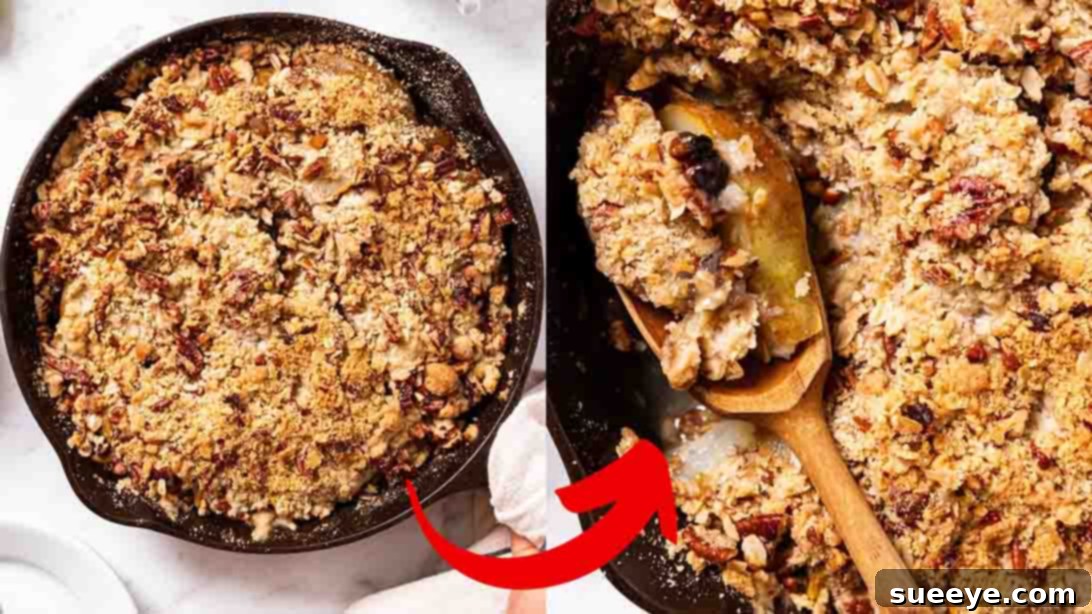
Easy Skillet Pear Crisp Recipe: Your Ultimate Fall Dessert Guide
As the leaves begin to change color and a crisp coolness fills the air, there’s an undeniable craving for warm, comforting desserts that capture the essence of autumn. Look no further than the delightful **Skillet Pear Crisp**, a heavenly treat that perfectly embodies the flavors of the season. This recipe, inspired by the culinary expertise of Wyse Guide on YouTube, transforms fresh, ripe pears into a caramelized, spiced sensation, topped with a rich, buttery streusel. It’s not just a dessert; it’s an experience that brings warmth and joy to any gathering, making it an absolute must-try for your fall baking repertoire.
Imagine succulent, tender pears, gently spiced with cardamom and nutmeg, bubbling away in a cast-iron skillet, covered with a crunchy, sweet oat and pecan topping. This isn’t just an easy pear recipe; it’s a celebration of seasonal bounty, designed to be simple enough for any home baker yet impressive enough for special occasions. The Skillet Pear Crisp is incredibly versatile, serving equally well as a comforting family dessert or an elegant end to a dinner party. Its rustic charm, combined with its irresistible aroma and taste, ensures it will become a cherished recipe in your household, just as it has in ours. Get ready to embark on a culinary journey that promises pure, unadulterated bliss with every spoonful.
Gather Your Essentials: Ingredients for the Perfect Pear Crisp
Crafting the perfect Skillet Pear Crisp begins with selecting high-quality ingredients. Each component plays a crucial role in achieving that delightful balance of sweet, spicy, and buttery textures. We’ll break down the elements for both the irresistible streusel topping and the luscious pear filling.
For the Irresistible Streusel Topping:
- 3/4 cup All-Purpose Flour: The foundation of our crisp topping, providing structure and a tender crumb.
- 1/4 cup Old-Fashioned Rolled Oats: Adds a delightful chewiness and rustic texture, enhancing the “crisp” in our pear crisp.
- 1/3 cup Light Brown Sugar: Contributes deep, molasses-rich sweetness and a subtle caramel note that complements the pears beautifully.
- 1/2 tsp Salt: A pinch of salt is essential to balance the sweetness and elevate the overall flavor profile of the topping.
- 1/2 tsp Cardamom: This aromatic spice brings a unique, citrusy, and slightly floral warmth, a perfect partner for pears.
- 1/4 tsp Nutmeg, Freshly Ground: Freshly ground nutmeg offers a potent, sweet, and woody spice that truly shines in fall desserts. Always opt for fresh if possible!
- 8 tbsp Unsalted Butter, cut into 1/2″ cubes and chilled: Cold butter is key to achieving a perfectly crumbly streusel. It melts slowly during baking, creating pockets of tender flakiness.
- 1 cup Pecans, Toasted and Chopped: Toasted pecans add a wonderful nutty flavor and a satisfying crunch. Toasting beforehand deepens their flavor significantly.
For the Luscious Pear Filling:
- 3 lb Pears (approximately five medium-sized pears), cored, peeled, and sliced: The star of our show! Choose firm-ripe pears like Bartlett, Bosc, or Anjou for the best baking results. They hold their shape well and offer a sweet, juicy texture.
- 1 tbsp Fresh Lemon Juice: This brightens the flavor of the pears and, crucially, prevents them from browning, keeping them visually appealing.
- 2 tbsp All-Purpose Flour: Acts as a thickening agent for the pear juices, creating a luscious, not watery, filling.
- 3 tbsp White Granulated Sugar: Enhances the natural sweetness of the pears, ensuring a perfectly balanced dessert.
- 1/2 tsp Salt: Just a touch to awaken the fruit’s flavors and marry them with the spices.
- 1/2 tsp Cardamom: Echoes the spice in the streusel, creating a harmonious flavor throughout the dish.
- 1/4 tsp Nutmeg, Freshly Ground: Another layer of warming spice, tying all the autumn flavors together beautifully.
Step-by-Step Guide: Crafting Your Skillet Pear Crisp
Making this Skillet Pear Crisp is an enjoyable process, and following these detailed steps will ensure a perfect, crowd-pleasing dessert every time. Precision and a little patience will reward you with an unforgettable treat.
Step 1: Preparing the Exquisite Streusel Topping
Your first task is to create the magical streusel topping – the crunchy crown of your pear crisp. In a spacious mixing bowl, combine the dry ingredients: 3/4 cup all-purpose flour, 1/4 cup old-fashioned rolled oats, 1/3 cup light brown sugar, 1/2 teaspoon salt, 1/2 teaspoon cardamom, and 1/4 teaspoon freshly ground nutmeg. Use a whisk or a spoon to thoroughly mix these ingredients until they are uniformly combined. This ensures that the spices and sugar are evenly distributed throughout the topping.
Next, it’s time to incorporate the chilled butter. Add the 8 tablespoons of unsalted butter, which you’ve cut into 1/2-inch cubes. The key here is to keep the butter cold, as this prevents it from melting too quickly and allows it to create pockets of steam during baking, resulting in a wonderfully flaky and crumbly texture. Using a pastry blender, two knives, or even your fingertips (working quickly to avoid warming the butter too much), cut the butter into the dry mixture. Continue this process until the mixture resembles coarse crumbs, with some pieces of butter still visible, ranging from pea-sized to small bean-sized. This coarse texture is exactly what we’re looking for to achieve that signature crisp. Finally, gently fold in the 1 cup of toasted and chopped pecans. The toasty notes of the pecans add an extra layer of flavor and crunch that elevate the streusel to perfection. Set this mixture aside as you prepare the filling.
Step 2: Crafting the Pear Filling and Assembling Your Crisp
Now, let’s turn our attention to the star fruit. Take your peeled, cored, and sliced pears and place them in a large mixing bowl. It’s crucial to ensure your pears are uniformly sliced, ideally about 1/4-inch thick, to ensure even cooking. Pour 1 tablespoon of freshly squeezed lemon juice over the pears. The lemon juice isn’t just for flavor; it also helps to prevent the pears from oxidizing and turning brown, preserving their appealing color.
To the bowl of pears, add 2 tablespoons of all-purpose flour, 3 tablespoons of white granulated sugar, 1/2 teaspoon salt, 1/2 teaspoon cardamom, and 1/4 teaspoon freshly ground nutmeg. Gently toss all these ingredients together until the pears are thoroughly coated. The flour will help thicken the released pear juices during baking, creating a rich, syrupy filling rather than a watery one. The sugar enhances the natural sweetness of the pears, and the spices infuse them with warm, autumnal notes.
Once your pear filling is perfectly mixed, transfer the entire mixture into a well-seasoned 10 or 12-inch cast-iron skillet. Cast iron is ideal for this recipe as it distributes heat incredibly evenly, ensuring a consistent bake and a beautifully browned bottom crust. Spread the pear mixture evenly across the bottom of the skillet, making sure there are no large gaps. Then, generously sprinkle the prepared streusel topping over the pears, creating an even layer from edge to edge. Don’t press the streusel down too firmly; a loose application allows for maximum crispiness.
With your skillet assembled, place it into a preheated 350-degree F (175-degree C) oven. Bake for approximately 50 to 60 minutes. Baking time may vary slightly depending on your oven and the ripeness of your pears. You’ll know it’s done when the pear filling is visibly bubbling around the edges, and the streusel topping has turned a beautiful golden brown and is wonderfully crisp. The aroma filling your kitchen will also be an excellent indicator!
Once baked to perfection, carefully remove the skillet from the oven. Resist the urge to dive in immediately! Allow the Skillet Pear Crisp to cool for at least ten minutes before serving. This cooling period allows the filling to set properly, preventing it from being too runny, and also ensures the streusel maintains its crispness. Serve warm, perhaps with a scoop of vanilla bean ice cream or a dollop of fresh whipped cream, for an utterly delightful experience.
Why a Skillet? Your Secret Weapon for Dessert Perfection
While you could certainly bake a pear crisp in a traditional baking dish, using a cast-iron skillet offers several distinct advantages that elevate this dessert from good to absolutely phenomenal. First and foremost, cast iron excels at heat retention and even distribution. This means your pears will cook uniformly, becoming tender and juicy without any burnt edges. More importantly, it creates a wonderfully caramelized bottom crust that adds an extra layer of flavor and texture that’s hard to achieve with other bakeware. The skillet also transitions beautifully from oven to table, providing a rustic and inviting presentation that enhances the overall dining experience.
Furthermore, cooking and serving in the same pan reduces cleanup, which is always a bonus! A well-seasoned cast-iron skillet also imparts a subtle depth to the flavors, contributing to the rich, hearty character of this fall dessert. Its robust nature makes it perfect for dishes that bake for a longer duration, ensuring consistent results every time. If you’re looking for the ultimate homemade pear crisp, embracing the cast-iron skillet is a game-changer.
Tips for the Perfect Pear Crisp Every Time
Achieving pear crisp perfection is easier than you think with a few expert tips:
- Choose the Right Pears: Select pears that are firm but yield slightly to gentle pressure. Bartlett, Bosc, and Anjou varieties are excellent choices for baking as they hold their shape and develop a wonderfully sweet flavor. Avoid overly soft or bruised pears.
- Don’t Overmix the Streusel: When combining the butter with the dry ingredients for the streusel, aim for a coarse, crumbly texture. Overmixing can lead to a tough or cake-like topping. The goal is distinct butter pieces that melt and create steam, resulting in a light and crisp texture.
- Even Pear Slices: Cut your pears into uniform slices, ideally about 1/4 to 1/2 inch thick. This ensures they cook evenly and become tender at the same rate. Inconsistent slices can lead to some pears being mushy while others are still firm.
- Adjust Sweetness to Taste: The amount of sugar in the filling can be adjusted based on the sweetness of your pears and your personal preference. If your pears are very ripe and sweet, you might reduce the sugar slightly.
- Embrace Freshly Ground Spices: While pre-ground spices are convenient, freshly ground nutmeg and cardamom offer a significantly more vibrant and aromatic flavor that truly makes a difference in this crisp.
- Don’t Skip the Cooling Time: Allowing the crisp to cool for 10-15 minutes after baking is crucial. This time allows the filling to set and thicken, preventing it from being too runny, and ensures the streusel remains crispy.
Variations and Serving Suggestions to Elevate Your Crisp
This Skillet Pear Crisp is wonderful on its own, but it also serves as a fantastic canvas for creativity. Consider these variations and serving ideas to make it truly your own:
Customizing Your Crisp:
- Add Other Fruits: For a delightful mix, incorporate 1 cup of sliced apples (Granny Smith for tartness, Honeycrisp for sweetness) or a handful of fresh cranberries for a tangy burst of flavor.
- Nutty Alternatives: While pecans are classic, feel free to substitute with chopped walnuts, almonds, or even hazelnuts in the streusel for a different flavor profile.
- Spice it Up: A pinch of ground ginger or a teaspoon of cinnamon can be added to the pear filling for an extra layer of warmth and spice.
- Gluten-Free Option: Easily adapt this recipe by using a gluten-free all-purpose flour blend (one that contains xanthan gum) for both the streusel and the filling. Ensure your oats are certified gluten-free.
- Vegan Twist: For a plant-based version, replace the butter in the streusel with a good quality vegan butter alternative.
Serving Your Skillet Pear Crisp:
- Classic Companions: A generous scoop of vanilla bean ice cream melting over the warm crisp is a timeless pairing. Alternatively, a dollop of freshly whipped cream adds a light, airy contrast.
- Decadent Drizzle: A drizzle of homemade caramel sauce or a sprinkle of toasted coconut flakes can elevate the flavor and presentation.
- Breakfast or Brunch: Don’t limit this to dessert! A warm slice of pear crisp with a dollop of Greek yogurt makes a surprisingly delicious and comforting breakfast or brunch item.
- With Coffee or Tea: Enjoy a small portion with your favorite hot beverage for a cozy afternoon treat.
Storing and Reheating Your Delicious Pear Crisp
Leftover Skillet Pear Crisp, while rare, can be stored and enjoyed later. Allow the crisp to cool completely before covering the skillet tightly with aluminum foil or transferring the crisp to an airtight container. It will keep well in the refrigerator for up to 3-4 days. To reheat, you can warm individual portions in the microwave, but for the best texture, place the entire skillet (if cast iron and oven-safe) or a portion in an oven preheated to 300°F (150°C) for 15-20 minutes, or until warmed through and the streusel has re-crisped slightly. This method helps restore some of that delightful crunch to the topping.
Conclusion: Your New Fall Favorite Dessert Awaits!
The Skillet Pear Crisp is more than just a recipe; it’s an invitation to savor the cozy, comforting flavors of autumn in a simple yet elegant way. From the tender, spiced pears to the irresistible crunchy streusel topping, every bite is a testament to the beauty of seasonal baking. We hope this comprehensive guide, inspired by the wonderful Wyse Guide, empowers you to create a dessert that will become a beloved tradition in your home.
Whether you’re gathering with family, hosting friends, or simply treating yourself to a moment of autumnal bliss, this easy skillet pear crisp promises to deliver. Its robust flavors and comforting warmth make it the ultimate fall dessert. So, preheat your oven, grab your skillet, and get ready to bake a masterpiece that celebrates the best of the season. Your taste buds will thank you!