
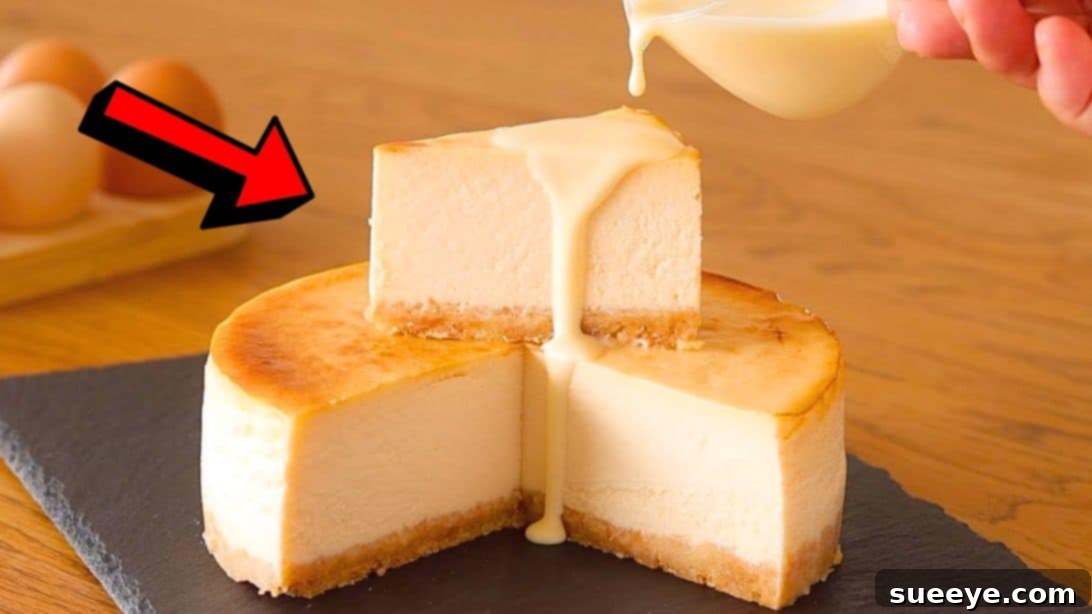
Easy Melt-in-Your-Mouth New York Style Cheesecake: Your Ultimate Guide
Prepare to delight your taste buds with this exquisite New York Style Cheesecake recipe! Often hailed as the king of desserts, a perfectly baked cheesecake boasts an irresistibly creamy texture and rich flavor that can elevate any occasion. This particular recipe yields a cheesecake so incredibly delicious, you’d swear it came straight from the display case of a high-end bakery or a fancy restaurant. It’s a true crowd-pleaser that I frequently prepare and keep chilled in my refrigerator, ready to enjoy whenever a craving strikes.
Whether you’re battling a hot summer day or seeking comfort during a chilly evening, this versatile dessert pairs wonderfully. Imagine savoring a slice with a refreshing iced tea or a sparkling lemonade when the sun is high, or indulging with a warm cup of coffee or herbal tea as the temperatures drop. This recipe promises not just a dessert, but an experience. I’m confident that once you try it, you’ll fall in love with its luxurious taste and velvety smooth consistency just as much as I have. For a visual guide to perfecting this masterpiece, you can also follow along with the detailed video tutorial by HidaMari Cooking on YouTube.
Why This Homemade Cheesecake Recipe Stands Out
There are countless cheesecake recipes out there, but this one consistently delivers exceptional results. It strikes the perfect balance between richness and lightness, ensuring every bite is a dream. Here’s why this recipe deserves a spot in your baking repertoire:
- Unforgettable Texture: Achieves that signature melt-in-your-mouth creaminess that New York cheesecakes are famous for, without being overly dense.
- Simple Yet Sophisticated: While the final product feels incredibly gourmet, the steps are straightforward and manageable for bakers of all skill levels.
- Perfect Balance of Sweetness: Not too sweet, allowing the natural tang of the cream cheese to shine through beautifully.
- Versatile for All Seasons: As mentioned, it’s a dessert that adapts to any weather, making it a year-round favorite.
- Impressive Presentation: With its golden crust, smooth filling, and optional sweet cheese drizzle, it looks as good as it tastes.
Ready to bake a cheesecake that will earn you rave reviews? Let’s gather our ingredients and begin this delightful culinary journey.
Ingredients You’ll Need:
For the Irresistible Cookie Crust:
- 2.8 ounces (approx. 80g) of your favorite plain cookies (digestives, shortbread, or graham crackers work wonderfully)
- 1½ tablespoons of unsalted butter, gently melted
For the Rich and Creamy Filling:
- 1½ cups (approx. 340g) of full-fat cream cheese, softened to room temperature
- ½ cup (approx. 100g) of cane sugar (granulated sugar also works)
- 2 whole large eggs, at room temperature
- ¾ cup (200ml) of heavy cream (or whipping cream)
- 2 teaspoons of pure vanilla extract
For the Sweet & Tangy Cheese Sauce Topping:
- ¼ cup (approx. 55g) of cream cheese, softened
- 1½ teaspoons of honey (adjust to your preferred sweetness)
Step-by-Step Directions for Cheesecake Perfection:
Step 1: Crafting the Golden Cookie Crust
The foundation of any great cheesecake is a flavorful, perfectly textured crust. To begin, take your chosen cookies and place them into a sturdy Ziploc bag. Using a rolling pin or the bottom of a heavy glass, crush them thoroughly until they form fine, even crumbs. The finer the crumbs, the more uniform your crust will be. Once crushed, pour the melted unsalted butter directly into the bag with the cookie crumbs. Seal the bag (leaving a tiny gap to let air out) and mix everything together thoroughly until the crumbs are evenly moistened and resemble wet sand. This ensures your crust will hold its shape beautifully.
Next, prepare a round cake pan, ideally an 8 or 9-inch springform pan, by lining the sides with a strip of parchment paper. This step is crucial for easy unmolding later. Transfer the buttery cookie crumb mixture into the prepared pan. Using the bottom of a clean glass or a flat-bottomed measuring cup, press the crust down firmly and evenly across the bottom of the pan. Aim for a compact, solid layer. Once pressed, set the pan aside, allowing the crust to slightly chill and firm up while you prepare the creamy filling. In a large mixing bowl, add your softened cream cheese. It’s important for the cream cheese to be at room temperature to ensure a smooth, lump-free filling. Break it up with a spatula or spoon, then mix it gently until it becomes smooth and pliable.
Step 2: Preparing the Velvety Cheesecake Filling
With your cream cheese smoothed, it’s time to add the next layer of ingredients. Gently crack and add the two whole eggs to the cream cheese mixture. Mix them in carefully until just combined and smooth. Be mindful not to overmix at this stage, as excessive air incorporation can lead to cracks in your baked cheesecake. Next, pour in the heavy cream and vanilla extract. Continue to mix gently until all ingredients are well incorporated and the batter is homogeneous. To ensure an absolutely silky-smooth filling, strain the entire mixture through a fine-mesh sieve into another clean bowl. This step removes any tiny lumps of cream cheese or bits of unmixed egg, guaranteeing that signature smooth texture. Set this beautiful, creamy filling aside for a moment.
Now, prepare your cake pan for its water bath. Carefully wrap the outside of your springform pan with two layers of heavy-duty aluminum foil, covering both the sides and the bottom. This creates a protective barrier against water seeping into the crust during baking. Place the foil-wrapped cake pan into a larger baking dish (like a roasting pan). Gently pour the prepared cheesecake filling directly over your chilled cookie crust. Then, carefully pour hot water into the larger baking dish, ensuring it reaches about halfway up the sides of your springform pan. This water bath method is key to a perfectly baked cheesecake, providing a moist environment that helps prevent cracks and ensures even cooking.
Step 3: Baking & Gentle Cooling
Carefully transfer the baking dish with the water bath and cheesecake into a preheated oven set to 160°C (320°F). Bake for approximately 1 hour. The cheesecake is done when the edges are set, but the center still has a slight wobble when gently shaken. Resist the urge to open the oven door frequently, as this can cause temperature fluctuations and lead to cracks. Once baked, turn off the oven but leave the cheesecake inside with the oven door ajar for another hour. This slow, gradual cooling process is vital for preventing the cheesecake from cracking due to sudden temperature changes. After this, carefully remove the cheesecake from the oven and the water bath. Allow it to cool completely on a wire rack at room temperature for another 1-2 hours.
Step 4: The Essential Overnight Chill
Once your cheesecake has cooled to room temperature, loosely cover the top with plastic wrap. Avoid pressing the plastic wrap directly onto the surface to prevent condensation from forming and affecting the top layer. Transfer the covered cheesecake to the refrigerator and allow it to chill thoroughly, ideally overnight or for at least 8 hours. This prolonged chilling period is non-negotiable for a perfect New York Style Cheesecake. It allows the flavors to meld, the texture to firm up, and the cheesecake to set properly, ensuring that beautiful, dense, and creamy consistency you’re aiming for.
Step 5: Whipping Up the Dreamy Cheese Sauce
While your cheesecake is chilling (or just before serving), prepare the luscious cheese sauce. In another clean mixing bowl, add the softened cream cheese. Whisk it vigorously until it becomes completely smooth and free of any lumps. Then, drizzle in the honey. Continue whisking until the honey is fully incorporated and the sauce is uniform and beautifully smooth. This adds a delightful extra layer of flavor and a touch of sweetness that complements the main cheesecake perfectly.
Step 6: Unmolding, Drizzling & Serving
Once your cheesecake has fully chilled overnight and is ready to be served, carefully take it out of the refrigerator. Gently remove the plastic wrap. To unmold, run a thin, sharp knife around the edge of the pan before releasing the springform ring. This helps ensure a clean separation. Carefully remove the parchment paper lining from the sides. Now for the final touch: drizzle the prepared sweet and tangy cheese sauce generously all over the top of the cheesecake. Slice, serve, and prepare for compliments! Each slice offers a sublime experience of creamy texture and rich flavor.
Tips for Cheesecake Perfection:
- Room Temperature Ingredients: This cannot be stressed enough, especially for the cream cheese and eggs. Cold ingredients will lead to a lumpy batter and a less smooth final texture.
- Do Not Overmix: Overmixing incorporates too much air into the batter, which can cause the cheesecake to puff up in the oven and then sink and crack as it cools. Mix just until combined.
- The Water Bath is Your Friend: It creates a moist, even heat environment, preventing cracks and ensuring a creamy, silky texture throughout.
- Slow Cooling is Key: Sudden temperature changes are the enemy of cheesecake. Let it cool gradually in the oven, then on a wire rack, before chilling.
- Overnight Chill for Best Results: Patience is a virtue here. The long chill allows the cheesecake to fully set, firm up, and develop its maximum flavor and density.
- Clean Slicing: For perfect slices, dip your knife in hot water and wipe it clean between each cut.
Customization Ideas & Variations:
While this classic New York Style Cheesecake is perfect as is, feel free to experiment and make it your own:
- Crust Variations: Instead of plain cookies, try using crushed graham crackers, Oreos (for a chocolate crust), or even ginger snaps for a spicy twist.
- Flavor Infusions: Add lemon or orange zest to the filling for a citrusy bright note. You can also swirl in fruit purees (like raspberry or blueberry) before baking for a marbled effect.
- Topping Galore: Beyond the included cheese sauce, consider fresh berries, chocolate shavings, caramel drizzle, fruit compotes, or a dollop of whipped cream.
- Mini Cheesecakes: Bake in a muffin tin lined with paper cups for individual servings. Adjust baking time accordingly.
Storage and Make-Ahead Tips:
This cheesecake is excellent for making ahead, which further enhances its flavor and texture:
- Refrigeration: Store the cheesecake, covered loosely with plastic wrap, in the refrigerator for up to 3-4 days. It tastes even better the day after it’s made!
- Freezing: For longer storage, you can freeze the cheesecake. Ensure it’s fully chilled, then wrap it tightly in several layers of plastic wrap and then aluminum foil. It can be frozen for up to 1 month. Thaw overnight in the refrigerator before serving.
- Serving Temperature: While best enjoyed chilled, letting it sit at room temperature for 15-20 minutes before serving can enhance its creamy texture and allow the flavors to bloom even more.
This ultimate guide to homemade New York Style Cheesecake provides you with all the knowledge and steps to create a dessert that will truly impress. It’s more than just a recipe; it’s a labor of love that results in pure indulgence. So, roll up your sleeves, gather your ingredients, and prepare to create a culinary masterpiece. Enjoy every decadent bite!
All image credit belongs to HidaMari Cooking via YouTube. Follow and subscribe to her channel for more incredible recipes and baking tutorials!