
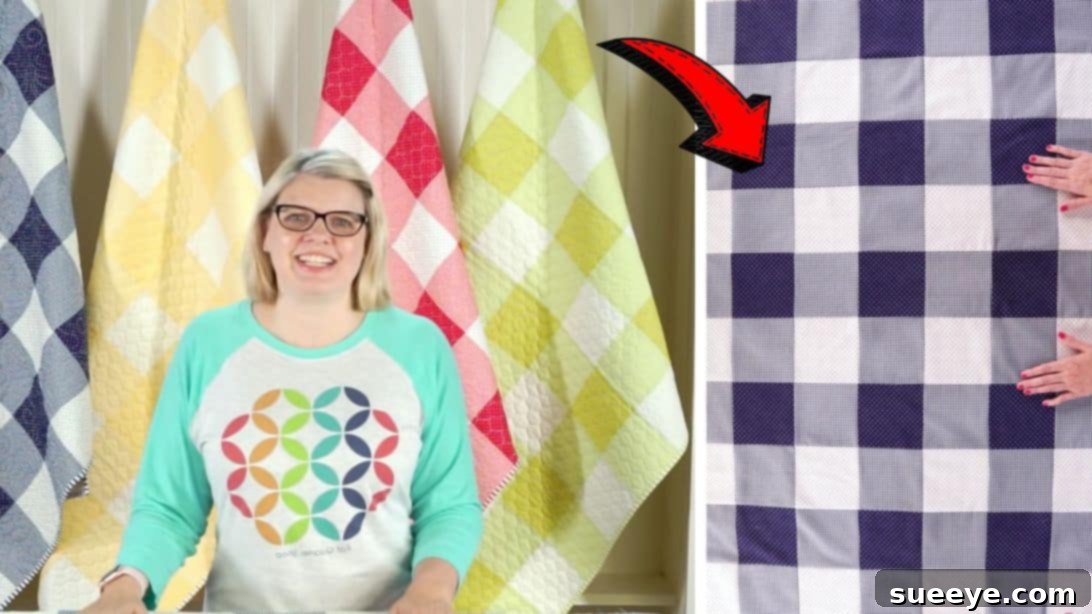
Embark on a delightful sewing adventure with this charming and incredibly easy baby gingham quilt. Whether you’re preparing for an upcoming baby shower, welcoming a new little one into your family, or simply seeking a rewarding and straightforward project to enjoy over the weekend, this tutorial by Fat Quarter Shop on YouTube is an absolute gem. Its timeless design and simple construction make it an ideal choice for quilters of all skill levels, especially beginners. You have the creative freedom to select any color palette that speaks to you, allowing for endless personalization. Imagine crafting a unique, handmade gift that will be cherished for years to come. This project promises not only a beautiful finished product but also a satisfying creative journey from start to finish.
Why This Easy Baby Gingham Quilt is Your Next Project
The gingham pattern is a classic for a reason – it’s visually appealing, incredibly versatile, and relatively simple to achieve, making it perfect for baby quilts. This particular design focuses on ease and speed, allowing you to complete a beautiful quilt without feeling overwhelmed. A handmade quilt is more than just a blanket; it’s a tangible expression of love and care. For a baby, it offers warmth, comfort, and a touch of handmade charm that mass-produced items simply can’t replicate. Furthermore, engaging in a quilting project provides a wonderful opportunity to relax, focus, and develop new skills. Even if you’re new to quilting, the clear instructions and free pattern from Fat Quarter Shop will guide you every step of the way, ensuring a successful and enjoyable experience.
Essential Materials for Your Baby Gingham Quilt
Gathering your materials is the first exciting step in creating your baby gingham quilt. The right supplies will ensure a smooth process and a beautiful finished product. Pay attention to fabric quality, especially for baby items, as softness and durability are key.
- ¾ yard of light print fabric: This fabric will form the lightest squares of your gingham pattern. Choose a soft, breathable cotton or flannel.
- 1⅜ yards of medium print fabric: This is your primary color, providing the middle tone in your gingham design. Ensure it complements both your light and dark fabrics.
- ¾ yard of dark print fabric: The darkest shade for your gingham, offering contrast and depth. Make sure its colorfastness is excellent to prevent bleeding during washing.
- ⅝ yard of binding fabric: This fabric will frame your quilt, providing a neat and durable edge. It can be a coordinating solid or a subtle print.
- 2⅞ yards of backing fabric: The fabric for the back of your quilt. Since it’s a large piece, consider a soft minky, flannel, or wide-back quilting cotton for extra comfort.
- Needle and coordinating thread: Choose a high-quality all-purpose polyester or cotton thread that matches your fabrics for strong, invisible seams.
- Fabric pins: Essential for holding fabric pieces together accurately before sewing, preventing shifting.
- Ruler: A clear acrylic quilting ruler (at least 6×24 inches) is invaluable for precise measuring and cutting.
- Marking pen, pencil, or chalk: Used to mark cutting lines or quilting designs directly on your fabric.
- Scissors or rotary cutter and a cutting mat: A rotary cutter makes quick, precise cuts, especially for strips. A self-healing cutting mat protects your surfaces.
- Iron, for pressing: An iron is crucial for pressing seams open or to one side, ensuring flat, accurate quilt blocks.
- Sewing machine: A reliable sewing machine with a quarter-inch foot attachment will greatly simplify piecing.
- Pattern (Click here to download the free pattern): This detailed pattern from Fat Quarter Shop is your roadmap for exact cutting dimensions and assembly instructions.
Step-by-Step Directions for Your Easy Baby Gingham Quilt
Follow these detailed instructions carefully to bring your beautiful baby gingham quilt to life. Precision in cutting and pressing is key to a professional-looking finish.
Step 1: Fabric Preparation and Light Strip Set Assembly
Begin by preparing your fabrics. Before cutting, it’s highly recommended to pre-wash all your fabrics. This helps prevent future shrinking and ensures colorfastness, which is especially important for baby items. Once dry, press your fabrics thoroughly to remove any wrinkles.
Now, carefully cut your fabrics according to the precise requirements outlined in the free downloadable pattern. Accuracy here is paramount, as even slight variations can affect the final alignment of your quilt. Utilize your rotary cutter, ruler, and cutting mat for the cleanest and most accurate cuts. If using scissors, take your time and follow your marked lines precisely.
Once all your fabric strips are prepared, it’s time to assemble your first set: the “light strip set.” Take four strips of your designated light print fabric (Fabric A) and four strips of your medium print fabric (Fabric B). Arrange them alternately to create a striped sequence (e.g., A-B-A-B-A-B-A-B).
With careful attention, begin sewing these strips together using a consistent ¼-inch seam allowance. To sew the strips, start with two strips, lay them together with their right sides facing each other, and align the raw edges. Stitch down one long side. After sewing, gently press the seam open using your iron. Pressing open helps reduce bulk and creates a flatter, more stable surface. Using the same process, sew the next strip to the previous pair, always aligning right sides together and maintaining that ¼-inch seam. Continue until all eight strips are sewn together in the correct sequence.
After all strips are joined and pressed, carefully trim any excess fabric to ensure the entire light strip set measures precisely 30 x 40½ inches. Refer to your pattern guide for specific pressing directions, often indicated by arrows, to ensure your seams lay correctly. This meticulous pressing and trimming are vital for achieving the crisp, clean lines characteristic of a gingham pattern.
Step 2: Dark Strip Set, Sub-cutting, and Final Quilt Assembly
Next, using the exact same methodical process described in Step 1, assemble your “dark strip set.” This time, you will combine four strips of your medium print fabric (Fabric B) with four strips of your dark print fabric (Fabric C). Sew them together with right sides facing and a ¼-inch seam allowance, pressing each seam open as you go. Once assembled, trim the excess fabric to ensure this dark strip set also measures precisely 30 x 40½ inches. Accuracy in these dimensions is critical for the seamless piecing of your quilt top.
Now comes the exciting part of revealing the gingham pattern! You will sub-cut both your light strip set and your dark strip set. Using your ruler and rotary cutter, carefully cut each of these larger strip sets into five individual strips, each measuring 5½ x 40½ inches. Take your time to ensure these cuts are perfectly straight and accurate, as they form the blocks of your quilt.
Once you have your sub-cut strips, it’s time to line them up and assemble them according to the pattern’s visual guide and as demonstrated in the helpful Fat Quarter Shop video. The key is to alternate between a light strip set and a dark strip set to create the classic gingham check. Start piecing these larger strips together, just as you did with the initial fabric strips: lay two strips with their right sides facing, align the edges, and sew with a ¼-inch seam allowance.
Continue to sew and press each seam open until you have completed the entire quilt top. This careful piecing and pressing will result in a flat, beautiful, and perfectly aligned gingham pattern.
Quilting and Binding Your Masterpiece
With your quilt top complete, the next steps are quilting and binding, which transform your fabric pieces into a finished, durable quilt.
Quilting Your Baby Gingham Quilt
Quilting is the process of stitching together the three layers of your quilt: the quilt top, the batting (the soft inner layer for warmth and loft), and the backing fabric. For a baby quilt, simple quilting designs are often best, as they allow the quilt to remain soft and pliable. You can opt for “stitch-in-the-ditch” quilting, where you stitch along the seam lines of your pieced top, or simple straight lines spaced a few inches apart. Another easy option is to quilt in a grid pattern.
Before quilting, create your “quilt sandwich.” Lay your backing fabric face down, smooth it out completely. Place your batting on top of the backing, centered. Finally, place your quilt top face up on top of the batting, making sure it’s also centered and smooth. Secure these layers together with basting pins or spray basting to prevent shifting during quilting. Use your sewing machine to stitch your chosen quilting design through all three layers. Remember to use a walking foot if your machine has one, as it helps feed all layers evenly.
Binding Your Baby Gingham Quilt
Binding is the final edge finish that not only protects the raw edges of your quilt but also adds a beautiful frame. Prepare your binding fabric by cutting it into strips (usually 2.5 inches wide, but check your pattern for specifics). Sew these strips together end-to-end to create one long continuous strip. Press the binding strip in half lengthwise, wrong sides together.
Attach the raw edge of your folded binding strip to the raw edge of your quilt top, starting along one side. Use a ¼-inch seam allowance and miter the corners for a professional finish. Once sewn all around the perimeter, fold the binding over to the back of the quilt and hand-stitch or machine-stitch it down. This creates a clean, durable edge that will withstand countless washes and snuggles.
Tips for a Flawless Baby Gingham Quilt Experience
- Accurate Cutting is Key: Invest in a good quality rotary cutter, ruler, and self-healing mat. Precise cutting prevents wavy seams and ensures your blocks fit together perfectly.
- Press, Don’t Iron: When piecing, lift your iron and set it down to “press” the seams, rather than sliding it. This prevents stretching and distortion of your fabric.
- Use a Quarter-Inch Foot: Many sewing machines have a specialized foot that helps maintain a consistent ¼-inch seam allowance, which is crucial in quilting.
- Chain Piecing: To speed up the process, try chain piecing. Sew one seam, then without breaking the thread, feed the next two pieces under the needle. This saves time and thread.
- Don’t Rush the Process: Quilting is a meditative craft. Enjoy each step, and if you make a mistake, don’t be afraid to use a seam ripper. It’s better to correct it early than to have a less-than-perfect finish.
- Pre-Wash Fabrics: As mentioned, pre-washing helps prevent shrinking and color bleeding, ensuring your quilt looks great for years.
- Quality Materials: Choose good quality 100% cotton fabrics, batting, and thread. This makes the quilting process easier and results in a more durable and beautiful quilt.
Personalizing Your Baby Gingham Quilt
While the gingham pattern itself is wonderfully classic, there are many ways to add your unique touch:
- Color Choices: Don’t limit yourself to traditional colors. Experiment with bright, bold hues for a modern look, or soft pastels for a more serene feel.
- Fabric Prints: While the pattern calls for “print fabrics,” you can use solids, tone-on-tone prints, or even small-scale novelty prints within the light, medium, and dark categories to add subtle interest.
- Embroidery or Appliqué: Consider adding the baby’s name, birth date, or a cute animal appliqué to one of the larger squares after the top is pieced but before quilting.
- Quilt Label: Handwrite or machine-embroider a small fabric label with your name, the date, and a special message, then stitch it to the back of the quilt. This creates a wonderful heirloom.
Caring for Your Handmade Baby Quilt
To ensure your beautiful baby gingham quilt remains soft, vibrant, and cuddly for years to come, proper care is essential:
- First Wash: For the first wash, use a gentle cycle with cold water and a color-safe detergent. You might add a color catcher sheet to absorb any potential dye bleeding.
- Regular Washing: Continue to wash on a gentle cycle with cold water. Avoid hot water, which can set stains and cause colors to fade.
- Drying: Tumble dry on low heat or, for best results, lay flat to dry. High heat can cause fabric shrinkage and wear.
- Avoid Harsh Chemicals: Do not use bleach or harsh stain removers, as these can damage fabric fibers and colors.
- Store Properly: When not in use, store your quilt folded in a breathable container, away from direct sunlight, to prevent fading and dust accumulation.
Crafting this easy baby gingham quilt is a truly rewarding experience. From selecting your fabrics to making the final stitch on the binding, each step is a creative act of love. This project, guided by the excellent tutorial from Fat Quarter Shop, empowers even novice quilters to create something beautiful and meaningful. Download your free pattern today, gather your materials, and prepare to create a cherished heirloom that will bring warmth and joy for years. Happy quilting!
*All image credit belongs to Fat Quarter Shop via YouTube. Follow and subscribe to their channel for more inspiring projects!