
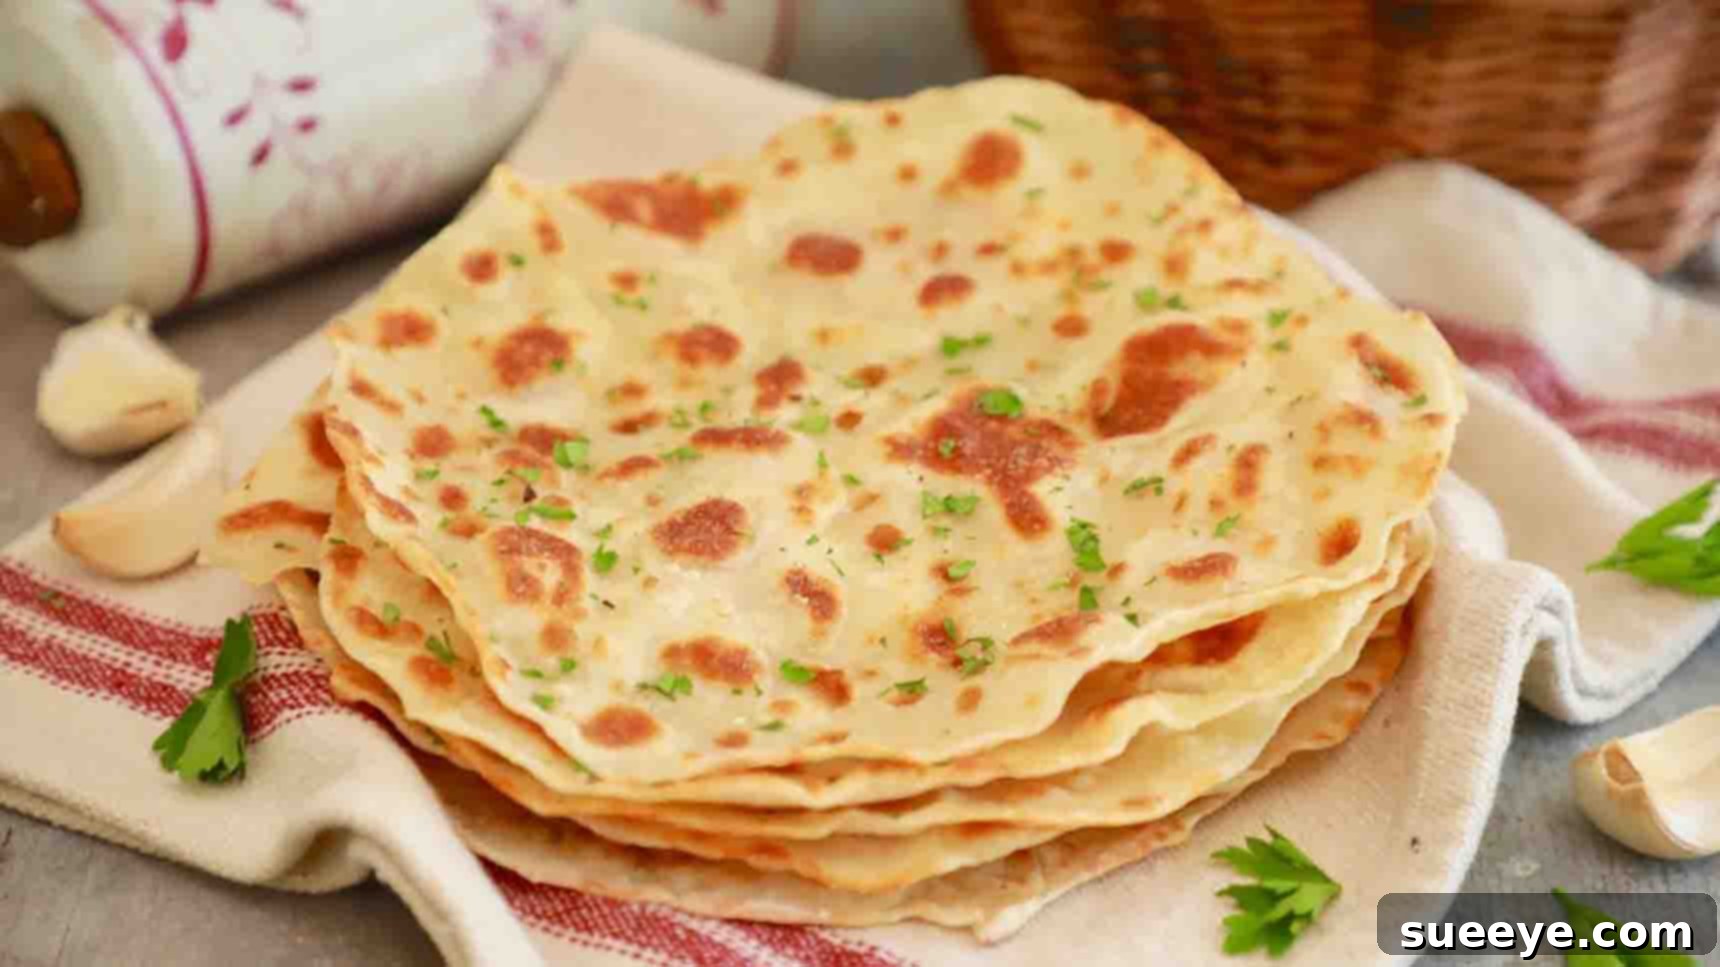
Are you craving warm, fresh bread but don’t have hours to wait for dough to rise? Look no further! This incredibly simple 3-ingredient flatbread recipe is a game-changer for anyone who loves quick, delicious, and homemade eats. Inspired by the fantastic creators at Bigger Bolder Baking on YouTube, this recipe transforms basic kitchen staples into a soft, chewy, and utterly satisfying flatbread in minutes. Whether you’re a bread-making novice or an experienced baker seeking instant gratification, this no-yeast wonder is about to become your new go-to recipe.
The Ultimate 3-Ingredient Flatbread: Your New Go-To Recipe for Quick & Delicious Bread (No Yeast!)
Imagine serving warm, pillowy flatbreads straight from your pan, infused with optional garlic-butter goodness, all made with just three humble ingredients you likely already have on hand. This isn’t just a recipe; it’s an invitation to rediscover the joy of homemade bread without the fuss. Perfect for a quick snack, a versatile side dish, or even a base for mini pizzas, these flatbreads are incredibly adaptable and guaranteed to impress your family and friends. Get ready to elevate your culinary game with minimal effort and maximum flavor!
Why You’ll Absolutely Love This Easy Flatbread Recipe
- Unbelievably Simple: With only three core ingredients and straightforward steps, this recipe is perfect for absolute beginners in the kitchen. No complicated techniques or obscure ingredients required!
- No Yeast Required: Forget about proofing and waiting for hours. Baking powder acts as the leavening agent, making this a super-fast bread option.
- Quick to Make: From mixing the dough to cooking on the stovetop, you can have fresh flatbreads ready in under 30 minutes.
- Versatile: These flatbreads are a blank canvas for flavors. Enjoy them plain, with a savory garlic-herb butter, or get creative with sweet or spicy toppings.
- Economical: Made with common, inexpensive pantry staples, this recipe is kind to your wallet.
- Delicious: Soft, slightly chewy, and wonderfully flavorful, these flatbreads taste far more gourmet than their simple ingredient list suggests.
The Magic Three Ingredients & Optional Flavor Boosters
The beauty of this recipe lies in its simplicity. Here’s what you’ll need to create culinary magic:
- 1 cup full-fat plain yogurt: This is the secret star, providing moisture, tenderness, and helping with the dough’s structure. Greek yogurt works wonderfully for a slightly denser bread, while regular plain yogurt will yield a softer texture. Ensure it’s plain and unsweetened.
- 1 cup all-purpose flour: Standard all-purpose flour is perfect here. You might need a tiny bit more for dusting your work surface.
- 2 tsp baking powder: Our quick-acting leavening agent, responsible for the flatbreads’ light and airy texture. Make sure your baking powder is fresh for the best results.
Optional Topping for Extra Flavor: Garlic Herb Butter
While delicious on their own, a brush of homemade garlic herb butter takes these flatbreads to an entirely new level. It adds a savory, aromatic kick that makes them irresistible.
- 1/2 cup unsalted butter: Melted, for coating the warm flatbreads.
- 2 – 3 cloves of minced garlic: Freshly minced garlic offers the best flavor.
- Chopped fresh parsley: Adds a pop of color and a fresh, herbaceous note.
- A pinch of salt: To enhance all the flavors.
Feel free to customize this topping with other herbs like dill, chives, or a sprinkle of chili flakes for a touch of heat!
Essential Equipment for Flatbread Success
You don’t need any fancy gadgets for this recipe. Basic kitchen tools are all you’ll require:
- Large mixing bowl: For combining your ingredients.
- Measuring cups and spoons: For accurate ingredient measurement.
- Spatula or spoon: For initial mixing.
- Clean work surface: A countertop or large cutting board for kneading and rolling.
- Rolling pin: To flatten your dough into even circles.
- Large non-stick frying pan or cast-iron skillet: Essential for cooking the flatbreads evenly.
- Pastry brush (optional): For applying the garlic-butter topping.
Step-by-Step Directions: Crafting Your Perfect Flatbreads
Follow these detailed instructions to create consistently delicious flatbreads every time. Precision and a gentle touch are key!
Step 1: Prepare the Dough
In a spacious mixing bowl, begin by thoroughly combining the all-purpose flour and baking powder. Use a whisk or a fork to ensure they are well integrated, as this uniform distribution is crucial for even leavening. Once your dry ingredients are ready, add the cup of yogurt. Start mixing with a spoon or spatula until the mixture begins to come together. Initially, it might look crumbly and somewhat dry, but persist with the mixing. As the yogurt hydrates the flour, the texture will gradually change. When it becomes too stiff to mix with an utensil and has a coarse, crumbly consistency, it’s time to switch to your hands.
Lightly flour your hands and carefully bring the crumbly mixture together. Gently knead it within the bowl or transfer it to a lightly floured surface. The goal is to form a cohesive, soft dough ball. Avoid over-kneading, as this can make the flatbreads tough. Just a minute or two of gentle kneading until the dough is smooth and no longer sticky should suffice. It should be pliable and easy to work with. If it’s too sticky, add a tiny bit more flour; if it’s too dry, a tiny splash of milk or water can help, but generally, the 1:1 ratio of flour to yogurt works perfectly.
Once you have a smooth dough ball, gently dust your clean working surface with a small amount of flour. Transfer the dough onto this surface. Using a sharp knife or a dough scraper, divide the dough into six equal pieces. For best results, try to make them as evenly sized as possible. Take each piece and roll it into a neat, small ball with your hands. These individual dough balls are now ready to be transformed into flatbreads. Using a rolling pin, gently roll out each dough ball into a round or oval shape, approximately 8 inches (20 cm) in diameter and about 1/8 to 1/4 inch thick. Aim for an even thickness to ensure uniform cooking. As you roll, you can lightly flour your rolling pin and surface if the dough starts to stick.
Step 2: Cook the Flatbreads
Before cooking, if you’re opting for the optional garlic-butter topping, now is a good time to prepare it. In a small bowl, melt the butter, then stir in the minced garlic, chopped parsley, and a pinch of salt. Set aside. You can brush this mixture onto the rolled-out dough before cooking, or simply brush it onto the hot flatbreads after they come off the pan – both methods yield delicious results, with the latter often giving a more intense fresh garlic flavor.
Heat a large, non-stick frying pan or a cast-iron skillet over medium heat. It’s crucial not to overheat the pan, as this can cause the flatbreads to burn on the outside before cooking through, or become tough. A good test is to flick a tiny drop of water onto the pan; if it sizzles and evaporates immediately, the pan is ready. Carefully take one of your rolled-out dough pieces and gently place it into the hot frying pan. Do not overcrowd the pan; cook one or two at a time, depending on the size of your pan.
Allow the flatbread to cook for approximately two to three minutes on the first side. You’ll notice bubbles forming on the surface, and the edges might start to look slightly dry. The underside should be golden brown and slightly charred in spots. Using a spatula or tongs, carefully flip the flatbread to the other side. Cook for another two to three minutes, or until that side is also golden brown and cooked through. The flatbread should feel soft and pliable, not stiff or hard. Repeat this process with the remaining dough pieces.
As each flatbread finishes cooking, you can immediately brush it with your prepared garlic-butter mixture, if using. Stack the cooked flatbreads on a plate and cover them with a clean kitchen towel to keep them warm and soft until all are cooked and ready to serve. This also allows them to steam slightly, enhancing their tender texture.
Expert Tips for Making the Best 3-Ingredient Flatbread
While this recipe is incredibly forgiving, a few pointers can elevate your flatbreads from good to absolutely outstanding:
- Accurate Measurement is Key: Especially for flour, use the spoon-and-level method. Spoon flour into your measuring cup and then level it off with a straight edge. Don’t scoop directly from the bag, as this can compact the flour and lead to a dry dough.
- Don’t Overwork the Dough: Knead just enough to bring the dough together into a smooth ball. Over-kneading develops too much gluten, resulting in tough flatbreads.
- Adjust for Dough Consistency: Different brands of yogurt and flour can vary in moisture content. If your dough is too sticky, add flour in small increments (1 tablespoon at a time). If it’s too dry and crumbly, add a tiny bit more yogurt or a splash of milk.
- Even Thickness: Aim to roll your flatbreads to a consistent thickness (about 1/8 to 1/4 inch). This ensures they cook evenly and prevents some parts from being raw or overly crispy.
- Proper Pan Temperature: Medium heat is ideal. If the pan is too hot, the flatbread will burn quickly; too low, and it will dry out and become tough. You want those beautiful golden-brown spots without burning.
- Keep Them Warm: Stack cooked flatbreads and cover them with a clean towel to keep them soft and warm until serving. The residual steam helps them stay pliable.
Delicious Variations and Serving Suggestions
This basic flatbread recipe is a fantastic starting point for endless culinary creativity. Here are some ideas to inspire you:
Flavor Variations:
- Herby Delight: Incorporate finely chopped fresh herbs like rosemary, thyme, or oregano directly into the dough for an aromatic twist.
- Spicy Kick: Add a pinch of red pepper flakes or a dash of chili powder to the dough or garlic butter for a subtle heat.
- Cheesy Goodness: Mix shredded cheddar, mozzarella, or crumbled feta into the dough before kneading.
- Sweet Treat: For a dessert flatbread, skip the garlic butter. Instead, brush cooked flatbreads with melted butter and sprinkle with cinnamon sugar. Serve with fruit or a dollop of whipped cream.
- Whole Wheat Option: While the texture will be denser, you can substitute some or all of the all-purpose flour with whole wheat flour for a healthier version. Adjust yogurt slightly if needed.
Serving Suggestions:
- Dips & Spreads: The perfect accompaniment to hummus, tzatziki, baba ghanoush, or your favorite creamy dip.
- Soups & Stews: Use them to scoop up hearty soups, chilis, or stews – a wonderful alternative to traditional bread.
- Wraps & Sandwiches: Fill them with grilled chicken, falafel, fresh vegetables, and a drizzle of sauce for a portable and delicious meal.
- Curries & Stir-fries: They make an excellent side for Indian curries, Middle Eastern dishes, or Asian stir-fries.
- Mini Pizzas: Top cooked flatbreads with tomato sauce, cheese, and your favorite toppings, then briefly bake or broil until cheese is bubbly.
- Breakfast: Serve alongside scrambled eggs, avocado, and a sprinkle of everything bagel seasoning for a unique breakfast experience.
Storing and Reheating Your Homemade Flatbreads
If you’re lucky enough to have leftovers (which is rare with these!), proper storage will help maintain their freshness:
- Storage: Once completely cooled, store the flatbreads in an airtight container or a Ziploc bag at room temperature for up to 2-3 days. For longer storage, you can freeze them for up to 1 month. Layer them with parchment paper to prevent sticking.
- Reheating:
- Stovetop: Place flatbreads in a dry skillet over medium heat for 1-2 minutes per side until warmed through and slightly crisp. This is often the best method for restoring texture.
- Microwave: For a quick reheat, microwave for 15-30 seconds. Be careful not to overdo it, as they can become chewy.
- Oven: Wrap flatbreads in foil and warm in a preheated oven at 350°F (175°C) for 5-7 minutes.
Frequently Asked Questions (FAQs) About 3-Ingredient Flatbread
- Can I use Greek yogurt instead of regular plain yogurt?
- Yes, absolutely! Greek yogurt is thicker, so you might need a tiny bit less flour or a splash more water/milk to achieve the right dough consistency. It tends to yield a slightly denser, chewier flatbread, which many people love.
- What if I don’t have baking powder?
- Baking powder is essential for this no-yeast recipe as it’s the primary leavening agent. A substitute can sometimes be made with baking soda and an acid (like cream of tartar or lemon juice), but for best results and simplicity, sticking to baking powder is recommended.
- My dough is too sticky/dry. What should I do?
- This is a common issue due to varying flour/yogurt moisture. If too sticky, add flour 1 tablespoon at a time until it’s manageable. If too dry, add yogurt or a tiny bit of water/milk a teaspoon at a time until it comes together. The dough should be soft but not overly sticky.
- Can I bake these flatbreads instead of frying them?
- Yes, you can! Preheat your oven to 400°F (200°C). Place the rolled flatbreads on a baking sheet (you might want to lightly grease it or use parchment paper). Bake for 5-8 minutes, flipping halfway, until golden brown and puffed. Frying often gives a more tender result, but baking is a good option if you prefer.
- How long can I store the dough?
- It’s best to use this dough immediately after mixing, as the baking powder starts reacting once wet. While you could store it for a very short time in the fridge (30 minutes to an hour), the leavening power might diminish. Freshly made dough yields the best texture.
Conclusion: Your Journey to Effortless Homemade Bread Starts Here!
There you have it – a foolproof, quick, and incredibly satisfying 3-ingredient flatbread recipe that promises to simplify your kitchen endeavors without sacrificing flavor. Whether you’re whipping up a quick snack, complementing a hearty meal, or just enjoying the simple pleasure of fresh, warm bread, this recipe delivers every time. So, grab your yogurt, flour, and baking powder, and get ready to create culinary magic. Your taste buds (and your busy schedule!) will thank you. Happy baking!