
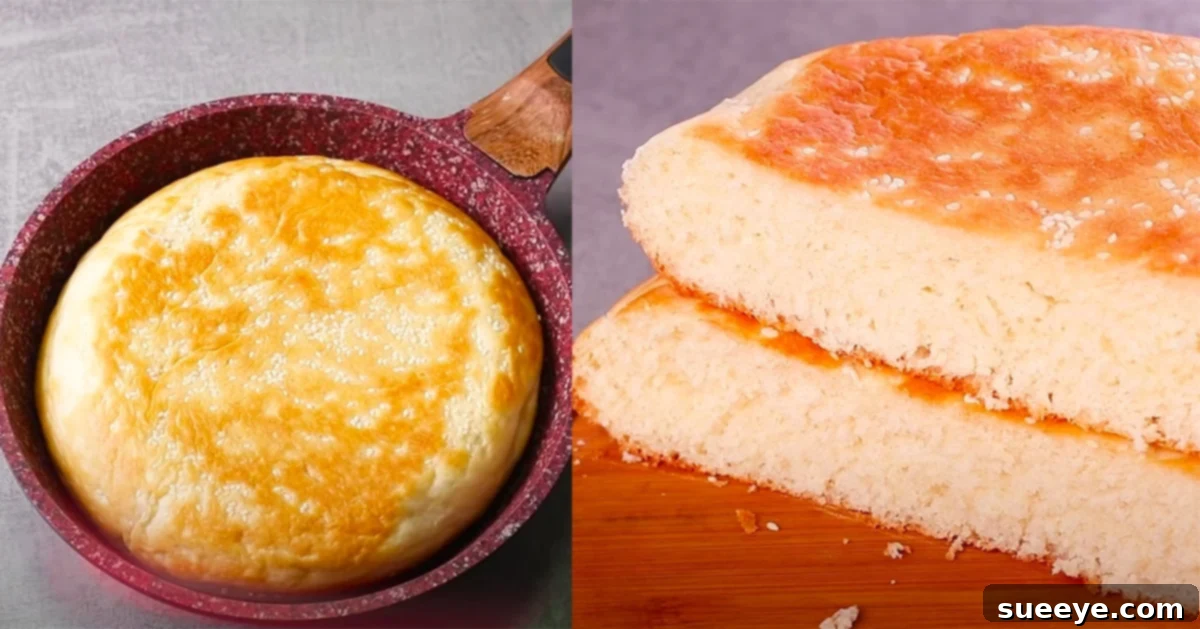
Embarking on the journey of homemade bread often feels daunting, conjuring images of complex machinery, lengthy proofing times, and the precision of an oven. However, what if we told you that creating perfectly soft, bouncy, and utterly delicious bread could be as simple as reaching for your frying pan? The notion might sound unconventional, but thanks to innovative methods, the dream of fresh, warm bread is more accessible than ever. Our inspiration for this culinary revelation struck after encountering the mesmerizing N’Oven – Cake Cookies tutorial on YouTube. This video transformed our perception of bread-making, highlighting an incredibly convenient and surprisingly quick technique that eliminates the need for an oven entirely. For anyone, especially those new to baking or looking for a simplified approach, this frying pan method is a true game-changer, promising delightful results with minimal fuss.
The Allure of No-Oven Bread: Why Fry?
The concept of cooking bread in a frying pan opens up a world of possibilities, particularly for those living in smaller spaces, without an oven, or simply seeking an energy-efficient alternative. This method isn’t just a novelty; it’s a practical solution that delivers exceptional texture and flavor. The controlled, direct heat of a frying pan creates a beautifully golden crust while trapping moisture within, resulting in an interior that is remarkably soft and spongy. The absence of an oven streamlines the process significantly, cutting down on preheating times and making the entire experience feel less like a chore and more like an enjoyable experiment. It’s an invitation to explore the joys of baking without the traditional constraints, proving that culinary innovation can truly simplify our lives.
A Closer Look at the Recipe: Simplicity and Satisfaction
What makes this particular recipe stand out, beyond its ingenious cooking method, is its inherent simplicity. It’s an eggless recipe, making it suitable for individuals with dietary restrictions or allergies, and the ingredient list is refreshingly short and common. You likely have most of these staples in your pantry right now! From the moment we witnessed the bread’s incredible texture in the video – how it appeared so thick, dense, and luxuriously fluffy – we were captivated. The visual of pressing down on the bread, only for it to spring back effortlessly like a sponge cake, was enough to ignite an immediate desire to replicate it. The addition of sesame seeds on top doesn’t just add a delightful crunch and nutty flavor; it elevates the bread’s presentation, making it suitable for any dinner gathering or special occasion. This is homemade bread that truly impresses, both in taste and appearance, without demanding hours of your time.
Essential Ingredients for Your Frying Pan Masterpiece
Gathering your ingredients is the first step towards creating this delightful frying pan bread. Each component plays a vital role in achieving the desired texture and flavor, contributing to the overall success of the recipe. The beauty lies in their accessibility and how they come together to form something truly special.
- 3/4 cup lukewarm water: Crucial for activating the yeast. Ensure it’s not too hot (which can kill the yeast) or too cold (which won’t activate it).
- 2 tbsp sugar: Feeds the yeast, helping it to rise effectively, and contributes to the bread’s golden-brown crust.
- 2 tsp yeast: The leavening agent responsible for giving the bread its wonderful rise and airy texture.
- 2 cup flour / Maida: The structural backbone of your bread. All-purpose flour or Maida works perfectly here.
- 1 tbsp powder milk: A secret ingredient for extra softness and a richer flavor profile. It helps achieve that desirable spongy texture.
- ½ tsp salt: Balances the flavors and strengthens the gluten structure in the dough, contributing to its elasticity.
- 1 tbsp oil: Adds moisture, tenderness, and helps with the browning process, preventing the bread from sticking to the pan.
- sesame seeds: For a delightful nutty flavor, appealing texture, and an elegant finish.
- liquid milk: Used for brushing the top, it helps the sesame seeds adhere and promotes a beautiful golden crust.
Step-by-Step Directions: Mastering the Frying Pan Technique
Follow these detailed steps to create your own soft, fluffy bread right on your stovetop. Precision and patience are key to achieving perfect results.
Step 1: Activate the Yeast
Begin by preparing your yeast. In a spacious mixing bowl, combine the lukewarm water, sugar, and yeast. The lukewarm water is essential here, as it provides the ideal temperature for the yeast to awaken without being too hot to kill it or too cold to hinder its activity. Give it a gentle stir to dissolve the sugar and ensure the yeast is well distributed. Once mixed, cover the bowl with a clean kitchen towel or plastic wrap. Allow this mixture to sit undisturbed for approximately 5 minutes. During this time, you should observe the yeast becoming foamy and bubbly on the surface. This effervescence is a positive sign that your yeast is alive and active, ready to work its magic in making your bread rise beautifully. If you don’t see any activity, your yeast might be old or the water temperature was off, and it’s best to start again.
Step 2: Mix and Knead the Dough
Once your yeast is fully activated, it’s time to introduce the remaining dry ingredients. Add the flour, powdered milk, and salt to the yeast mixture in the bowl. Using a spatula or your hands, begin to mix the ingredients until a shaggy dough forms. Transfer the dough to a lightly floured surface and start kneading. Kneading is a crucial step that develops the gluten in the flour, which gives the bread its structure and elasticity. Knead for about 8-10 minutes until the dough becomes smooth, elastic, and no longer sticky. It should feel pliable and bounce back slowly when you gently poke it with your finger. This vigorous kneading ensures a soft and chewy texture for your final product.
Step 3: First Rise and Preparation
After kneading, place the dough back into the clean bowl. Lightly grease the bowl with a little oil to prevent the dough from sticking. Cover the bowl again with a kitchen towel or plastic wrap and let the dough rise in a warm, draft-free place for about 1 hour. The duration may vary depending on the temperature of your environment. You’ll know it’s ready when the dough has roughly doubled in size. This first rise, also known as bulk fermentation, allows the yeast to produce gases, creating air pockets that contribute to the bread’s light and airy texture. While the dough is rising, prepare your frying pan. Brush the interior of a non-stick frying pan with a tablespoon of oil, ensuring the bottom and sides are well coated. This prevents sticking and helps in achieving a golden-brown crust.
Step 4: Second Rise in the Pan and Topping
Once the dough has completed its first rise, gently punch it down to release the air. Transfer the dough into the prepared frying pan, pressing it down evenly to fill the bottom. Cover the pan with a lid and let the dough sit for another 15 minutes. This second, shorter rise in the pan is crucial for achieving that characteristic light texture. While the dough is undergoing its final proof, prepare your liquid milk and sesame seeds. Once the 15 minutes are up, gently brush the top surface of the dough with liquid milk. This milk wash will give your bread a beautiful golden hue and act as an adhesive for the sesame seeds. Generously sprinkle the sesame seeds over the milk-brushed dough, ensuring an even coating for both aesthetic appeal and a delightful crunch.
Step 5: Cook and Flip
With the dough topped and ready, place the frying pan on your stovetop over low-medium heat. It is vital to maintain a consistent low-medium heat to ensure the bread cooks through without burning the crust. Cook the bread for approximately 15 minutes, keeping the pan covered with its lid. The lid traps steam, which helps the bread to rise further and ensures even cooking. After 15 minutes, carefully check the underside of the bread; it should be golden brown and cooked through. Using a large spatula, gently flip the bread over to cook the other side. Cover the pan again with the lid and continue cooking for another 10-15 minutes, or until the second side is also golden brown and the bread sounds hollow when tapped. This indicates it is thoroughly cooked inside.
Tips for Frying Pan Bread Success
- Water Temperature is Key: Ensure your lukewarm water is between 105-115°F (40-46°C). Too hot will kill the yeast; too cold won’t activate it.
- Don’t Rush the Rise: Patience during the rising times is crucial for light, airy bread. A warm environment helps speed up the process.
- Low and Slow: Cook on low-medium heat. This prevents the outside from burning before the inside is cooked through.
- Keep it Covered: The lid is essential. It creates a steamy environment that helps the bread cook evenly and prevents it from drying out.
- Test for Doneness: The bread should be golden brown on both sides and sound hollow when tapped on the bottom.
- Grease the Pan Well: A well-oiled pan prevents sticking and ensures a beautiful crust.
The Delicious Results and Serving Suggestions
The moment you slice into your freshly made frying pan bread, you’ll be greeted by an incredibly soft, spongy interior that is truly a delight. The texture is bouncy and moist, far exceeding expectations for a no-oven recipe. The subtle sweetness from the sugar and the richness from the powdered milk create a beautifully balanced flavor profile that makes this bread incredibly versatile. It’s fantastic served warm, slathered with butter and your favorite jam for a comforting breakfast. Alternatively, pair it with savory spreads, a slice of cheese, or use it to sop up delicious sauces from your favorite meals. It’s also sturdy enough to make a simple sandwich, elevating your everyday lunch experience. Overall, discovering this method was an exciting revelation. Its simplicity, speed, and the sheer deliciousness of the end product make this frying pan bread a recipe we’re eager to make again and again, and we wholeheartedly encourage you to try it too!