
Illuminate Your Home: The Ultimate Hack for Clean, Fresh-Scented Light Bulbs
In the constant pursuit of a sparkling clean home, it’s easy to overlook the small, seemingly insignificant details that can make a monumental difference. We meticulously dust shelves, vacuum floors, and scrub surfaces, yet often neglect hidden areas that silently accumulate grime. Among these often-forgotten spots are your humble light bulbs. While they might appear innocuous, these essential household items can become surprising magnets for dust, dirt, and even microscopic bacteria, diminishing their light output and contributing to a less-than-pristine environment. But what if we told you there’s a simple, ingenious hack that not only keeps your light bulbs spotless but also infuses your entire home with a delightful, long-lasting fragrance? Prepare to transform your cleaning routine with this viral tip, championed by cleaning expert Andrea Jean Cleaning, that promises a brighter, more aromatic living space.
Why Your Light Bulbs Deserve a Deep Clean
You might wonder, “Do light bulbs really need cleaning?” The answer is a resounding yes! Over time, dust particles, airborne grease from cooking, and other microscopic debris settle on the surface of your light bulbs. This accumulation isn’t just an aesthetic issue; it has several practical implications:
- Reduced Illumination: A layer of dust can significantly dim the light output of your bulbs, making your rooms appear darker and less inviting. What you perceive as a fading bulb might just be one in need of a good wipe.
- Potential Allergen Trap: Dust is a common allergen. If your light bulbs are caked with it, they could be circulating these particles into the air, potentially affecting those with allergies or asthma.
- Unsightly Appearance: Dirty light bulbs detract from the overall cleanliness and aesthetic of your home, especially in fixtures where they are visible.
- Overheating Risk (Minor): While less common with modern LED bulbs, excessive dust accumulation on older incandescent bulbs can theoretically act as an insulator, leading to slightly higher operating temperatures.
Cleaning your light bulbs is a small task that yields noticeable results, enhancing both the brightness and cleanliness of your living space.
The Revolutionary Scented Cleaning Method: A Dual-Action Hack
Beyond simple dusting, this unique cleaning hack introduces an unexpected twist: using household items like fabric conditioner or pure vanilla extract to not only clean your light bulbs but also turn them into subtle, passive air fresheners. The science is surprisingly simple yet effective. When a light bulb heats up, the gentle warmth helps to evaporate the scented solution, releasing a pleasant aroma into the room. Simultaneously, the residual coating from the fabric conditioner can help repel dust, keeping your bulbs cleaner for longer. It’s an innovative, budget-friendly approach to maintaining a fresh and inviting home atmosphere, tackling two common household concerns with one easy method.
Materials You’ll Need for This Brilliant Hack
Gathering your supplies is the first step towards a brighter, fresher home. Most of these items are likely already in your pantry or laundry room, making this a truly accessible DIY project.
- Light Bulb: The star of the show! This method works best with traditional incandescent, halogen, or certain LED bulbs with a glass-like exterior. Always ensure the bulb is cool to the touch before handling.
- Fabric Conditioner (e.g., Downy Cool Cotton): This is the secret ingredient for dust repulsion and scent. Choose a scent you love, as it will gently diffuse throughout your home. A “cool cotton” or similar fresh, clean scent is often recommended for its subtle appeal.
- Small Container or Cup: Essential for dipping the bulb. A plastic cup, a small bowl, or any container deep enough to submerge the glass portion of your light bulb will work perfectly.
- Pure Vanilla Extract: An excellent alternative to fabric conditioner if you prefer a food-safe, warm, and comforting aroma. Ensure it’s pure extract for the best scent quality.
- Microfiber Towel: Ideal for dry wiping dust due to its electrostatic properties and gentle texture, preventing scratches.
- Clean, Soft Cloth: Another option for dusting, or for any final buffing. Avoid abrasive materials that could scratch the bulb’s surface.
Step-by-Step Guide: How to Clean & Scent Your Light Bulbs
Before you begin, always prioritize safety. Working with electrical components requires caution. Ensure you follow each step carefully for a secure and effective cleaning process.
Safety First: Preparation is Key
- Unplug the Fixture: This is the most crucial safety step. Before touching any part of your lamp or light fixture, always unplug it from the wall socket. If you’re cleaning bulbs in a ceiling fixture, turn off the power at the circuit breaker. Never attempt to clean a bulb while it’s connected to a live power source.
- Allow Bulbs to Cool: If the lamp has recently been on, give the bulb ample time to cool completely. Hot bulbs can cause burns and are more fragile, increasing the risk of breakage.
- Careful Removal: Gently unscrew the light bulb from its socket. Hold the glass portion of the bulb, avoiding twisting the base too forcefully, which could separate it from the glass.
Step 1: The Initial Dry Dusting
Once the bulb is safely removed and cool, it’s time for the first round of cleaning.
- Grab Your Microfiber Cloth: Take a clean, dry microfiber towel or a soft, lint-free cloth.
- Gentle Wipe-Down: Carefully dry-wipe the entire surface of the light bulb, paying close attention to any visible dust, cobwebs, or grime. Use gentle pressure to avoid smudging the dirt. The goal here is to remove the loose, dry debris before introducing any liquid. Ensure the bulb is thoroughly clean and dry from this initial dusting.
Step 2: The Scented Coating Application
This is where the magic happens, infusing your bulb with long-lasting freshness.
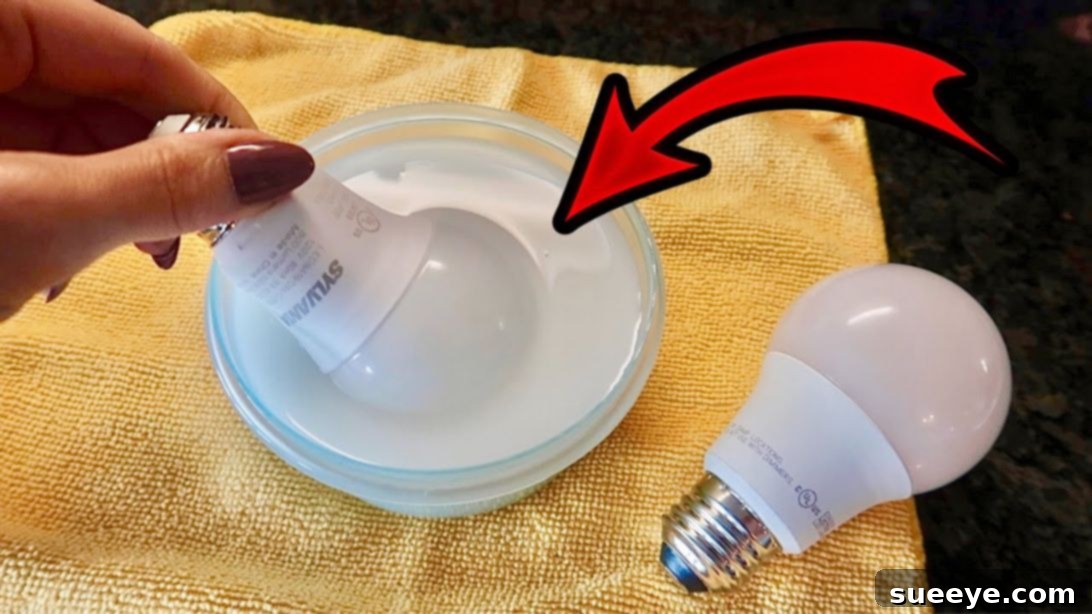
- Prepare Your Solution: Pour a small amount of your chosen fabric conditioner or pure vanilla extract into a small plastic container or cup. You only need enough to submerge the glass portion of the bulb.
- Dip and Coat: Carefully dip the glass material of the light bulb into the solution. Ensure the entire glass surface is well-saturated and evenly coated. Be extremely careful not to get any liquid on the metal screw-in base (the contact points) of the bulb, as this could cause electrical issues or corrosion. Only the glass part should be dipped.
- Remove Excess: Gently lift the bulb from the solution and allow any excess liquid to drip back into the container. You want a thin, even coating, not a heavy residue. You can lightly tap the base of the bulb on the rim of the container to encourage drips.
- Allow to Dry Completely: This step is critical. Place the coated light bulb on a clean, dry surface (perhaps on a paper towel) and allow it to air dry for several minutes, or even up to overnight. The longer it dries, the more effectively the solution will cling to the light bulb, providing a more robust dust-repellent and scent-releasing effect. Ensure it is bone dry before proceeding.
Step 3: Reinstallation and Enjoyment
With your freshly cleaned and scented bulb, it’s time to bring back the light and fragrance.
- Reinstall the Bulb: Once absolutely dry, carefully screw the light bulb back into its socket in the lamp or fixture. Do not overtighten.
- Restore Power: Plug the lampshade back into the wall socket or flip the circuit breaker back on.
- Light It Up: Turn on your lamp. As the light bulb gently heats up, it will begin to release a subtle, delightful aroma into your room, transforming the ambiance. You’ll immediately notice a brighter room and a fresher scent.
The Amazing Benefits: A Brighter, Fresher Home
This simple hack offers a multitude of benefits that extend far beyond a mere clean bulb:
- Long-Lasting Home Fragrance: The heat from the light bulb acts as a gentle diffuser, continuously releasing your chosen scent into the room. Unlike candles or sprays, this provides a subtle, consistent aroma that isn’t overwhelming.
- Effective Dust Repellent: The thin coating left by the fabric conditioner creates a barrier that helps to repel dust, keeping your light bulbs cleaner for a significantly longer period. This means less frequent cleaning for you!
- Enhanced Illumination: By removing dust and preventing its rapid re-accumulation, your light bulbs will operate at their optimal brightness, making your living spaces feel more vibrant and welcoming.
- Cost-Effective Air Freshener: You’re leveraging existing heat from your light bulbs to scent your home, saving you money on plug-in diffusers, candles, or aerosol sprays.
- Improved Home Ambiance: A clean, well-lit, and subtly scented room creates a more pleasant and relaxing atmosphere for everyone.
- Easy and Quick: This cleaning method requires minimal effort and time, making it a perfect addition to your regular cleaning routine.
Pro Tips for Lasting Freshness and Cleanliness
To maximize the benefits of this ingenious light bulb cleaning and scenting hack, consider these additional tips:
- Consistency is Key: Incorporate this into your routine every few months, or whenever you notice dust building up, to maintain consistent brightness and fragrance.
- Experiment with Scents: Don’t limit yourself to just one. Try different fabric conditioner scents or essential oil-infused vanilla extracts to match your mood or the season. Lavender for bedrooms, citrus for kitchens, or warm vanilla for living areas.
- Consider Bulb Type: This method is most effective for bulbs that produce a noticeable amount of heat (like incandescent, halogen, or older CFLs). While it can still clean LEDs, the heat emission is much lower, so the scent diffusion might be less pronounced.
- Eco-Friendly Alternatives: For an all-natural approach, a mixture of water and a few drops of your favorite essential oil can also be used, though the dust-repelling properties of fabric softener won’t be present.
- Spot Cleaning: For quick touch-ups between deep cleans, a simple dry wipe with a microfiber cloth is often sufficient to remove surface dust.
Transform Your Home with This Simple Secret
Who knew that a small detail like cleaning your light bulbs could yield such remarkable results? This simple, two-in-one hack not only ensures your home is brighter and dust-free but also infuses it with a continuous, delightful fragrance. It’s a testament to how often the most impactful changes come from addressing the overlooked details. By integrating this easy trick into your home maintenance, you’re not just cleaning; you’re enhancing the entire sensory experience of your living space. Give it a try, and prepare to be amazed by the difference it makes!
*Special thanks to Andrea Jean Cleaning via YouTube for inspiring this fantastic hack and for all the insightful images used here. If you enjoyed this innovative cleaning tip, be sure to visit her channel for more brilliant ideas and subscribe for a wealth of cleaning wisdom!