
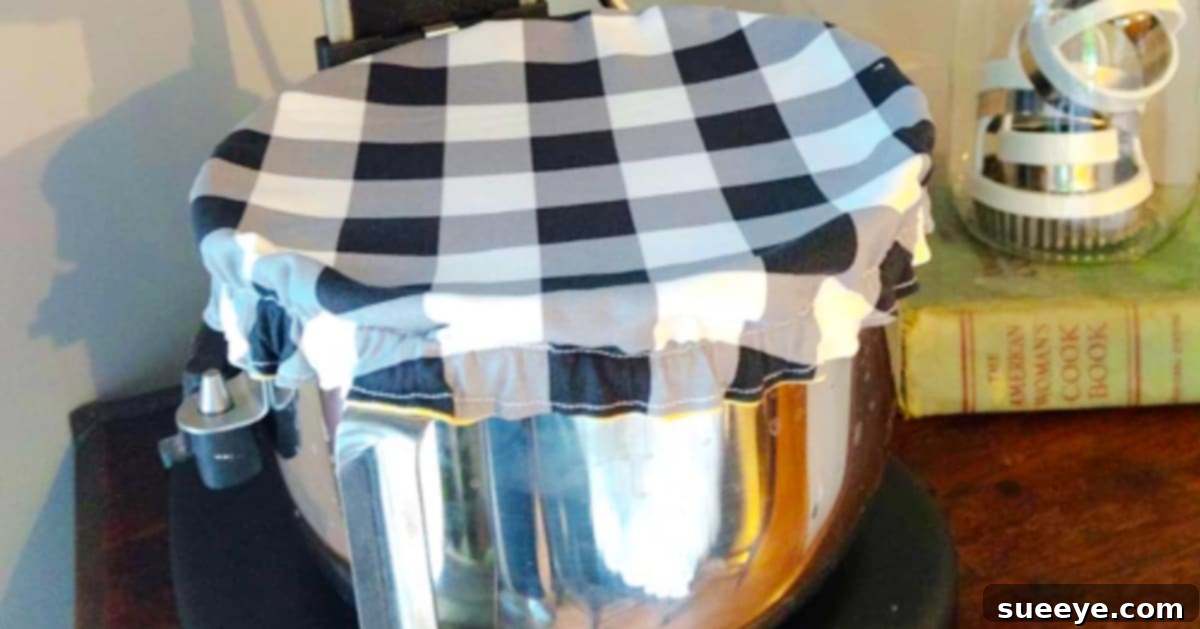
DIY Kitchen Aid Mixer Cover: Keep Your Mixing Bowl Dust-Free and Stylish
Every home baker knows the joy and convenience of a stand mixer, especially a trusty Kitchen Aid. It’s an indispensable tool that transforms tedious tasks into effortless culinary adventures. However, there’s a common dilemma many of us face: how to keep that beautiful, often large, mixing bowl clean and ready for action. Whether your mixer resides permanently on your countertop or on a portable cart, like mine, its bowl is a magnet for dust, stray flour particles, and even pet hair. The frustration of pulling out your mixer, only to find the bowl needs a thorough wash before you can even begin your baking project, is all too familiar.
Imagine this scenario: you’re inspired to bake. You gather your ingredients, pull out your mixer, only to sigh as you spot a fine layer of dust inside the bowl. This means halting your creative flow, lugging the bowl to the sink, washing, drying, and then finally starting your recipe. This small but frequent inconvenience can be a real dampener on your baking enthusiasm. But what if there was a simple, elegant solution that not only kept your bowl spotless but also added a touch of personalized charm to your kitchen?
Enter the brilliant idea from Youtuber @Zazu’sStitchArt! She’s shared an incredibly practical and aesthetically pleasing method to combat this common kitchen woe: a DIY fabric bowl cover secured with elastic. This ingenious solution ensures your mixing bowl remains pristinely dust-free, always ready for your next baking masterpiece, all while allowing you to proudly display your gorgeous Kitchen Aid mixer. It’s a project that combines functionality with personal style, making your kitchen not only more efficient but also more inviting.
This sewing project is perfect for beginners and seasoned crafters alike. Zazu’s video provides clear, easy-to-follow directions, requiring only the most basic sewing materials. If you’ve been looking for a simple yet impactful way to upgrade your kitchen organization and streamline your baking routine, then crafting a custom fabric mixing bowl cover is exactly what you need. Let’s dive into how you can create your own!
Why Every Stand Mixer Needs a Fabric Bowl Cover
A fabric bowl cover might seem like a small detail, but its benefits are immense for any home baker or kitchen enthusiast. Here’s why investing a little time into making one (or a few!) is a game-changer:
- Unmatched Hygiene: The most obvious and crucial benefit. Kitchens, despite our best efforts, are dusty environments. Flour, spices, lint, and general household dust settle everywhere, including inside your mixer’s bowl. A cover acts as a protective barrier, ensuring that when you’re ready to mix, your bowl is already clean and ready to go, free from airborne contaminants.
- Time-Saving Convenience: No more pre-baking rituals of washing and drying your bowl. With a cover, your mixer bowl is always in a “ready-to-use” state. This small saving of time and effort adds up, making your baking process smoother and more enjoyable.
- Protects Your Investment: Stand mixer bowls, especially those made of stainless steel or glass, are durable but can still be prone to minor scratches or dulling over time from constant exposure. A fabric cover provides a soft layer of protection, preserving the pristine condition of your bowl.
- Aesthetic Enhancement: Beyond practicality, a custom fabric cover allows you to infuse personality into your kitchen decor. Choose fabrics that match your kitchen’s color scheme, your personal style, or even seasonal themes. It transforms a utilitarian appliance into a charming display piece.
- Keeps Accessories Contained: Many people, myself included, store mixer attachments (like the paddle, whisk, and dough hook) inside the bowl. A snug cover helps keep these accessories securely in place and prevents them from getting dusty or dislodged.
- Cost-Effective and Eco-Friendly: Instead of frequently washing your bowl or purchasing expensive commercial covers, a reusable fabric cover is an economical and environmentally friendly alternative.
Essential Materials for Your DIY Mixer Bowl Cover
One of the best aspects of this project is its simplicity, requiring only a few readily available materials. You likely have many of these items in your crafting stash already!
- Fabric: The star of your project! Quilting cotton is an excellent choice due to its durability, wide array of patterns, and ease of sewing. Broadcloth or even sturdy linen blends also work well. Consider pre-washing your fabric to prevent shrinkage after your cover is made. Choose a pattern that brings you joy or complements your kitchen decor. You’ll need enough to cut one large circle.
- A Bowl (for outlining a pattern): Not your mixer bowl! You’ll need a large bowl, plate, or even a drawn compass to create the initial circular pattern for your fabric. The size will depend on your mixer bowl, allowing for ample seam allowance and elastic casing.
- Elastic: A crucial component for securing the cover. A 1/4-inch to 1/2-inch wide braided or knit elastic is ideal. Ensure it has good stretch and recovery to keep the cover snug around your mixer bowl.
- Scissors: Sharp fabric scissors are a must for clean, precise cuts.
- Grain Feed Bag Material (or alternative lining): This is used as an inner layer to give the cover some structure and thickness, helping it sit nicely and offer better protection. If you don’t have a grain feed bag, excellent alternatives include batting (thin quilt batting), fusible fleece, or even a layer of sturdy broadcloth. The goal is to provide a bit of body without making the cover too stiff.
- A Sewing Machine: While theoretically possible to hand-sew, a sewing machine will make this project quick and enjoyable.
- Thread: All-purpose polyester thread in a color that matches or complements your chosen fabric.
- A Fabric Marker (or Tailor’s Chalk, or a Pencil): Essential for accurately marking your cutting lines on the fabric. A disappearing fabric marker or tailor’s chalk is preferable as it won’t leave permanent marks.
Step-by-Step Directions to Craft Your Mixer Bowl Cover
Ready to transform your baking routine? Follow these detailed steps to create your beautiful and functional mixer bowl cover.
Step 1: Preparing Your Pattern and Cutting the Fabric
This is where accuracy pays off. Lay your main fabric flat and smooth. You’ll need to create a large circle that accounts for the diameter of your mixer bowl, plus extra for the height of the bowl and the elastic casing. A good starting point is to measure the widest diameter of your mixer bowl (usually the top rim). Then, measure the height of your bowl. Add these measurements together, plus an additional 2-3 inches for the elastic channel and seam allowance. This total will be the diameter of the fabric circle you need to cut. For example, if your Kitchen Aid bowl has a 9-inch diameter and is 7 inches tall, you might aim for a fabric circle with a diameter of roughly 9 + (7*2) + 3 = 26 inches (assuming the fabric drapes over the sides). Use your large plate or bowl as a guide, or draw a perfect circle with a fabric marker and a string compass (a string tied to a pencil and held in the center). Cut out this large fabric circle precisely.
Next, cut a slightly smaller circle from your grain feed bag material (or batting/fusible fleece). This inner circle should be approximately 1-2 inches smaller in diameter than your main fabric circle. This allows for the outer fabric to fold over and create the elastic casing without the inner lining getting in the way.
Once both circles are cut, layer them with the right side of your main fabric facing up, and the lining material centered on top of it.
Step 2: Sewing the Fabric Layers and Creating the Elastic Casing
Now it’s time to bring your cover to life with your sewing machine. Place your main fabric circle right side up. Position your lining circle (grain feed bag/batting) on top, centered. Pin them together around the edges to prevent shifting.
Fold the outer edge of your main fabric over towards the wrong side by about 1/4 inch and press it firmly. Then, fold it over again, this time by about 1 inch to 1.5 inches, creating a channel for your elastic. Pin this hem all the way around, leaving a gap of about 2-3 inches unstitched. This opening is crucial for threading your elastic through later.
Sew this hem down using a straight stitch, close to the inner folded edge. Remember to leave that small opening. As seen in the inspiration video, you can also add a decorative quilted stitch across the main body of the cover at this stage. This isn’t just for looks; quilting helps to stabilize the fabric and batting, preventing shifting and adding a professional finish to your cover. You can do simple concentric circles or a crosshatch pattern.
Step 3: Inserting the Elastic and Finishing the Cover
This step brings the cover to life by giving it its snug, bowl-hugging capability. Attach a safety pin to one end of your elastic. Thread this safety pin through the opening you left in your casing. Gently guide the elastic all the way around the channel until the safety pin emerges from the other side of the opening. Be careful not to twist the elastic inside the casing!
Once both ends of the elastic are out, overlap them by about 1 inch. Stitch them securely together with your sewing machine, creating a strong loop. Test the fit on your mixer bowl at this point. If it’s too loose, you might need to shorten the elastic slightly and re-stitch. If it’s too tight, you may need to adjust with a slightly longer piece of elastic (though typically, it’s easier to shorten than lengthen).
Once you are satisfied with the tension and fit, gently pull the elastic back into the casing so that the stitched join is hidden. Then, close the remaining gap in your casing by stitching it shut with a straight stitch, neatly finishing your elastic channel.
Tips for a Perfect Mixing Bowl Cover
- Pre-Wash Your Fabric: Always pre-wash and dry your main fabric before cutting and sewing. This prevents future shrinkage and keeps your cover looking neat after washing.
- Pressing is Your Friend: Use an iron at every stage of folding and seaming. Pressing creates crisp edges, helps fabric lay flat, and makes your stitching much easier and more accurate.
- Use a Walking Foot: If you’re adding decorative quilting or working with multiple layers of fabric and batting, a walking foot attachment for your sewing machine can be incredibly helpful. It feeds all layers evenly, preventing puckering and shifting.
- Don’t Rush the Elastic: Take your time when threading the elastic. A twisted elastic will not sit correctly on your bowl. Use a large safety pin or a bodkin for easy maneuvering.
- Test Fit Before Final Stitch: Before you close the opening after joining the elastic, carefully place the cover on your mixer bowl. This allows you to check the snugness and make any necessary adjustments to the elastic length.
- Experiment with Design: Don’t limit yourself to plain fabric. Consider adding appliqués, embroidery, or using contrasting fabrics for a truly unique look.
Caring for Your Fabric Bowl Cover
To ensure your beautiful new mixer bowl cover lasts for years, proper care is essential. Most cotton fabrics are machine washable. Wash your cover on a gentle cycle with cold water to prevent fading and shrinkage. Tumble dry on low or air dry for best results. If needed, a light iron can smooth out any wrinkles. Avoid harsh bleaches or high heat, which can damage the fabric and elastic.
Conclusion: A Small Project, a Big Impact
This mixing bowl cover truly is exactly what every Kitchen Aid owner needs! It’s a simple sewing project that yields incredibly practical benefits, transforming a minor kitchen annoyance into a seamless part of your baking routine. No more dust, no more pre-wash hassle, just a clean, ready-to-use bowl every single time. Plus, you get the satisfaction of having created a custom, stylish accessory that reflects your personal taste and enhances your kitchen decor.
So, gather your materials, fire up your sewing machine, and give this rewarding DIY project a try. You’ll wonder how you ever managed without it. A huge thank you to @Zazu’sStitchArt for sharing such a brilliant and simple solution!