
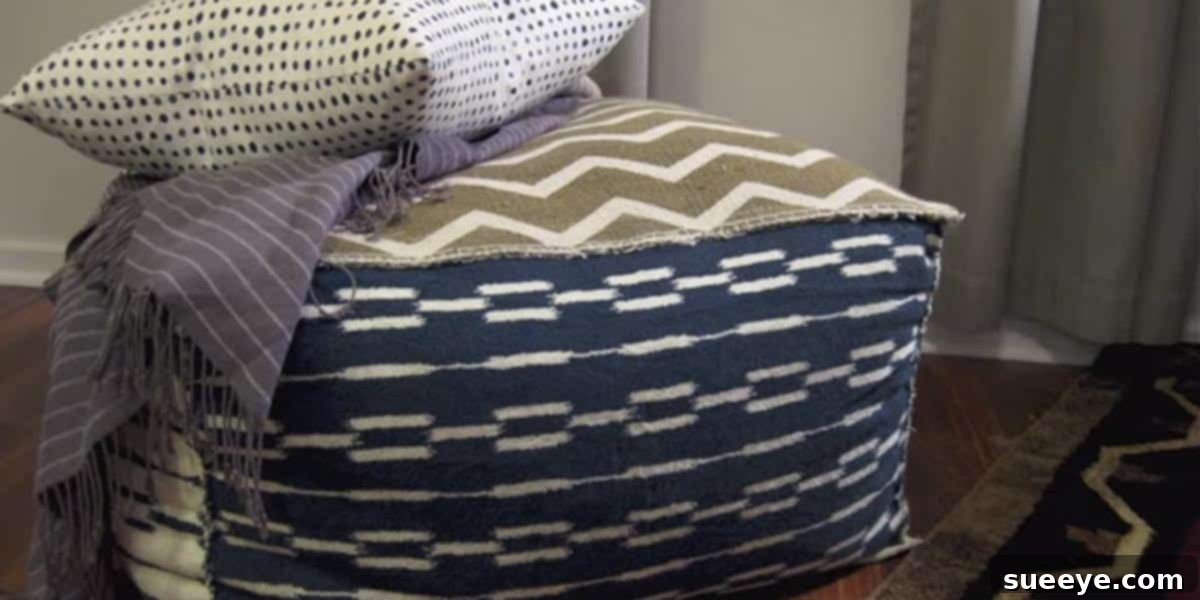
DIY Pouf Ottomans: Crafting Affordable Style and Versatile Seating for Your Home
In the realm of contemporary home decor, pouf ottomans have emerged as an undeniable sensation. You’d be hard-pressed to scroll through design blogs or browse furniture showrooms without encountering these charming, versatile pieces. They effortlessly add a touch of bohemian chic, modern minimalist, or cozy comfort to any space, serving as everything from a convenient footrest to a much-needed extra seat. However, their widespread popularity often comes with a significant drawback: the price. High-quality poufs from popular retailers can be astonishingly expensive, placing them out of reach for many budget-conscious decorators. This creates a compelling reason to explore the world of DIY. Why pay a premium when you can create a personalized, high-quality pouf yourself? This comprehensive guide will walk you through the appeal of poufs, the undeniable advantages of making your own, and essential considerations to ensure your DIY project is a resounding success.
The Ubiquitous Charm of Poufs: More Than Just a Pretty Face
Pouf ottomans, often affectionately shortened to “poufs” or referred to as “floor cushions,” are far more than just trendy items. Their enduring appeal stems from their multifaceted functionality and aesthetic versatility, making them a smart addition to almost any room:
- Dynamic Extra Seating: This is arguably their most celebrated role. Whether you’re hosting a lively family gathering, a casual game night with friends, or simply have a full house, running out of comfortable seating is a common predicament. Poufs offer an elegant and easy solution. Lightweight and effortlessly movable, they can be pulled into action as impromptu chairs, providing a cozy spot for guests, especially children, without the formality or bulk of traditional seating. Gone are the days of guests perching on the floor or redecorating your entire house just to accommodate everyone.
- Ultimate Comfort Footrest: After a demanding day, there’s little more satisfying than elevating your feet. A pouf provides the perfect soft yet supportive surface to rest your weary legs, enhancing the comfort of your sofa or armchair and promoting relaxation.
- Stylish Decor Accents: Beyond their practical uses, poufs are powerful decorative elements. They introduce texture, color, and a layer of visual interest to a room. From plush velvets to rustic knits, vibrant patterns to subtle neutrals, the choice of fabric and design allows a pouf to either complement an existing decor scheme seamlessly or stand out as a captivating focal point. They add a sense of lived-in comfort and personality that elevates the overall ambiance.
- Remarkably Versatile and Portable: Unlike heavy armchairs or fixed furniture pieces, poufs are designed for flexibility. Their relatively light weight means they can be easily carried from the living room to a bedroom, a reading nook, or even an enclosed patio, adapting to changing needs and activities within your home.
Their “totally in” status isn’t just about fleeting fashion; it’s about intelligent design that meets practical needs in a stylish package. This blend of trendiness and utility makes them an irresistible addition to modern homes, especially when considering the significant cost savings of a DIY approach.
Embracing the DIY Advantage: Crafting Your Way to Savings and Style
The decision to make your own pouf is a deeply rewarding one, offering advantages that a store-bought item simply cannot match. It’s about more than just saving money; it’s about infusing your home with pieces that are uniquely yours.
- Unrivaled Cost Efficiency: Let’s be frank: the primary motivator for many is the substantial savings. A quick glance at retailers like West Elm confirms that designer poufs often command prices well into the hundreds. By carefully selecting your materials and dedicating a little time, you can construct a pouf of comparable, or even superior, quality for a mere fraction of the retail price. This makes high-end aesthetics genuinely accessible on almost any budget.
- Complete Design Customization: This is where DIY truly shines. When you craft your own pouf, you are the designer. You have absolute control over every detail: the exact shade and pattern of the fabric, the specific size and shape to fit your space perfectly, and even the texture and firmness of the filler. Want a pouf that perfectly matches that throw pillow? Or one that fits precisely under a console table? DIY makes it possible. This level of bespoke personalization allows you to create a piece that is truly harmonious with your existing decor and personal taste.
- The Deep Satisfaction of Creation: There’s an inherent joy and pride that comes with creating something beautiful and functional with your own hands. Every time you see or use your handmade pouf, you’ll be reminded of your creativity and skill. It transforms a simple piece of furniture into a cherished item with a story.
- Assured Quality Control: When you’re the maker, you dictate the quality. You can choose durable, high-grade fabrics and ensure every stitch is strong. Crucially, you control the type and density of the filler. As emphasized in the original sentiment, “Use a firm filler, or your pouf will get dowdy real quick. You don’t want a bean bag!” This is a golden rule for pouf construction. A DIY approach guarantees you avoid the common pitfall of a saggy, shapeless pouf by allowing you to pack it with the right materials for lasting structure and comfort.
- Sustainable and Eco-Conscious Choices: DIY projects provide a fantastic avenue for upcycling and repurposing. Old denim, unused blankets, curtain panels, or even fabric remnants can find a new life as a pouf cover. Similarly, the filler can be composed of old clothes, towels, or shredded foam, diverting waste from landfills and promoting a more sustainable approach to home furnishing.
Forget the notion that high style requires a high price tag. With a little ingenuity and effort, you can create a “knock-off” that is, in fact, an original masterpiece, perfectly suited to your home and your budget.
Planning Your Project: Essential Considerations for a Successful Pouf
Before you embark on the exciting journey of cutting and stitching, a thoughtful planning phase will pave the way for a smooth process and a beautifully finished pouf. Here’s what to consider:
1. Selecting the Ideal Fabric: Balancing Durability and Design
The choice of fabric is paramount, influencing both the aesthetic and the longevity of your pouf. Think about where the pouf will be placed and how it will be used. For high-traffic areas, homes with children, or pet owners, prioritize robust, tightly woven upholstery fabrics such as canvas, denim, heavy-duty linen blends, or outdoor-grade materials. These are more resistant to wear and tear and often easier to clean. If your pouf is primarily decorative or destined for a quieter space, you might indulge in more luxurious textures like velvet, chenille, or a chunky knit fabric. Always remember to pre-wash and dry your fabric if it’s made from natural fibers prone to shrinkage; this prevents distortion after your pouf is completed.
2. Choosing the Right Filler: The Foundation of Firmness and Form
This is arguably the most critical decision for a successful pouf. The key is to achieve a firm, supportive structure that resists sagging, distinctly different from the loose, pliable nature of a traditional bean bag. Avoid fillers that are too soft or don’t compress well. Here are the most effective options:
- Foam Scraps / Shredded Foam: An excellent choice for providing substantial firmness and density. You can often purchase bags of shredded foam from upholstery suppliers, or repurpose foam from old cushions or mattresses.
- Old Clothes / Fabric Scraps: This is a highly recommended and eco-friendly option. Cut old jeans, t-shirts, sweaters, towels, or blankets into small pieces (about 1-2 inches square). When packed densely, these scraps provide significant weight and structure, helping the pouf hold its shape beautifully.
- Poly-Fil / Polyester Fiberfill: While soft and inexpensive, large quantities are required to achieve adequate firmness. It’s often best used in combination with denser materials to add a layer of softness or to fill smaller gaps.
- Repurposed Pillow Inserts: Old, firm pillow inserts can be cut up and used as part of your filler, especially if they are dense and no longer suitable for sleeping.
A combination of shredded foam and densely packed fabric scraps often yields the best results, offering both structural integrity and a comfortable feel. For hygiene and ease of maintenance, consider making an inner liner from an inexpensive fabric like muslin or an old bedsheet. This liner will hold the filler securely, allowing you to remove and wash the outer cover.
3. Design and Dimensions: Tailoring to Your Specific Space
Before cutting any fabric, determine the ideal size and shape for your pouf. Will it be a compact footrest, a substantial extra seat, or a statement piece? Measure the area where it will reside and consider its intended function. Common shapes include cubes, cylinders, and sometimes more complex geometric forms. For beginners, a simple cube or cylinder is the easiest starting point. Carefully sketch out your pattern pieces, always remembering to add seam allowances (typically 1/2 to 1 inch) to all edges for accurate construction.
A General Blueprint: Step-by-Step Guide to Crafting Your Pouf Ottoman
While specific patterns and techniques may vary based on your chosen design, the fundamental steps for most DIY pouf projects remain consistent. This outline provides a clear roadmap for your creation:
Phase 1: Preparation and Cutting
- Gather All Materials and Tools: Assemble your chosen fabric (ensure you have sufficient yardage), filler material (shredded foam, fabric scraps, etc.), strong upholstery-grade thread, a reliable sewing machine (or heavy-duty needle for hand-sewing), sharp fabric scissors, a measuring tape, pins, and a fabric marker or chalk. Decide if you want a zipper for a removable cover and if you’ll be making an inner liner.
- Measure and Precisely Cut Fabric Pieces: Based on your pattern (e.g., for a cube, you’ll need six identical square panels; for a cylinder, two circular panels for the top/bottom and one long rectangular panel for the side), meticulously measure and cut your fabric. Double-check that all seam allowances are consistent.
Phase 2: Construction of the Pouf Cover
- Sew the Pouf Panels Together: With right sides facing, pin the fabric panels together. For a cube, sew four side panels to form a continuous band, then attach the top and bottom panels. For a cylinder, sew the short ends of the rectangular side panel to create a tube, then attach the two circular panels. Use strong, even stitches.
- Incorporate an Opening: This is crucial for filling your pouf. Either leave one seam partially unsewn, approximately 12-18 inches long, or, ideally, insert a sturdy zipper into one of the seams. A zipper allows for easy removal of the outer cover for cleaning, significantly extending the life and freshness of your pouf.
- (Optional) Create an Inner Liner: If you’re using loose filler materials or want a washable outer cover, sew a simple inner bag (using the same dimensions as your outer cover) from an inexpensive, durable fabric like muslin. This will contain the filler and make the outer cover easier to manage.
Phase 3: Filling and Finishing
- Stuff Your Pouf Firmly: Turn the pouf cover (or inner liner) right side out. Begin to pack it tightly with your chosen filler material. This step requires patience and a significant amount of material to achieve the desired firmness and shape. For square poufs, pay extra attention to thoroughly stuffing the corners to prevent them from collapsing. Distribute the filler evenly to avoid lumps or soft spots. The goal is a dense, structured form, not a loosely filled bag.
- Securely Close the Opening: Once your pouf is packed to your satisfaction, carefully hand-stitch the remaining opening closed using a ladder stitch for a neat, almost invisible finish. If you installed a zipper, simply close it.
- Final Shaping and Enjoyment: Gently fluff and shape your newly made pouf. Step back and admire your handcrafted creation!
While this outline provides a general framework, consulting visual resources can be incredibly helpful. Numerous excellent video tutorials and step-by-step blog posts are available online, demonstrating various patterns, cutting techniques, and sewing tips. Searching for terms like “DIY pouf sewing tutorial,” “how to make a floor pouf,” or “fabric ottoman DIY” will provide a wealth of detailed guides, often with precise measurements and visual aids that you can adapt to your specific project. Don’t hesitate to utilize these resources to boost your confidence and refine your technique.
Pro Tips for a Polished, Professional-Looking DIY Pouf
- Invest in Quality Tools: Sharp fabric scissors will ensure clean cuts, and a reliable sewing machine with the right needle (e.g., a heavy-duty needle for upholstery fabric) will make the sewing process smoother and prevent frustration.
- Always Use Upholstery Thread: This specialized thread is much stronger and more durable than regular sewing thread, essential for seams that need to withstand the pressure of sitting and the weight of filler.
- Reinforce Key Seams: For extra strength and longevity, especially on seams that will bear significant stress, consider double-stitching them.
- Consider a Non-Slip Base: If your pouf will be on hard flooring (wood, tile, laminate), sewing a piece of non-slip rug grippe fabric to the bottom panel can prevent it from sliding around.
- Add Thoughtful Embellishments: Elevate your pouf with decorative touches like piping along the seams, playful tassels, unique buttons, or even subtle tufting for a more sophisticated look.
- Patience Pays Off: Rushing through any stage, particularly the cutting and stuffing phases, can lead to mistakes and a less satisfactory end product. Take your time, measure twice, and stuff thoroughly.
Beyond the Basics: Exploring Advanced Pouf Designs
Once you’ve successfully completed your first basic cube or cylindrical pouf, you might feel inspired to tackle more intricate designs. The world of pouf creation is vast and creative possibilities are endless. Consider experimenting with different styles such as:
- Knitted or Crocheted Poufs: Using chunky yarn, you can create a cozy, textured cover that adds immense warmth and character.
- Tufted Poufs: Adding fabric-covered buttons and creating tufts can give your pouf a more elegant, upholstered furniture aesthetic.
- Patchwork Poufs: A fantastic way to utilize fabric scraps and create a unique, eclectic, or bohemian design.
- Moroccan-Inspired Poufs: Often featuring intricate embroidery, leather, or specific geometric patterns, these can add an exotic touch.
Each new technique offers a chance to further personalize your home decor and hone your crafting skills.