
There’s something uniquely captivating about kinetic sand. It flows, it molds, it crumbles, and then magically re-forms, offering an endless tactile adventure. This mesmerizing substance, renowned for its ability to stick to itself but not to you, provides a sensory experience unlike any other. Whether you’re a child marveling at its transformative properties or an adult seeking a calming escape, kinetic sand truly transcends age. Its vibrant colors and satisfying texture make it a perennial favorite, an ideal medium for both imaginative play and stress relief.
While store-bought kinetic sand is readily available, the joy of creating your own is an experience in itself. Not only is it a cost-effective alternative, but it also gives you complete control over the ingredients and customization options. For parents in search of an engaging, mess-free toy for the playroom, or anyone looking for a fun DIY project, homemade kinetic sand is an absolute winner. It’s quick, incredibly simple, and uses ingredients you likely already have around the house.
The Magic Behind Kinetic Sand: More Than Just a Toy
Before diving into the recipe, let’s appreciate why kinetic sand holds such universal appeal. Its unique properties stimulate multiple senses, making it a powerful tool for development and relaxation. For children, it’s a gateway to creativity and learning. The act of squeezing, shaping, and molding the sand helps develop fine motor skills and hand-eye coordination. As they build castles, form letters, or create abstract sculptures, kids engage in imaginative play that fosters storytelling and problem-solving abilities. The tactile feedback provides essential sensory input, which can be incredibly beneficial for sensory development and regulation.
Beyond its developmental benefits for kids, kinetic sand offers a therapeutic experience for all ages. The repetitive motion of playing with it can be incredibly calming, acting as a natural stress reliever. It’s a wonderful way to unwind after a long day, providing a gentle distraction that helps clear the mind. For adults, it can serve as a mindful activity, allowing a brief escape from digital screens and daily pressures. Its squishy, yet firm, consistency offers a satisfying sensation that many find incredibly soothing, making it a fantastic tool for fidgeters or anyone needing a moment of quiet focus.
Unlock Your Creativity: Why DIY Kinetic Sand is a Must-Try
Making kinetic sand at home isn’t just about saving money; it’s about embracing creativity, understanding the science of materials, and having a ready supply of fun. When you craft it yourself, you can experiment with different colors, incorporate scents, or even adjust the texture slightly to your preference. It’s also reassuring to know exactly what ingredients are going into the plaything your children (or you!) will be interacting with. This particular recipe, shared by Brooke with WhatsUpMoms, is celebrated for its simplicity and effectiveness, making it an excellent starting point for any DIY enthusiast.
Brooke’s DIYs have a reputation for being straightforward and successful, and her kinetic sand recipe is no exception. It’s designed to be accessible, requiring only a handful of common household items. This means less time spent hunting for obscure ingredients and more time enjoying the process of creation and play. If you’ve ever been in a situation where you needed a quick, engaging activity for kids, or a unique gift in a pinch, this recipe is your secret weapon. The ingredients work together harmoniously to mimic the unique qualities of store-bought kinetic sand, ensuring a satisfying play experience.
Gather Your Simple Supplies for Homemade Kinetic Sand
One of the most appealing aspects of this kinetic sand recipe is its reliance on readily available and inexpensive ingredients. You don’t need fancy craft supplies or specialized chemicals. A quick trip to your pantry and cleaning cabinet, or a brief stop at a local store, is all it takes to get started. Here’s what you’ll need to create your own batch of this magical, moldable sand:
- 1 cup cornstarch: This forms the primary base of your kinetic sand, giving it its characteristic powdery yet firm texture.
- 1/8 cup liquid detergent: The detergent acts as a binder, helping the cornstarch particles stick together in that unique kinetic way. It also contributes to the smooth, flowing consistency.
- 1 cup shaving cream: This is the secret ingredient that introduces the squishy, airy, and truly “kinetic” feel. It makes the mixture light, fluffy, and incredibly satisfying to play with.
- Optional food coloring: If you wish to infuse your kinetic sand with vibrant hues, food coloring is your best friend. Gel food colorings often provide more intense colors without significantly altering the consistency compared to liquid drops.
When selecting your ingredients, consider the types. For liquid detergent, a standard dish soap or laundry detergent should work fine. However, if there are any sensitivities in your household, opting for a hypoallergenic or natural detergent might be a good idea. For shaving cream, any standard foam or gel shaving cream will do; the cheaper options often work just as well as the more expensive ones for this purpose. If you’re using food coloring, remember that a little goes a long way, especially with gel varieties. You can always add more to achieve your desired shade.
Step-by-Step Guide: Mixing Your Way to Mesmerizing Sand
The beauty of Brooke’s recipe isn’t just in its simple ingredient list, but also in its incredibly straightforward preparation process. You don’t need any special equipment or advanced crafting skills. All you need is a mixing bowl, a spoon, and a desire for fun! The entire process takes just minutes, making it an ideal activity for a spontaneous creative burst.
Here’s how to bring your homemade kinetic sand to life:
- Combine the Dry Base: Start by pouring the 1 cup of cornstarch into a large mixing bowl. The bowl should be large enough to allow for thorough mixing without spills.
- Add the Liquid Binder: Next, add the 1/8 cup of liquid detergent to the cornstarch. At this stage, you might start to see a slight clumping.
- Introduce the Fluffiness: Now, add the 1 cup of shaving cream to the mixture. This is where the magic truly begins to happen.
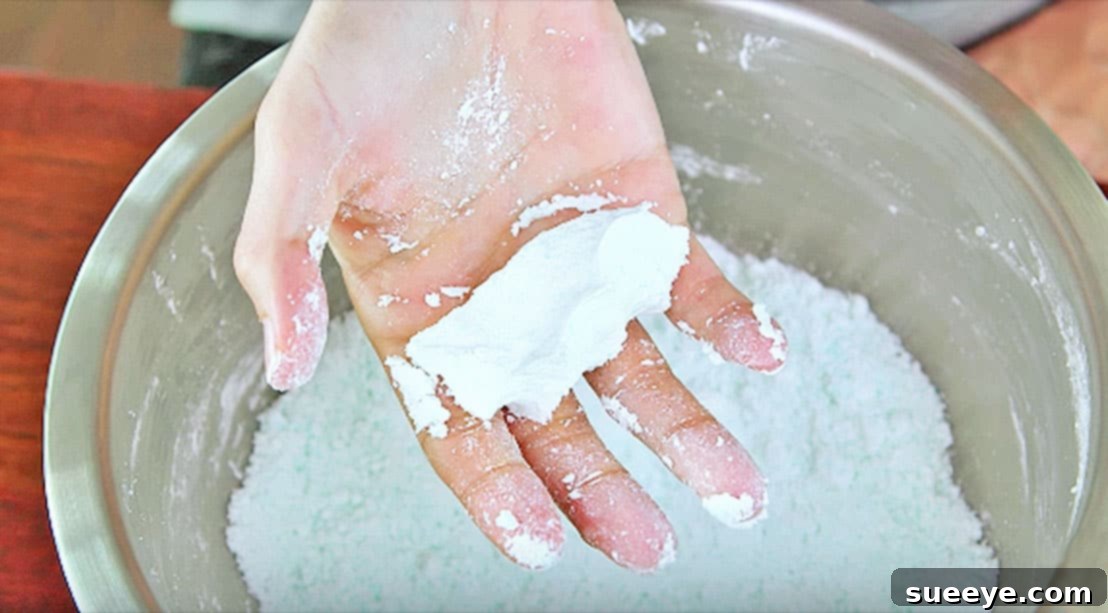
- Mix Thoroughly: Using a spoon, fork, or even your hands (which can be a fun sensory experience in itself!), begin to mix all the ingredients together. Start slowly, gently folding the ingredients into each other. You’ll notice the mixture transforming from a loose powder into a cohesive, squishy mass. Continue mixing until all the ingredients are fully incorporated and you achieve a uniform consistency. It should feel pliable and slightly moist, but not sticky or gooey.
- Add Color (Optional): If you’re adding food coloring, do so gradually after the initial mixing. Add a few drops at a time and knead the sand until the color is evenly distributed. Keep adding drops and mixing until you reach your desired hue. Remember that lighter colors can be beautiful too, offering a more natural sand-like appearance.
Troubleshooting Tips:
- Too Dry/Crumbly? If your sand feels too dry and isn’t holding together well, add a tiny bit more liquid detergent (a teaspoon at a time) and mix thoroughly until it reaches the desired consistency.
- Too Wet/Sticky? If the mixture feels too sticky or wet, gradually add a tablespoon of cornstarch and mix well. The key is to add small amounts and mix, rather than adding too much at once.
The perfect consistency will allow the sand to be molded easily, hold its shape when pressed, and then flow apart gently when released. It should leave minimal residue on your hands.
Caring for Your Creation: Storage and Longevity
Once you’ve crafted your perfect batch of homemade kinetic sand, you’ll want to ensure it lasts as long as possible for countless hours of play. Proper storage is key to maintaining its unique texture and preventing it from drying out or becoming contaminated. The simplest and most effective method is to store it in an airtight container.
Plastic food storage containers with secure lids, resealable plastic bags, or even glass jars with tight-fitting lids work wonderfully. The goal is to minimize exposure to air, which can cause the moisture in the shaving cream and detergent to evaporate, leading to dry, crumbly sand. Stored correctly, your homemade kinetic sand can last for several weeks, if not months, providing continuous enjoyment.
Periodically, you might notice your kinetic sand feeling a bit drier than usual, especially if it’s been left out during play. If this happens, you can often rejuvenate it by kneading it vigorously with your hands for a few minutes. The warmth and moisture from your hands can sometimes be enough to bring it back to life. If it’s still too dry, try adding a very tiny amount (a few drops) of liquid detergent or a spray of water and kneading it in. Be cautious not to overdo it, as too much liquid will make it sticky.
Beyond Playtime: Fantastic Gift Ideas and Party Favors
This homemade kinetic sand isn’t just for your own household; it makes an incredibly thoughtful and engaging gift! Brooke, with her knack for clever ideas, suggests packing the sand with little buried treasures, transforming it into a delightful “dig” kit. Imagine the excitement of a child discovering hidden gems, toy dinosaurs, or miniature figures nestled within the colorful, squishy sand.
For birthday parties, homemade kinetic sand can be an unforgettable party favor. Instead of generic trinkets, guests can take home a personalized container of this unique sensory toy. You can customize the colors to match the party theme, or even label each container with a child’s name. For a pirate-themed party, package yellow kinetic sand with plastic gold coins and jewels. For a mermaid theme, use blue or green sand with shell-shaped beads. The possibilities are endless, making your party favors both memorable and fun.
To elevate the gift or favor, consider these presentation ideas:
- Themed Dig Kits: Use small, clear plastic containers or jars. Fill with kinetic sand and embed a few themed treasures (e.g., small plastic animals, polished stones, mini erasers, or craft jewels). Add a mini shovel or spoon on the side.
- Layered Colors: Create a rainbow effect by layering different colored kinetic sand in a transparent container.
- Personalized Labels: Design and print custom labels for each container, including instructions for care or a fun message.
This creative and economical gift idea shows thoughtfulness and provides hours of imaginative play, far surpassing the appeal of many store-bought alternatives.
Safety and Supervision
While homemade kinetic sand is generally safe, especially when made with non-toxic ingredients, a few safety considerations are important, especially when young children are involved. Always supervise children during play, particularly those who might still put non-food items in their mouths. Although cornstarch is food-grade, and the detergent is typically non-toxic in small amounts, this kinetic sand is not intended for consumption. Ensure children wash their hands thoroughly after playing to remove any detergent residue.
If anyone in your household has skin sensitivities or allergies to specific detergents, opt for hypoallergenic or natural versions, or consider wearing gloves during preparation and play. Always prioritize a safe and enjoyable play environment.
Get Ready to Play and Share!
You’ve now got the simplest, most effective recipe for homemade kinetic sand at your fingertips. It’s an incredibly versatile substance that encourages creativity, provides sensory input, and offers a calming, engaging activity for all ages. Whether you’re crafting it for a quiet afternoon at home, preparing a unique gift, or setting up a fun party favor, this DIY kinetic sand is sure to be a hit.
We encourage you to try out this fantastic recipe. Experience the unique texture and endless possibilities firsthand. If you do make this sand, we’d love to hear about your experience! Share your thoughts, tips, and any creative variations you come up with in the comments section below. Don’t forget to pass this incredibly easy and fun recipe along to your friends and family too, so they can join in on the kinetic fun!
Happy molding!