DIY Decor
45 Fabric Scrap Crafts to Sew From Leftover Material
Fabric scrap crafts and easy sewing ideas, 45 of them: key fobs, zip pouches, bookmarks, quilts and hair bows, all with free step by step tutorials.
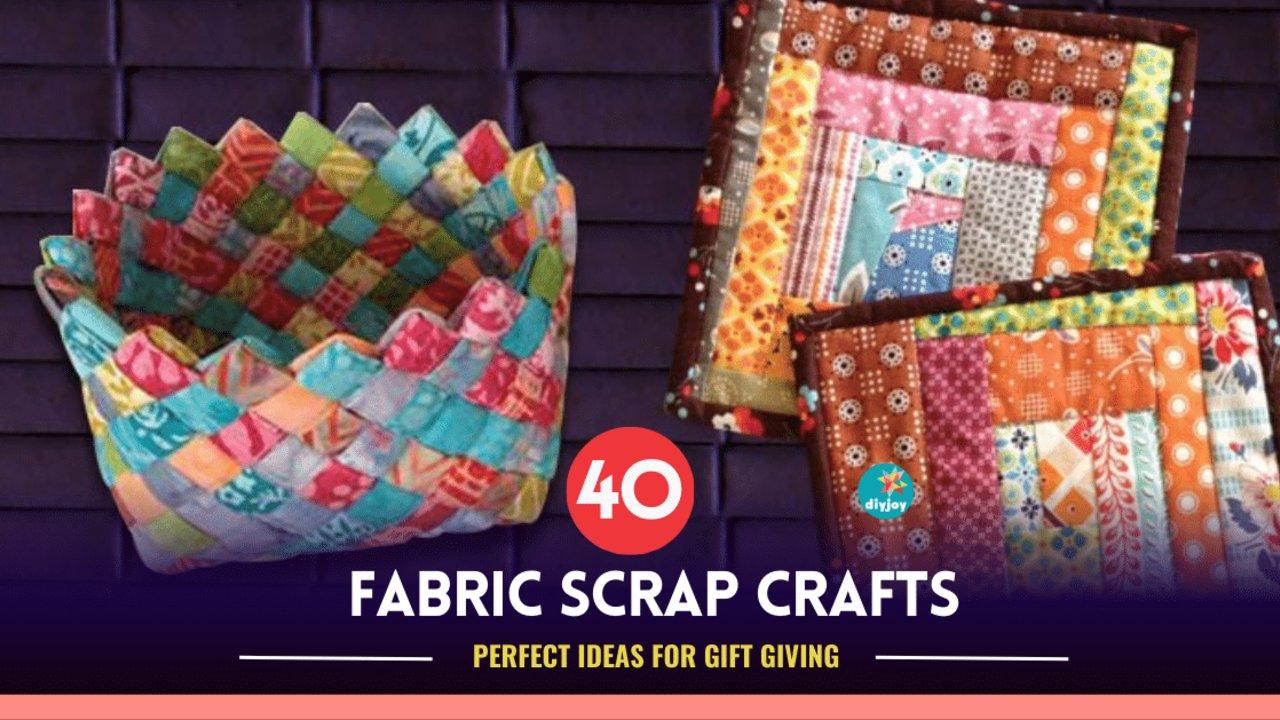
Nobody who sews throws fabric away. The bin fills up, the lid stops closing, and the good pieces sit in there for years waiting for a project worth their while. These 45 fabric scrap crafts are that project, and the range is the point: a two inch square becomes a magnet, a ten inch strip becomes a braided bracelet, a basketful becomes a rag rug your feet meet every morning. Some need nothing but a needle and an evening. Others want a machine, interfacing and a real afternoon. There are DIY gift ideas for sewing projects in here, crafty jewelry and hair accessories, wall art and home decor, and plenty of easy sewing projects for a first weekend at the machine. A good few double as sewing projects to make and sell. Sort by size before you start, because the scrap you have decides the project you can make, and half the work here is already done by edges somebody else hemmed.
Fabric Scrap Crafts Ideas
1. Hexagon Tetris Bag
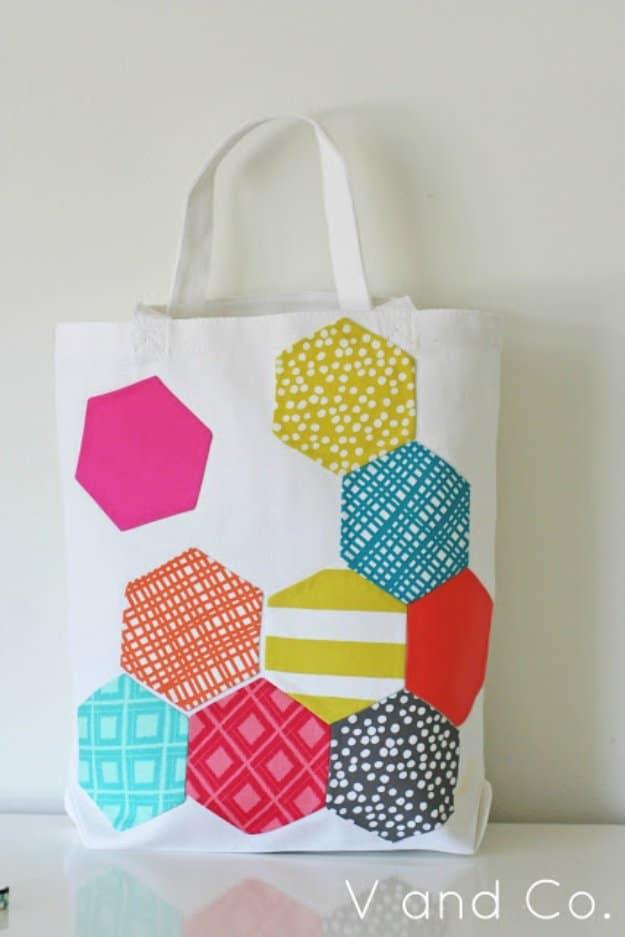
Nine five inch squares of quilting cotton become nine appliqued hexagons on a plain canvas tote, and the arrangement is deliberately off grid, which is where the Tetris name comes from. A four and a half inch hexagon template does the drawing. The clever part is the turning: fusible interfacing goes face to face with the fabric, the hexagon outline gets stitched all the way round, then a slit in the interfacing lets the whole shape turn right side out with crisp folded edges and no pressing under. Cut the seam allowance back to about an eighth of an inch first. Iron them down, then hand applique the edges in matching thread.
Get the full tutorial at Vanessa Christenson.
Easy DIY Fabric Covered Pots
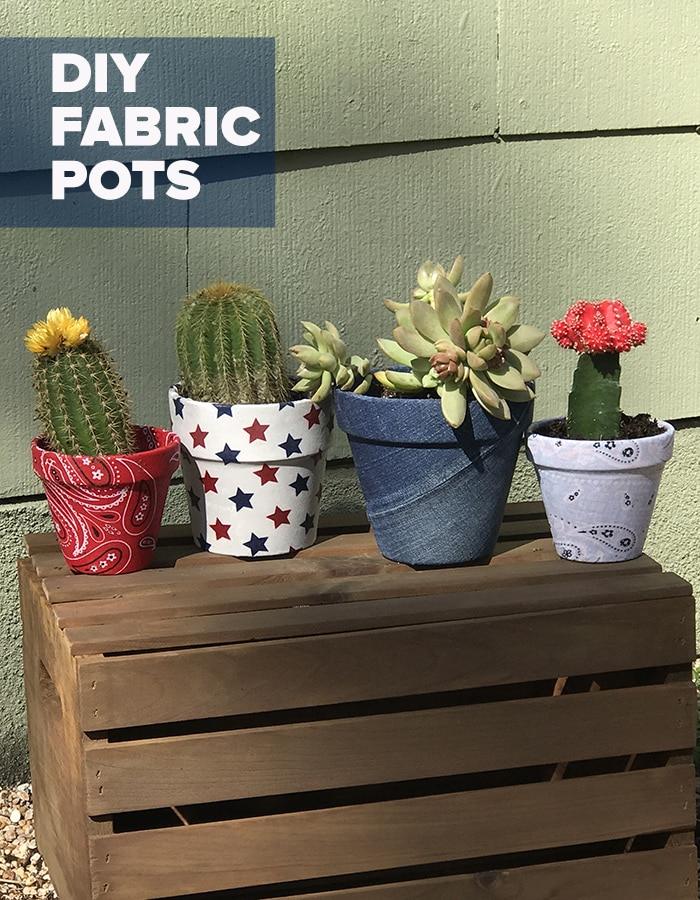
Learn how to make these fun and easy decoupage pots using only scrap fabric. Check out our latest video tutorial on Youtube to learn how. Perfect cheap idea to make and sell, but these cute and crafty pots also make super homemade gifts.
2. DIY Fabric Scrap Magnet
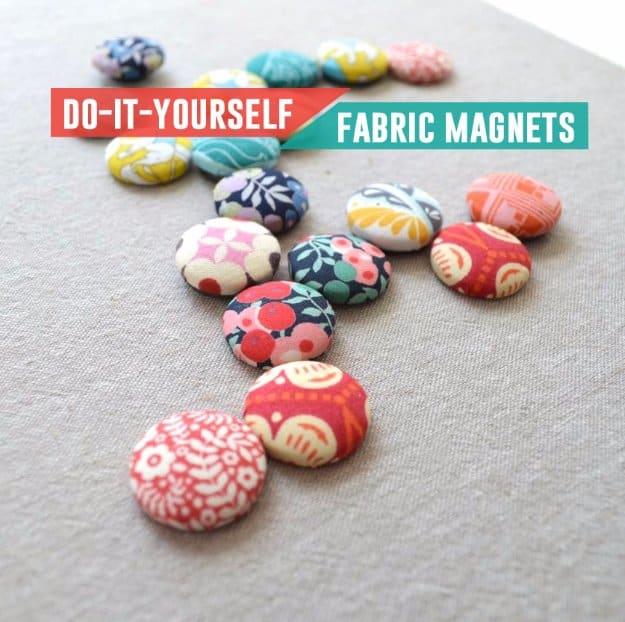
The scraps too small and too precious to cut into anything become seven eighths inch covered buttons with a magnet glued on the back. A Dritz cover button kit in size 36 does the shaping, and two inches square of fabric is enough for one. Run a gathering thread round the circle, pull it over the button shell, and press the back on with the blue pusher from the kit. Then two details that matter: scuff the smooth metal back with sandpaper first so the glue has something to bite, and use very little Gorilla Glue, because it expands as it cures and will foam out around the magnet.
Get the full tutorial at Andrea's Notebook.
3. Fabric Scrap Key Rings
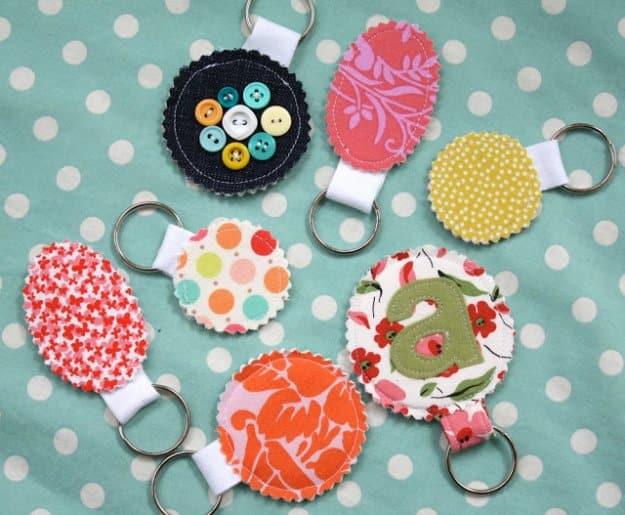
Two layers of scrap with a slab of Peltex between them makes a key fob stiff enough to survive a handbag for years. Iron medium weight interfacing to the wrong side of both pieces, then press the Peltex on for ten to fifteen seconds, which is what gives the finished fob its board-like body. Trace round anything circular for the pattern; two to three inches across is the sweet spot. Sew the two pieces a quarter inch from the edge, leave an inch open, trim with pinking shears and push a two inch loop of twill tape through the gap with the key ring on it before closing up.
Get the full tutorial at Craftiness Is Not Optional.
4. How to Make Fabric Koozies
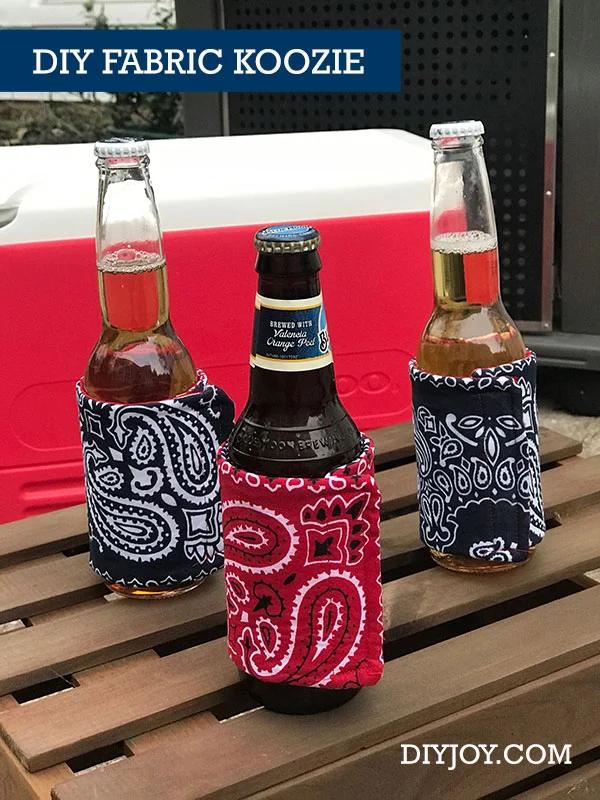
Two fabrics, Insulbright, iron on lining and a strip of Velcro, and the finished koozie is reversible, which means one sewing session gives you two looks. The whole build is rectangles cut to matching size, stacked, sewn almost all the way round and turned. The part worth slowing down for is the layer order: get the right sides facing each other correctly before the seam goes in, because the reversible trick only works if the turn comes out clean. About thirty minutes each the first time, faster after that. Mixed prints are the practical choice at a party, since nobody puts down the wrong bottle.
Get the full tutorial at Sueeye.
5. Pocket Warmers
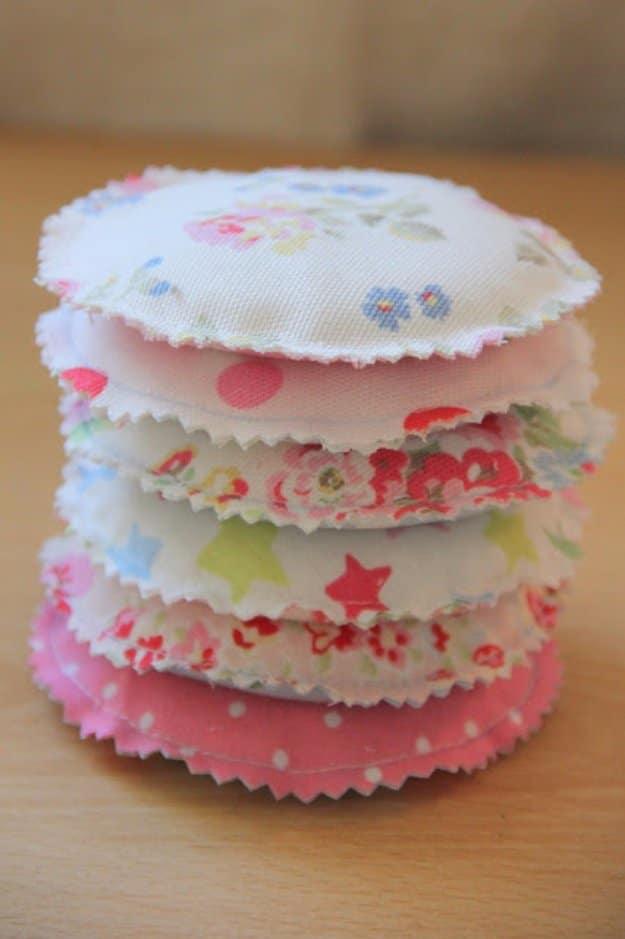
Two fabric circles, five or six tablespoons of dry rice and a running stitch, and the result lives in a coat pocket all winter. Draw the circle on the fabric first so both halves match, sew round leaving a gap, funnel the rice in, then stitch the opening shut and trim the whole edge with pinking shears so it will not fray. Fifteen to thirty seconds in the microwave is plenty, and they hold heat for twenty to thirty minutes, which covers a school run or a dog walk. Cotton only, no synthetics anywhere near a microwave, and make them in pairs.
Get the full tutorial at I Make.
6. Monogrammed Zipper Pouch
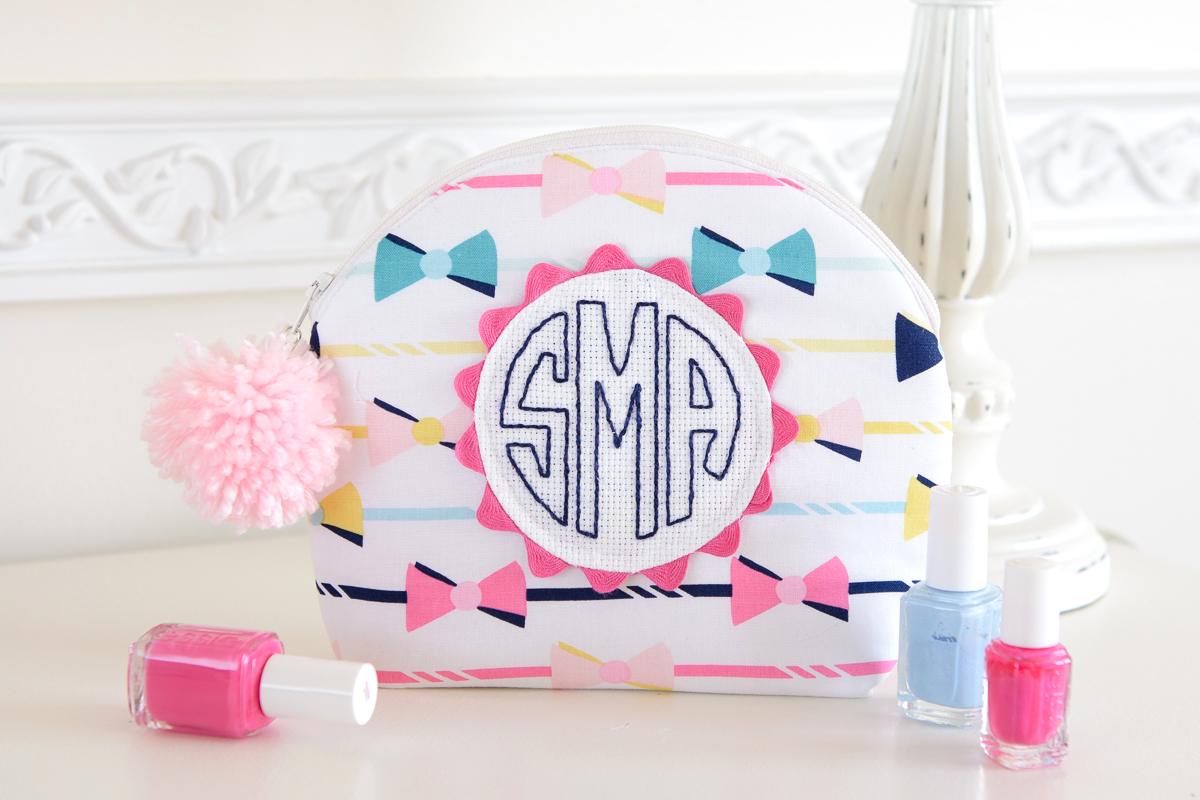
A curved top zipper and a hand stitched monogram, and the pouch that comes out looks like the fifty dollar version. The monogram is backstitched onto a six inch square of cross stitch fabric, cut down to a three inch circle and edged in ric rack so the raw edge disappears. Flex-Foam is what gives the pouch its shape and keeps it standing up on a dresser. Half inch seams throughout, boxed corners stitched an inch from the cut edge, and a three inch gap left in the lining for turning. Budget about three and a half hours, and treat it as an intermediate project rather than a first one.
Get the full tutorial at Polka Dot Chair.
7. Easy Fabric Scrap Bows
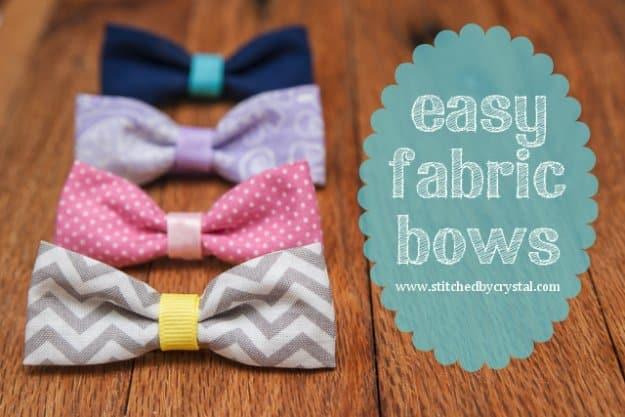
A rectangle three inches by seven is the whole material list, and it makes a bow about an inch wide and three inches long. Fold it in half, sew the long edge with a quarter inch seam, turn it out and press the seam into the middle at the back. Fold the two ends into the center, overlap them slightly and stitch them down. Then scrunch the middle and wrap it with three eighths inch ribbon, gluing the ends at the back and holding it with a clothes pin while the glue sets. Alligator clips come a hundred to a box for about six dollars.
Get the full tutorial at Stitched by Crystal.
DIY Ideas For Leftover Fabric Scraps
8. Bifold Wallet
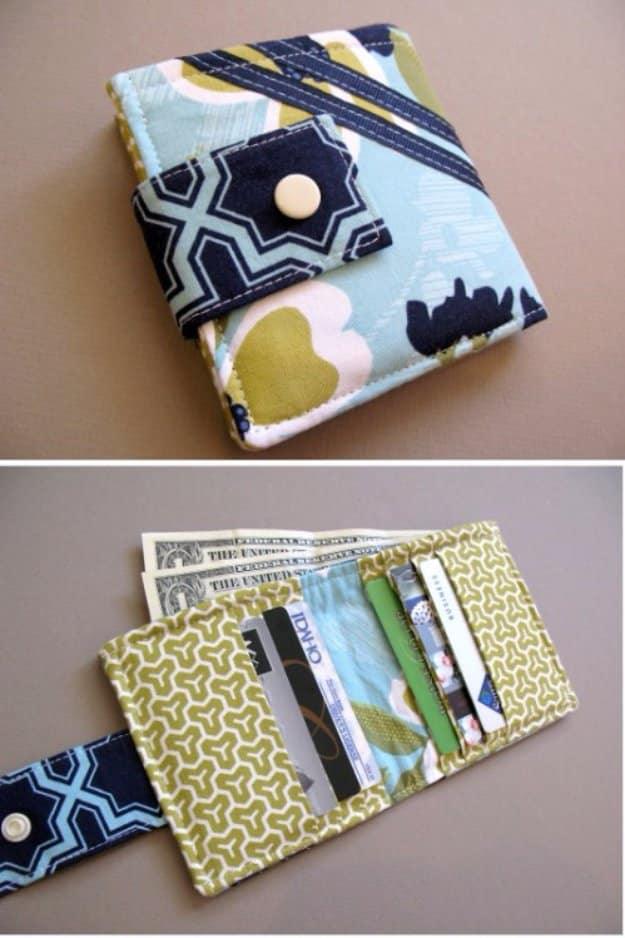
A proper bifold with staggered card slots, and the reason it holds a lot of cards without spilling them is that the slots face inward. Two nine by five inch rectangles make the outside and lining, two nine by four and a half inch pieces take the bills, and a pair of five by nineteen inch strips fold accordion style into the card stack. Interface everything if you are using quilting cotton. One specific warning from the maker: do not use an actual credit card as your measuring guide, because they warp and your slots come out wrong. Two to three hours, and a snap closes it.
Get the full tutorial at Modest Maven.
9. Key Chain Coin Purse
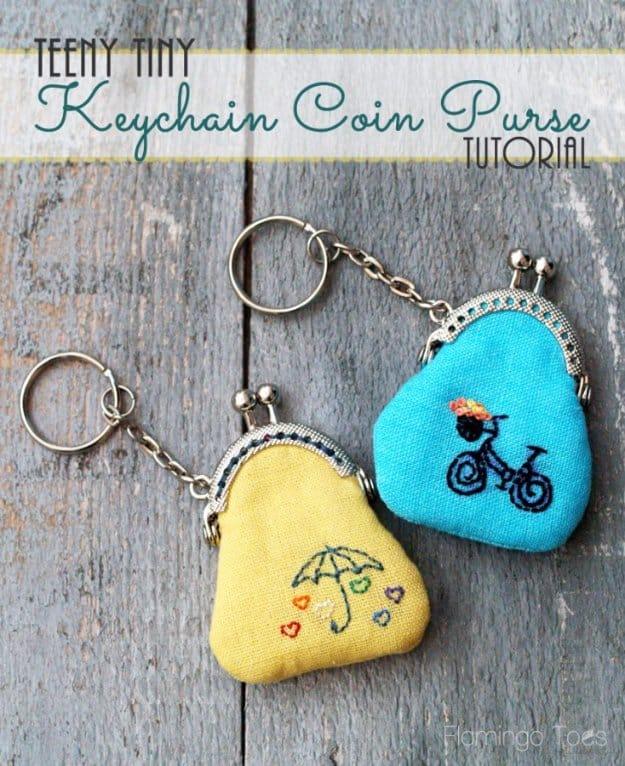
A four centimetre metal purse frame is the whole reason this reads as a bought object rather than a pouch. The fabric is embroidered first, while it is flat and easy to hold, then the outer pieces get fusible fleece trimmed a quarter inch smaller so the seams stay slim. Outer and lining are sewn separately, joined at the top edges, turned through a one inch gap and closed by hand. Then the fiddly part: E-6000 into the frame channel, fabric tucked in with a toothpick, and twenty four hours of drying before anybody opens it. Do not rush that last step.
Get the full tutorial at Flamingo Toes.
10. Fabric Scrap Bobby Pins
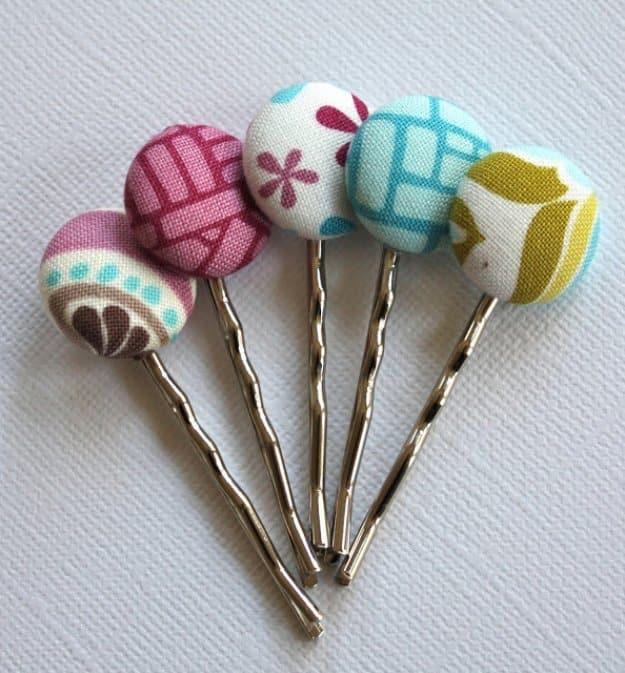
Ten millimetre pad bobby pins and a covered button kit, and the maths is the sell: about twenty five cents a pin against two dollars fifty in a shop. Cut the fabric circles with the pattern in the kit, cover the buttons the normal way, then take needle nose pliers and snap the wire shank off the back of each one, which is the step that lets the button sit flat. A small dab of Gorilla Glue on the pin pad, button pressed on, then lay them flat for half an hour to an hour. Go easy on the glue, because it expands while it cures.
Get the full tutorial at Just Call Me Chris.
11. DIY Braided Basket
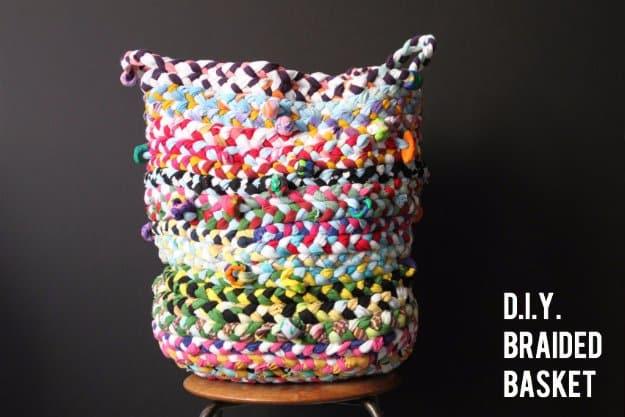
Outgrown t-shirts cut into two to two and a half inch strips, braided into a continuous rope and coiled into a standing basket, and it is genuinely a several day project rather than an afternoon. About twenty small shirts plus a yard of jersey is the stock, and joining all those strips end to end takes roughly three hours before any braiding starts. Polymer clay beads with quarter inch holes thread onto the braid as you go. Coil the base flat first, then stack the rows upward and stitch through the inside edges with an upholstery needle. Use a thimble; jersey layers fight back.
Get the full tutorial at Blogging Corner.
12. DIY Cord Keeper From Fabric Scraps
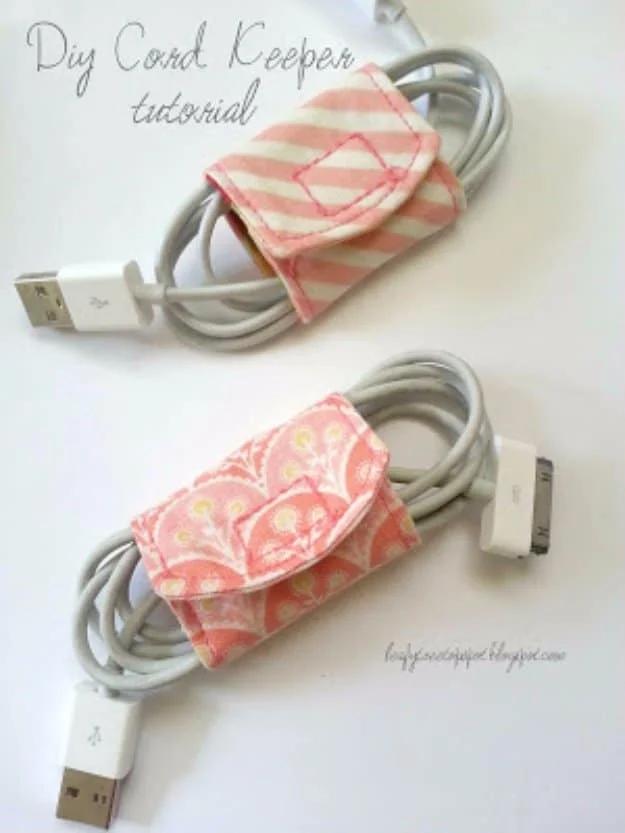
A piece of fabric roughly two and three quarter by four and three quarter inches with rounded ends, doubled, interfaced on one side and closed with an inch of Velcro. That is the entire thing, and it takes about twenty minutes. Stitch the two pieces a quarter inch from the edge with a two inch gap left open, notch the curves so they turn smoothly, press, then topstitch an eighth of an inch from the edge, which closes the gap and finishes the whole outline in one pass. Make six. They disappear into bags, and the difference between a drawer of coiled cables and a drawer of knots is exactly this.
Get the full tutorial at Leafy Treetop Spot.
13. DIY Fabric Tangram and Bag
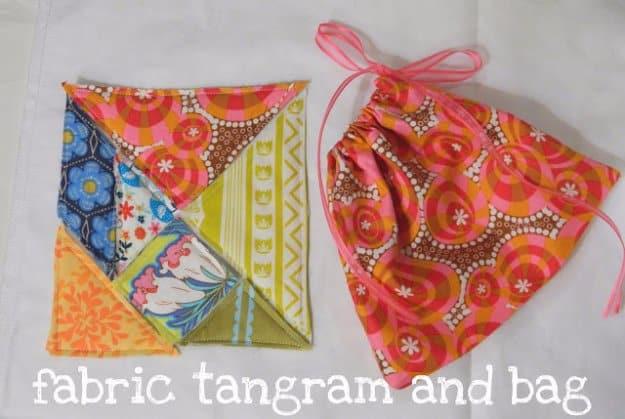
Seven tangram shapes in seven different prints, each one a sandwich of fabric, cardstock, batting and fabric stitched an eighth of an inch from the edge, which is what makes the pieces stiff enough to slide around a table without flopping. Print the pattern onto cardstock, trace, and cut two fabric pieces and one batting piece per shape. The drawstring bag is a folded rectangle about ten by fourteen inches with a zigzag finished seam and a casing folded a quarter inch then a full inch. Thread the ribbon through with a safety pin. Quiet, screen free, and it fits in a coat pocket.
Get the full tutorial at Sew Homegrown.
14. DIY Scrap Fabric Throw Pillow
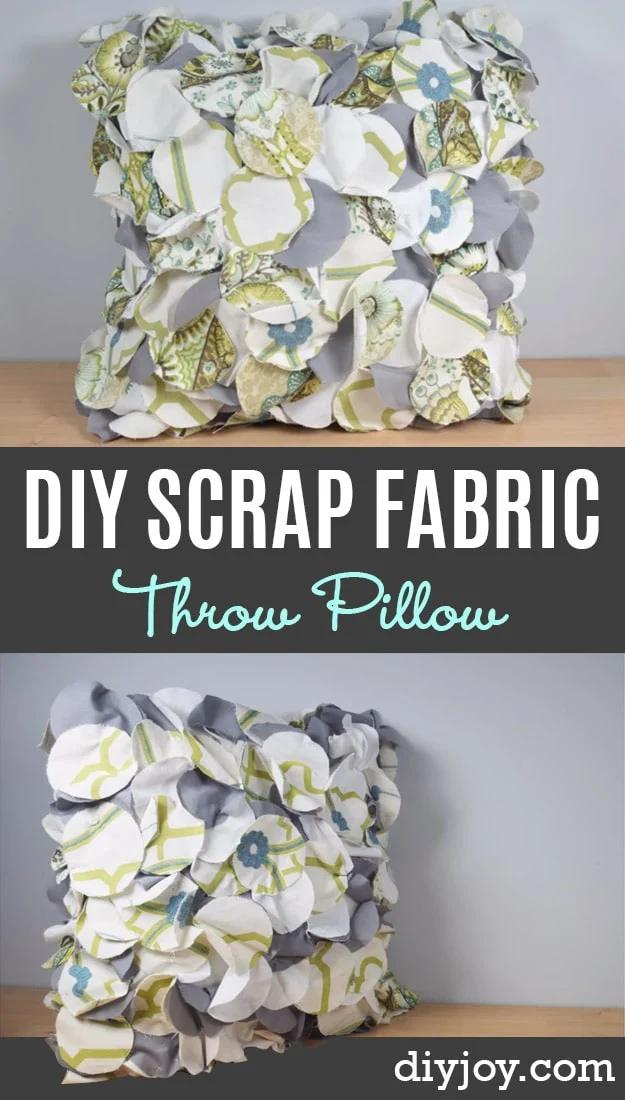
An eighteen inch pillow front disappears under overlapping fabric circles, each one left raw edged on purpose so it softens and curls a little after the first wash. The palette is the whole trick here: grey, white, chartreuse and a couple of blue florals, all from one saved basket of remnants, which is why it reads as a designed pillow rather than a pile of offcuts. No expert sewing required, and a beginner can genuinely finish this. Work from the bottom row upward so each row of circles overlaps the one below, and keep the density even or the corners look thin.
Get the full tutorial at Sueeye.
15. Make a Fabric Yo Yo or Suffolk Puff
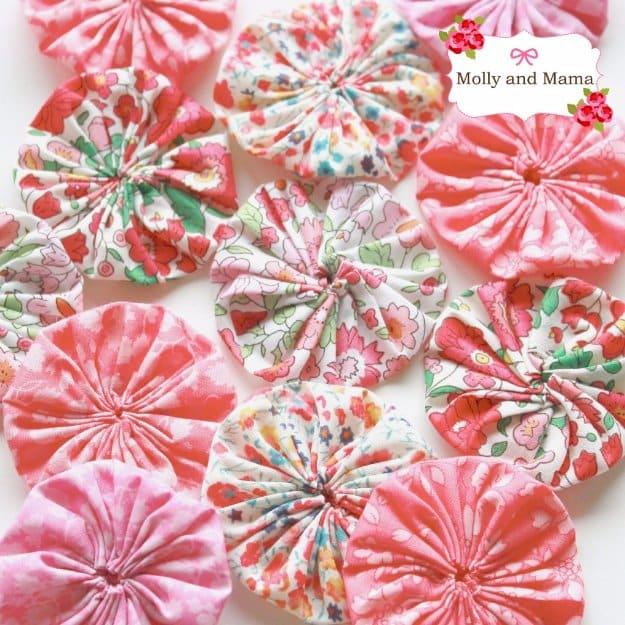
A circle of fabric, a running stitch round the edge over a quarter inch turned hem, and a firm pull on the thread. That is a yo yo, called a Suffolk puff by anybody who learned it from a quilting book, and it has been the answer to tiny scraps for about a century. Templates come in three inch, two inch and one and a half inch sizes. The one thing worth knowing before you start a pile of them: wider stitches gather into a smaller center hole, closer stitches leave a bigger gap, so pick your spacing to suit whether you want a tight rosette or an open one. Fifteen minutes each.
Get the full tutorial at Molly and Mama.
16. Fabric Scrap Bookmarks
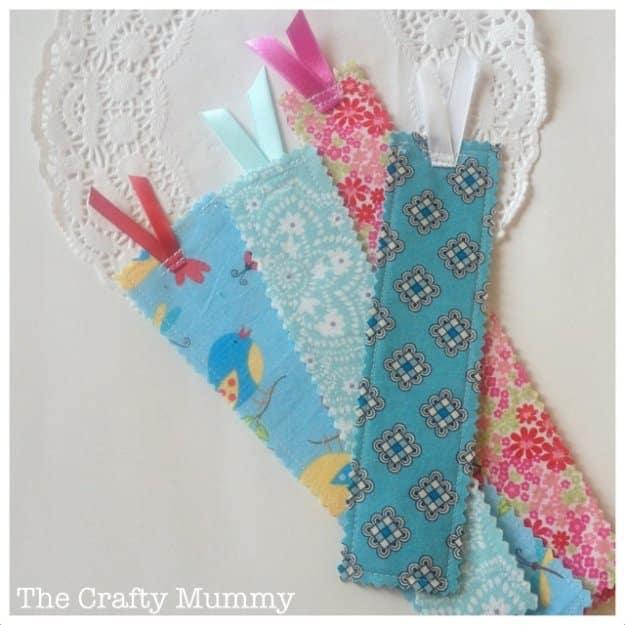
Strips one to two inches wide and six to nine inches long, two per bookmark, with iron on interfacing between them so the finished strip has enough body to stay put in a paperback. Stitch a quarter inch from the edge all the way round with the wrong sides facing, then trim the outline with pinking shears and the whole thing is done, no turning at all. A small ribbon V at the top is the decoration and the grab handle. There is a neater variation in the tutorial if you prefer a turned edge. These are the teacher gift that actually gets used, and one afternoon makes a stack.
Get the full tutorial at The Crafty Mummy.
17. DIY Fabric Scrap Bracelets
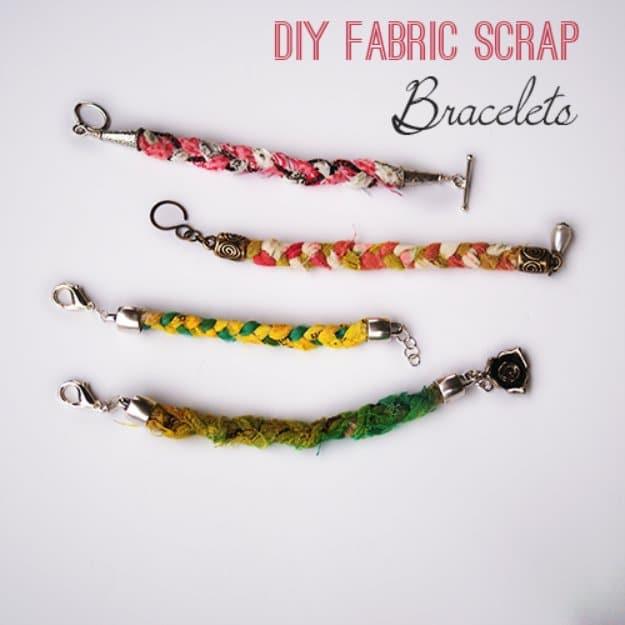
Three strips about ten inches long and anywhere from one to three inches wide, tied together at one end and braided until the plait sits an inch shorter than your wrist measurement. Wrap and knot thread at the other end to hold it. Then the part that turns a braid into jewelry: E6000 into a pair of end caps, the plaited ends pushed in and left to cure, then jump rings and a toggle clasp. Width is what changes the look, so a one inch strip gives a fine cord and a three inch strip gives something closer to a cuff. No two ever match, which is the appeal.
Get the full tutorial at Saved by Love Creations.
18. Fabric Block Hexagon Clock
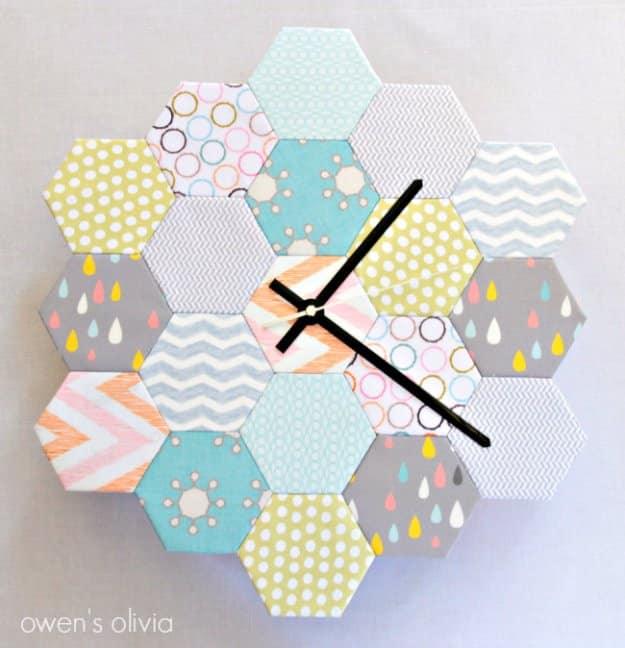
Nineteen hexagons cut from heavy three hundred pound paper, each one wrapped in fabric from a single fat quarter with a quarter inch turned round the back, then glued together into a honeycomb with a clock movement through the middle. Working from the center outward is what keeps the whole thing square, and paper strips glued across the back are what stop it flexing once it is on a wall. Under twenty dollars all in, and a few hours. One caution from the maker that is easy to ignore and expensive to learn: keep it out of direct sunlight, because the fabric fades.
Get the full tutorial at Owen's Olivia.
19. Super Easy Lanyard and Key Chain Wristlet
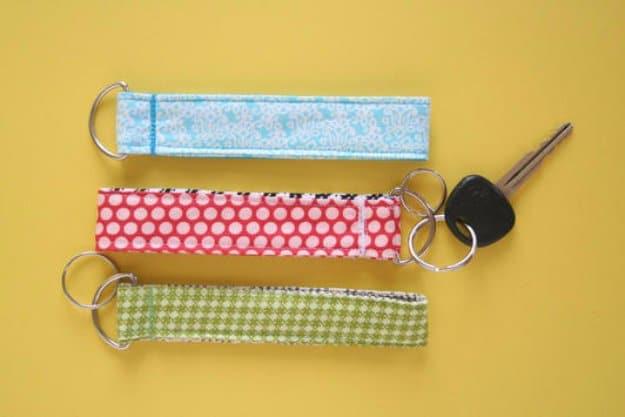
One strip of fabric, folded into its own bias tape, is the entire build. Cut three inches by forty for a neck lanyard or three inches by thirteen for a wrist version, fold both long edges into the middle, fold again down the center, press hard, then stitch along the open edge. Thread on a swivel hook and a key ring, fold the ends back and stitch them down firmly, because that join is the only thing between your keys and the floor. An eighth of a yard of fabric makes one. This is the craft fair bestseller for the obvious reason that everyone owns keys.
Get the full tutorial at AllFreeSewing.
20. DIY Rag Rug
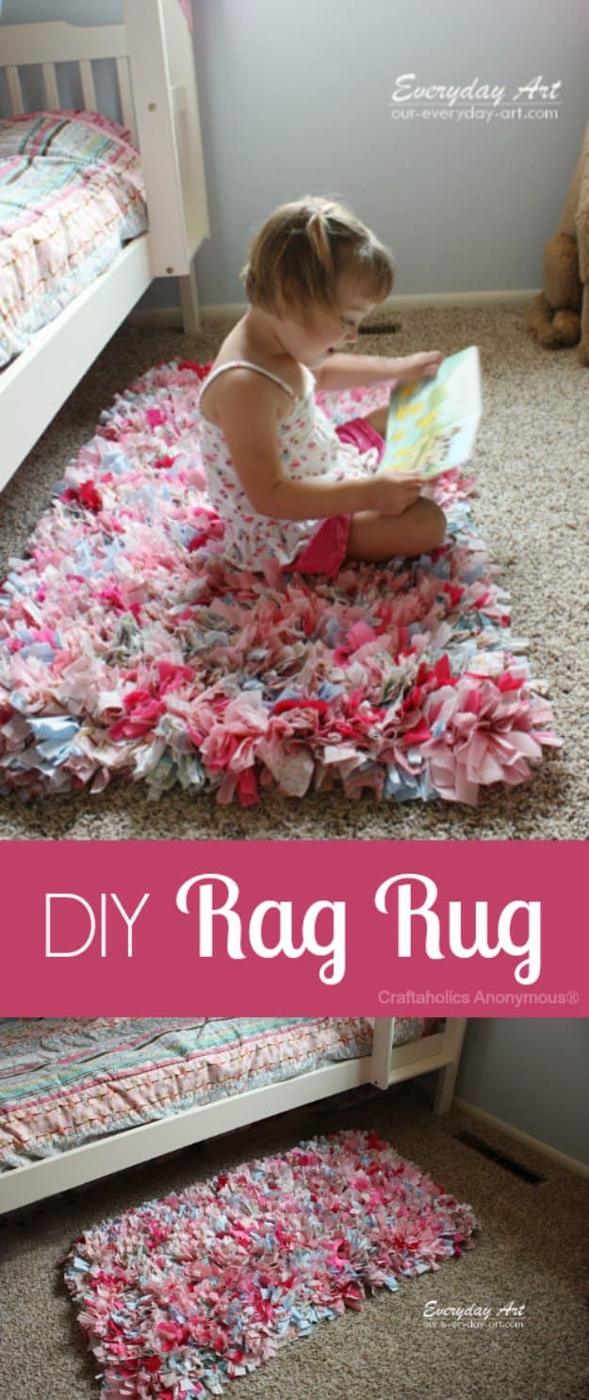
Fabric torn into strips roughly one inch by five inches, pushed through the holes of a non skid rug mat until the mat disappears. No knotting, no sewing and no latch hook needed, although a latch hook makes it faster. The honest part of the original is that this takes weeks of spare hours rather than an afternoon, and that is the tradeoff for a rug that swallows an entire stash. Shake it out to fluff the pile once you are done. Pink and blue cottons in the photograph give it a soft cottage look that no store version manages convincingly.
Get the full tutorial at Craftaholics Anonymous.
21. DIY Fabric Necklaces That Cost Mere Marbles
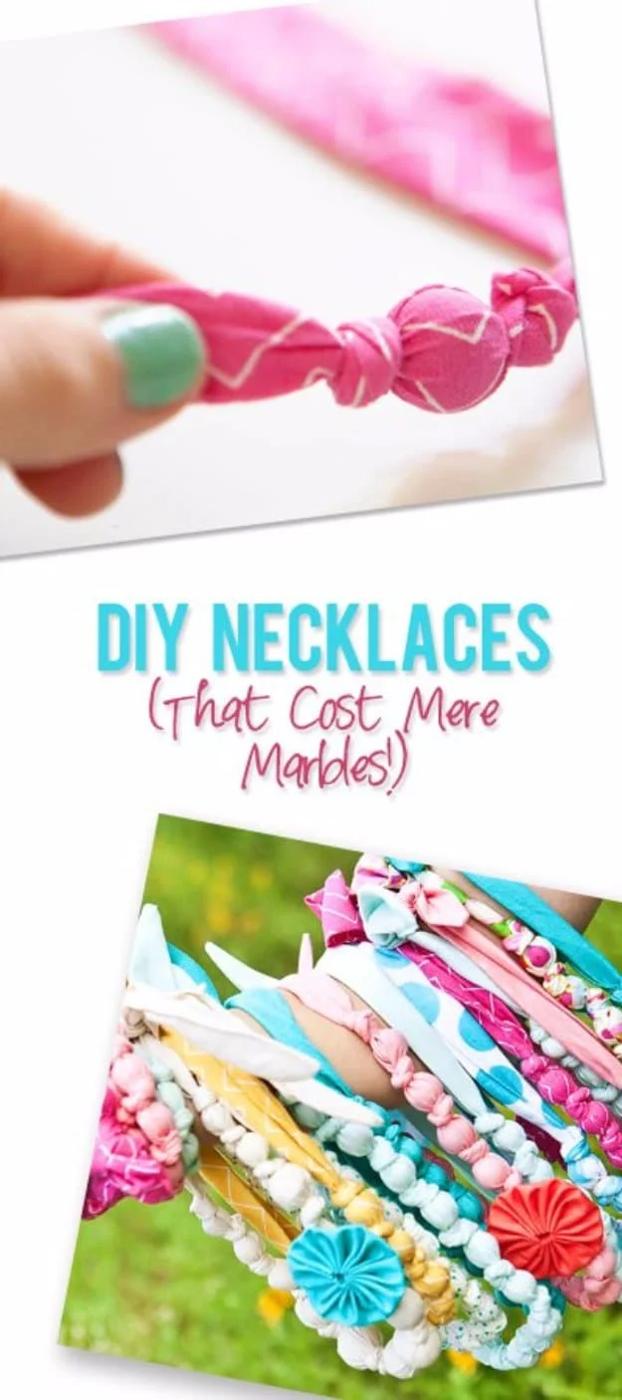
A strip of light to medium weight fabric three inches by sixty, sewn into a tube, turned, and then filled with marbles one at a time with a knot tied between each. Around fifty marbles cost a dollar at most dollar stores, which is where the title comes from. Leave a ten to twelve inch tail before the first knot and keep the tails even at both ends, because uneven tails are the thing that makes a handmade necklace look handmade. Ten to twelve marbles is a full necklace. A three by thirty inch strip makes a matching bracelet from the same fabric.
Get the full tutorial at How Does She.
22. Easy DIY Fabric Hearts Storage Basket
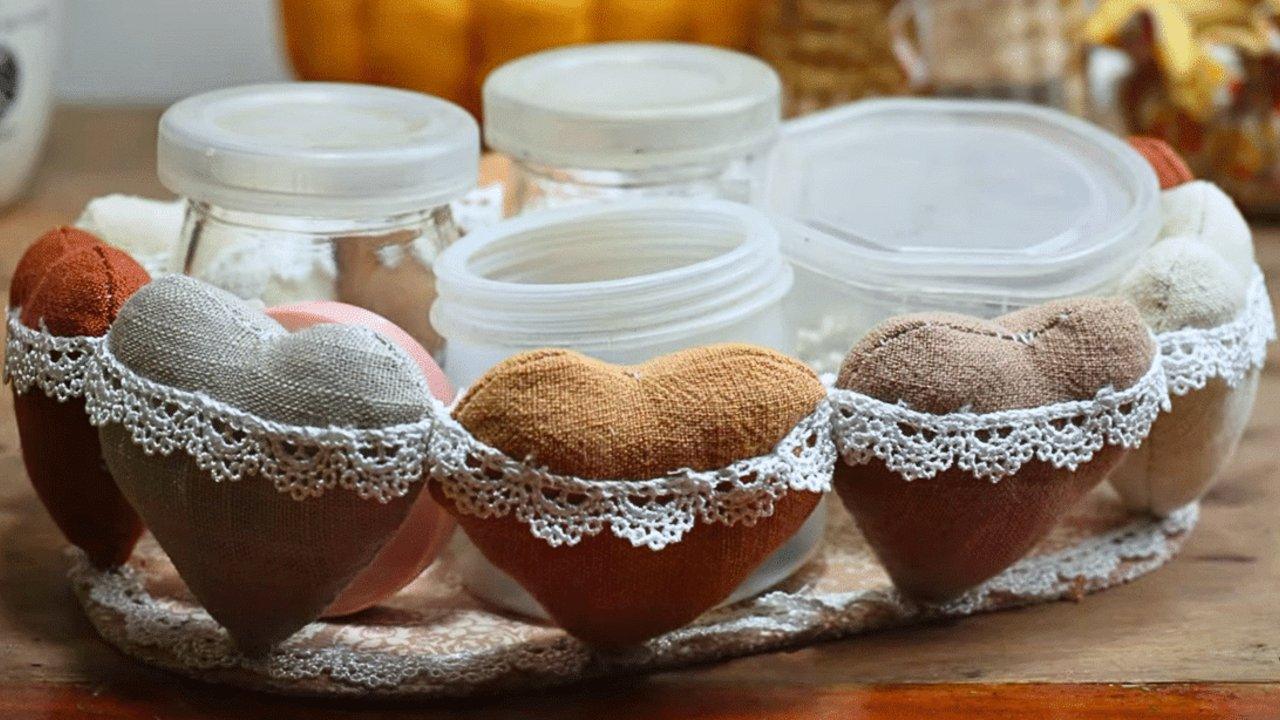
A fabric basket with a row of appliqued hearts round the outside, and the hearts are the reason it is here: they are cut from assorted scraps, so every one can be a different print. The base fabric is one piece and the hearts go on before the basket is assembled, which is far easier than trying to applique a curved wall later. Lace ribbon finishes the top edge. It holds sewing supplies, bathroom clutter or a toddler’s collection of small important objects, and it stands up on its own, which is the difference between a basket and a bag.
Get the full tutorial at Sueeye.
23. Make a Scrappy Tassel
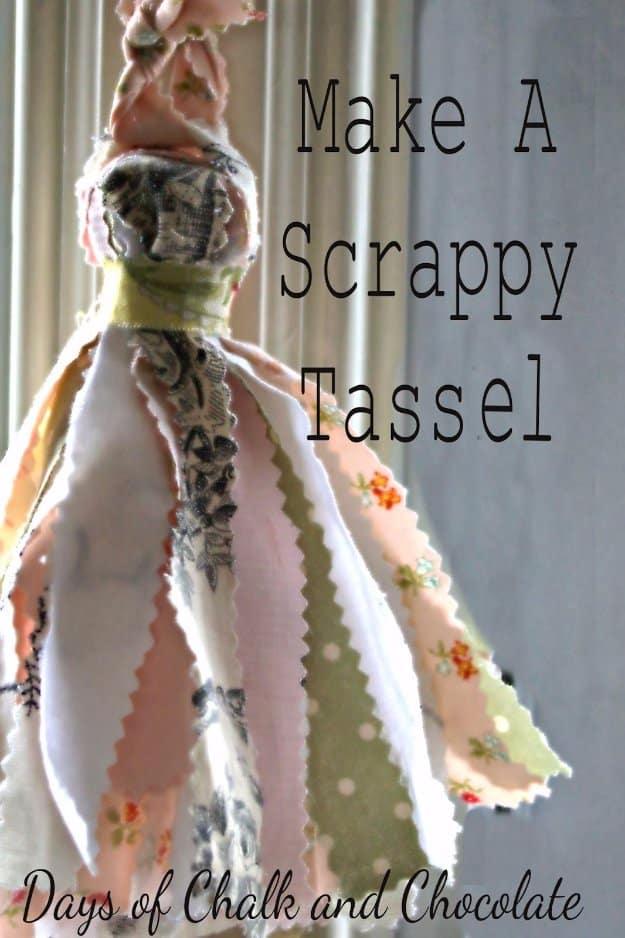
Fifty strips of fabric, every one of them pinked so the fraying stops where you want it, cut at about fifteen inches and laid out flat in a wheel spoke pattern with each strip crossing at the same point in the middle. One extra strip goes underneath, ready to tie the bundle. Slide a hand under the spokes, pinch the whole lot at the center and lift. Cutting the fabric to fifteen inches and folding it in half before slicing the strips is what makes the cutting quick. Pale pink, cream, sage and a grey toile is the palette in the photograph.
Get the full tutorial at Days of Chalk and Chocolate.
24. Shabby Chic Ruffle Necklace
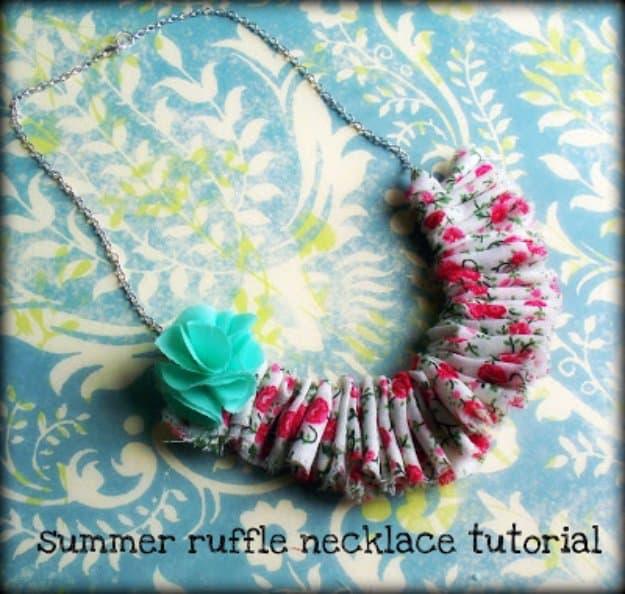
A strip thirty inches by three, gathered on a thread with a safety pin until it ruffles into a dense band, then pulled tight and locked with a backstitch. Six two inch squares of a contrasting fabric make the flower accent that sits at one end, and a seventeen inch chain with a clasp carries the whole thing. Under an hour, no machine, and a genuine beginner project. The reason it works is the length ratio: thirty inches of fabric compressed into a few inches of finished ruffle is what gives the density, so do not be tempted to start with a shorter strip.
Get the full tutorial at Poppy Chic.
25. DIY Simple Phone Wallet
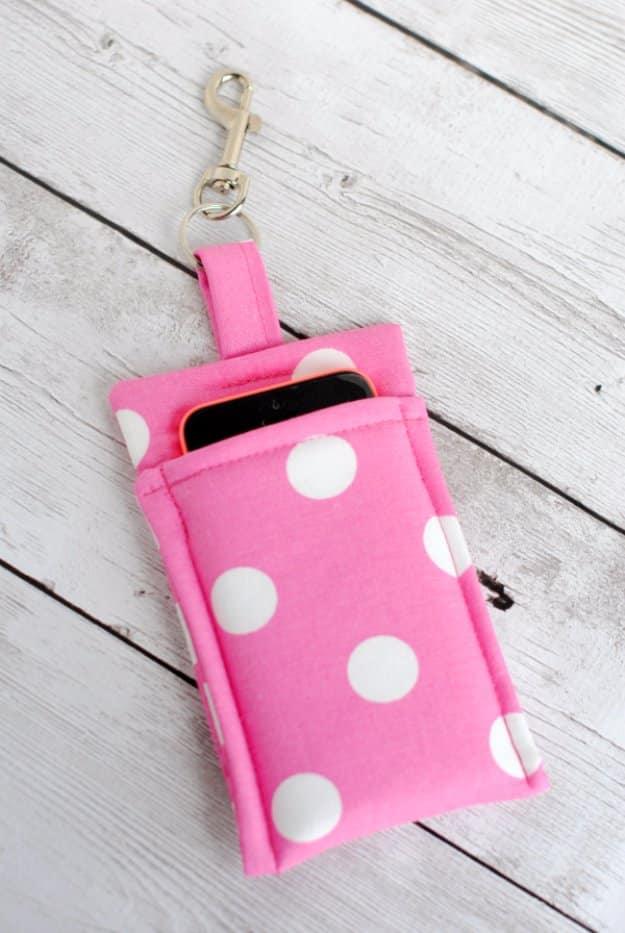
Cut one piece of fabric twice as wide as your phone plus two or three inches, and about twice its length plus a couple more. Fuse a piece of fleece the same size to the back, fold it in half lengthwise, sew across one short end and down the long side, then turn it out and press it flat. Try the phone in it before you trim the length. A four by two inch strip, sewn into a tube and folded round a swivel clasp, makes the strap. Under twenty minutes, and a lighter interfacing works if your machine fights the bulk.
Get the full tutorial at Crazy Little Projects.
26. Braided Fabric Statement Bracelet
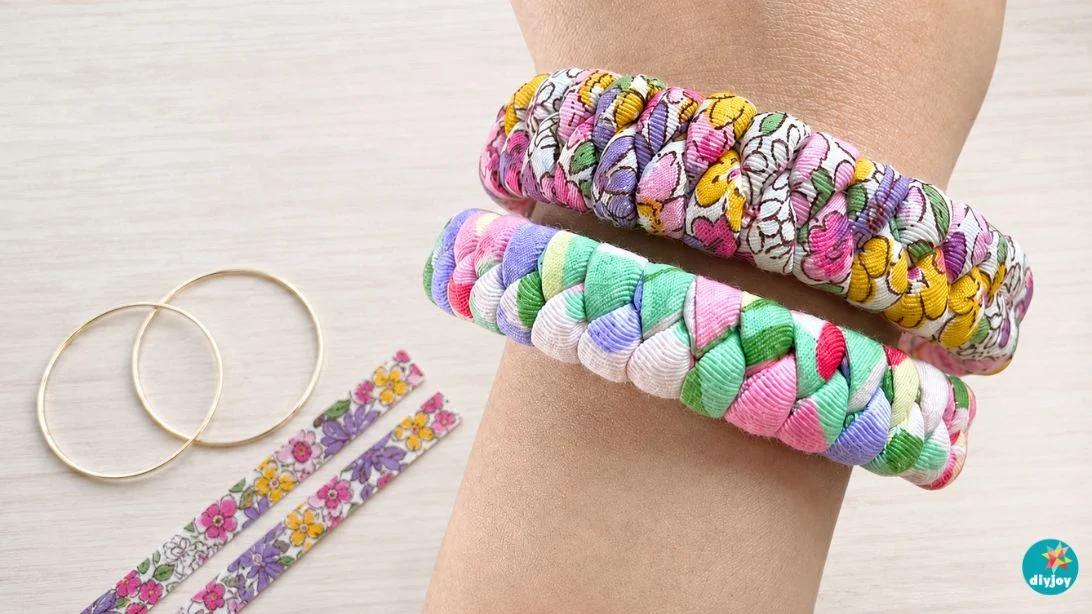
Old bangles you no longer wear get wrapped and braided in leftover fabric until the hardware disappears completely, which is how a bracelet you were bored of becomes one you are not. Bright colors and printed cottons mixed together is the look, and because the bangle underneath sets the size there is no measuring and no clasp to fit. No sewing machine is needed anywhere; hand stitching the ends down works perfectly well and is easier to control on a curve. Stack three or four in different palettes and the set reads as collected rather than matched.
Get the full tutorial at Sueeye.
27. Fabric Scrap Twine
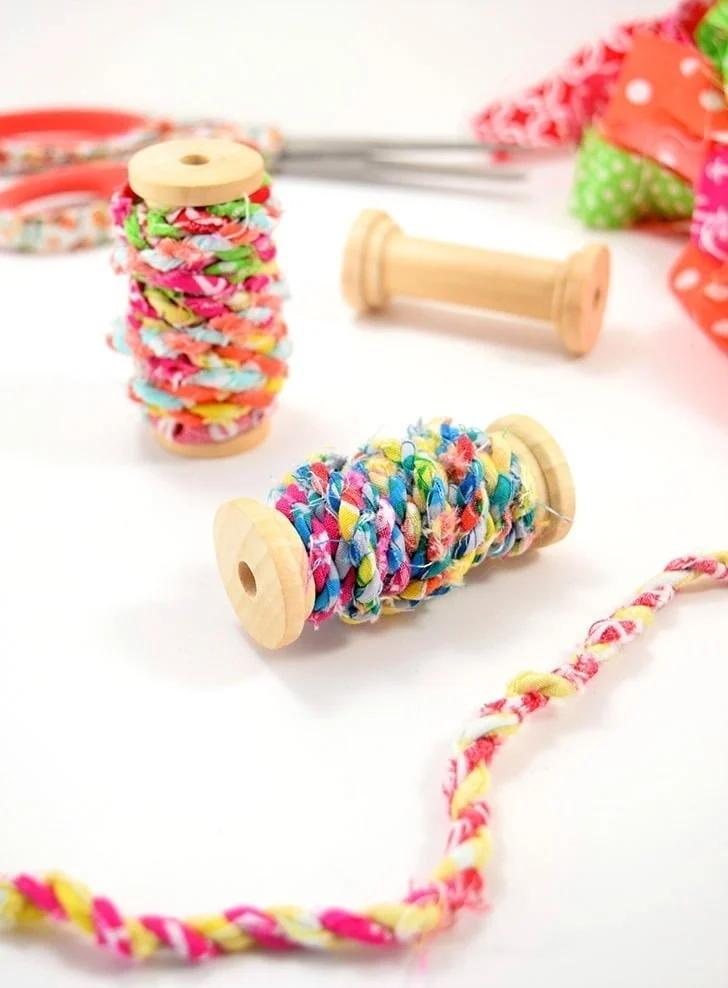
Strips torn about an inch wide, twisted into a two ply cord with nothing but your fingers, and this is where the scraps other projects rejected finally go. Tie two strips together, twist one round a pointer finger and bring it under the other, then alternate, swapping which strip you are twisting each time. Join a new strip by pinching it in hard or catching it with two or three small stitches. Every six inches, twist the whole cord to keep it from unwinding. Wind the finished length onto a wooden spool. Use it for gift wrap, garlands, plant hangers or a quick handle.
Get the full tutorial at Dream a Little Bigger.
28. Fabric Band-Aids
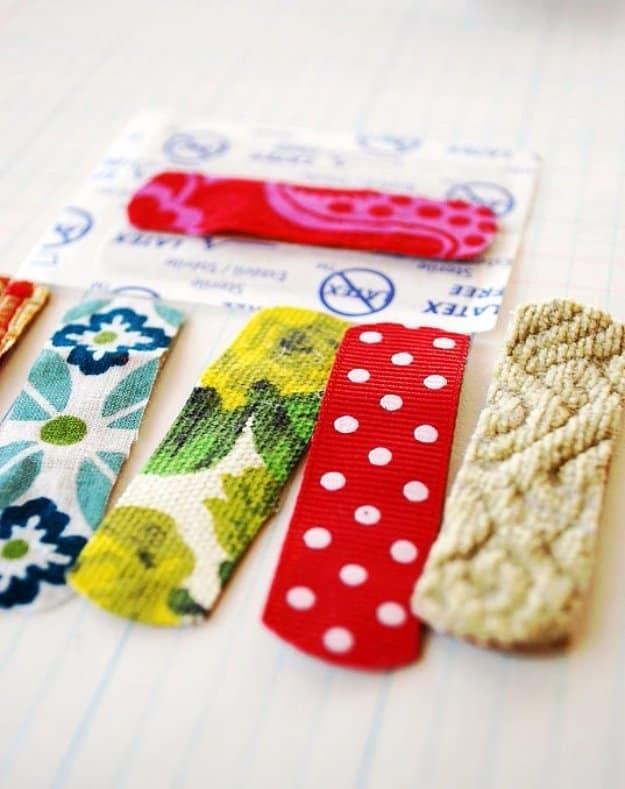
Plain adhesive bandages with a scrap of fabric or ribbon stuck to the top, which is the comfort object disguised as first aid for injuries that are ninety percent feelings. Three craft glue dots on the surface of the bandage, the fabric pressed on, then the excess trimmed flush with the edges. That is the whole method. Cable knit, red dots, a navy and green floral and a little paisley all show up in the photograph. One real warning from the original: keep the finished ones away from very small children, who reliably treat them as stickers rather than as bandages.
Get the full tutorial at The Pink Couch.
29. Finger Hot Pads
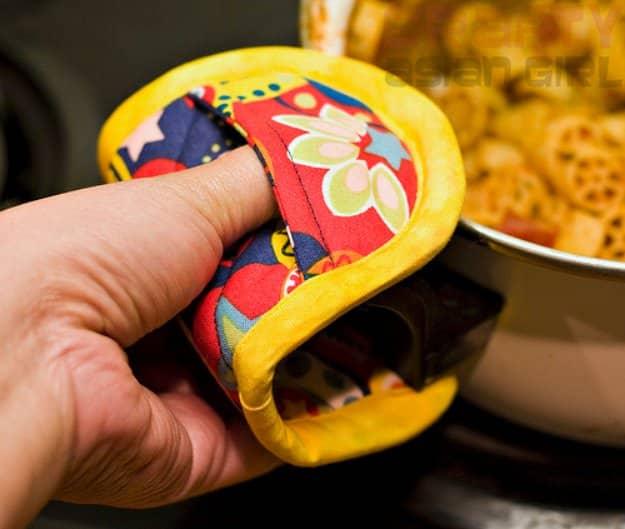
Small padded pinchers sized for grabbing a hot handle or pulling out an oven rack, which beats wrestling a full mitt for the nine times out of ten that you only need two fingers. Each one takes four rectangles, two at four by seven inches and two at four by two and a half, with cotton batting and a four by seven piece of Insul-Bright doing the heat work. Quilt the sandwich on the diagonal, attach the finger pockets and bind the outside in one inch single fold bias tape. The binding round the curve is the awkward part. Three evenings made nearly a dozen pairs assembly line style.
Get the full tutorial at Crafty Asian Girl.
30. DIY Fabric Scrap Hearts
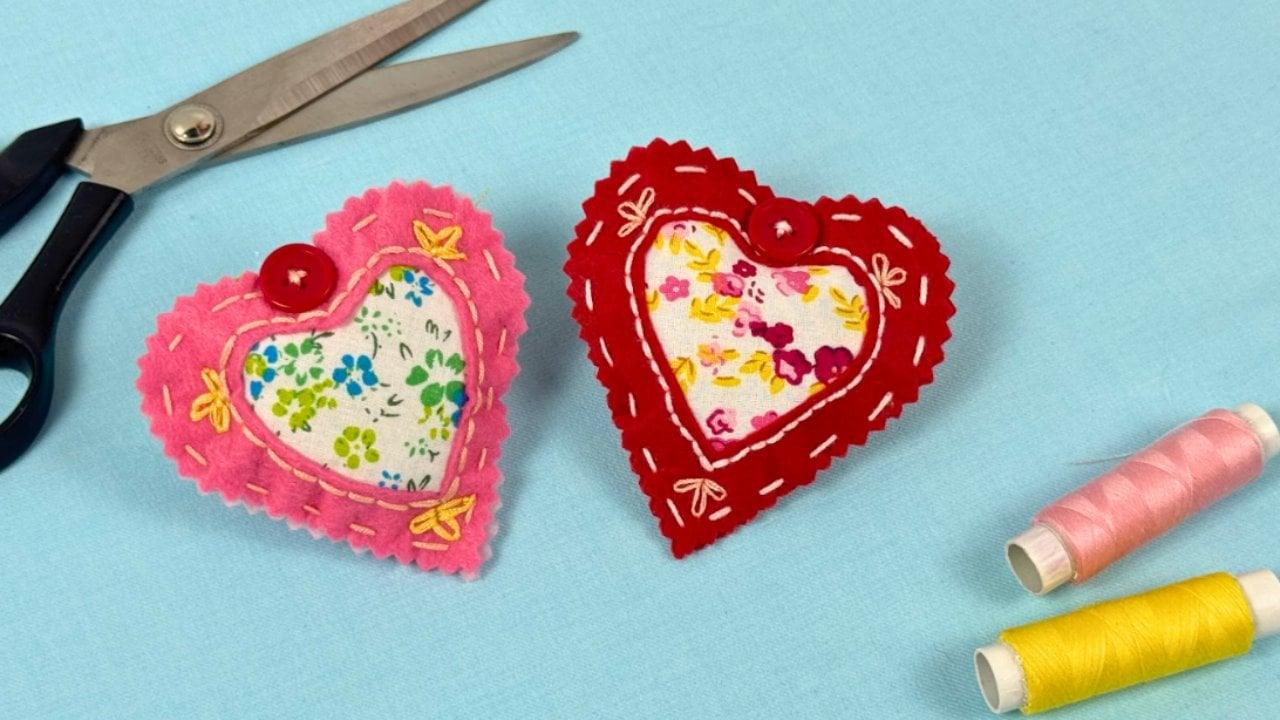
Felt backing, a small print cotton heart on top and a running stitch in contrasting embroidery thread, and there is no machine anywhere in this one. Pinked edges on the felt do the finishing, a button at the top corner adds weight, and the whole thing takes an evening in front of the television. The smallest calico and cotton pieces left in a bin are exactly the right size, which is unusual. Tuck in a loop of ribbon, a pinch of lavender or a gift tag depending on what it is for. A garland of them is a very easy Valentine or baby shower decoration.
Get the full tutorial at Sueeye.
31. Fabric US Map Hoop Art
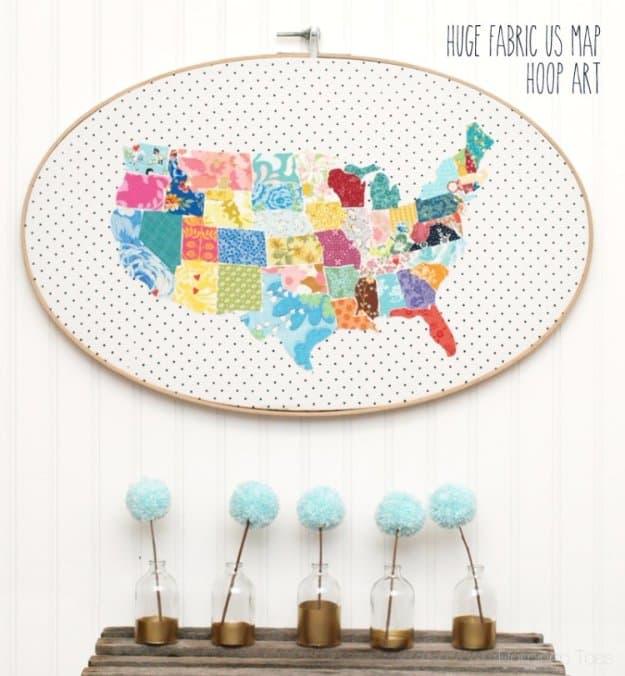
A twenty six inch quilting hoop, a printed map used as a pattern, and every state cut from a different scrap. Print the map once at full size and lay white fabric with fusible webbing over it to trace, then print it again and cut that copy up to use as the actual pattern pieces. Iron the states onto the white backing, then iron the whole map onto the hoop’s background fabric and stretch it. Glue the excess to the back of the hoop. A small fabric heart over your home state is what turns it from a map into a gift, and a thrifted hoop keeps the cost near nothing.
Get the full tutorial at Flamingo Toes.
32. Quick-Easy Sunglasses Case From Fabric Scrap
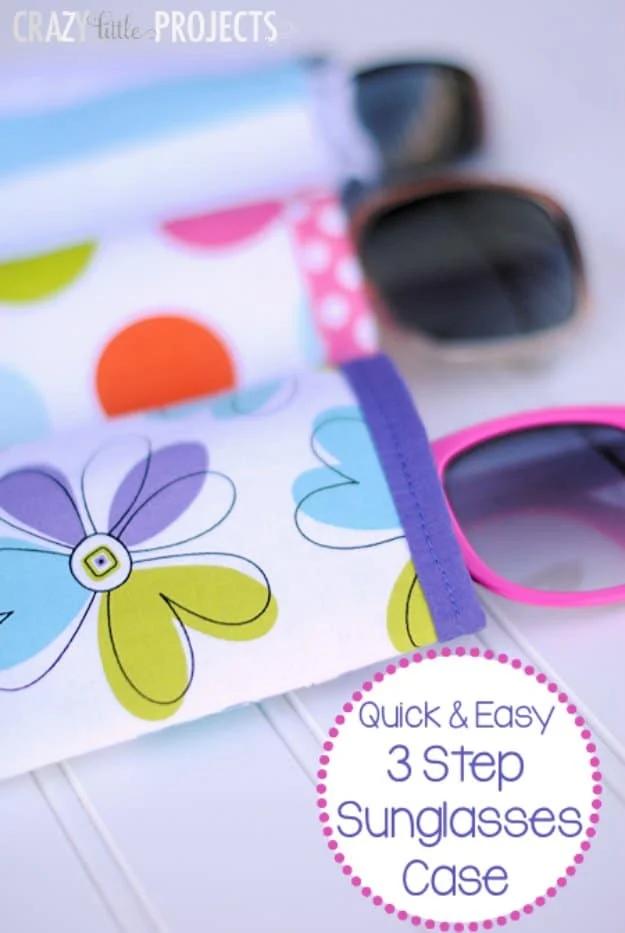
Four rectangles at seven and a half by four and a half inches, two from an outer fabric and two from a lining, with fusible fleece on the outer pair. Trim about half an inch off the length of the fleeced pieces so the lining ends up slightly taller. Sew each pair right sides together round three edges, slide the lining inside the outer, match the top edges and stitch round leaving a gap to turn. Turn it out, push the lining down so a band of it shows at the top, and topstitch. Thirty minutes, three steps, all straight lines.
Get the full tutorial at Crazy Little Projects.
33. Fabric Scrap Banner
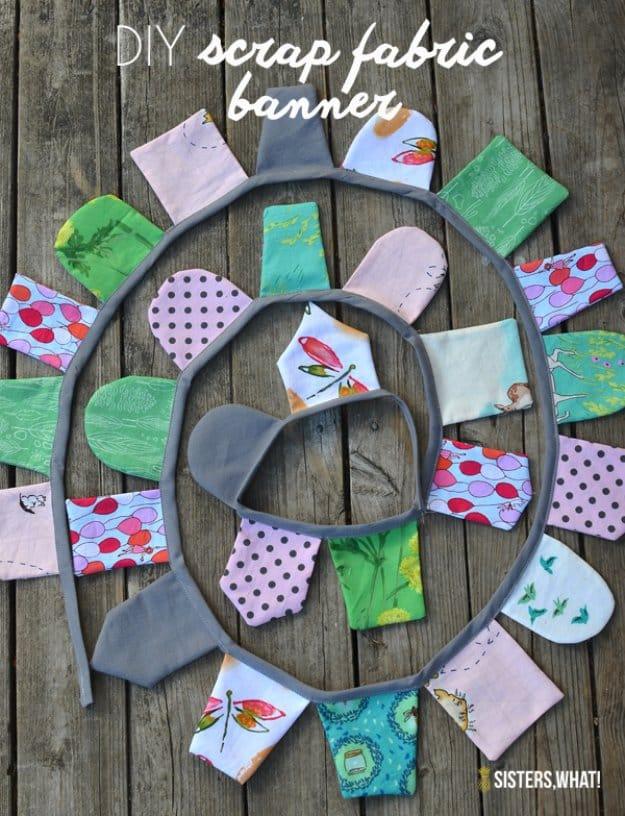
Shapes cut from scraps, sewn right sides together, turned out and then pinned along a length of bias tape which gets stitched down in one continuous pass. The shapes in the photograph are not triangles at all, which is the good idea here: rounded tabs, squares, a few odd leaf shapes, all mixed together with woodland prints and plain grey. Make paper patterns first and try them on fabric before committing, since shapes that look right on paper can read as lumpy in cloth. Unlike a paper banner this survives a box in the loft and comes back out every year, softer each time.
Get the full tutorial at Sisters, What!.
34. Stackable Scrap Bucket Bag
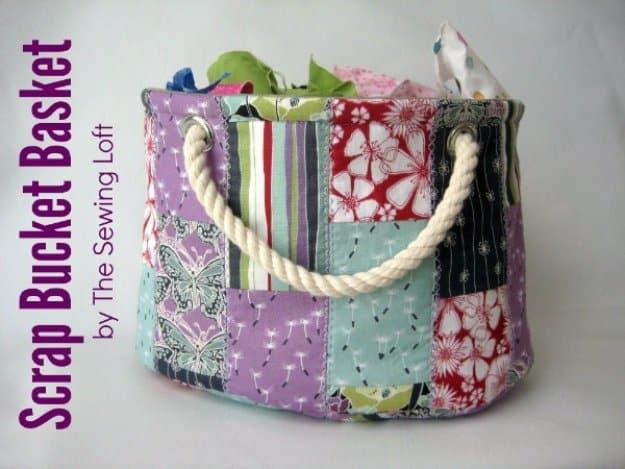
A quilted fabric bucket with rope handles that stands up on its own and nests inside the next size when it is not working. Half a yard each of main fabric, lining and heavyweight fusible, one yard of three eighths inch cotton rope and four extra large eyelets. The structure comes entirely from that fusible, so a lighter one gives you a slumping bag. Clip the seam allowance every three eighths to half an inch where the side joins the oval base, or the curve will pucker. Eyelets go six inches apart on center, three quarters of an inch below the top edge. Rope threads through and knots.
Get the full tutorial at The Sewing Loft.
35. Round Fabric Basket
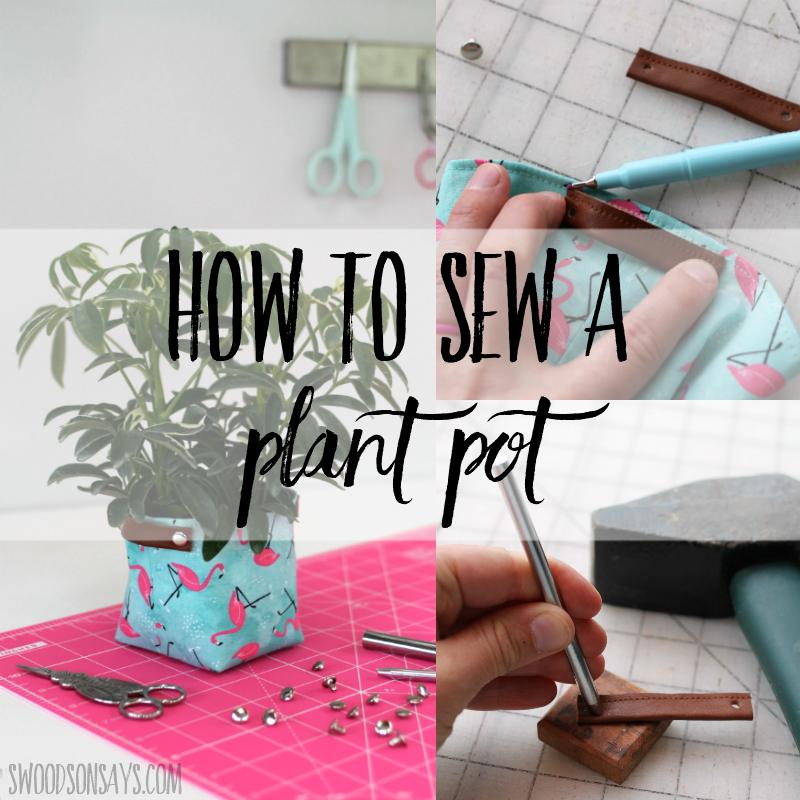
A small structured basket with leather handles set on with rivets, sewn and riveted rather than woven, which is why it comes together in an evening and still looks like a real basket. Four squares at six and a quarter by five and a half inches with an inch and a half cut out of each corner, medium weight fusible on two of them, quarter inch seams throughout. Box the corners, layer the two halves, stitch round leaving a two inch gap, turn and topstitch. Then the leather strips go on with rivets and a mallet. Coordinating prints make the panels read almost like a plaid once they are joined.
Get the full tutorial at Swoodson Says.
36. Plush Alphabet From Fabric Scraps
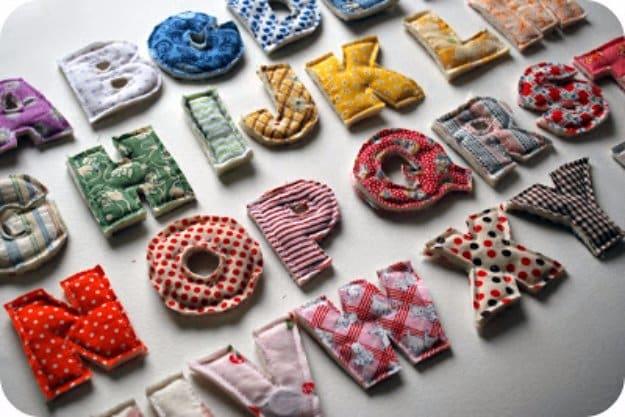
Twenty six soft letters, each from a different print, each with a small magnet tucked behind the back layer so the finished set lives on a fridge. Templates print in Arial Black at 175 point. Trace the letters reversed, layer fabric, batting and fabric, stitch along the traced line and cut the shapes out with a seam allowance. The interiors of P, B, R and O get cut out separately. About three hours for the full set. Two warnings worth repeating from the original: keep the magnets away from children who mouth things, and keep them away from your sewing machine, which they will magnetize.
Get the full tutorial at Chez Beeper Bebe.
37. Potholders From Fabric Scraps
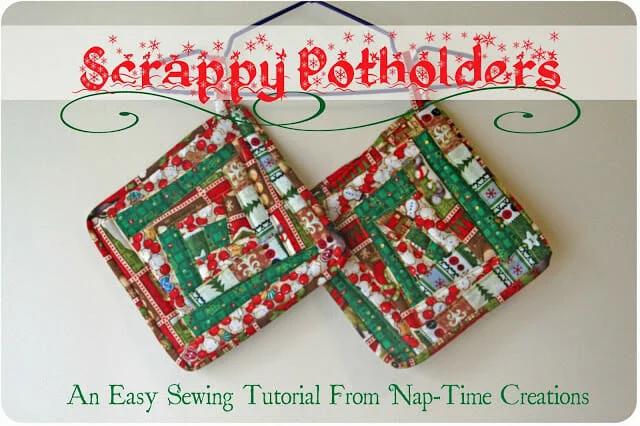
Three quarters of a yard of assorted scraps cut into inch and a half strips, pieced outward from a center in a rotating log cabin so the angles shift with every round, then squared up to eight inches. Batting goes between that pieced top and an eight inch backing square, quilted along the existing seams, and the whole thing is bound with a two inch strip finished by hand on the back. Use insulated batting or double the layers, because a single layer of plain cotton batting will let heat straight through. One to two hours each, and a dozen prints in one potholder still looks intentional.
Get the full tutorial at So Sew Easy.
38. Fabric Journal Cover
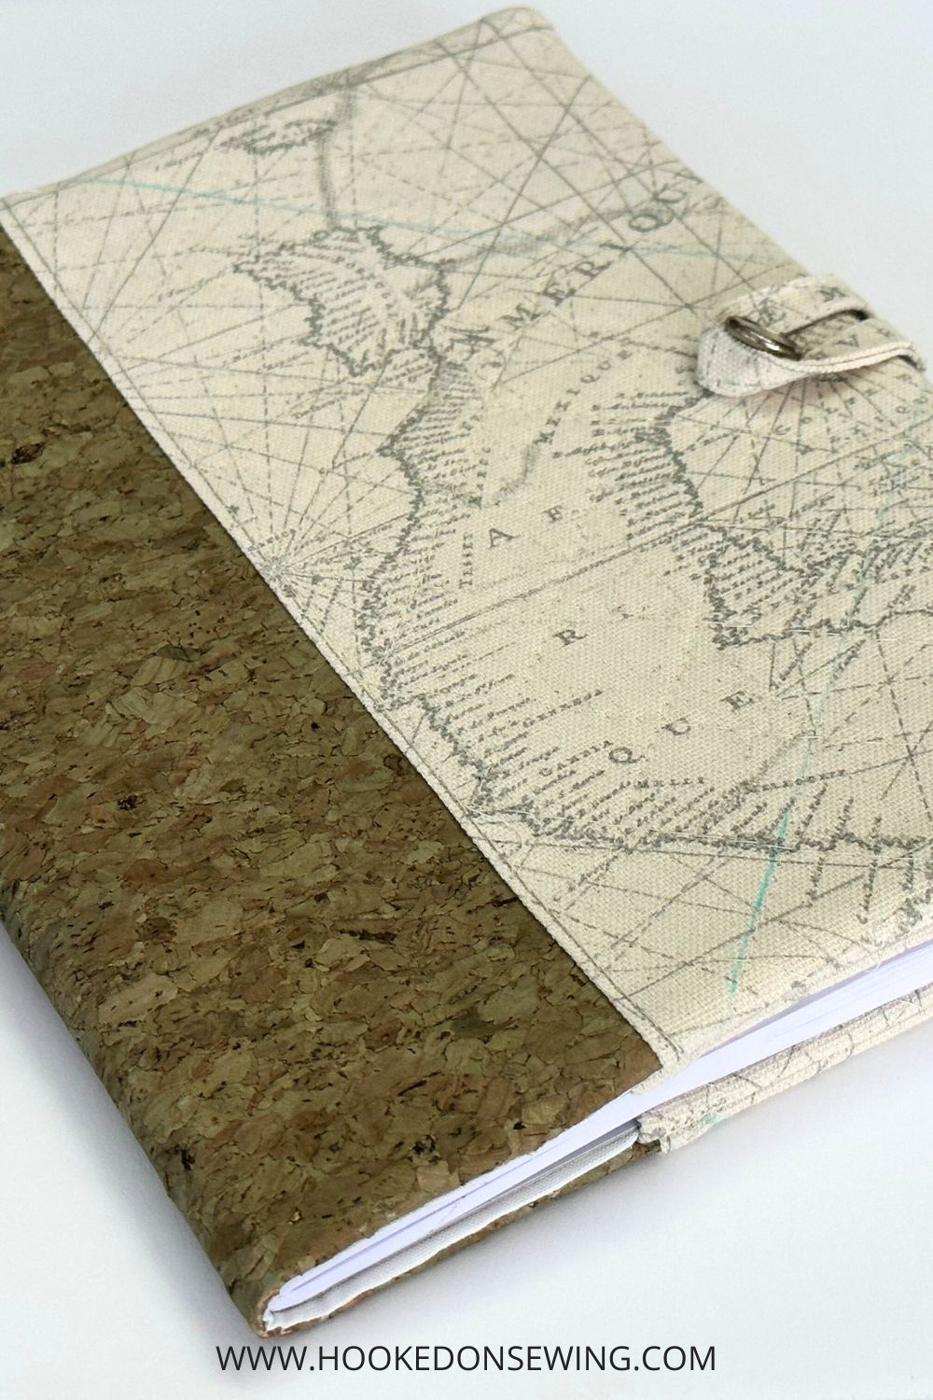
A composition notebook gets a removable cover with quilted diagonal lines, a button loop closure and an elastic pen keeper, and the notebook itself does most of the shaping. Front and back pieces cut five and a half by eleven inches, a spine at six by eleven, lining at sixteen by eleven and fusible fleece to give it body. Every seam is a straight line. Quilt the marked diagonals before assembly, attach the loop and the elastic to the back exterior, then stitch the whole sandwich leaving three inches for turning. Around thirty five minutes once the pieces are cut, and the cover moves to the next notebook when this one fills up.
Get the full tutorial at Hooked On Sewing.
39. Fabric Scrap Coffee Cozy
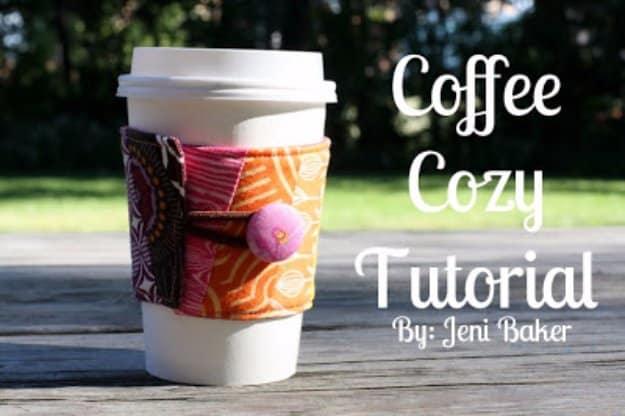
Twelve strips at an inch and a half by four and a half inches, pieced into a band, then cut to shape with a template and backed with fusible fleece. An elastic hair tie stitched into one end and a small button on the other is the entire closure, which means nothing to fasten and nothing to lose. Quarter inch seams unless the pattern says otherwise, a turning gap of an inch and a half to two inches, then topstitch round the outside to close it. It replaces a thousand cardboard sleeves and does real thermal work, which cardboard barely does.
Get the full tutorial at Skip To My Lou.
40. Fabric Scrap Rosette Pillow
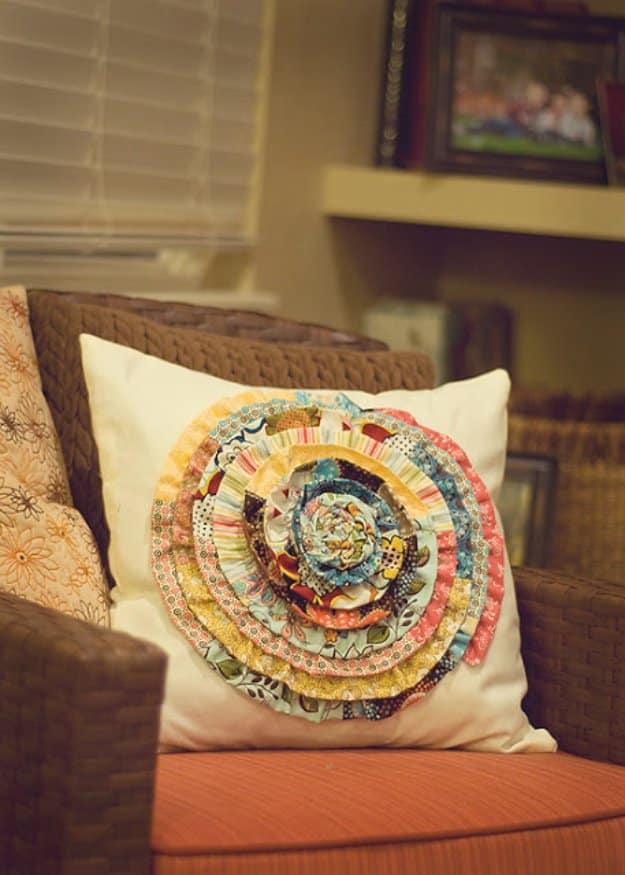
Strips two and a half inches wide in varying lengths, coiled into one enormous spiral rosette that covers most of an eighteen inch pillow front. Trace a large circle onto the pillow front using a mixing bowl as the guide, then hot glue the coiled strip down in a spiral working from the outside edge inward, with a separate small rosette glued into the center to finish it. The back is two eighteen by twelve inch pieces overlapped into an envelope closure. It consumes scraps by the basketful, and the finished surface has a depth that no printed cushion cover comes close to.
Get the full tutorial at Laundry and Other Stuff.
41. Fabric Twine Spiral Mat
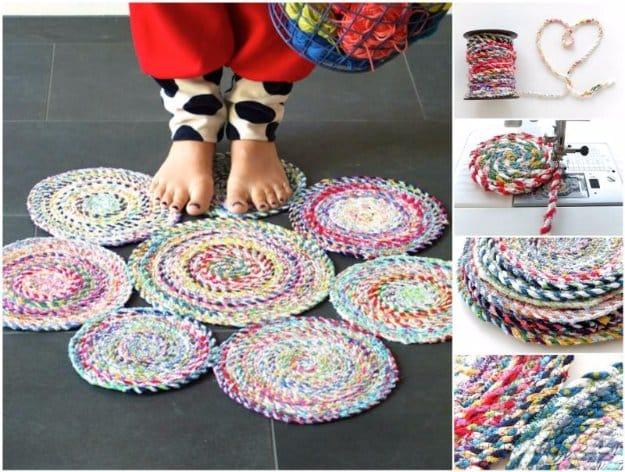
Fabric twine, twisted by hand from torn strips the same way as the twine project earlier on this list, coiled flat and stitched into a round mat, which is how the whole page closes on the scraps every other project turned down. Old t-shirts and quilt offcuts all work. Coil the twine in a tight spiral and zigzag across the join as you go, or hot glue it if you would rather not fight a machine on a curve. An anti-slip underlay glued to the back stops it wandering across a tile floor. Keep going and a coaster becomes a trivet, then a placemat, then a rug.
Get the full tutorial at FabArtDIY.
42. How to Quilt Scraps That Are Too Small
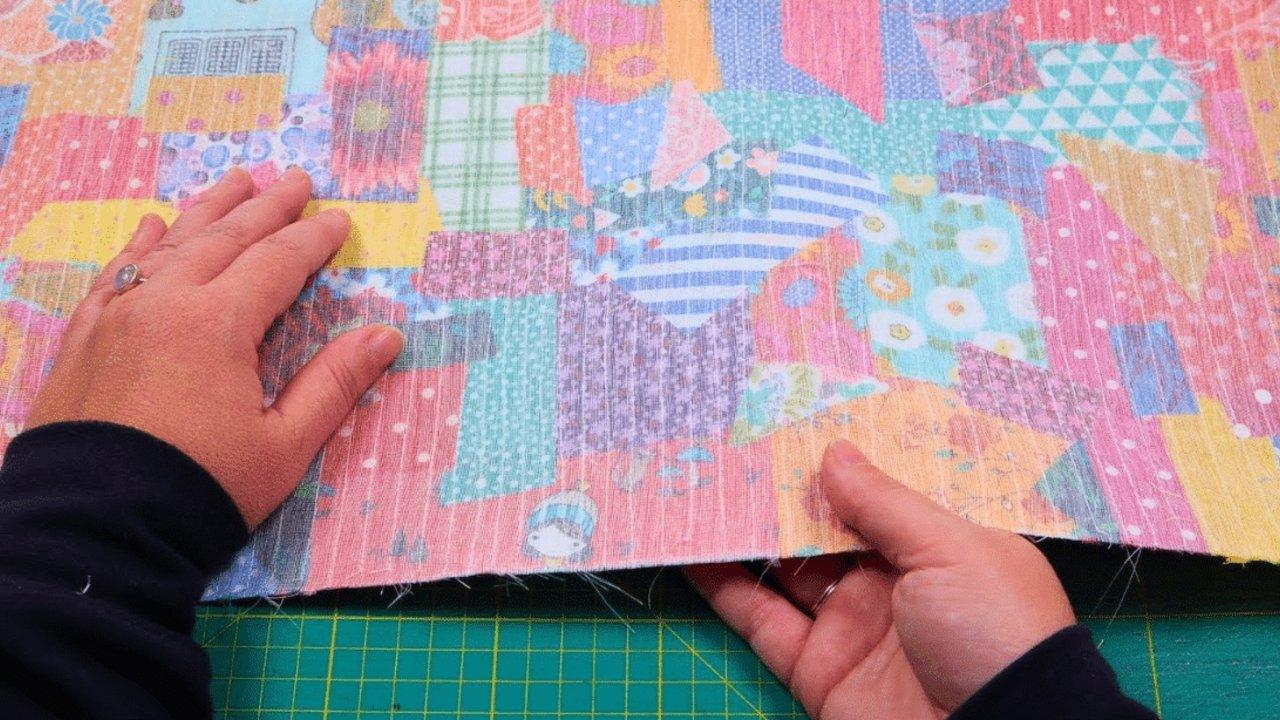
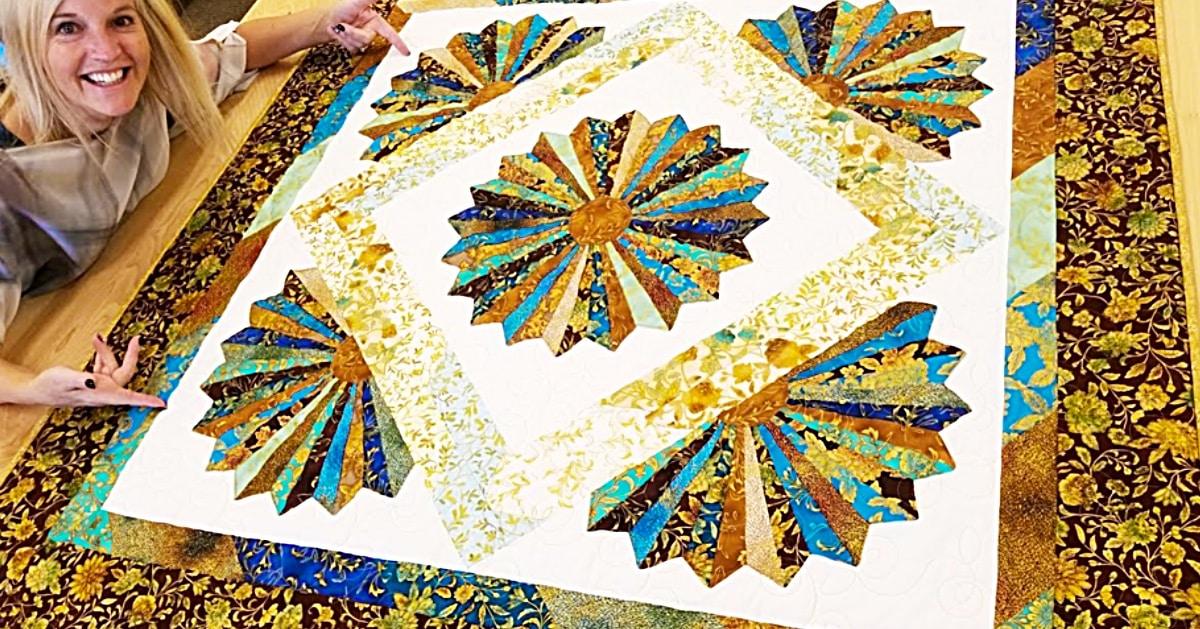
Crumb quilting is the technique for the pieces that are genuinely too small to cut a shape from, and in this one the smaller they are the better it works. Assorted scraps get laid onto a thermal adhesive sheet, covered with a transparent veil fabric and quilted through, which locks hundreds of tiny fragments into a single usable piece of cloth. From there it behaves like any other fabric and can be cut, bound and sewn into whatever you want. There is no pattern to follow and nothing to line up, which makes it the most forgiving quilting on this whole page.
Get the full tutorial at Sueeye.
43. Easy Confetti Crumb Quilting Tutorial
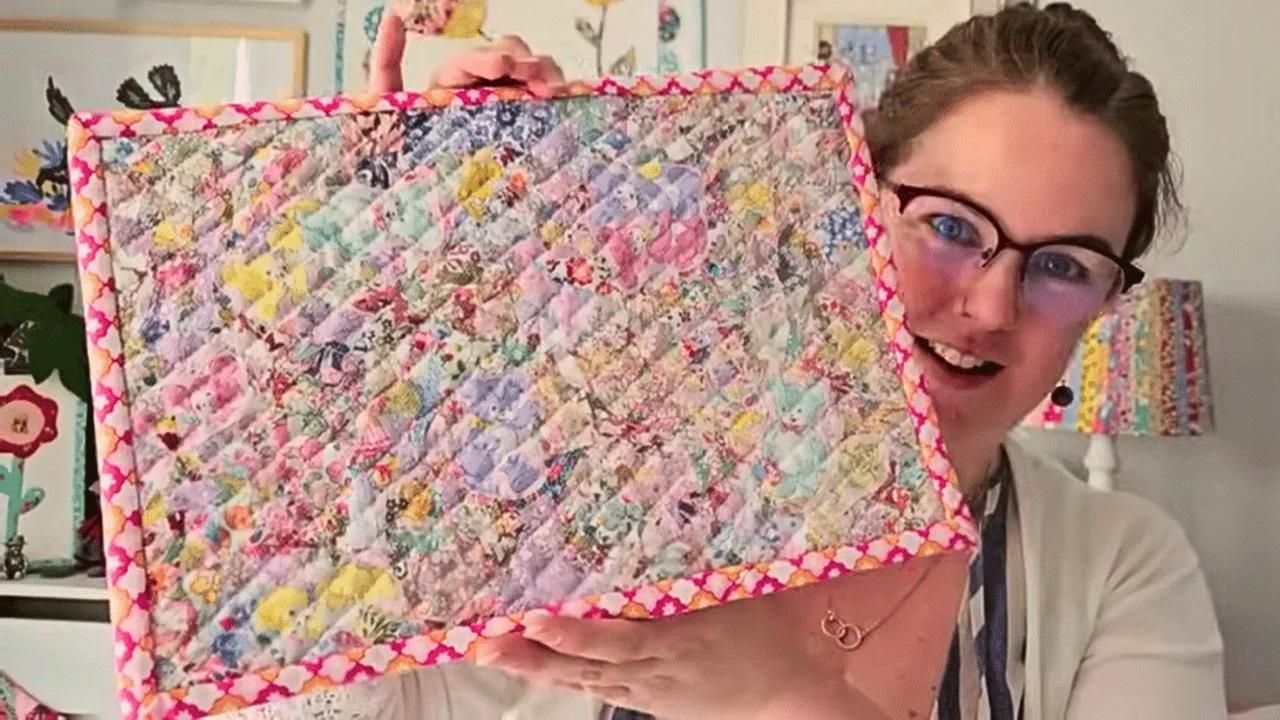
Confetti crumb quilting takes scraps of any shape and size at all, scatters them across a backing and traps them under tulle before quilting through the lot. The tulle is the whole technique: it holds hundreds of loose fragments in place so you never pin, never piece and never match a seam. The finished cloth becomes table runners, table toppers or potholders depending on how big you make the panel. It is close to impossible to get wrong, which makes it a good first quilting project for anybody who has been putting off starting.
Get the full tutorial at Sueeye.
44. Stashbuster Chips and Jelly Quilt
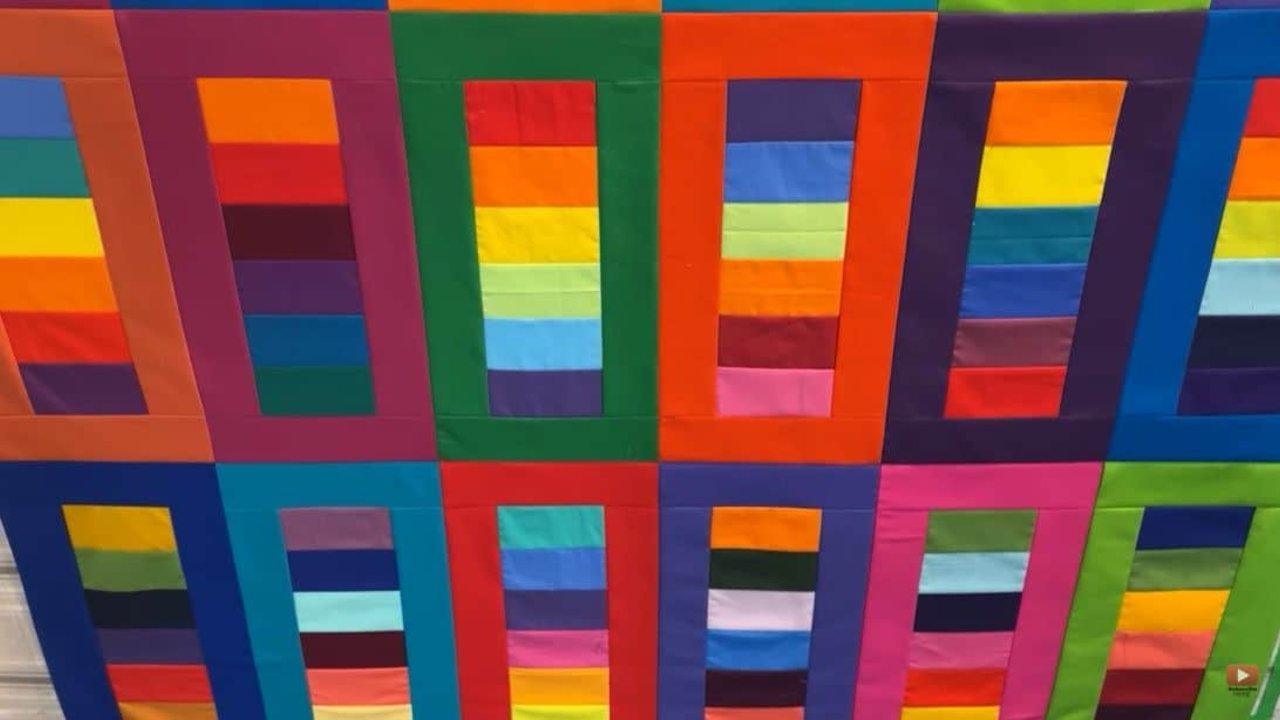
A proper quilt built from the leftovers of other quilts, and the cutting list is refreshingly short: twenty four jelly roll strips at two and a half inches, and one hundred and forty four rectangles at two and a half by four and a half inches. The block is stacked rectangles with a border all the way round, so there are no points to match and no curves anywhere. The finished quilt comes out at forty eight inches, which suits a lap or a crib. Arranging the blocks differently changes the whole look, so lay the top out on a floor before sewing a single row.
Get the full tutorial at Sueeye.
45. Learn How to Make a Rag Quilt
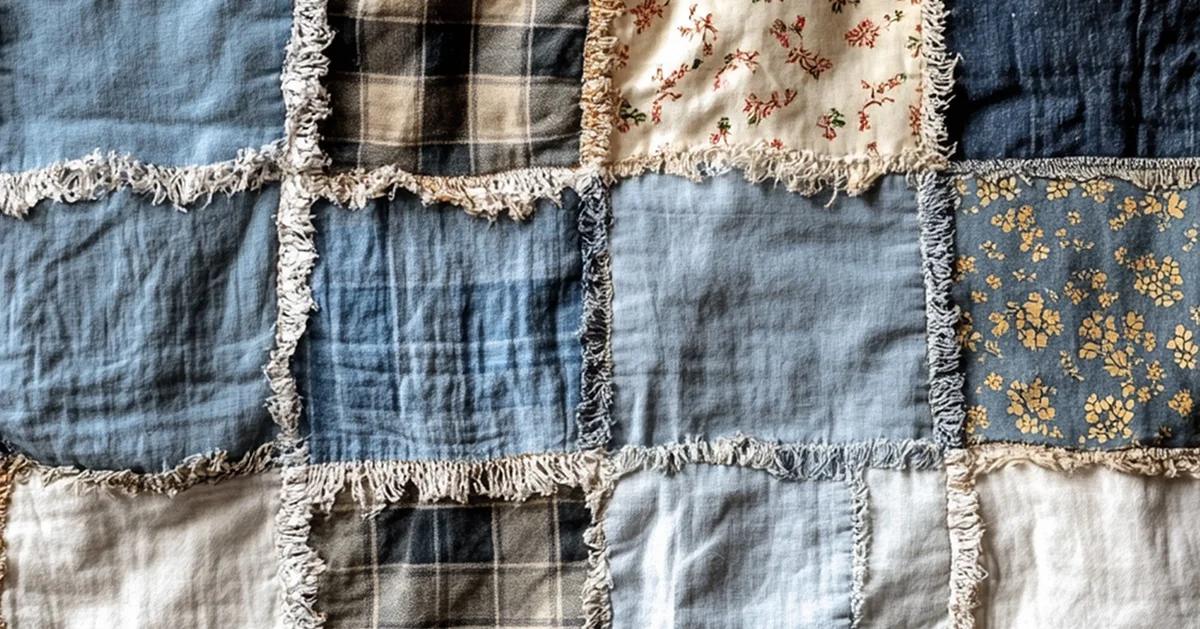
A rag quilt is straight stitching and straight lines, which is why it is the one quilt to start with if quilting has always looked like too much. Squares of fabric are layered and sewn with the seam allowances on the outside, and then those allowances are clipped and washed so they fray into the soft ragged texture the whole thing is named for. Flannel and cotton scraps both work. It goes together fast, needs no pattern and no sewing experience to speak of, and it comes out as a lap blanket or a new baby gift that people keep for years.
Get the full tutorial at Sueeye.