Jewelry Making Ideas
31 DIY Earrings Worth Making Instead of Buying
DIY earrings you can make at home: 31 tutorials for tassels, polymer clay studs, wrapped hoops, wood dangles, beaded fringe and glitter faux leather.
diy earringsDIY Giftsgifts for herroundups
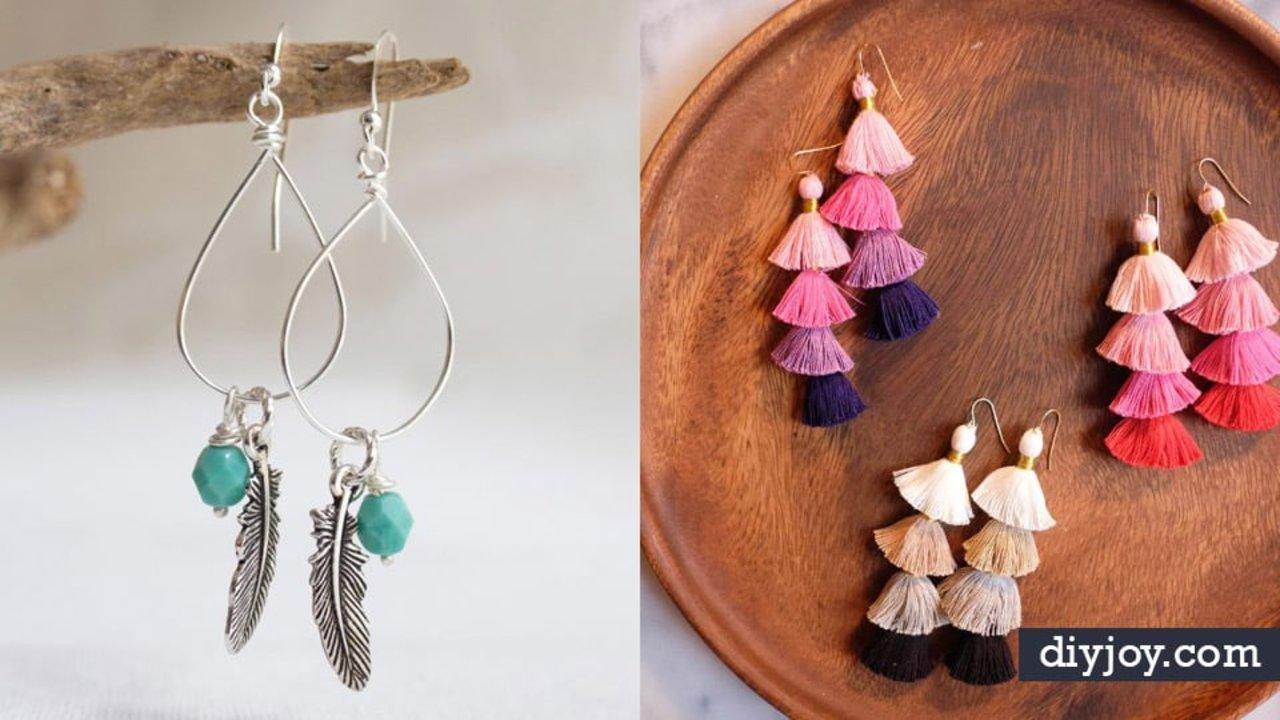
Earrings are the one piece of jewelry worth making yourself, because the materials are tiny, the mistakes are cheap and nobody can tell from across a room whether you paid fifty dollars or fifty cents. That is what this list of 31 DIY earrings is built on. There are polymer clay studs that come out looking like ceramic, hoops wrapped in embroidery floss, tassels in every color a floss rack sells, wood circles papered in vintage florals, seed bead fringe, raw stones glued straight onto a post, clear resin with gold leaf floating inside it, and a pair inlaid with shards of a dead CD. A few take three minutes. The longest ones take an evening. Every project links straight to its tutorial.
1. DIY Multicolor Tassel Earrings
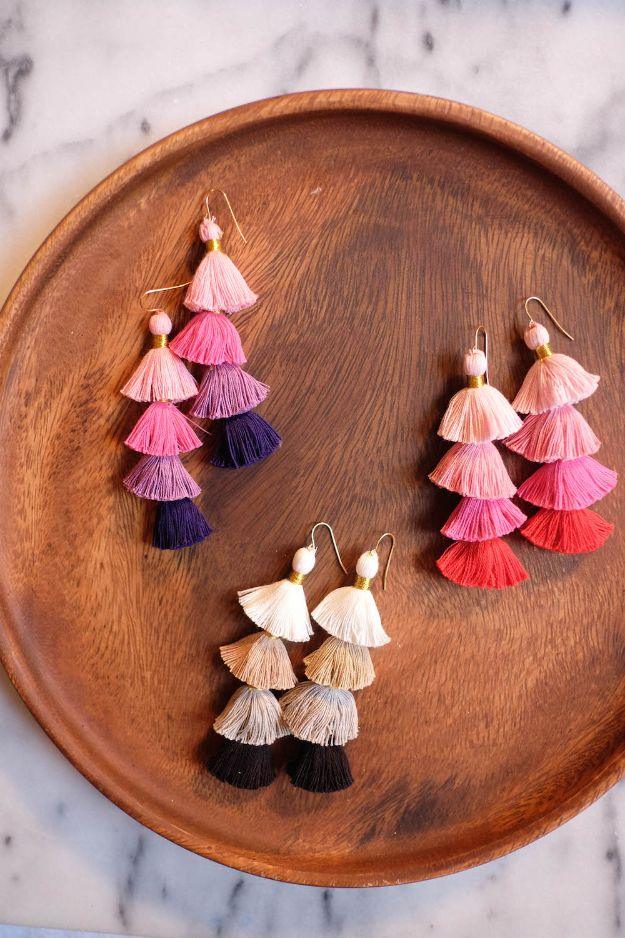
Stacked tassels look complicated and are really just threading. Buy mini tassels in the 1.25 inch size, lay them out in the color order you want, then double a length of thread and knot the end several times so it cannot pull through. Pierce the first tassel through its center with a needle, which is honestly the fiddliest part of the whole thing, and run the rest onto the same thread. Knot through the top loop, fan the layers apart and open the ear wire to attach. Sewing them holds far better than glue, and three pairs take about an hour.
Get the full tutorial at The Stripe.
2. DIY Terrazzo Earrings
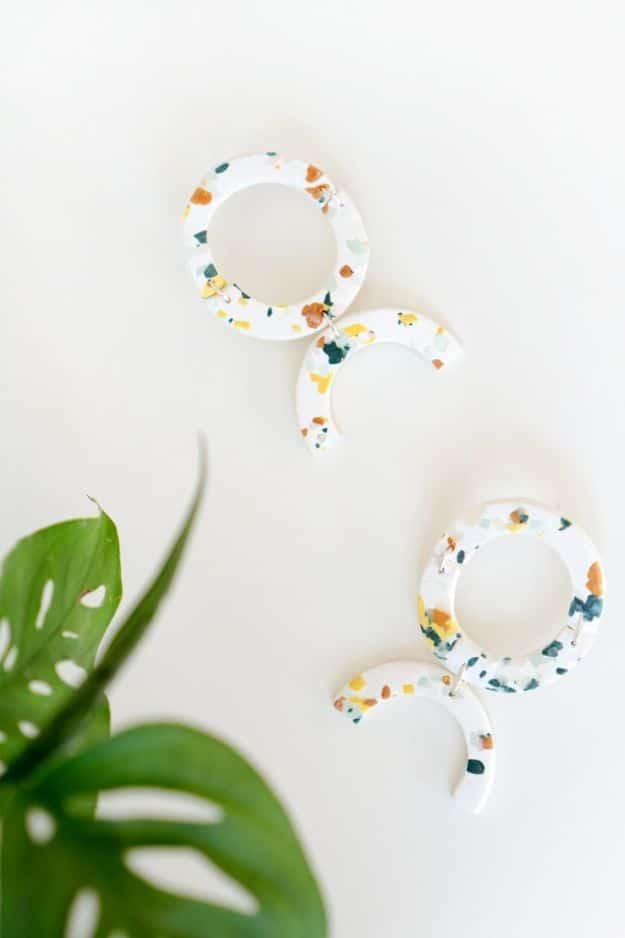
Terrazzo is the pattern that makes leftover polymer clay look deliberate. Each earring here is a white circle hoop with a crescent hanging from it, flecked all over in burnt orange, mustard, teal and pale green, so the chips read like the real stone floor rather than a marbled blob. That is the difference: terrazzo wants distinct chips of color on a clean white base, not blended swirls, so chop your scrap clay small and press it in rather than rolling it through. The two-piece shape also lets one earring use two different offcuts and still look like a matched pair.
Get the full tutorial at Ctrl Curate.
3. DIY Scalloped Statement Hoop Earrings
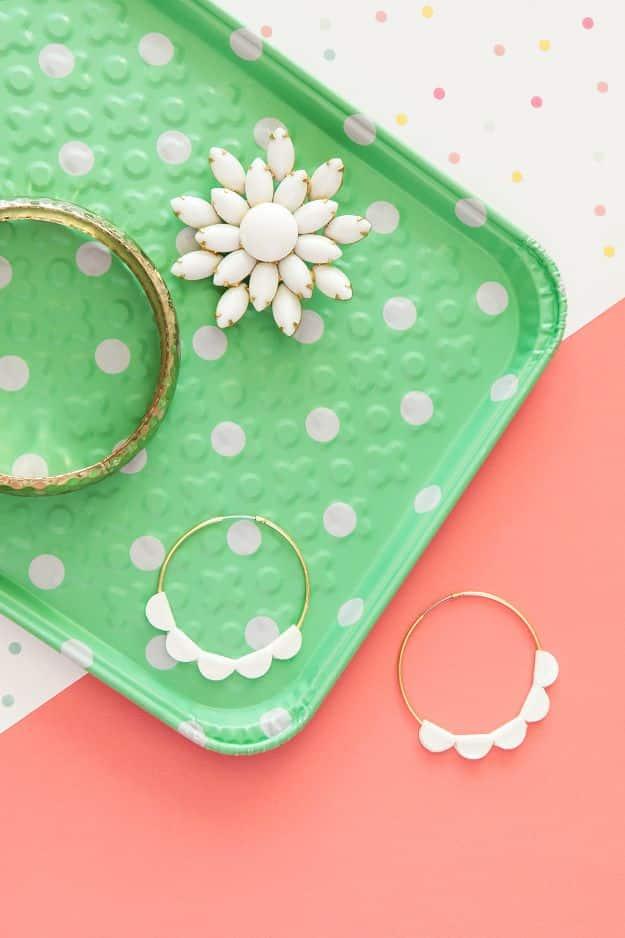
The clever bit here is not the shape, it is the water. Cut two scalloped pieces from white faux leather paper, then drop them into a bowl of water and gently crinkle them as though you were washing them. The paper comes out with real leather grain instead of that flat printed look. Once dry, fold each scallop in half so the edges meet, sit it over the bottom of a 40mm gold hoop and hold it with super glue until it grabs. The whole thing takes under ten minutes, and 4cm is the sweet spot: big enough to notice, light enough to wear all day.
Get the full tutorial at Sarah Hearts.
4. DIY Macrame Earrings
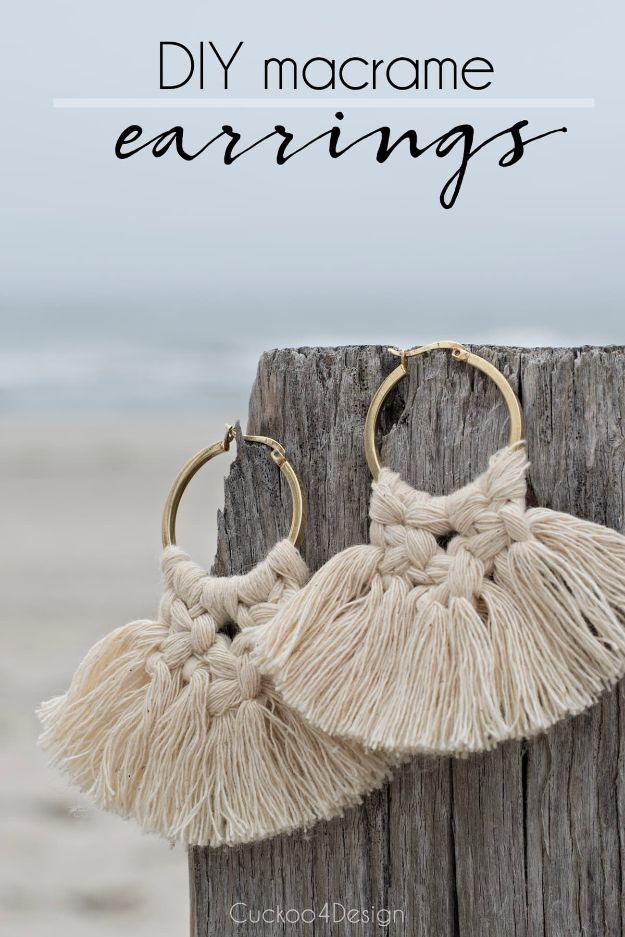
Two knots is the entire skill list. Unravel 4mm macrame yarn into its four separate strands, which drops the weight a lot, and cut pieces about ten inches long, eight strands for a pair. Attach four looped strands to a 50mm hoop with lark’s head knots, then tie two square knots side by side in the first row and one centered square knot below them, which pulls the whole thing into a V. Alternate which strand crosses on top or you will get a spiral instead of a flat knot. Dip the ends in fabric stiffener, comb them out and trim to a fan.
Get the full tutorial at Cuckoo 4 Design.
5. DIY Wood Burned Earrings
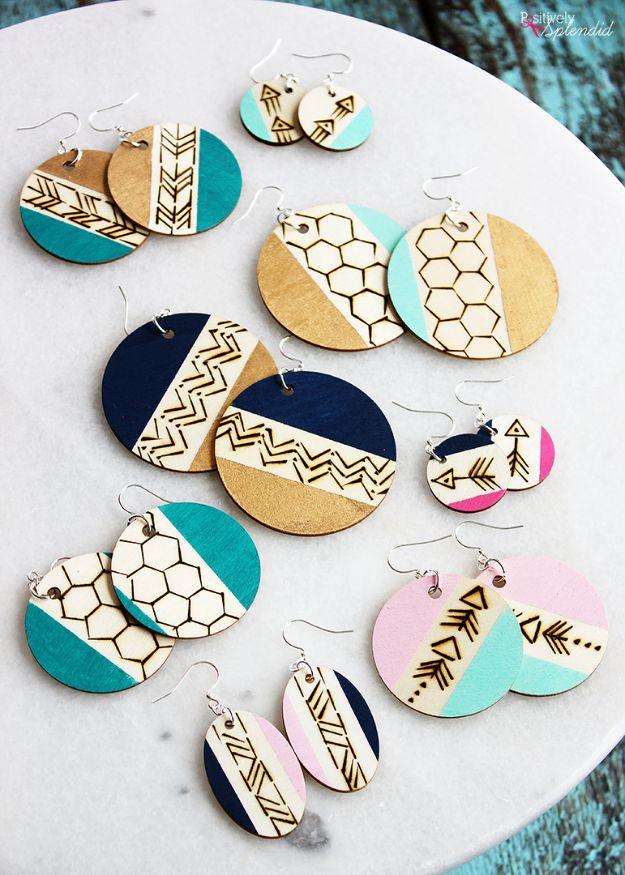
Wood blanks plus a burning pen equals earrings that look like they came from a boutique stand. The set in the photo runs circles and ovals in two sizes, each one painted solid on a diagonal in navy, teal, pink or gold with the raw wood left bare on the other half, and the burned pattern sits across the bare side. Chevrons, arrows and honeycomb all read well because they are straight lines, which is what a burning tip does best. Tape off the paint line rather than freehanding it, and burn first, paint second, so a slipped tip lands where paint will cover it.
Get the full tutorial at Positively Splendid.
6. Faux Fur Pom Pom Earrings
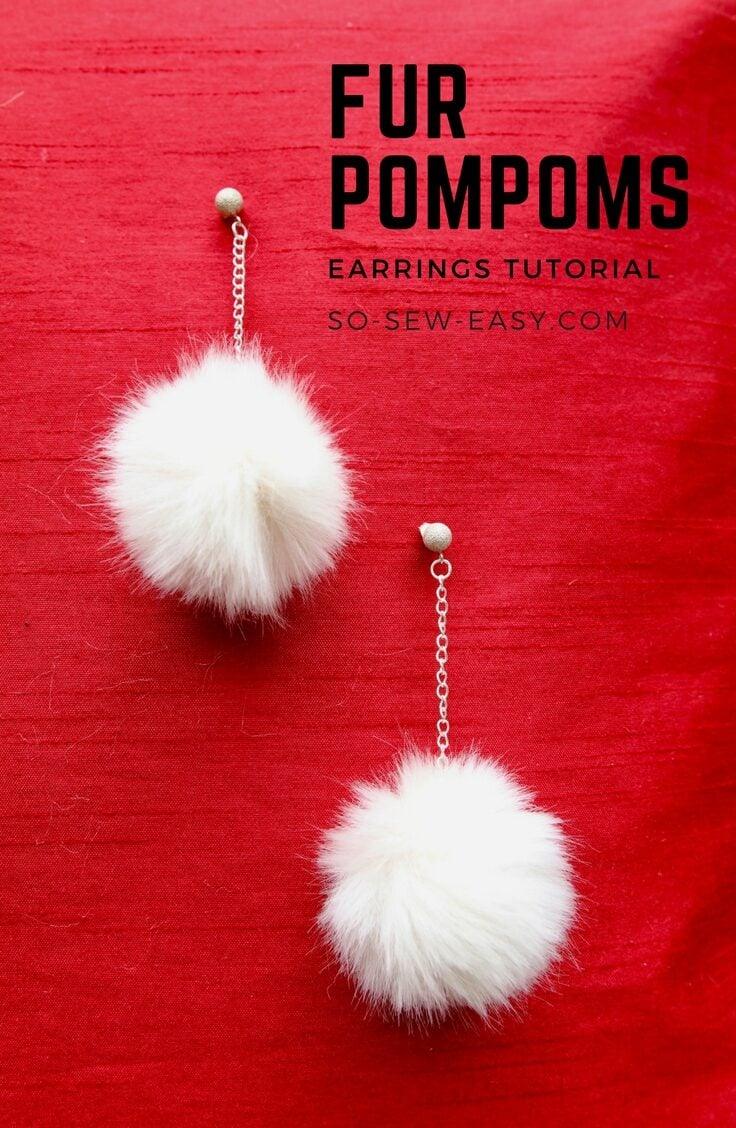
Faux fur offcuts are impossible to throw away and almost impossible to use, which is what makes this one satisfying. Trace a circle about an inch and a half across using a bottle cap, run a hand stitch around the edge, tuck a little stuffing into the middle and pull the thread tight so the fur gathers itself into a ball. Sew the finished pom to a jump ring at the end of a short chain and hang that from a plain stud. The pair takes roughly fifteen minutes. White reads wintry, a bright color reads like it was bought to match a coat.
Get the full tutorial at So Sew Easy.
7. DIY Beaded Hoop Earrings
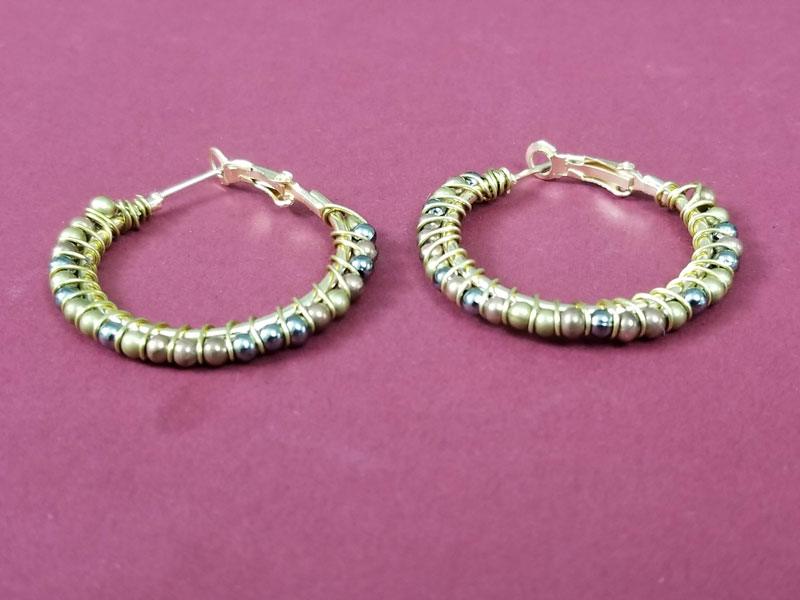
Mixed metals are the point of these, and no soldering is involved. Wrap 24 gauge wire around a plain hoop finding and slide small 3 to 4mm beads on as you go, then wrap the tail back over itself to lock everything down. Gold and silver tone spacer beads together is the combination that stops them looking like a kit, and spacer beads are exactly what tends to be left over once a project is finished. About fifteen minutes once the beads are chosen. Keep the wraps tight and evenly spaced or the beads will slide and leave a bare patch on the hoop.
Get the full tutorial at Moms and Crafters.
8. Marbled Clay Stud Earrings
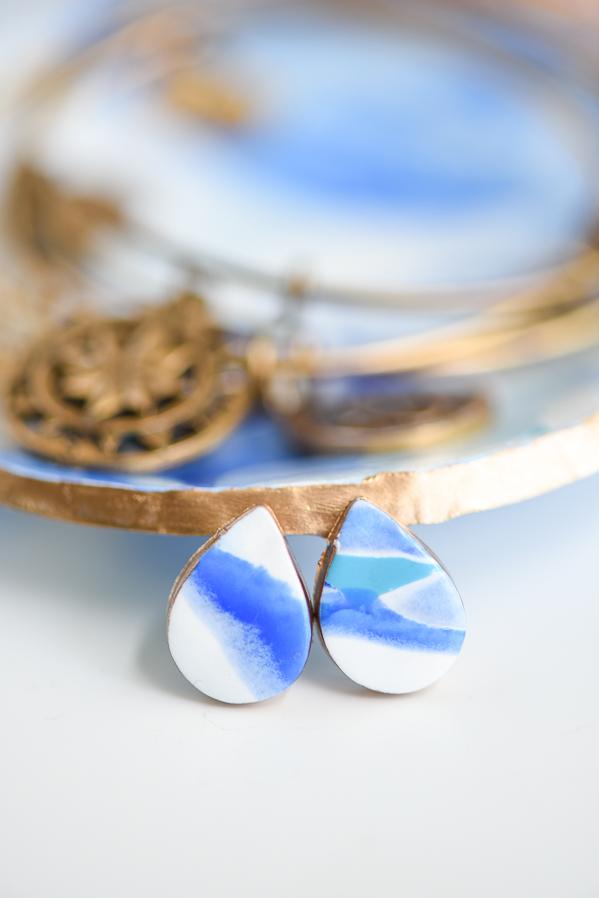
These are teardrop studs in marbled polymer clay, streaked in three shades of blue against white with a thin band of gold along the top edge. They read as ceramic rather than craft clay, which is the whole trick, and the marbling is forgiving because there is no pattern to get wrong. Roll the colors together only two or three times; keep going and the streaks turn to mud. One block of leftover clay yields several pairs that coordinate without matching, since the marbling falls differently every time you cut. Sand the baked edges smooth before you glue the posts on.
Get the full tutorial at A Pumpkin And A Princess.
9. DIY Two-tone Chevron Stud Earrings
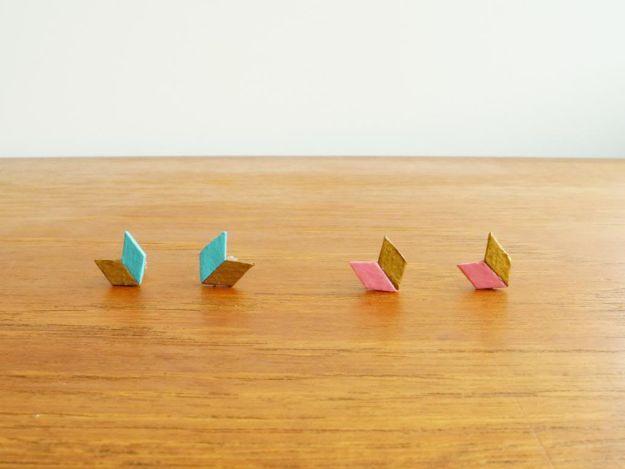
Cardboard earrings sound like a joke until you see them finished. Cut four tiny diamonds from medium weight dense cardboard, and if you are painting a light color on brown board, put a white base coat down first or the color will look muddy. Paint both sides of each diamond, two in one color and two in another, then glue them into a chevron on the stud pads. Tweezers save your fingertips on pieces this small. Two coats of sealer on the front and carefully around the back, then dry overnight. They survive a sprinkle of rain and nothing more.
Get the full tutorial at Baisley and Noir.
10. DIY Statement Earrings
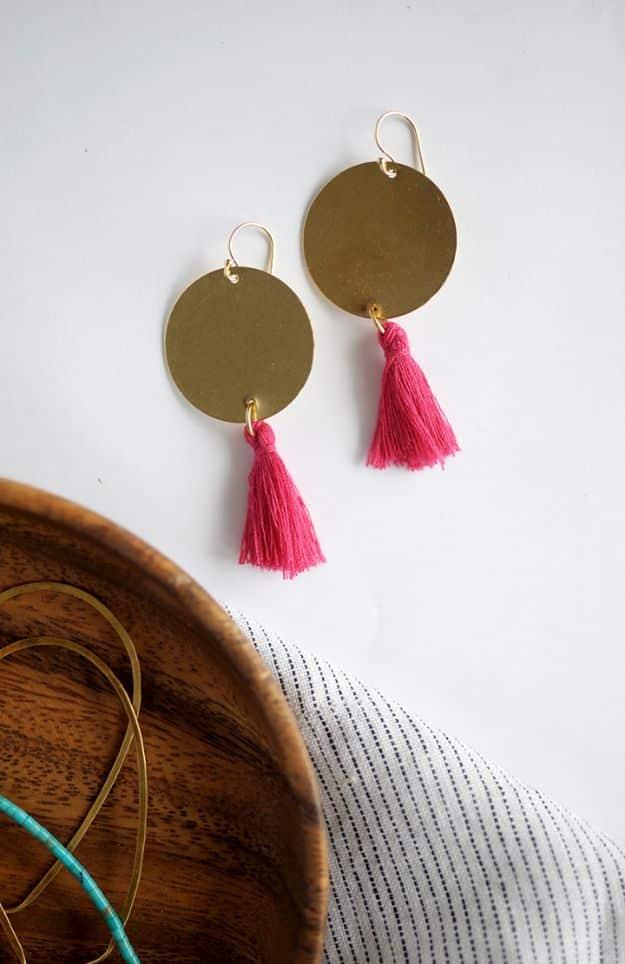
A brass circle and a tassel, and that is the entire parts list. Lay a brass stamping blank face down over a scrap of wood, set a small nail near the edge and hammer it all the way through so the hole is clean, then tap gently over the hole to flatten the burr. Punch a second hole at the top for the ear wire. Open a jump ring, catch the loop of a one inch tassel and hook it through the lower hole. The brass takes a patina over time, which most people end up liking more than the shiny version.
Get the full tutorial at Alice and Lois.
11. DIY Hoop Tassel Earrings
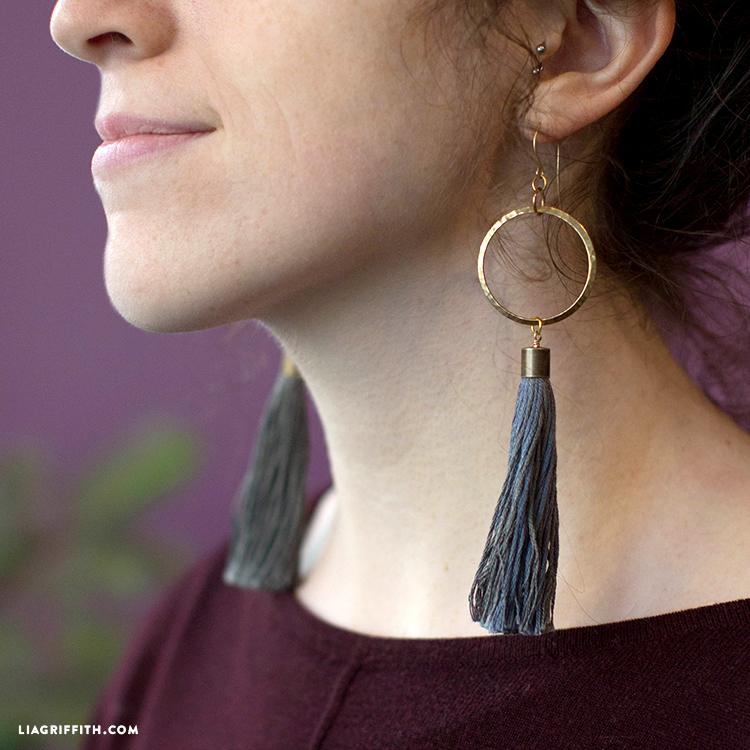
Long tassel drops look expensive and cost almost nothing. Wind embroidery floss around a scrap of cardboard about thirty times, tie one end off as tightly as you can manage, then cut the loops at the bottom free and even them up. A dab of E6000 seats the bundle inside a small metal cap, and a wire wrapped loop at the top of that cap is what lets it hang from a hoop. Give the glue a full day before you wear them, because a tassel that drops out of its cap in public is a particular kind of annoying. Changing the floss color gives a completely different pair.
Get the full tutorial at Lia Griffith.
12. DIY Lace Earrings
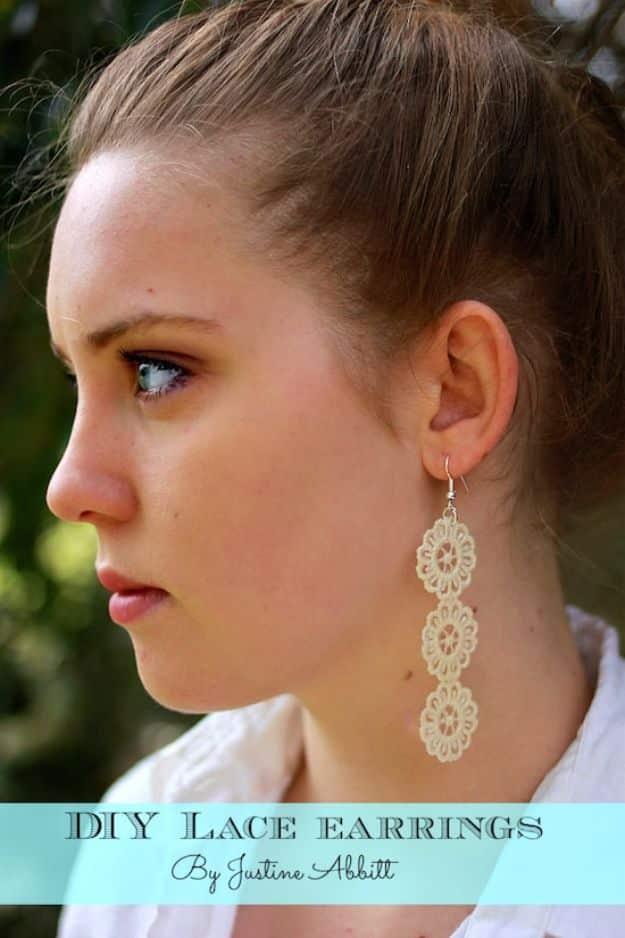
Thickness is everything with lace earrings. Thin lace will not stiffen no matter how much you put on it, so choose a heavier lace ribbon or lace ric rac, the kind you can feel between your fingers. Cut your shapes, lay them on wax paper or a silicone mat and brush a medium layer of Mod Podge over them; the stiffening formula works harder if you have it. Twenty minutes of work, an hour and a half minimum of drying, and overnight is genuinely better. Then open a jump ring wide enough to take the lace thickness and hook it to the ear wire.
Get the full tutorial at Mod Podge Rocks.
13. Gold Plated Gemstone Earrings
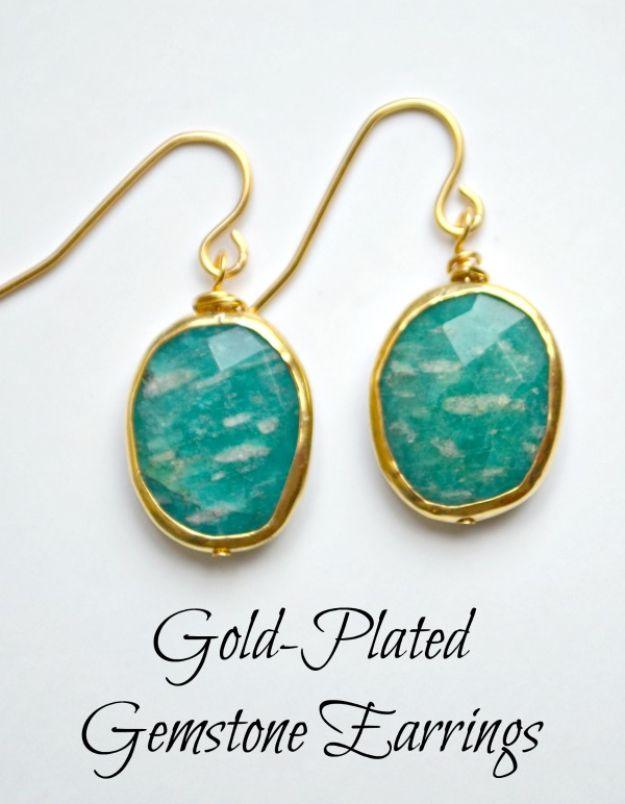
This is the five minute pair, and it is the one to make if someone needs a gift tonight. Slide a 15mm gold vermeil plated amazonite bead onto a headpin, turn a loop at the top with needle nose pliers, and either wrap the extra wire down the shank for a decorative finish or just trim it for a clean simple loop. Open the French ear wire, hook the loop in and close it. That is the whole build. The stones carry the look, so spend your effort choosing them; amazonite comes in teal, brown, purple and bright blue.
Get the full tutorial at Amy Latta Creations.
14. Modern Wooden Earrings
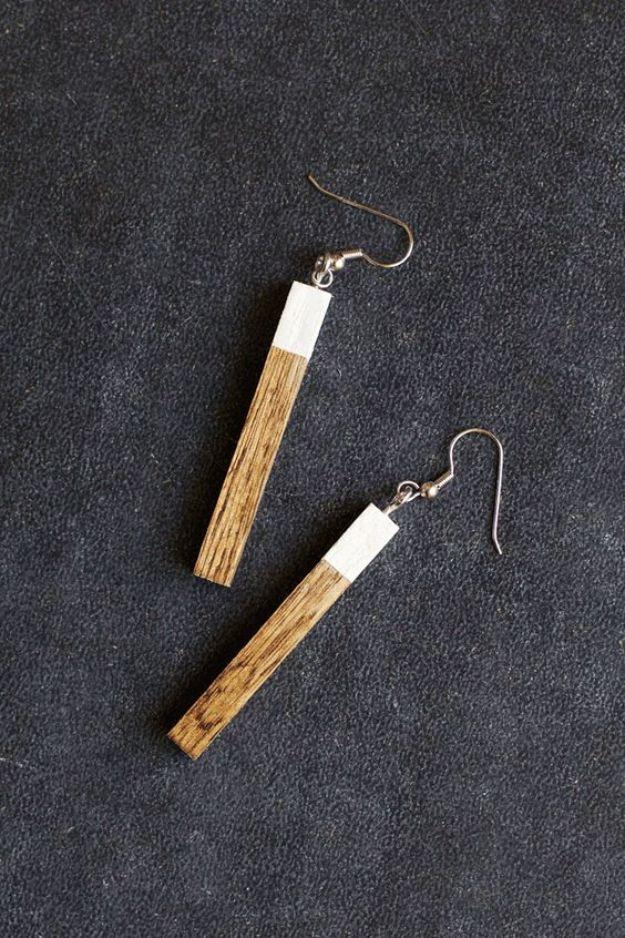
Long, narrow and completely plain, which is exactly why these work. Each earring is a two inch length of square dowel, cut with a saw and sanded smooth at around 180 grit, stained a warm golden oak and then painted white across the tip. Do not skip the primer under that white. Paint goes straight into bare wood otherwise, and the finish cracks and peels away. Painter’s tape gives a clean line between the paint and the stain. A tiny eyelet screw twists into the top of each bar, and the earring hook loops onto it.
Get the full tutorial at A Beautiful Mess.
15. Floral Wooden Circle Earrings
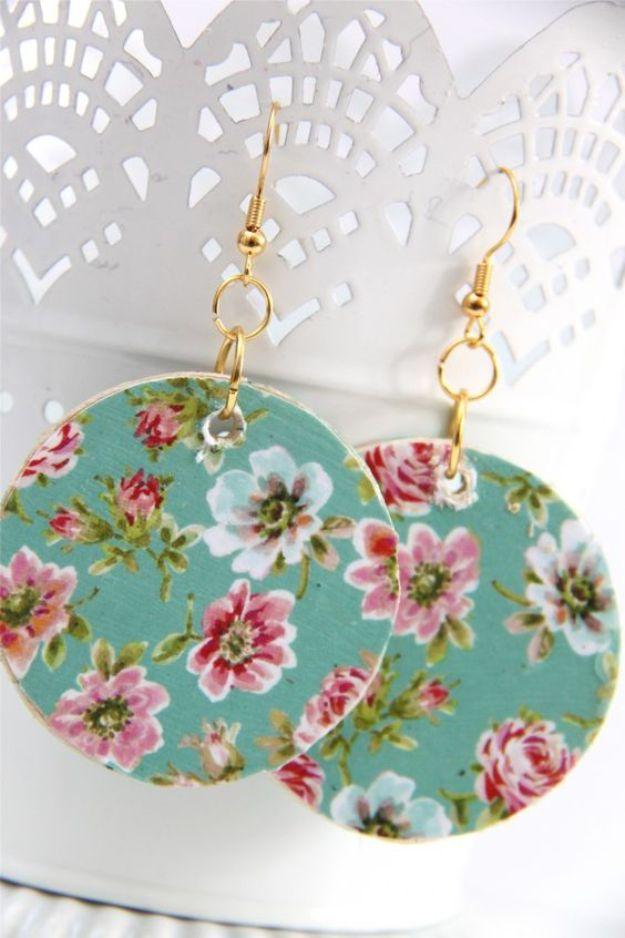
Wood circles plus scrapbook paper is the cheapest route to a patterned earring, and the finish is what makes or breaks it. Trace your quarter inch thick circles onto the back of the paper, cut with a craft knife, glue the paper down design side up, then coat it, wait twenty minutes, coat it again, and do the same on the reverse. Four coats sounds excessive and it is the reason these survive a handbag. Drill a 1/8 inch hole near the top afterward, and look at which way the pattern sits before you drill, because upside down roses are hard to unsee.
Get the full tutorial at Smashed Peas and Carrots.
16. Embroidery Thread Wrapped Hoop Earrings
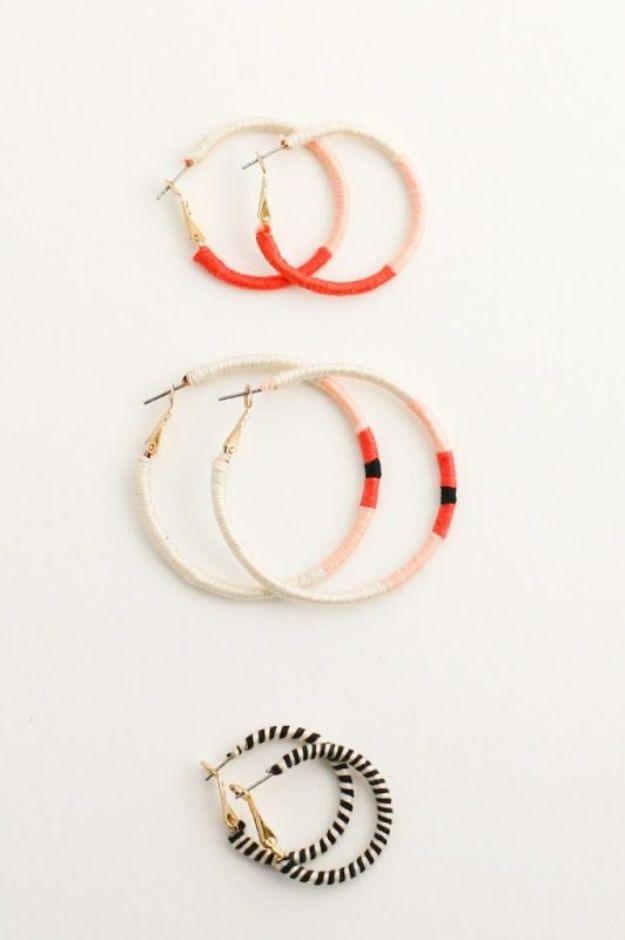
Cheap hoops become something else entirely once they are wrapped. Cut roughly forty inches of six strand floss for a large hoop, less for smaller ones, put a dot of craft glue near the post and lay all your colors along the hoop in the glue. Wrap the first color around the hoop and over the other threads at the same time, keeping the wraps snug and side by side so no metal shows. To change color you simply drop the one you were using alongside the hoop and start wrapping the next over it. Glue at the end, wrap over the glue, trim.
Get the full tutorial at Flax and Twine.
17. Anthro Knockoff Tassel Earrings
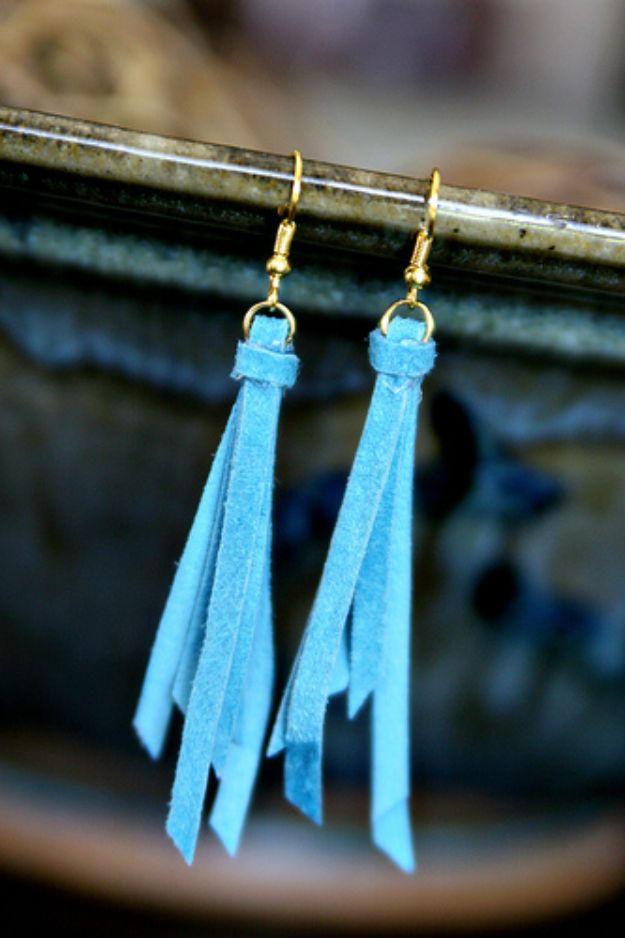
Four dollars of suede lace against a fifty dollar original is a decent trade. Cut six strips per pair at three different lengths, four inches, four and a half and five, with the ends cut at an angle so the finished fringe falls in steps. Thread all three strands of one earring through a jump ring and fold them in half so the ring sits at the middle. Wrap a separate short piece of suede tightly around the whole bunch just under the ring and hot glue it down; that wrap is the only thing holding the shape, so do not be shy with it. Open the earwire, hook the jump ring in, close.
Get the full tutorial at See Vanessa Craft.
18. DIY Raw Stone Earrings
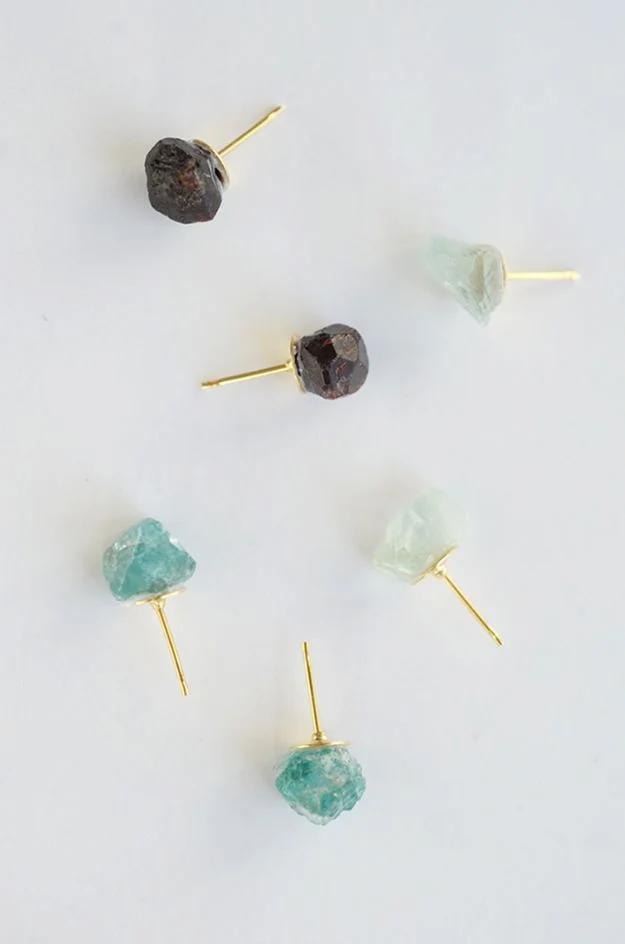
There is essentially one step: put a tab of E6000 on a gold stud, press the stone onto it firmly and leave it to dry. Under five minutes of work. All the real effort goes into the shopping, because the hard part is finding two raw stones close enough in shape and size to wear as a pair. A bead shop or a rock shop with trays of loose minerals is where to go; amazonite, rose quartz, fluorite, garnet and apatite all work. Buy more than you need, since matching is easier with a pile in front of you than with two hopeful pieces.
Get the full tutorial at Alice and Lois.
19. Ombre Stacked Tassel Earrings
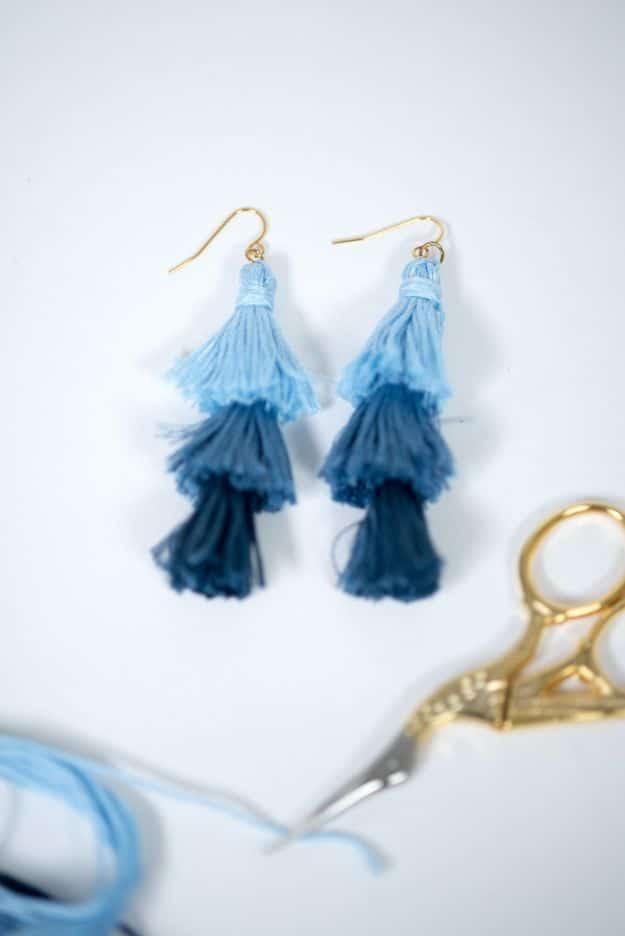
Three skeins of floss in dark, medium and light blue, and a piece of cardstock about an inch and a half wide to wrap them on. Tape a four inch tying thread to the card first, wrap the floss over it six to eight times, knot the tying thread at the top, cut along the bottom, fold the tassel in half and bind it with four wraps of floss half an inch down from the fold. Count your wraps on the very first tassel and stick to that number, otherwise the stack comes out lopsided. Bind the three tassels together dark to light and add a 5mm jump ring.
Get the full tutorial at Likely By Sea.
20. DIY Ethnic Beaded Earrings
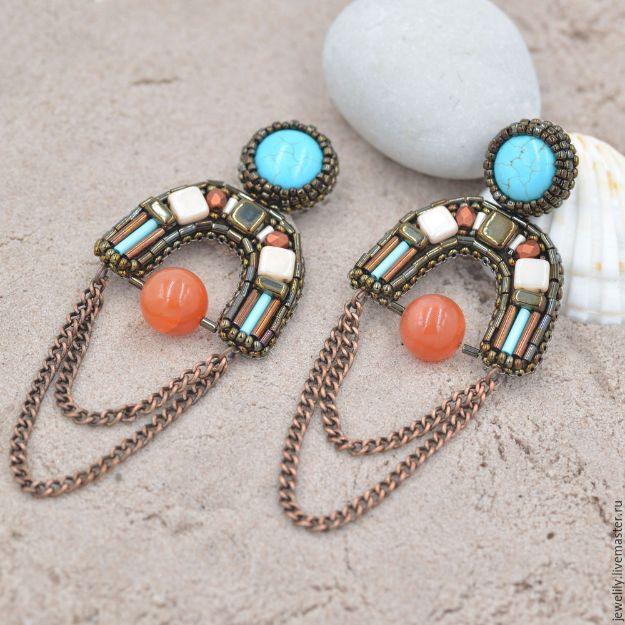
Bead embroidery is the technique here, and it is a slow one with a beautiful payoff. Each earring is an arch outlined and filled with seed beads, tile beads and small cabochons stitched down onto a backing rather than strung, with a round turquoise stone at the top acting as the stud and a single coral bead set into the curve. Two loops of fine copper chain swag from the bottom edge, which is what keeps a solid shape from looking heavy. Bead embroidery wants a firm foundation like felt or stiff interfacing; stitch onto anything soft and the arch will not hold its line.
Get the full tutorial at Livemaster.
21. Beaded Fringe Drop Earrings
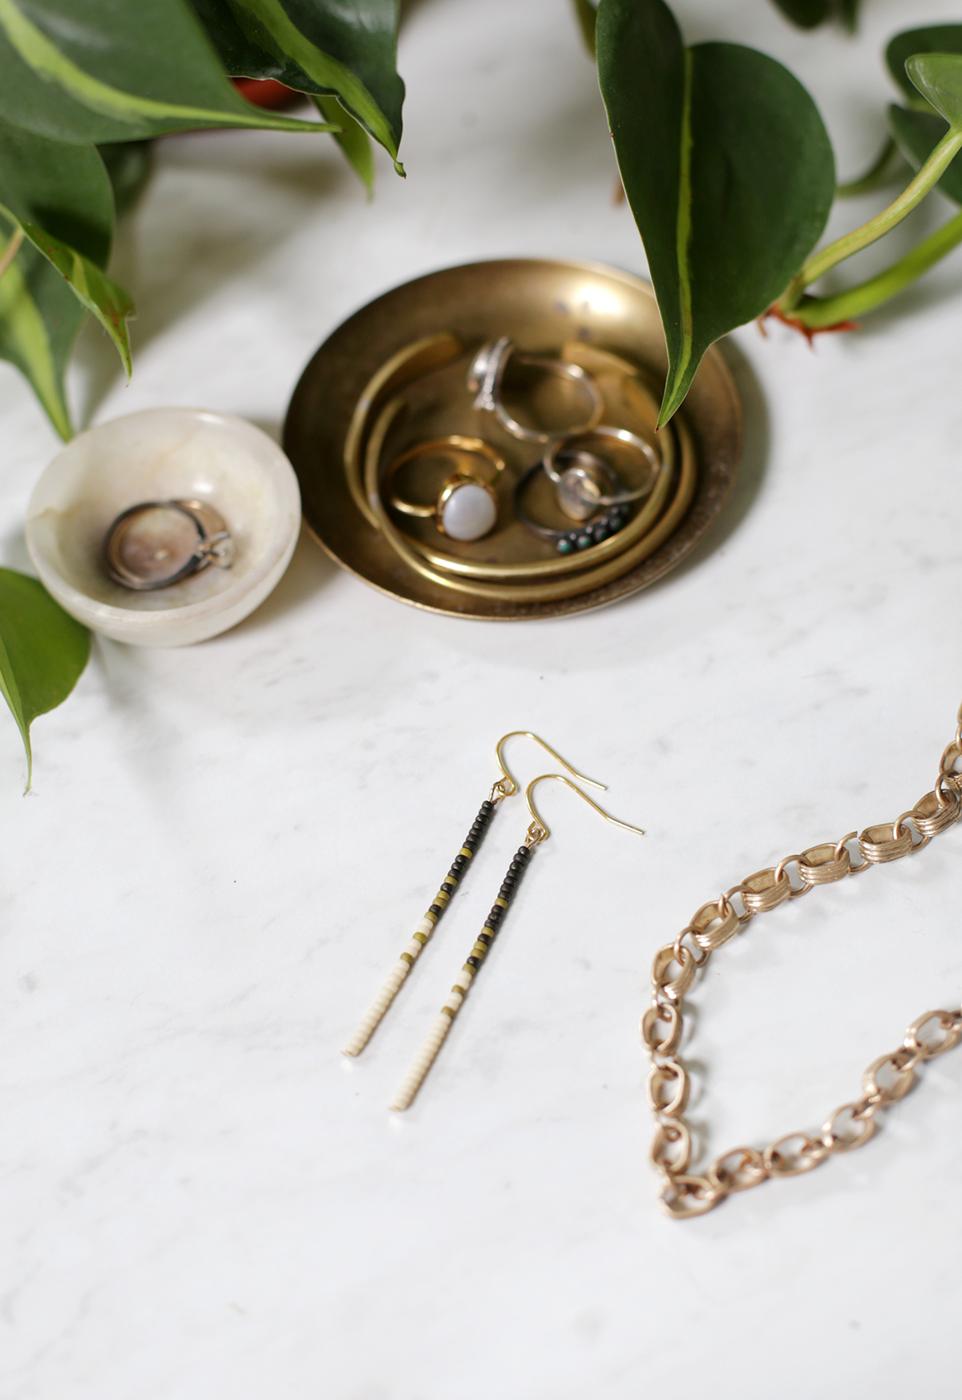
Long, slim and almost weightless, which is the combination that makes an earring go with everything. Each one is a narrow column of seed beads in black, olive and cream hung from a plain gold ear wire, so it swings freely and catches light as you move. The color blocking down the length is what keeps them looking considered rather than homemade; the same beads in random order would read as a friendship bracelet. Pick a palette from something already in your wardrobe and the earrings will earn their place instead of sitting in a dish.
Get the full tutorial at The Merrythought.
22. Fabric Button Earrings
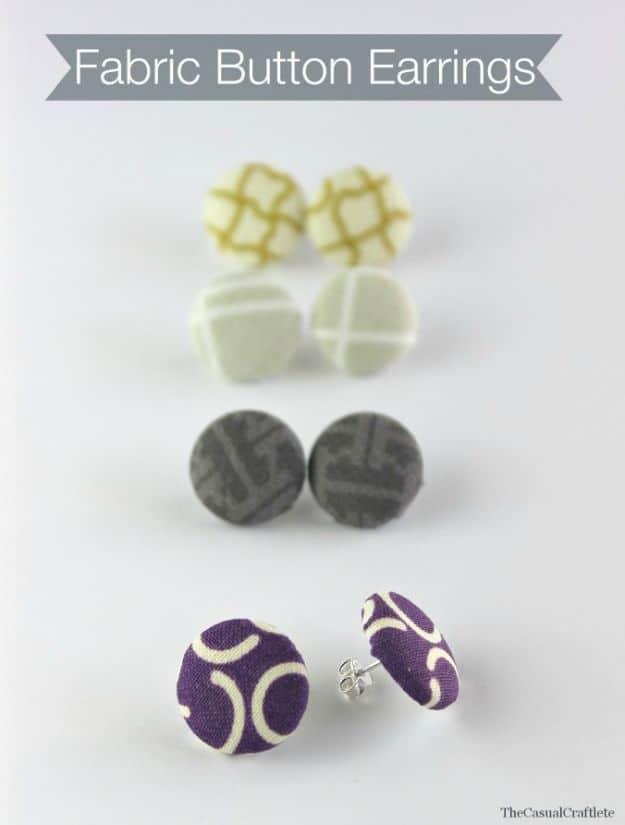
No sewing at all, which surprises people given the name. Use an aluminum cover button kit: cut the fabric circle using the template printed on the back of the pack, push it into the rubber mold with the button shell, tuck the excess in, cap it with the button back and press it home with the blue pusher until it pops. Then snip the shank loop off with side cutting pliers, glue a flat earring post to the back with E6000 and let it cure. Quilt block quarters are ideal because the prints are scaled small enough to read at button size.
Get the full tutorial at Purely Katie.
23. Gold Glitter Ball Stud Earrings
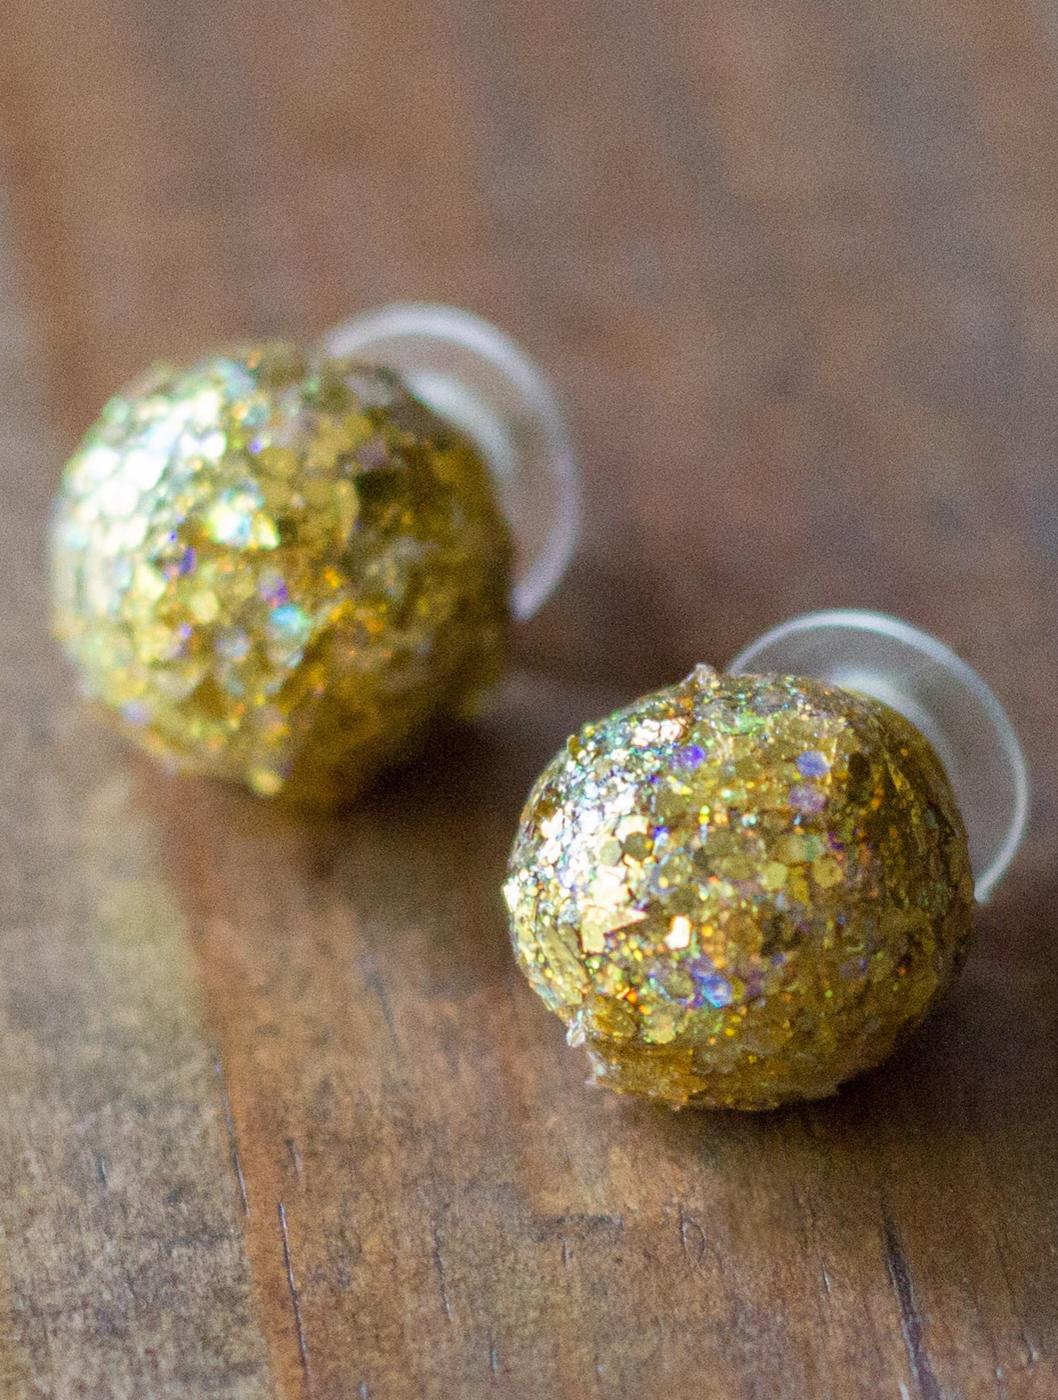
If you have never made studs before, start here. Roll two small balls of polymer clay, bake them for about fifteen minutes and let them cool completely. Paint them with a brushed gold metallic, then layer chunky glitter paint over the top until every side is covered, which takes two coats to get that solid jeweled surface with no base color showing through. A dab of super glue holds the posts. The size is entirely yours to choose, which is the real appeal: tiny for every day, oversized for a party, and silver or rose gold glitter gives a completely different pair.
Get the full tutorial at Erin Spain.
24. Clay Flower Dangle Earrings
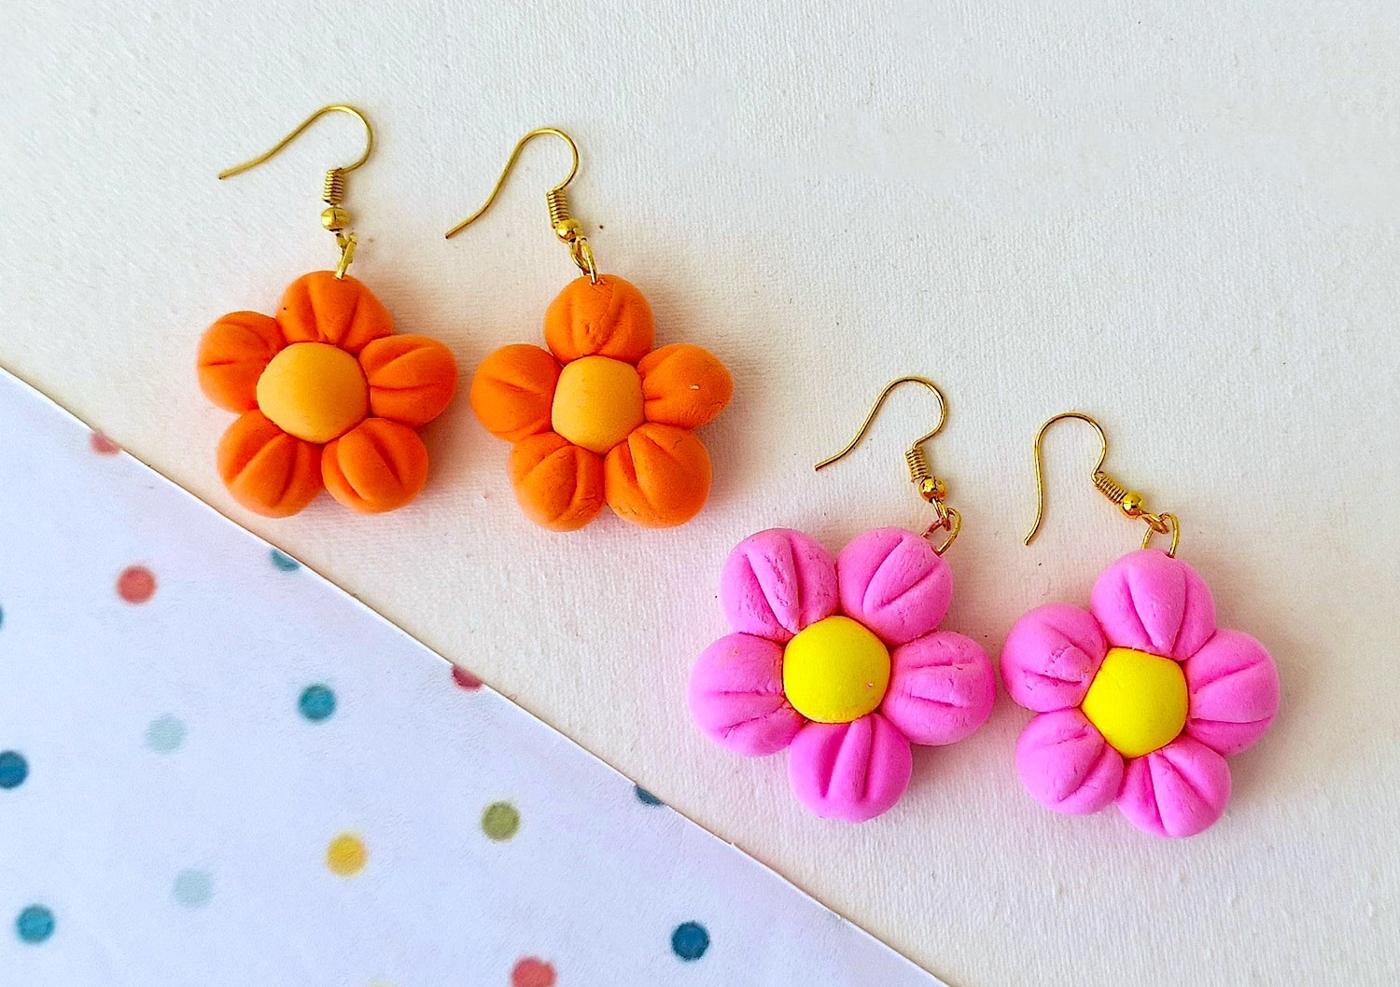
Not one specialty tool required, which makes this a good first clay project. For each flower, roll six little balls for petals and one for the center. Press a V shaped indent into every petal with a clay tool or the end of a pencil, which is what turns a ball into something that reads as a petal, then press the six around the center until they hold together. Let them firm up just enough to take a hole without squashing, pierce one petal, and add a jump ring and a hook. Air dry clay means no kiln and no oven, just patience.
Get the full tutorial at Single Girl's DIY.
25. Glitter Faux Leather Feather Earrings
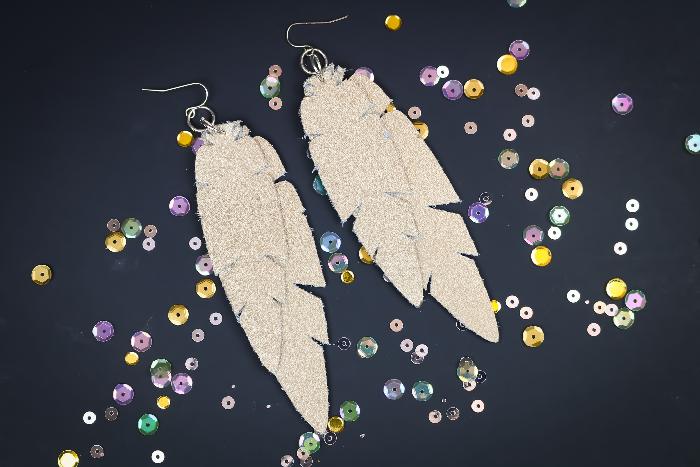
Feathers are the shape everyone wants and nobody can cut twice the same, which is why a cut file solves it. These start from a free downloadable feather design, so both feathers on a pair come out identical and you can scale them to whatever length suits you. The barbs are snipped in along each edge, which is what gives the feather its movement rather than reading as a leaf. Glitter faux leather is the right material because the cut edges do not fray and need no sealing at all. Big as they look, they weigh almost nothing.
Get the full tutorial at Mad in Crafts.
26. DIY Dangly Earrings
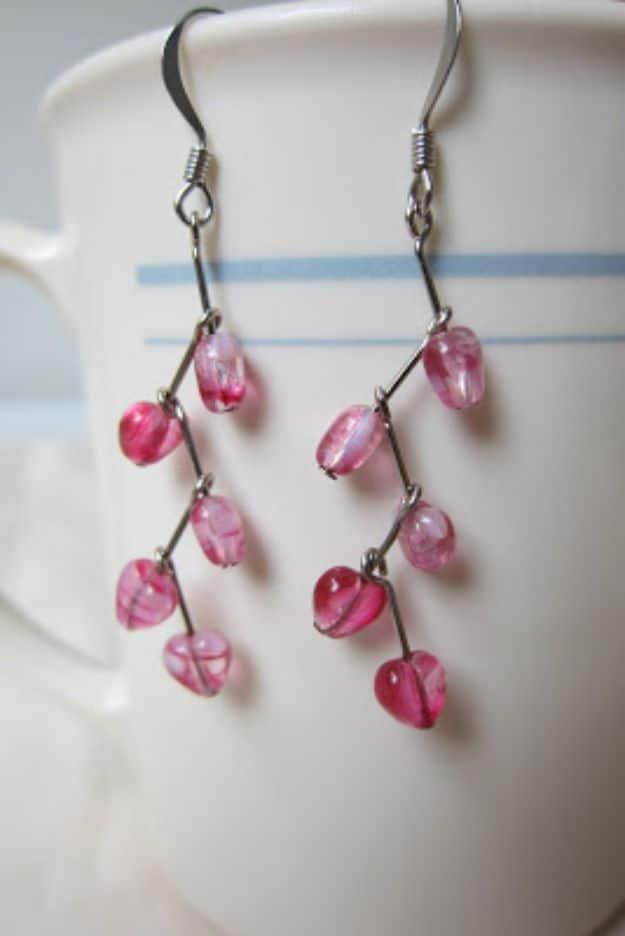
Linked beads fall differently from strung ones, and that is the whole reason to do it this way. Slide a 6mm heart shaped glass bead onto a head pin, turn a simple loop roughly three eighths of an inch above the bead, then put the next head pin through that loop before you close its own. Five beads linked in a chain gives a soft cascade that moves rather than hanging stiff. Use your flat nose pliers as a measuring guide when you bend each pin, because a consistent loop length is the only thing standing between a matched pair and a wonky one.
Get the full tutorial at Oksana Likes It.
27. Washi Tape Earrings
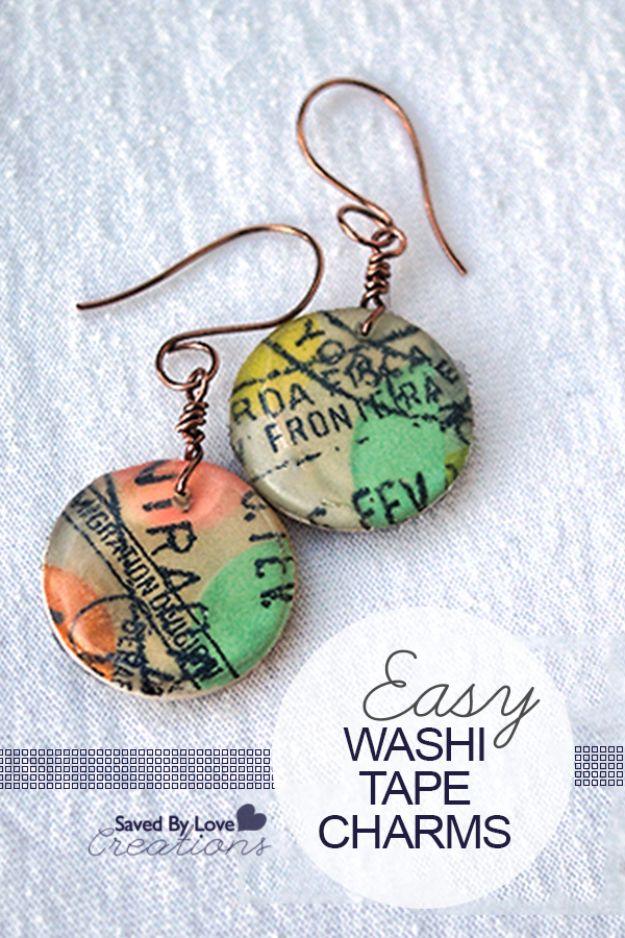
The finish is what turns washi tape into jewelry. Lay strips of tape across both sides of white card stock with no gaps between them, matching the pattern up if your punch is wider than the tape, then punch out your circles. Apply Dimensional Magic starting in the center and pulling out toward the edge with the tip of the bottle, wait twenty minutes and pop any air bubbles with a toothpick, then leave it overnight before flipping and sealing the reverse. That domed glass surface is what makes them read as enamel. Set them on a spiked drying tray so the excess runs off.
Get the full tutorial at Saved By Love Creations.
28. 3-Minute Earring DIY Hoops to Squares
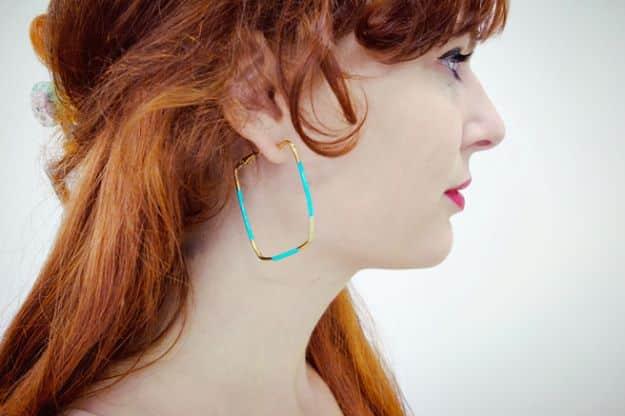
Three minutes and a pair of pliers is not an exaggeration. Take a cheap hoop, the sixty cent kind, and grip it with pliers about a third of the way round, then bend hard enough to make an actual sharp corner rather than a gentle curve. Move to the two thirds mark and bend again, then lay the hoop flat on a table and keep nudging until the shape sits square and even. Paint one side with nail polish, let it dry fully, then flip and do the other, which stops you from pressing a wet side into the table and ruining it.
Get the full tutorial at Lana Red Studio.
29. Turquoise Spike Drop Earrings
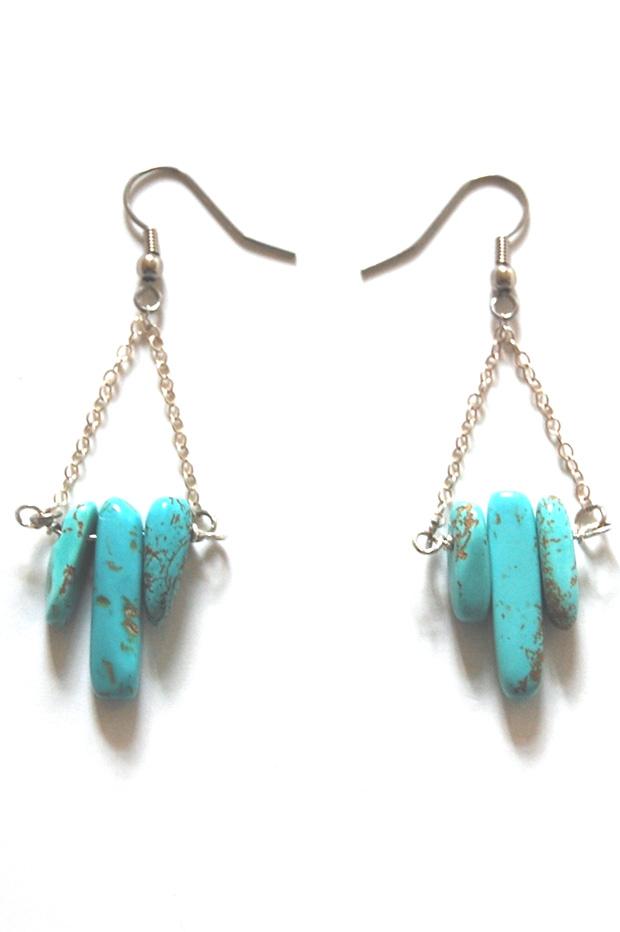
Three top drilled turquoise spikes per earring, a larger one in the middle with a matching pair either side of it. The stones thread onto a short length of wire with a wrapped loop turned at each end, then a couple of inches of fine chain hangs from the ear wire and clips to those loops with jump rings, so the stones cluster at the point of a narrow triangle. The chain is doing something clever there: it lets the whole cluster swing instead of hanging rigid. Dyed howlite gives you the turquoise look for a fraction of what real turquoise costs.
Get the full tutorial at DIY in PDX.
30. How to Make Epoxy Resin Earrings
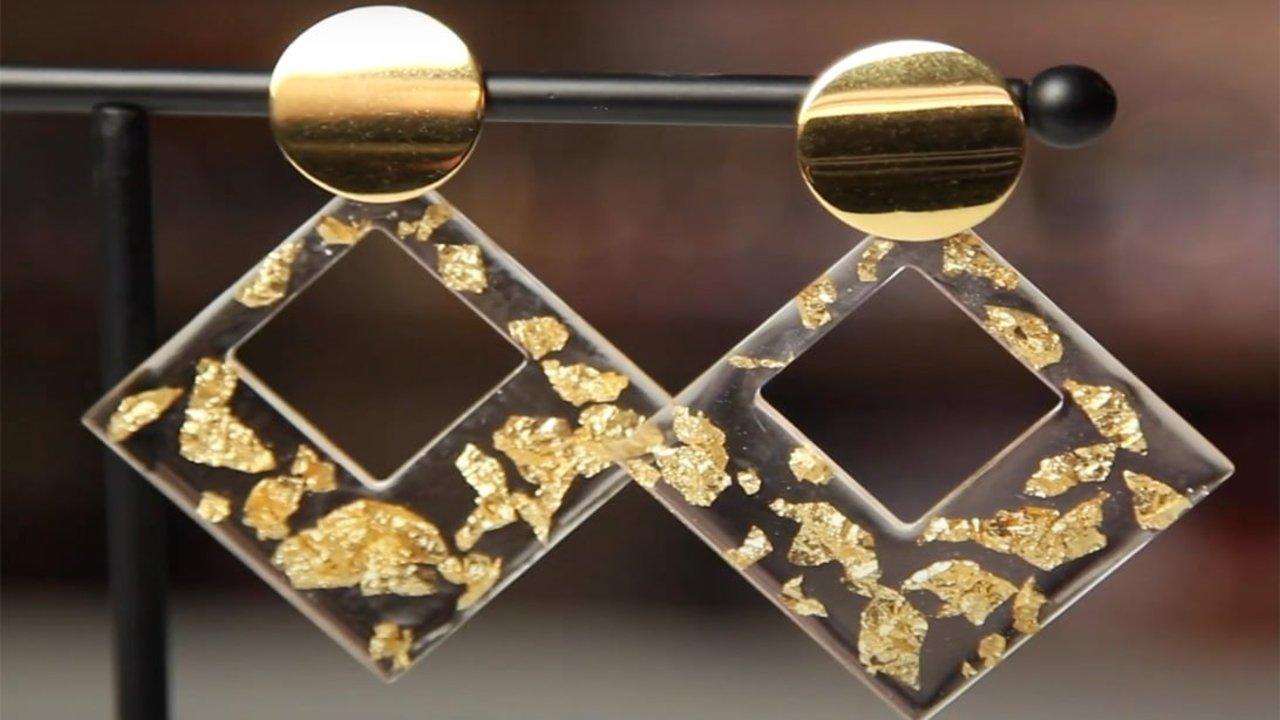
Resin earrings with gold foil suspended inside them look like a shop window and the mold is the part people skip. Cut the earring shape out of a plastic indent sheet and sand the edges with a refiner, build a small plastic box around it with hot glue, and pour blue wax in, rocking the box so the wax reaches every edge. Once it cures you lift the box away, cut around the plastic cutouts with a sharp blade and remove them, and the cavity left behind is the mold. Pour resin halfway, decorate with gold foil, pour the second layer, then sand and polish the edges.
Get the full tutorial at Sueeye.
31. How To Make Earrings With CDs
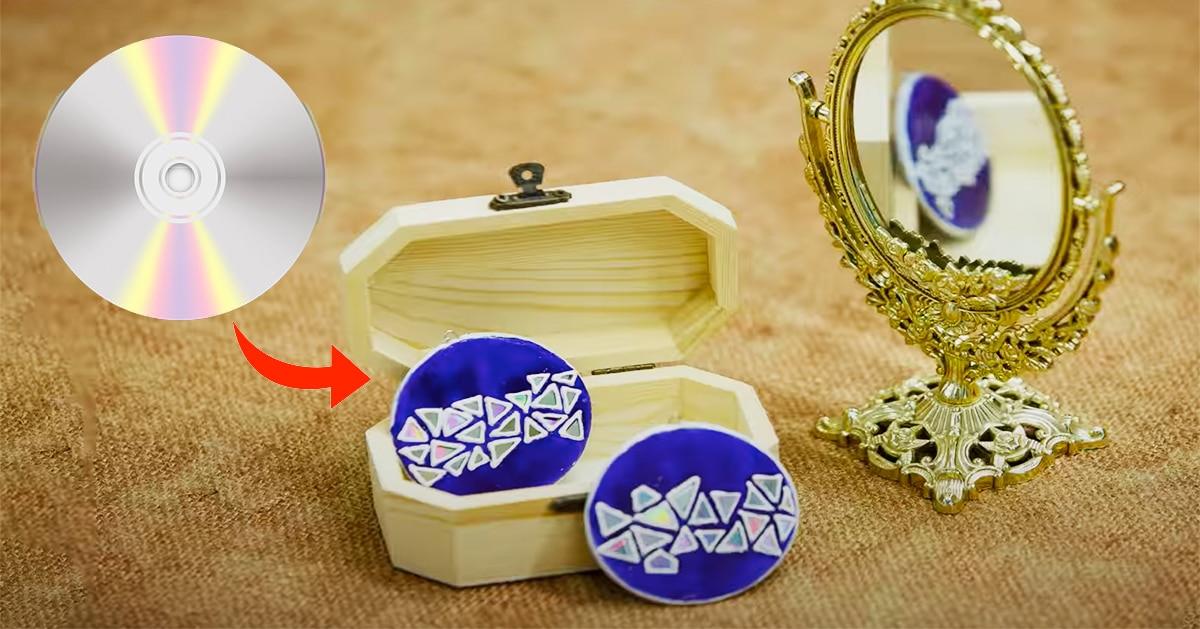
An old CD snapped into little triangles becomes a mosaic, and it costs nothing at all. Mix molding clay into a dough, split it into two equal balls, dust an OHP sheet with talcum powder and roll the balls flat into discs so they do not stick. Attach the earring hooks to the discs while the clay still takes them, then cut the CD into small triangular pieces with scissors and press them into the disc with fabric glue. Let it dry, then paint the clay around the mosaic in whatever color you like. A white outliner defines the edges of each shard.
Get the full tutorial at Sueeye.