Sewing
34 Easy Sewing Projects for Beginners
Sewing projects for beginners: easy zip pouches, lined tote bags, coasters, hot pads and fast handmade gifts, most of them straight stitches only.
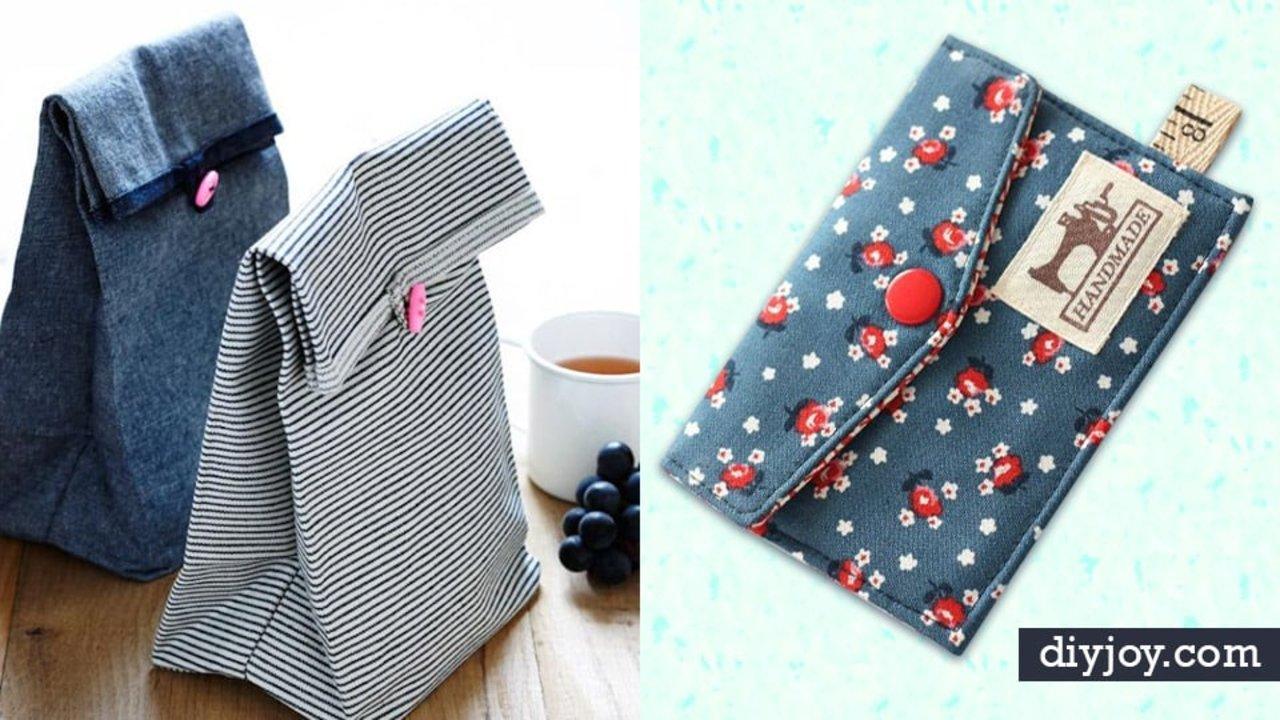
Nobody’s first sewing project should be a blazer. These sewing projects for beginners are the other end of that scale: a gift card holder cut from one rectangle, napkins that take five minutes each, a lined tote that goes together in fifteen. Most of them are straight stitches on straight edges, a couple of them you can do by hand on the couch, and the hardest thing on the whole list is a zipper that somebody has already talked you through. You will also find pouches, coasters, hot pads, a doorstop and a rice-filled heating pad, so there is something here whether you are testing a hand-me-down machine or quietly making Christmas early. Every tutorial links back to the maker who worked it out.
1. Make A Fabric Doorstop
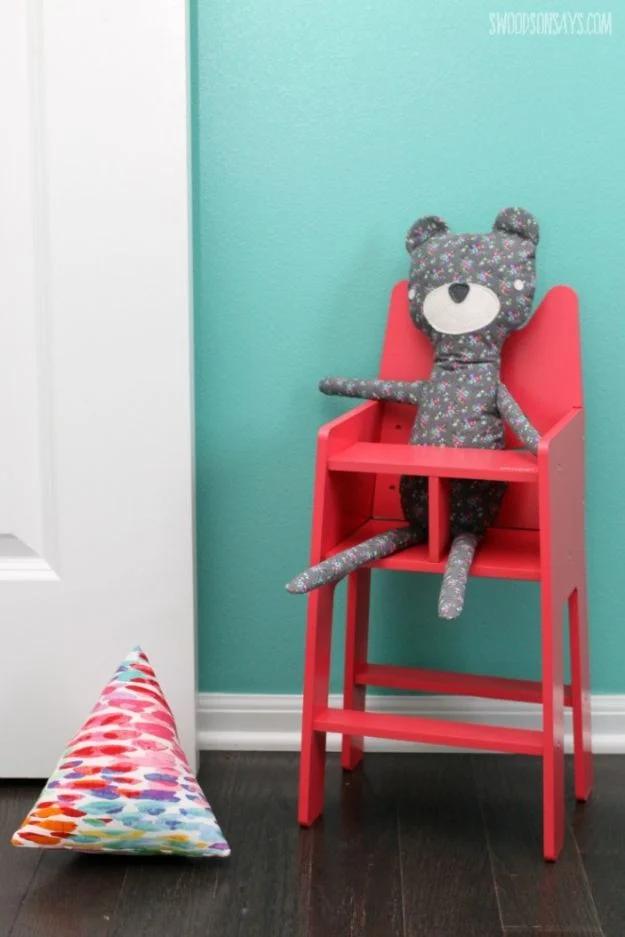
A quarter yard of canvas and two 8.5 inch squares is the entire cutting list. You sew three sides, press the seams open, then match the middle seams so the flat square turns into a wedge, and leave a two inch gap for turning. The filling is the part worth getting right: poly pellets for weight, poly-fill for shape, and it stays machine washable that way. Poke the corners out with a chopstick. If you are using quilting cotton rather than canvas, add interfacing or the edges go soft and the whole thing slumps.
Get the full tutorial at Swoodson Says.
2. Library Tote Bag
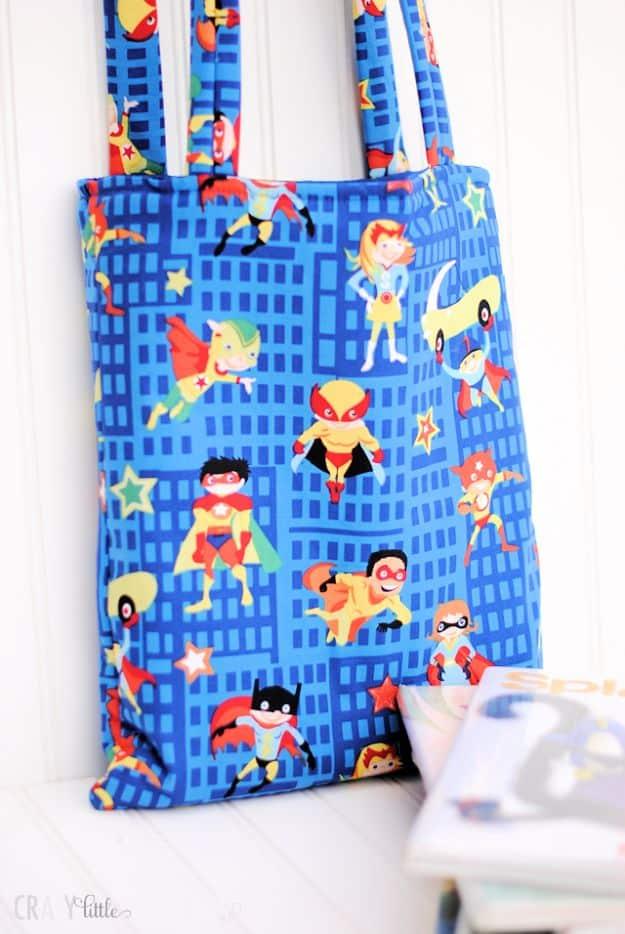
Everybody needs a tote and nobody needs to pay for one. Two thirds of a yard of each fabric covers the outside and the lining, cut as four rectangles roughly 13 by 15 inches, with the straps at 4 by 27. Fusible fleece is listed as optional and it is the difference between a bag that flops and one that stands up on its own, so iron it on before you sew a seam. About an hour start to finish. Pick a loud novelty print and the slightly wobbly topstitching of a first bag disappears into it entirely.
Get the full tutorial at Crazy Little Projects.
3. Simple Mesh Bag
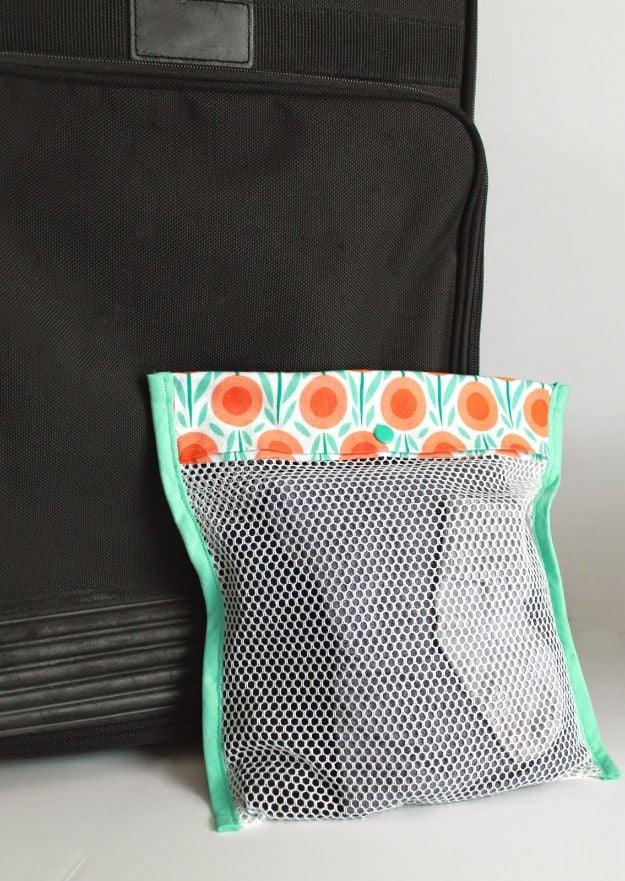
Utility mesh, a strip of quilting cotton at each end, and half inch double fold bias tape down the sides. The finished bag is about 10.5 by 11 inches, which is the right size for a suitcase packing cube or for keeping delicates together in the wash. The one technical note that matters: drop your stitch length to two or shorter, even when topstitching, so more stitches actually catch the mesh instead of skating over the holes. Half inch seam allowances throughout for the same reason. The closure can be a snap, a button or velcro.
Get the full tutorial at The Inspired Wren.
4. Simple Zip Pouch
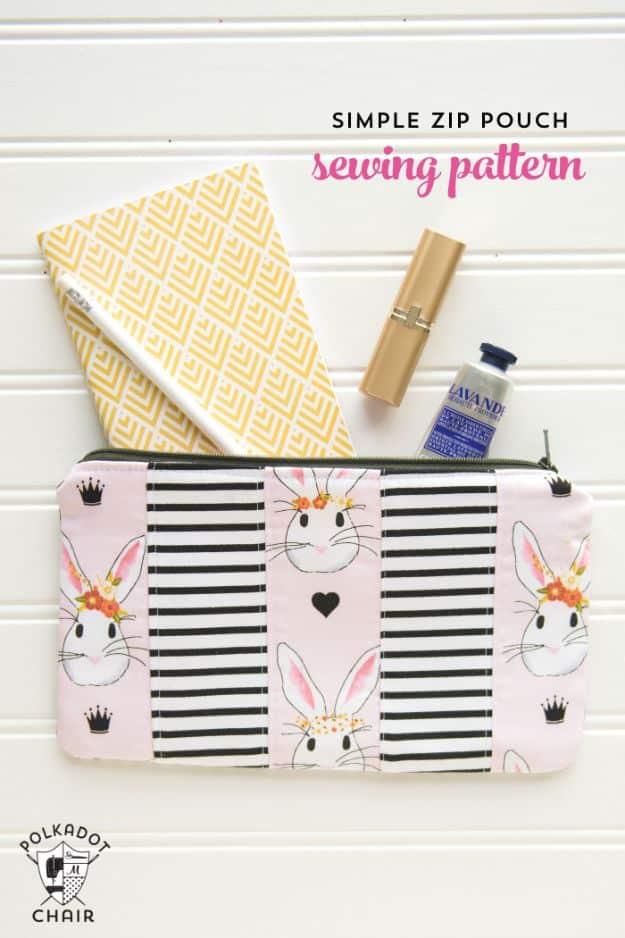
Six by ten inches finished, a nine inch zipper, and one to three fat quarters depending on how fancy you want the front. Fusible fleece gives it body so it stands up rather than flopping, and lightweight interfacing keeps the lining crisp. The step people skip and then regret: unzip the zipper before you sew the final perimeter, or you will stitch it shut and have no way to turn the pouch out. Topstitching along both sides of the zipper tape is what stops the lining getting chewed every time you open it.
Get the full tutorial at Polka Dot Chair.
5. DIY Luggage Tags
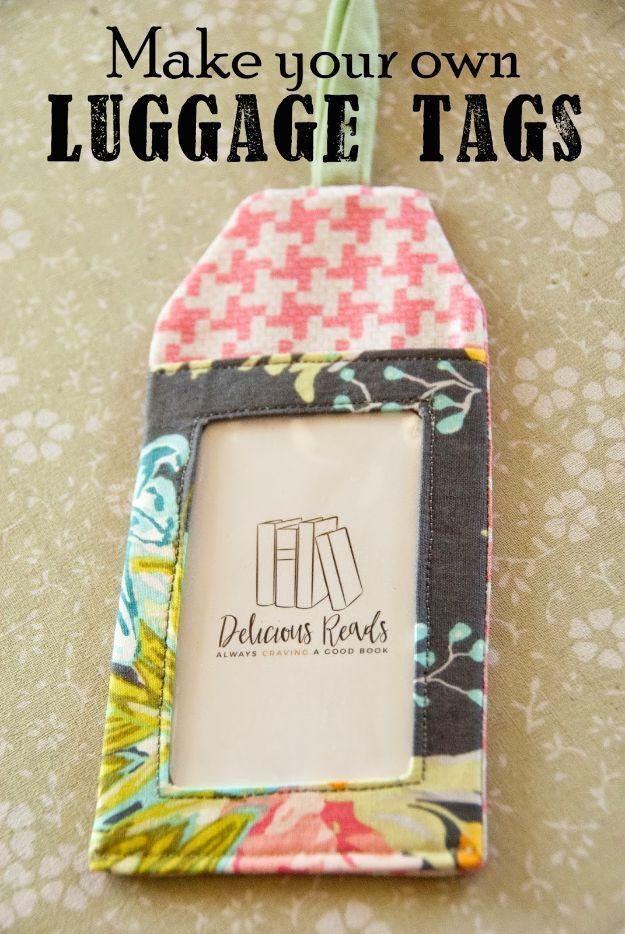
These use a clear vinyl window over a card, with interfacing behind the fabric so the tag holds its shape on a suitcase handle. Iron the vinyl before you sew it, always under a cloth, because it shrinks slightly with heat and if you press it after it is stitched to the fabric everything puckers. Lay tissue or scrap paper over the vinyl while sewing so it does not stick to the machine bed. The loop is a strip 2 by 12 inches, or use ribbon. Made in a batch they also work as bookmarks and pantry labels.
Get the full tutorial at Delicious Reads.
6. Fabric Scrap Teapot Coaster
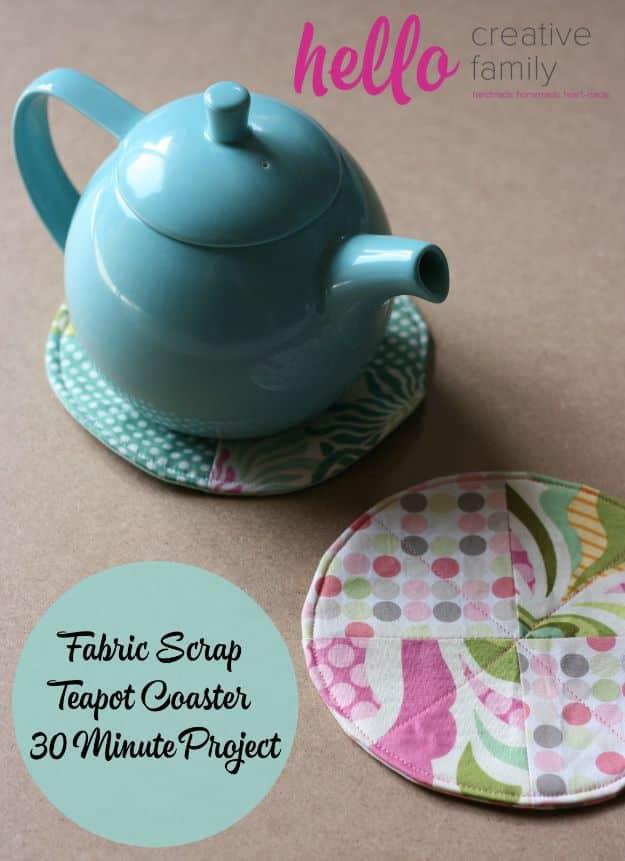
Four four inch squares get sewn into a little patchwork block, cut down to a seven inch circle, quilted diagonally onto a felt round, then sandwiched with a backing circle and turned through a one inch gap. Topstitching the edge closes the gap and finishes it in the same pass. Thirty minutes start to finish. If you are working with pale fabrics, use pale felt too, because a dark felt centre shadows straight through. Scale it down to three inch squares with a five inch circle for mug-sized coasters.
Get the full tutorial at Hello Creative Family.
7. Easy Rag Quilts
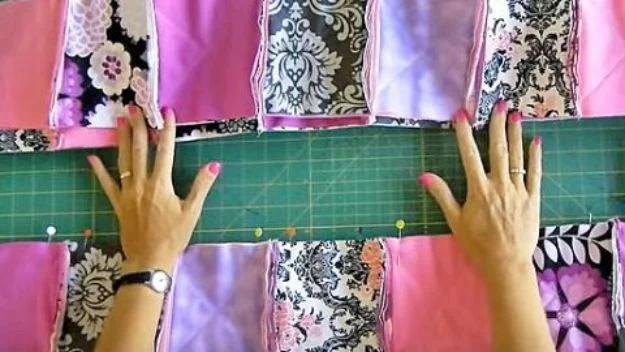
Rag quilts are the one quilt that forgives everything. There is no binding, no precise piecing and no quarter inch seam anxiety, because the seams are sewn on the outside on purpose and then snipped so they fray into that soft fringed grid after the first wash. The top is built from squares of scrap fabric, which means the pile in the cupboard becomes the design. It is a lot of straight stitching rather than anything difficult, so it suits an evening in front of the television more than a spare half hour.
Get the full tutorial at Sueeye.
8. Simple Hand Warmers
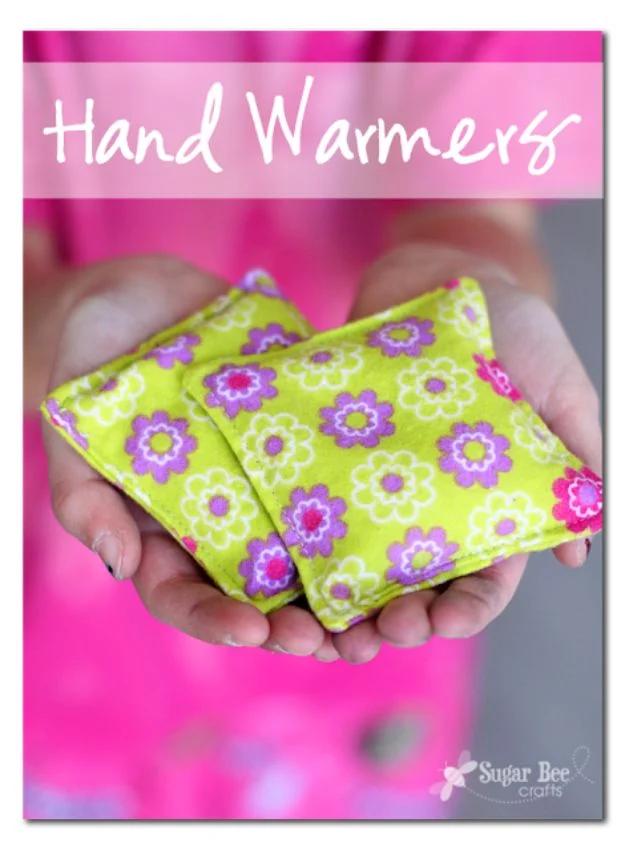
Two small squares, a rice filling, and about a minute in the microwave is the whole idea. Terrycloth cut from an old towel is the nicest outer because it holds heat and feels good in a cold hand, though flannel and quilting cotton both work. Wheat or feed corn can stand in for the rice. Keep them dry and sealed when they are not in use, since anything grain-filled and left loose in a garage is an invitation to mice. Pocket sized, so they suit school runs, bleachers and anyone who refuses to wear gloves.
Get the full tutorial at Sugar Bee Crafts.
9. 10-Minute Laptop Sleeve
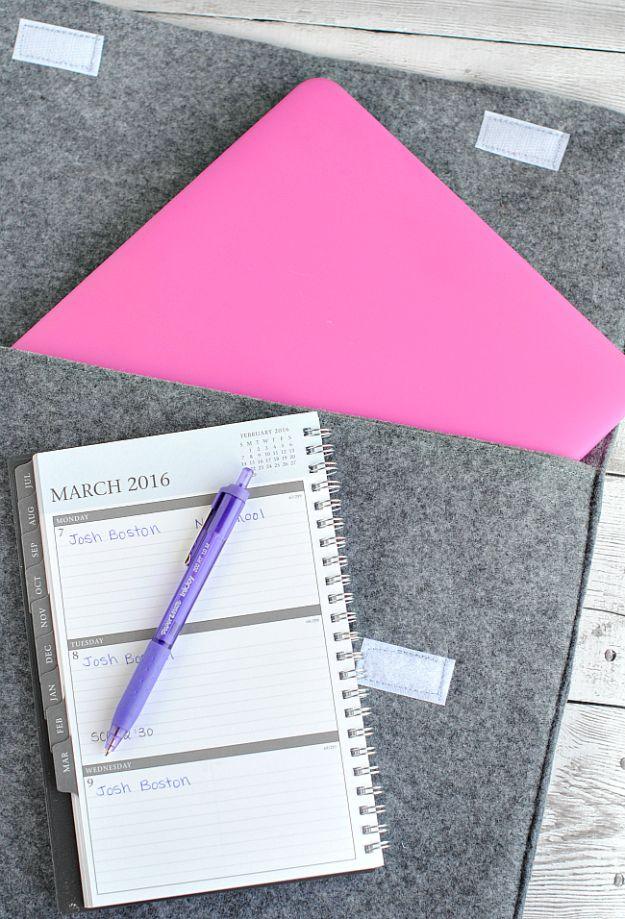
Shop sleeves come in three sizes and your laptop is never one of them. This one is cut to the actual machine. Lay the computer on half a yard of felt and cut about an inch and a half wider, which leaves three quarters of an inch spare each side. Two pieces that size make the front, two more the same width but six or seven inches longer make the back and the flap, and all four are sewn round the outside at the smallest seam allowance you can manage. Velcro closes it. Ten minutes, and about five dollars.
Get the full tutorial at Crazy Little Projects.
10. 5-Minute Gift Card Holder
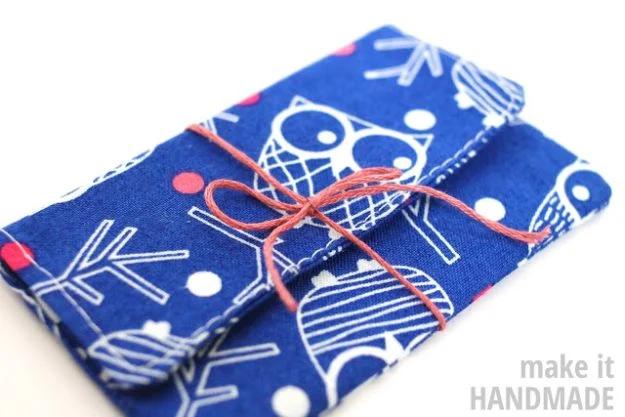
One rectangle, twelve by four and a half inches, and that is the entire cutting list. You fold it in half wrong sides together, then use the gift card itself as a measuring guide to crease the pocket, flip and repeat on the other side, sew around the outside leaving a small gap, turn it and topstitch the gap shut. The single-rectangle design exists specifically to cut down on turning and fiddling. Add a ribbon bow across the flap if you want the card to stay hidden until it is opened.
Get the full tutorial at So Sew Easy.
11. Business Card Wallet
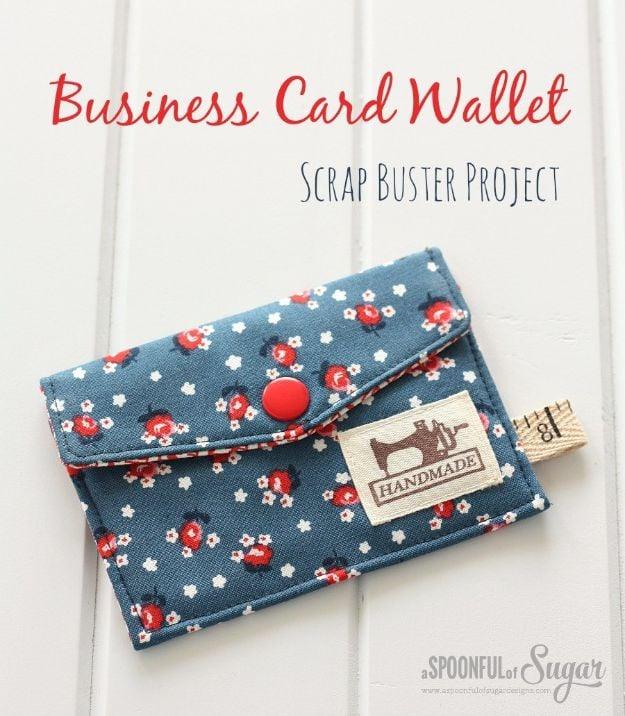
Three 8 by 5 inch pieces, an outer, a lining and a layer of flannel, finish at about 4.5 by 3.25 inches. The flannel is the interesting choice here: it interfaces a small item enough to give it structure without the cardboard stiffness that fusible gives you. Two small squares of interfacing go at the pointed and flat ends where the snap will sit. Use a denim or heavy duty needle, because by the time you stitch the perimeter you are going through a lot of layers at once. Velcro or a button works if snaps intimidate you.
Get the full tutorial at A Spoonful of Sugar.
12. 15-Minute Lined Tote Bag
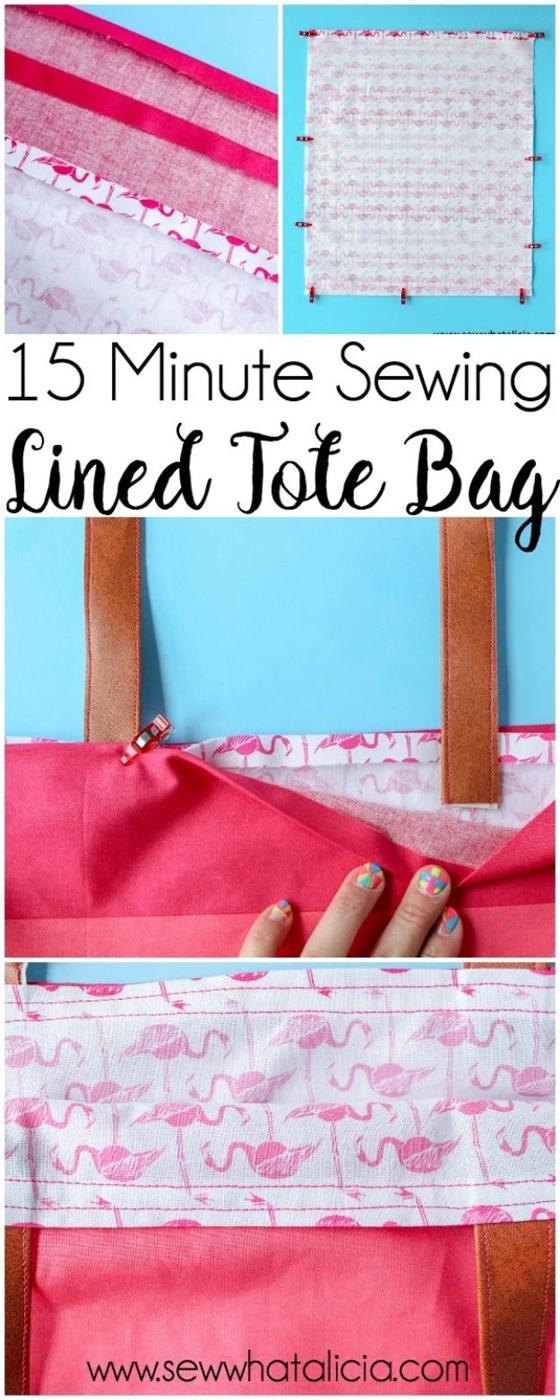
Two outer pieces and two lining pieces at 15 by 18 inches, or whatever size you want, and a pair of ready-made handles. Press a quarter inch fold along the top edge of all four pieces before you assemble anything, because doing that up front is what turns this into a fifteen minute bag instead of a forty minute one. Sew the outer, sew the lining, drop one inside the other, clip the handles between the layers and stitch around the top, then run a second line half an inch below it. It is reversible.
Get the full tutorial at Sew What, Alicia.
13. Simple Fabric Scrap Bookmark
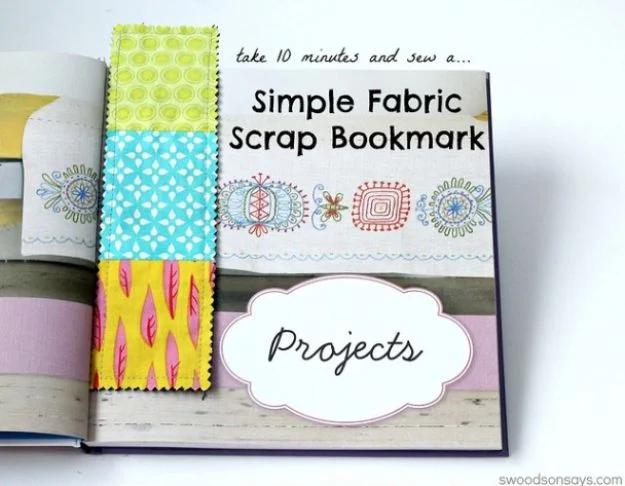
Three little scraps for the front, two at 3 by 3.5 inches and one at 3 by 4, plus a 3 by 9 backing. Join the front pieces with a half inch seam, press open, then lay the strip wrong sides together against the backing and stitch along both horizontal seams, which quilts it to the back in the same pass. Edge stitch a quarter inch all the way round and trim the outside with pinking shears so it never needs hemming. Denim as the backing gives it enough weight to stay put in a book.
Get the full tutorial at Swoodson Says.
14. Oilcloth Pencil Pouch
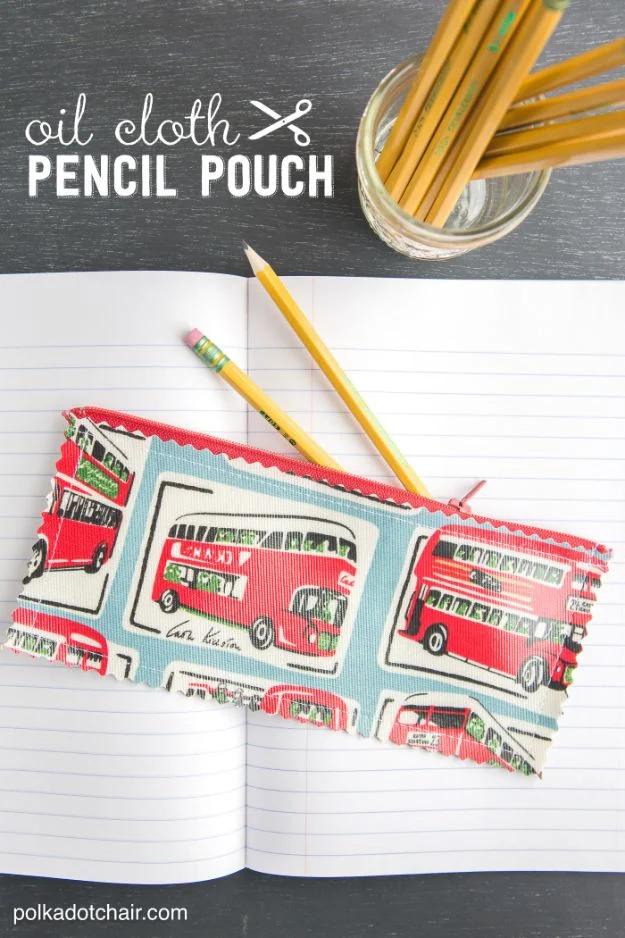
Oilcloth is heavyweight fabric with a coating that makes it behave like plastic, which is exactly what you want in a backpack: spills wipe off instead of soaking in. Two pieces at 9 by 4 inches, two matching pieces of laminated cotton for the lining, and a nine inch polyester zipper. Use a teflon foot, because coated fabric sticks and drags under a normal one. Never touch the right side with a hot iron, it melts and it will ruin the iron as well as the pouch. Under an hour, and the size is entirely up to you.
Get the full tutorial at Polka Dot Chair.
15. Sew A Drawstring Bag
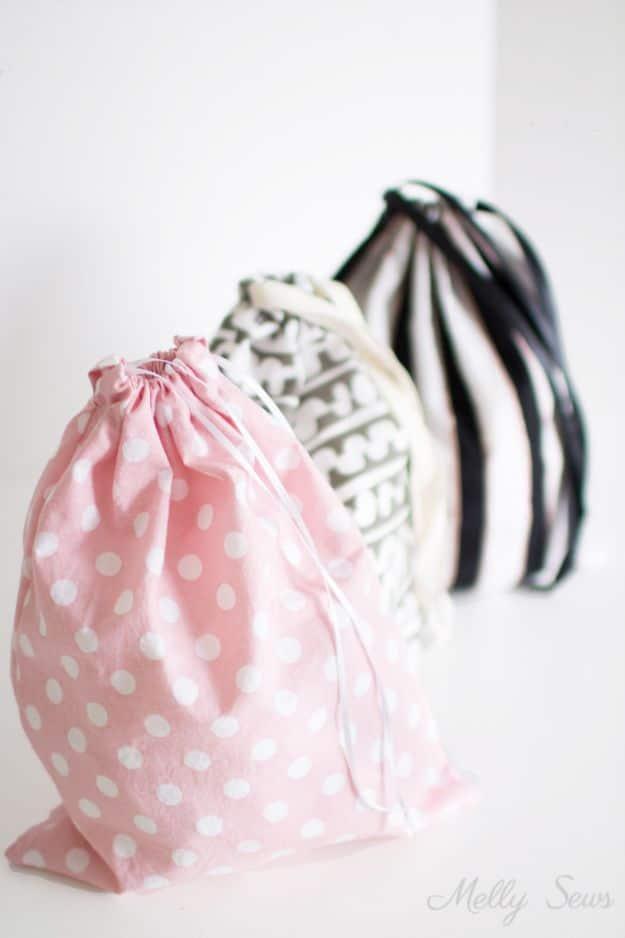
A third of a yard cut into two 10 by 13 inch rectangles, and about a yard and a third of ribbon. Finish the top edges first with a quarter inch fold so they cannot fray inside the casing later, then join the sides with a five eighths inch seam, stopping two inches short of the top so the casing openings stay clear. Fold the top over seven eighths of an inch, stitch, and thread two 18 inch ribbons through with a safety pin so they pull from both sides. Finished size is roughly 8.75 by 11.25 inches.
Get the full tutorial at Melly Sews.
16. 5-Minute Fabric Bags
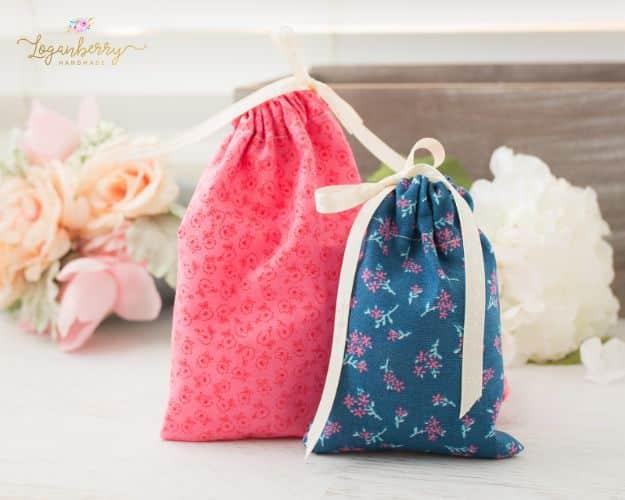
Seven by eight inches makes a gift card sized bag, eight by ten takes something bigger. Press and sew a one inch fold at the top with a half inch seam to form the casing, fold the fabric right sides together and sew the side and bottom with a quarter inch seam, turn it out, then thread three eighths inch satin ribbon through with a safety pin. The author timed herself at four minutes and thirty nine seconds, which is a faintly ridiculous but very persuasive argument for never buying a paper gift bag again.
Get the full tutorial at Loganberry Handmade.
17. DIY Toothbrush Travel Wrap
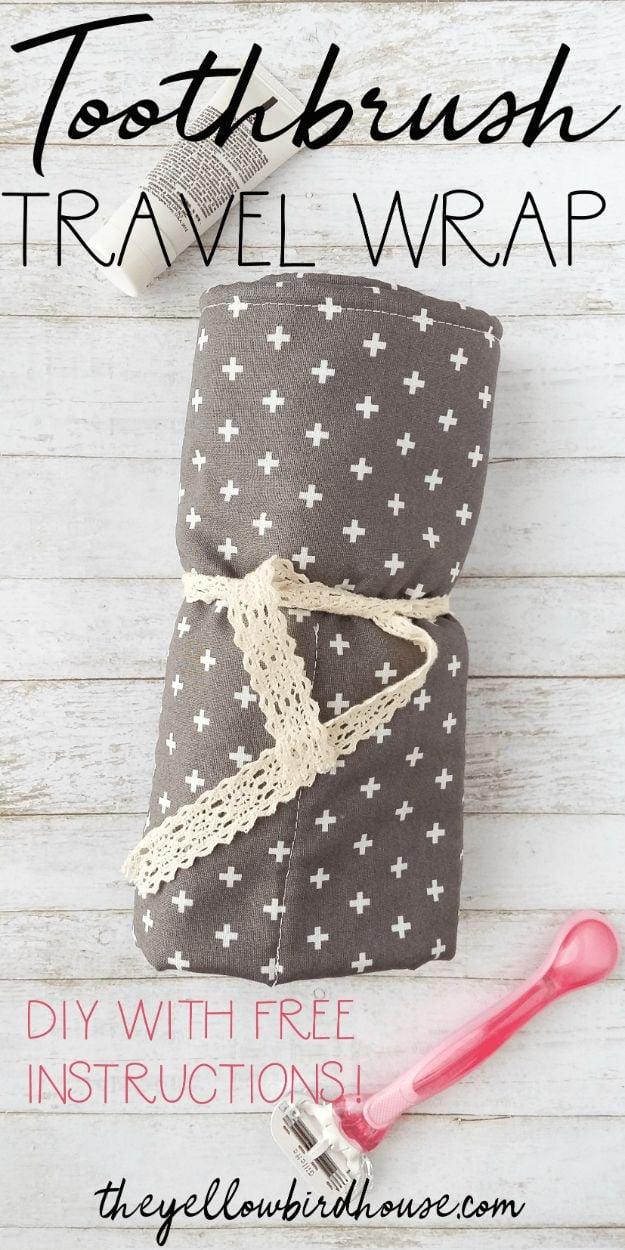
A damp toothbrush loose in a washbag is a small, entirely avoidable unpleasantness. One fat quarter makes the outside and an outgrown baby towel makes the terry lining that takes up the wet. The short sides are tapered so there is spare fabric to slide a brush into, then the two layers are sewn right sides together at about three eighths of an inch, turned through a three inch gap and topstitched. Fold the bottom edge up, stitch down it at intervals to make the slots, fold the top over as a flap, and tie the whole thing shut with a ribbon.
Get the full tutorial at The Yellow Birdhouse.
18. 15-Minute Reversible Placemats
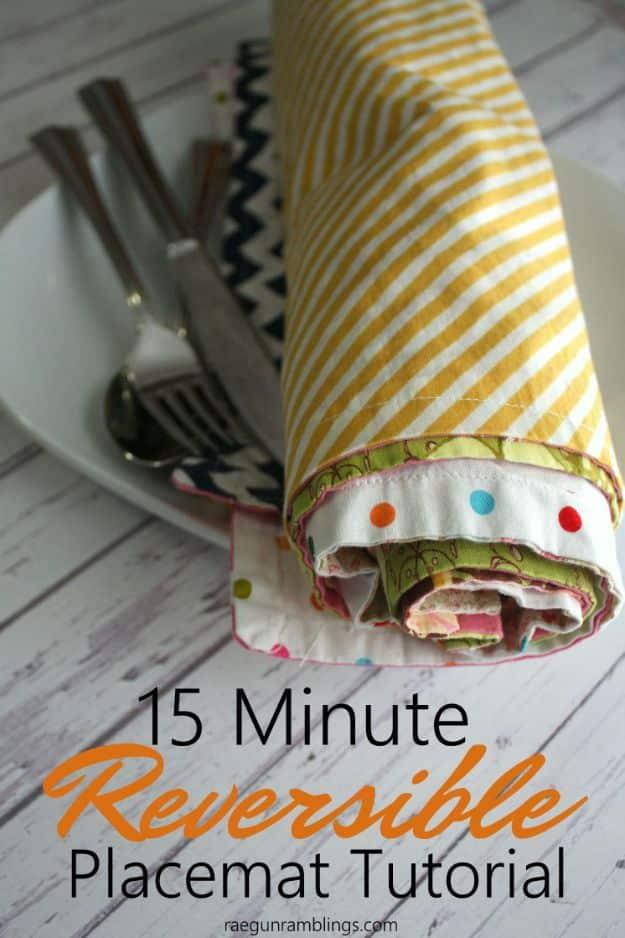
Two 18 by 15 inch rectangles, right sides together, sewn all the way round at a half inch seam with a two inch gap left open. Trim the corners close to the stitching before you turn, because that is the difference between a sharp point and a lumpy one. Press hard, then topstitch the whole edge, which closes the gap and finishes it at the same time. The real tip is batching: cut all eight pieces first, then do each step across the whole set, and six placemats take barely longer than one.
Get the full tutorial at Rae Gun Ramblings.
19. 30 Minute Baby Blanket
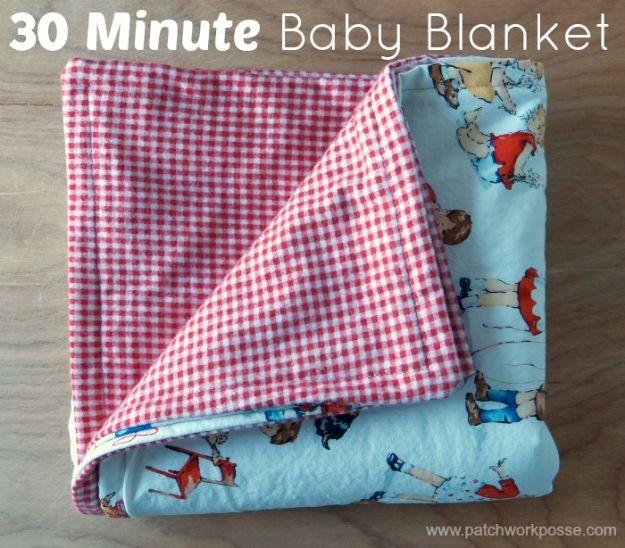
Two pieces of fabric cut exactly the same size, right sides together, sewn all the way round with a three inch gap, corners trimmed, turned and pressed. Ladder stitch the gap shut, then topstitch a quarter to half inch from the edge all the way round and it is finished. Flannel on both sides, or flannel backed with cotton, is the usual combination. If you scale it up for an older child, add a few ties or a stitched X through the middle so the two layers do not drift apart in the wash.
Get the full tutorial at Patchwork Posse.
20. DIY 5-Minute Cloth Napkins
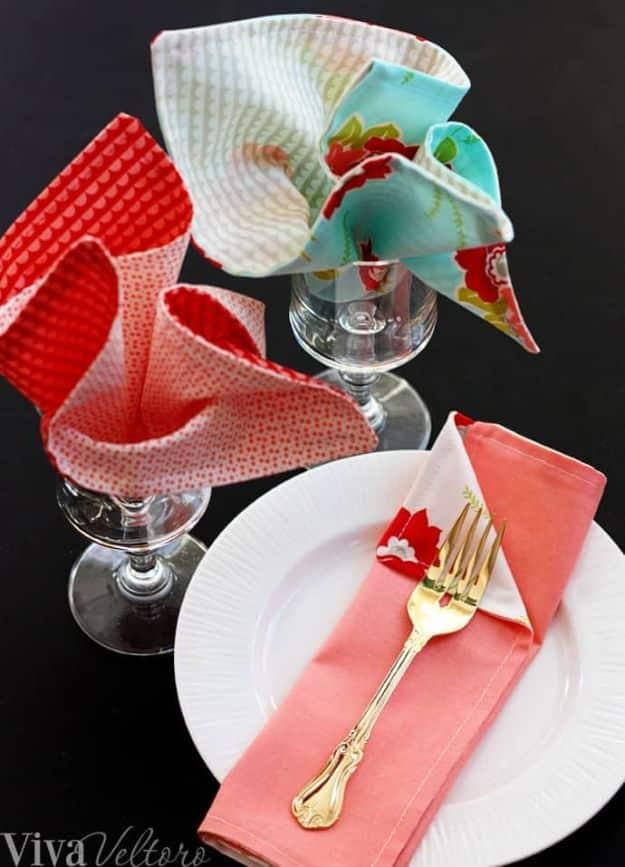
Start with a layer cake, the pre-cut bundle of ten inch coordinating squares, and the cutting and the color matching are both already done for you. Pair two squares right sides together, sew round at three eighths of an inch leaving two or three inches open, clip the corners, turn it out and push the points with a chopstick. Press flat, then stitch round at a quarter inch to close the gap and finish the edge in one pass. Prewash the fabric first. The author got ten made in under an hour.
Get the full tutorial at Viva Veltoro.
21. Easy DIY Two Story Curtain Panels

Two story windows are where store-bought curtains give up, because nothing off the shelf is long enough and quoted panels run into four figures. The math is simple: finished length plus four inches for the bottom hem plus three inches for the rod pocket. Home decor fabric at 54 inches wide cuts into two panels along its length, so twelve yards covered a full set. Then it is five straight seams, half inch side hems, a two inch bottom and a three inch rod pocket. Order all of it from one bolt so the color matches.
Get the full tutorial at Our Homemade Easy.
22. DIY Sensory Toy
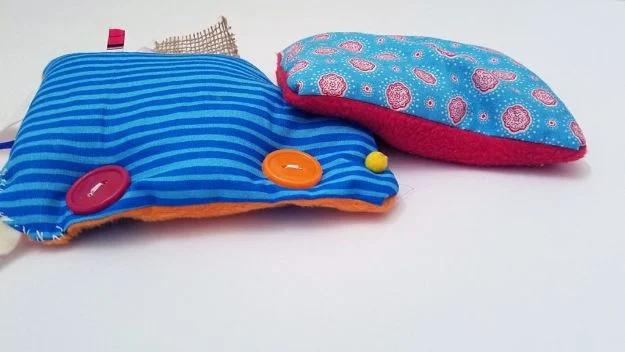
Two fabric scraps at roughly 6 by 12 inches, one of them fleece, with lengths of different ribbon sandwiched into the seam so they stick out as loops for small fingers to pull and rub. Buttons and pom poms go on for texture and contrast. Fill it through a funnel, and use polypropylene pellets rather than rice, because pellets go through the washing machine and rice does not. Hand stitch the opening properly closed, twice if you are unsure, since the whole point is that a baby will be gnawing on it.
Get the full tutorial at Moms and Crafters.
23. Easy Bowl Cover
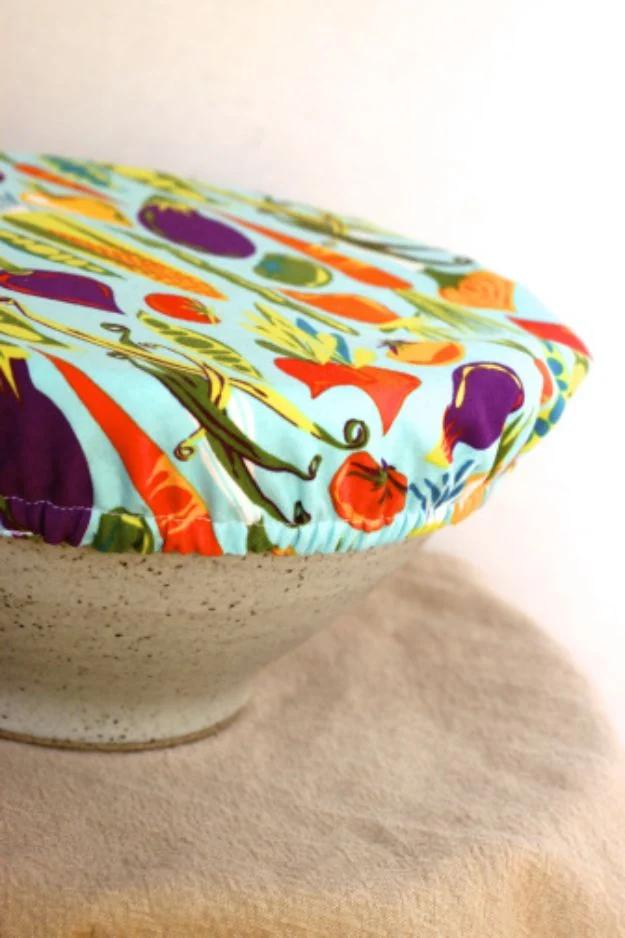
The pattern is your own bowl: turn it upside down on a sheet of paper, trace round it and mark three inches out all the way round. Two circles of prewashed cotton, right sides together, sewn at a third of an inch with a one and a half inch gap, pressed, turned and topstitched a third of an inch from the edge to form a casing. Thread elastic through, overlap the ends and sew them. It comes out looking like a shower cap and replaces a roll of cling film. Washable, not waterproof.
Get the full tutorial at A Kitschy Kitchen.
24. Large Hot Pad
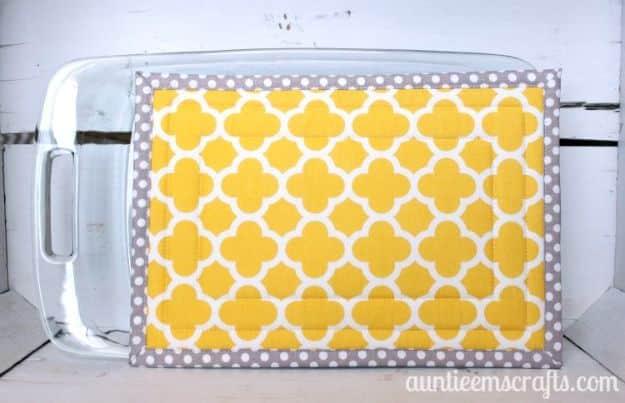
Cut batting, Insul-Bright and the top fabric at 13 by 9 inches, and the bottom fabric at 16 by 12, because the extra all round becomes the binding. If you use one layer of each, put the Insul-Bright on top. Basting spray holds the layers instead of pinning. Mark your quilting lines with a water soluble pen, never chalk, which is miserable to remove, and sew on them promptly before they fade. Clip a 1.5 by 0.75 inch rectangle out of each corner to cut bulk in the binding. A standard size hot pad is 8.5 inches square.
Get the full tutorial at Auntie Em's Crafts.
25. Easy Peasy Hooded Towels
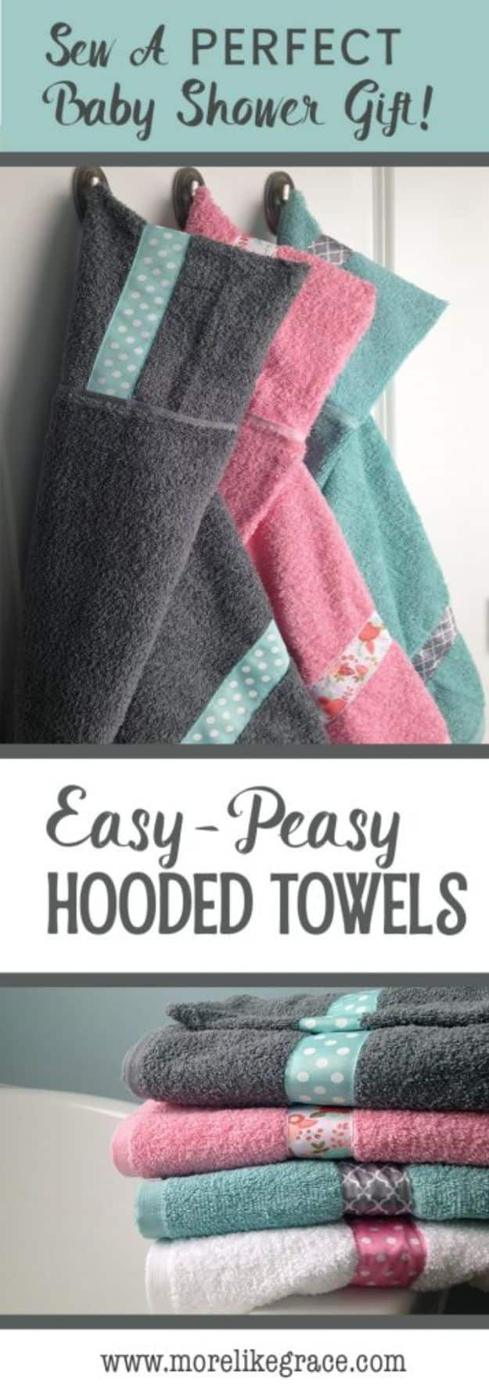
One bath towel and one hand towel make one hooded towel, which is a much better deal than the baby shop version. Cut 9.5 inches off the long edge of the hand towel for the hood, fold it and stitch the raw edges together, then set it into the fold of the bath towel and sew it on. Ribbon covers the cut edge and hides everything: grosgrain sits flat and resists puckering. Reinforce the hood seam at a half inch after the first quarter inch pass. Wash both towels first so any shedding happens before you cut.
Get the full tutorial at More Like Grace.
26. DIY Microwavable Heating Pad
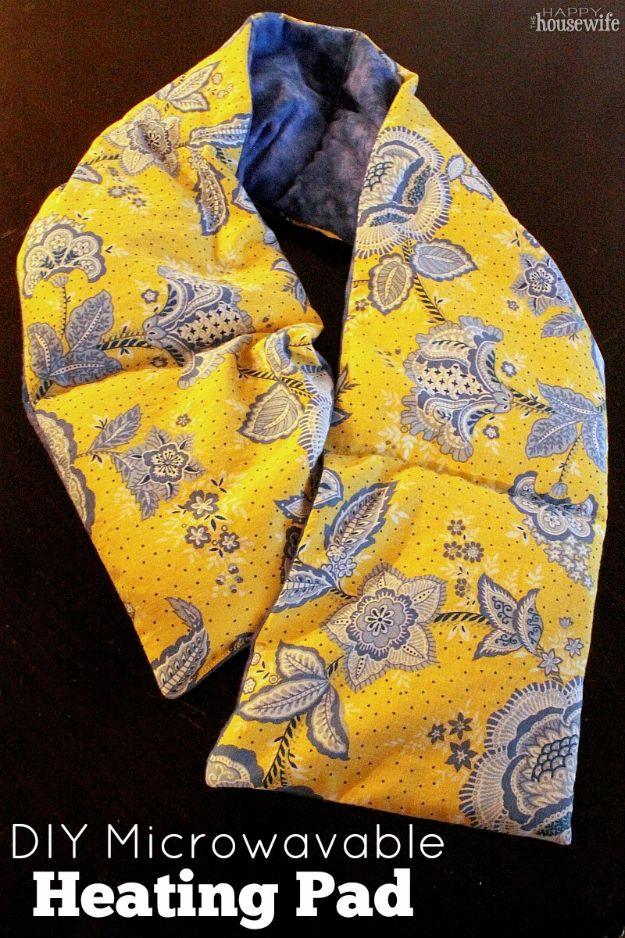
Two rectangles at 7.5 by 40.5 inches, one cotton and one flannel, sewn on three sides with a four inch opening. The clever part is the channels: mark five sections about six and two thirds inches apart, then fill and sew each one closed in turn, which keeps the rice spread evenly across the whole length instead of pooling at one end. Nine cups of uncooked rice total, a drop of essential oil per section. Microwave sixty seconds, then add fifteen at a time. Never dampen it first, that is how you get a steam burn.
Get the full tutorial at The Happy Housewife.
27. Makeup Brush Holder
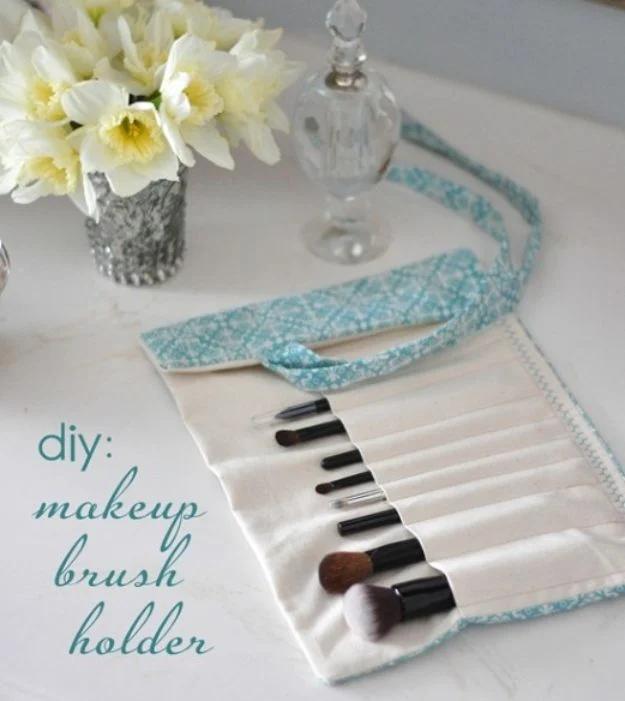
The inner pouch is a folded liner with a line of individual brush pockets stitched into it, each one sized to the brush that goes in it. Space them about an inch apart: an inch and a half leaves gaps and the brushes lean. Straps get turned right side out by walking a safety pin through, then pressed flat. Layer the inner pouch and the outer fabric inside out with the straps facing in, sew round leaving three or four inches, flip and close it with a decorative stitch. About an hour, and the brushes stay upright and dust free.
Get the full tutorial at Centsational Style.
28. DIY Sweater Pillow
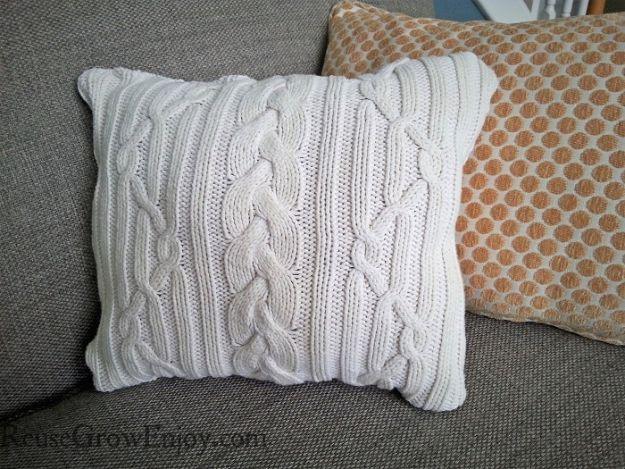
A cable knit sweater nobody wears is the best pillow cover you will ever get for free, and a thrift store one works just as well. Cut a paper pattern the size you want, add an inch on every side for the seam, and cut front and back together through both layers of the sweater at once. Sew with a zigzag stitch at a half inch, which is what stops knit fabric unravelling at the edges, and leave four inches open to turn and stuff. Cable and rib patterns give the best texture; flat jersey looks like nothing.
Get the full tutorial at Reuse Grow Enjoy.
29. Hanging Beach Chair Caddy
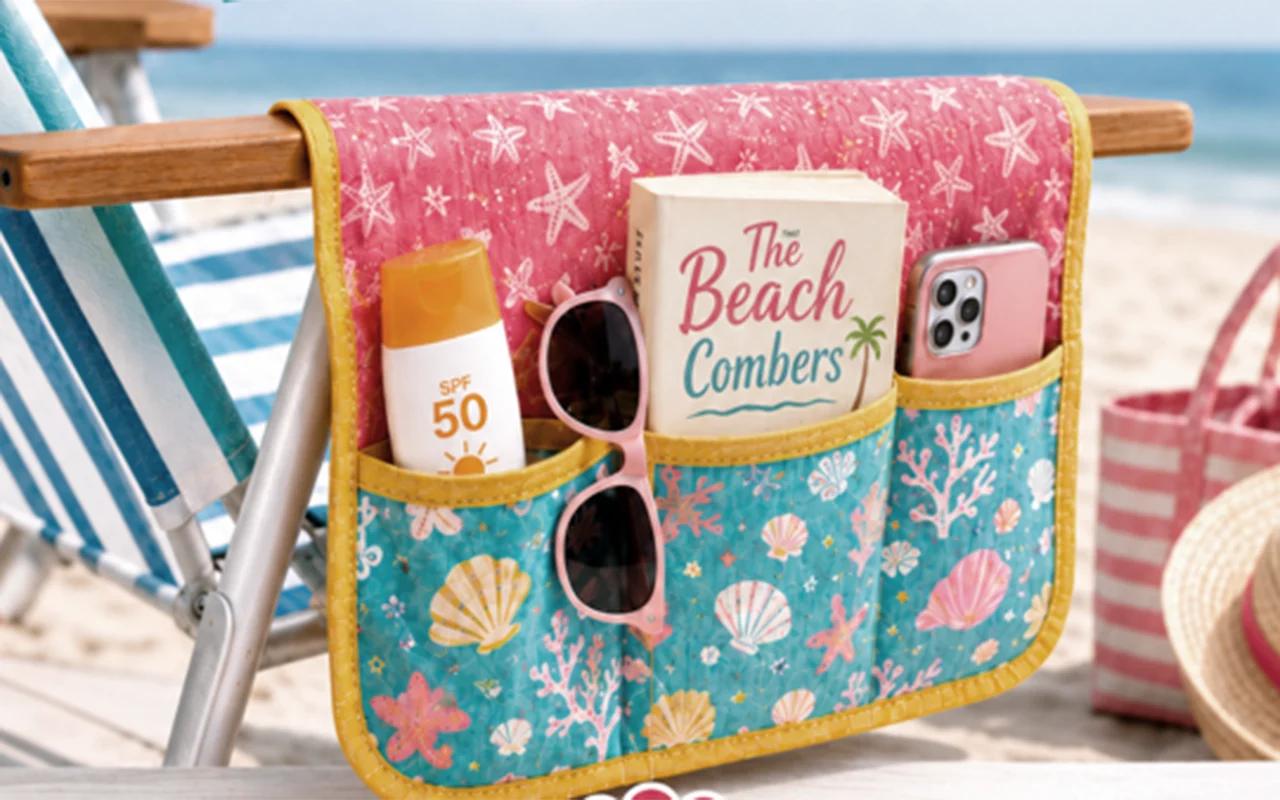
This one wraps over the arm of a folding chair and velcros shut around the rail, so it cannot slide off or blow away when you get up. Three pleated front pockets hold sunscreen, a paperback and a phone, and there is a hidden full-width zip pocket on the chair-facing side, covered by the flap, for keys and cash while you are in the water. Every piece is a rectangle, all the raw edges are finished in one pass of bias binding, and the zipper is a simple topstitched one. Finished size is about 14 by 10 inches.
Get the full tutorial at Sueeye.
30. Free Camper Zipper Pouch Pattern
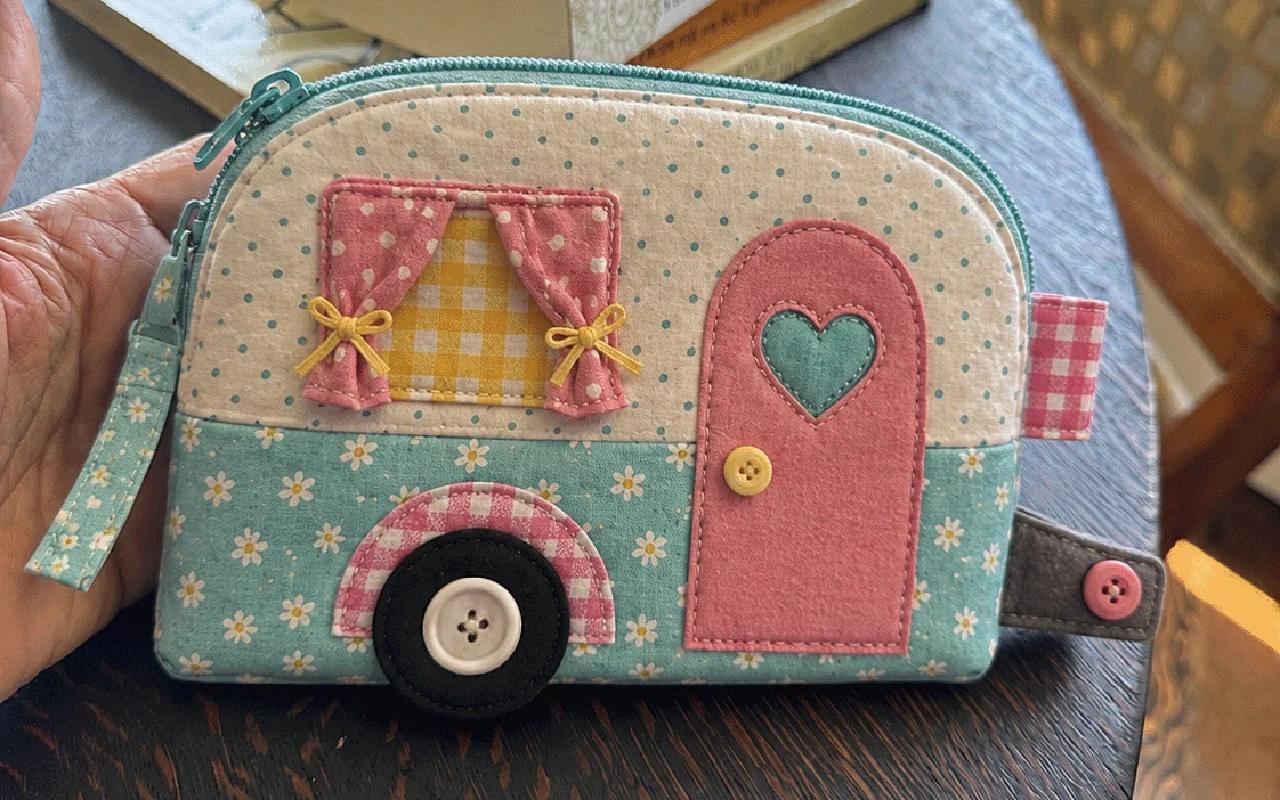
The finished pouch is about 7.25 inches wide by 6 tall with a 3.25 inch boxed bottom, which is big enough to be a genuine makeup bag rather than a token one. The body is pieced from two fabrics, a main print on top and a solid band along the bottom, then the camper details go on as fusible appliqué: an arched door with a heart window, gingham curtains tied back with ribbon, a felt wheel with a button hub and a little stitched hitch caught in the side seam. Fat quarters and a ten inch zipper.
Get the full tutorial at Sueeye.
31. Easy Fabric Hearts
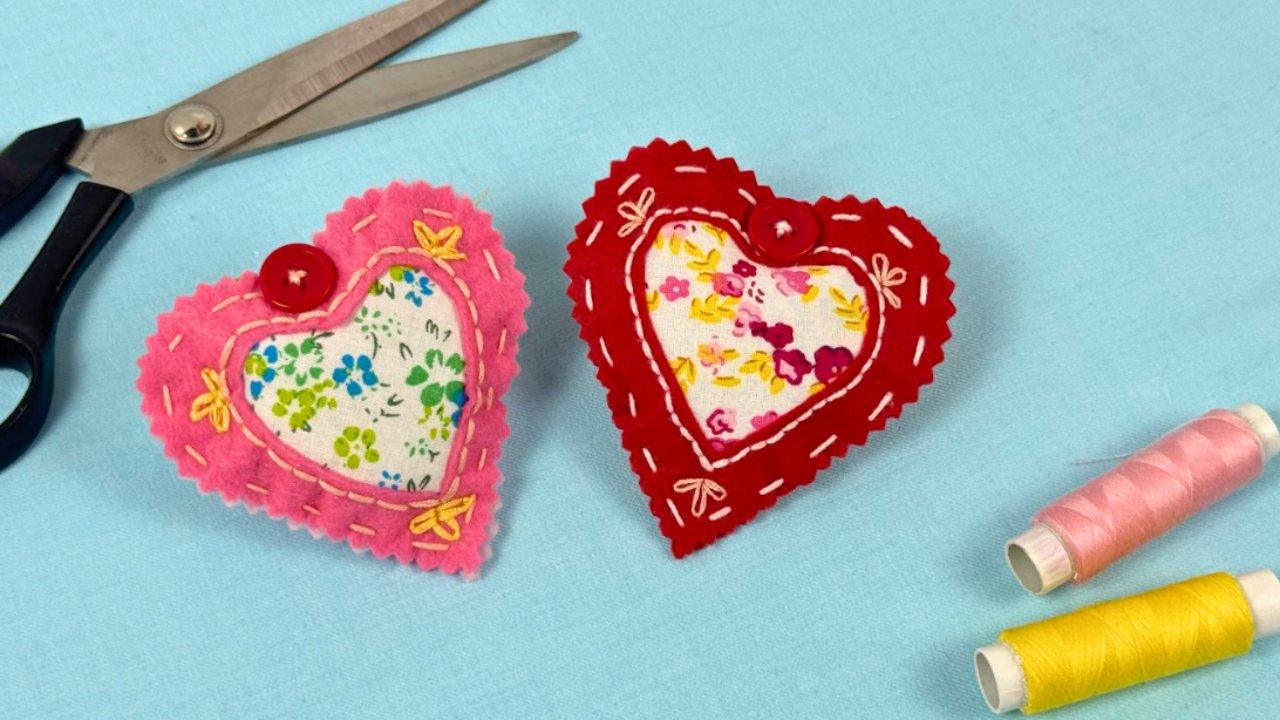
No machine needed for this one, which makes it the rare project you can finish on the sofa. Three paper templates get cut first: an outer heart at 3.5 inches, a print heart at 3 by 3 and an inner heart at 2 by 1.5. Two felt outer hearts are trimmed with pinking shears and the centre is cut out of one of them, so the printed fabric shows through the window. Backstitch around the opening, then running stitch the outer edges with a gap left for stuffing. Fill one with dried lavender if you want it scented.
Get the full tutorial at Sueeye.
32. Easy DIY Fruit Embroidered Tote Bag
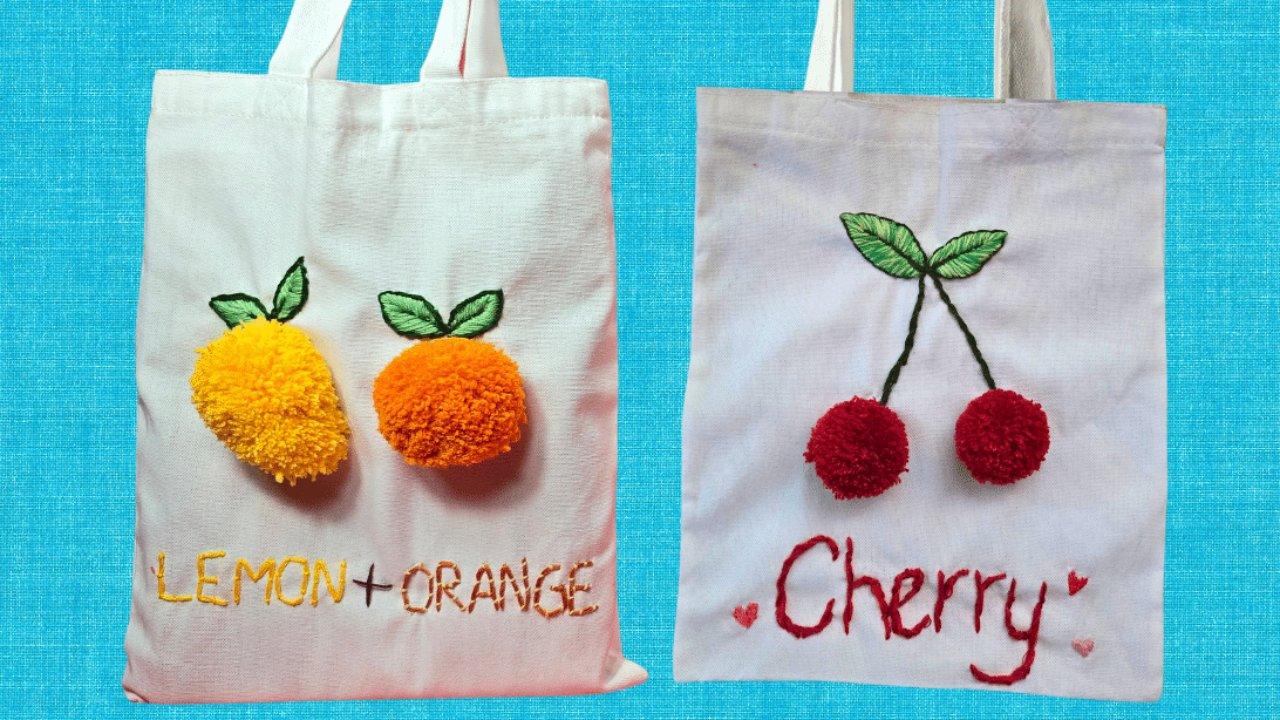
Start with a plain canvas tote, new or one you already own, and draw the design straight onto it. Outline the shapes in backstitch, work the stems in stem stitch and fill the leaves with satin stitch, then make pom poms by winding yarn around three fingers about a hundred times, tying through the middle, cutting the loops and trimming them round. Hot glue the pom poms on as cherries or citrus. Combining two thread colors gives the leaves more depth, though you will want to split the strands so the needle still passes through.
Get the full tutorial at Sueeye.
33. Quilted Fabric Scrap Zipper Pouch
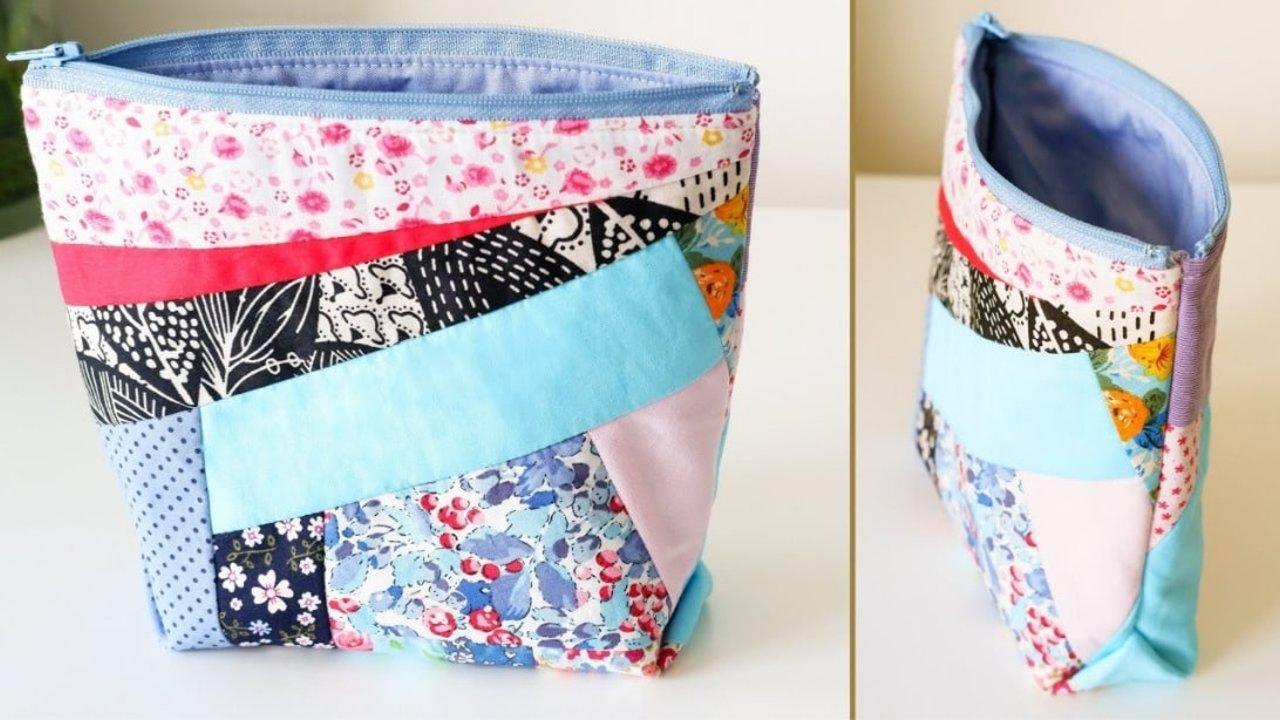
This is the pouch that eats the scrap basket. You iron every scrap flat, then sew the small pieces directly onto a sheet of batting measuring 8.7 by 14.6 inches, filling the whole surface with whatever shapes and sizes turn up and trimming the excess at the edges. Press the finished quilted panel, then build the pouch around a zipper with a matching lining. Because the patchwork is improvised rather than planned, there is no piecing accuracy to worry about, which is exactly why it suits a beginner better than a tidy quilt block would.
Get the full tutorial at Sueeye.
34. Turn Placemats into a Tote Bag
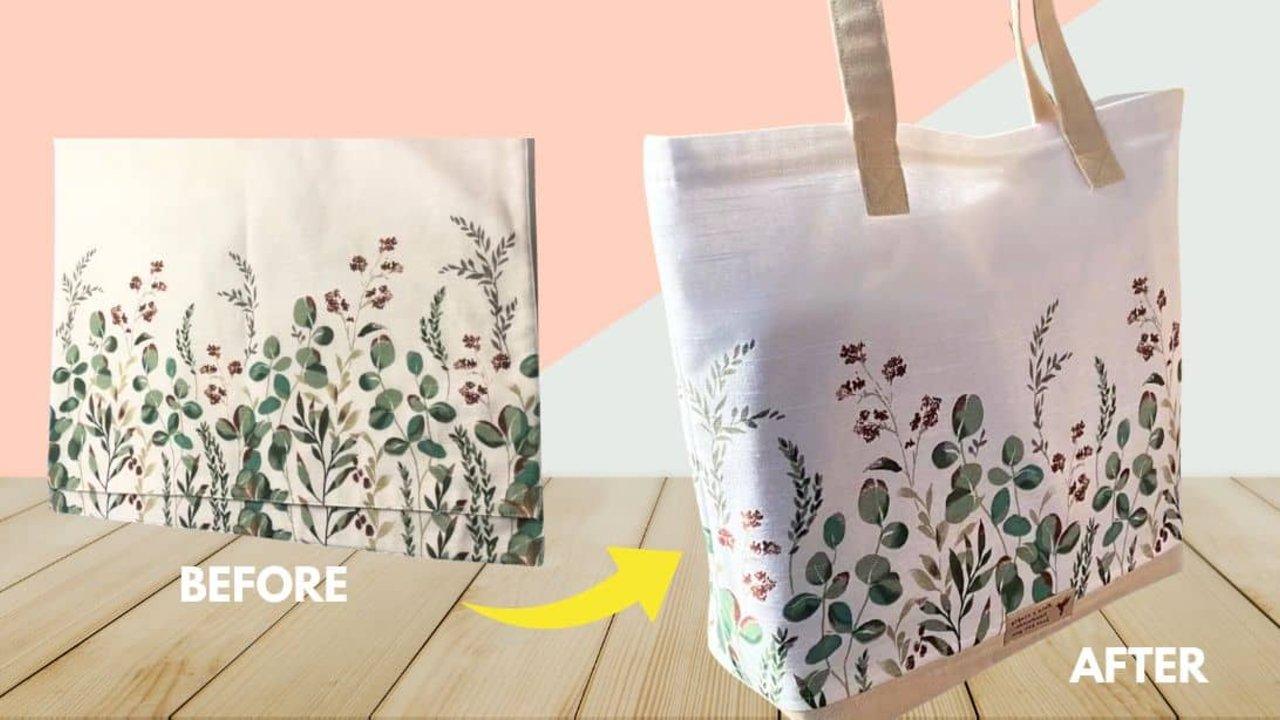
Two 18.75 inch placemats become the two sides of the bag, which means the hems, the edges and the print are all finished before you start. Add two 20 by 10 inch bottom panels and two 4.5 by 31.5 inch canvas strips for the handles. Fold and topstitch the handles, mark the placemat centres and set the handle ends three inches either side and four inches down, then box-x stitch them. Cut a 2.5 inch square from each bottom corner before the side seams to give the bag a flat base. No pattern needed anywhere.
Get the full tutorial at Sueeye.