
How to Build a Cinder Block Raised Garden Bed: The Ultimate DIY Guide
In an era where sustainability and fresh, homegrown produce are highly valued, building your own garden has become a popular endeavor. Among the myriad of gardening methods, raised garden beds constructed from cinder blocks stand out as an incredibly practical, budget-friendly, and versatile option. Whether you’re a seasoned gardener looking for an efficient setup or a beginner taking your first steps into the world of horticulture, a cinder block raised bed offers a robust foundation for success.
This comprehensive guide will walk you through everything you need to know about creating a beautiful and productive garden using this simple yet ingenious method. You’ll discover how to leverage the unique design of cinder blocks, not just for the main planting area, but also for cultivating smaller plants like herbs or succulents directly within the block openings. Furthermore, we’ll explore the integration of a soaker hose system, transforming your raised bed into a professional-grade, self-watering oasis that keeps your plants perfectly hydrated and your maintenance minimal. Get ready to transform your outdoor space and enjoy the fruits (and vegetables!) of your labor with this ingenious gardening solution.
Why Choose a Cinder Block Raised Garden Bed?
Cinder block raised garden beds offer a compelling combination of benefits that appeal to gardeners of all levels. Their popularity stems from their inherent advantages over traditional in-ground gardens or other raised bed materials.
Durability and Longevity
Unlike wood, which can rot, warp, or succumb to pest infestations over time, cinder blocks are incredibly durable. Made from concrete, they are impervious to rot, insects, and harsh weather conditions, ensuring your garden bed will last for many years with minimal maintenance. This makes them a wise long-term investment for any gardener, providing a stable and resilient structure for your plants.
Cost-Effectiveness
One of the most attractive aspects of cinder block beds is their affordability. Cinder blocks are relatively inexpensive and readily available at most hardware stores or building supply centers. Compared to pre-built raised bed kits or using expensive lumber like cedar, cinder blocks offer a budget-friendly alternative that doesn’t compromise on quality or functionality. You can often save a significant amount on initial setup costs, allowing you to invest more in quality soil and plants.
Modularity and Design Flexibility
Cinder blocks are inherently modular, allowing for incredible flexibility in design. You can arrange them in various shapes and sizes to fit your specific space and aesthetic preferences. Need to expand your garden later? Simply add more blocks! Their stackable nature also enables you to create beds of different heights, providing ergonomic benefits and making gardening more accessible. You’re not limited to simple rectangles; creative arrangements are entirely possible.
Excellent Drainage and Soil Control
Raised beds naturally improve drainage, preventing waterlogging that can lead to root rot. With a cinder block bed, you have complete control over your soil composition. You can fill it with a custom blend of nutrient-rich soil, compost, and amendments, ensuring your plants receive the optimal growing environment free from compaction and weeds often found in native garden soil. This allows for tailored growing conditions for specific plant needs.
Weed and Pest Suppression
Elevating your garden above ground level creates a natural barrier against many common garden pests and reduces weed intrusion. The contained environment of a raised bed also makes it easier to manage any weeds that do appear, as they are less likely to spread from surrounding areas. This results in less time spent on maintenance and more time enjoying your flourishing garden.
Ergonomics and Accessibility
Gardening in a raised bed is significantly easier on your back and knees. The elevated height reduces the need for constant bending and stooping, making gardening a more comfortable and enjoyable activity, especially for individuals with physical limitations or mobility challenges. This improved accessibility opens up the joys of gardening to a wider audience.
Extended Growing Season
The soil in raised beds tends to warm up faster in the spring and stays warmer longer into the fall compared to ground-level gardens. This can effectively extend your growing season, allowing you to get an earlier start and enjoy a later harvest. The thermal mass of the cinder blocks can also help regulate soil temperature, creating a more consistent environment for root development.
Planning Your Cinder Block Garden Bed
Careful planning is the first step to a successful and satisfying gardening project. Before you start digging, consider these essential aspects:
Location, Location, Location
Choose a spot in your yard that receives ample sunlight – most vegetables and herbs require at least 6-8 hours of direct sunlight per day. Observe your yard throughout the day to identify the sunniest areas. Ensure the area is relatively level or can be easily leveled, and ideally, close to a water source for convenient irrigation with your soaker hose system. Accessibility for pathways and harvesting should also be a consideration.
Determining Size and Shape
Measure your available space thoroughly. A common width for a raised bed is about 4 feet (approximately 1.2 meters), allowing you to reach the center from either side without stepping into the bed, which can compact the soil. The length can be as long as your space permits. Sketching out your design can help visualize the layout and calculate the precise number of cinder blocks needed. Remember, standard cinder blocks are typically 16 inches long, 8 inches wide, and 8 inches high, which will dictate your dimensions.
Estimating Materials
Once you have your desired dimensions, you can accurately estimate your materials. For a single layer, multiply the perimeter length (in feet) by 0.75 (since each 16-inch block covers about 1.33 feet) to get the approximate number of blocks. For a two-layer bed, double that number. Don’t forget to account for the soil volume; an online soil calculator can help you determine how many cubic feet or bags of soil you’ll need based on your bed’s internal dimensions and desired depth. It’s always a good idea to purchase a few extra blocks in case of breakage or future expansion.
Essential Materials for Your Cinder Block Raised Bed
Gathering all your materials before you begin will streamline the construction process. Here’s what you’ll need:
- Cinder Blocks: Purchase standard hollow-core blocks. The quantity will depend on your desired bed size and height. Double-check your measurements to ensure you have enough.
- Potting Soil or High-Quality Garden Soil: Opt for organic varieties for healthier plants and produce. The quantity will be substantial, so consider buying in bulk from a landscape supplier if building a large bed, or multiple bags from a home improvement store.
- Compost: An essential soil amendment to enrich your soil, improve structure, and provide vital nutrients for thriving plants.
- Soaker Hose: A highly efficient irrigation solution. Measure the perimeter of your bed to determine the appropriate length needed. Look for durable, porous hoses designed for raised beds.
- Plastic Liner (optional but recommended): Heavy-duty landscaping fabric or thick plastic sheeting. This can be used for the bottom to suppress weeds or for the inner sides to prevent soil erosion through the block openings and help retain moisture. Ensure any plastic used is UV-stabilized and safe for gardening.
- Shovel: A sturdy shovel for digging, clearing, and moving soil.
- Gardening Gloves: To protect your hands from rough blocks and soil.
- Level: A long carpenter’s level (2-4 feet) is crucial for ensuring your blocks are laid evenly and your bed is stable.
- Measuring Tape: For accurate planning and layout of your bed.
- Optional Tools: A wheelbarrow for easily moving soil and blocks, a rake for leveling the ground and soil, and a rubber mallet for gently adjusting blocks into place.
Consider sourcing organic potting soil or a blend of topsoil and compost. While slightly more expensive initially, organic soil promotes a healthier ecosystem for your plants and contributes to tastier, more nutritious produce. Stores like Home Depot often offer competitive pricing on organic options, and local nurseries may provide higher quality specialized blends.
Step-by-Step Guide to Building Your Cinder Block Raised Garden Bed
Follow these detailed steps to construct your durable and productive cinder block raised garden bed. This tutorial is inspired by the simple yet effective techniques shared by Vermi Bag Composting & Gardening Systems on YouTube, ensuring a budget-friendly and easy-to-follow process.
Step 1: Prepare Your Site and Level the Ground
Begin by clearly marking the perimeter of your garden bed. You can use stakes and string for this, or simply outline the shape with spray paint. Once marked, dig out the area to a depth of about 2-4 inches, removing any grass, weeds, large rocks, or debris. The goal here is to create a firm, level base for your cinder blocks. Use a level to ensure the ground is as flat as possible across the entire footprint of your bed. A perfectly level foundation is crucial for the stability and aesthetic appearance of your finished bed, preventing future settling or tilting.
Step 2: Lay the First Course of Cinder Blocks
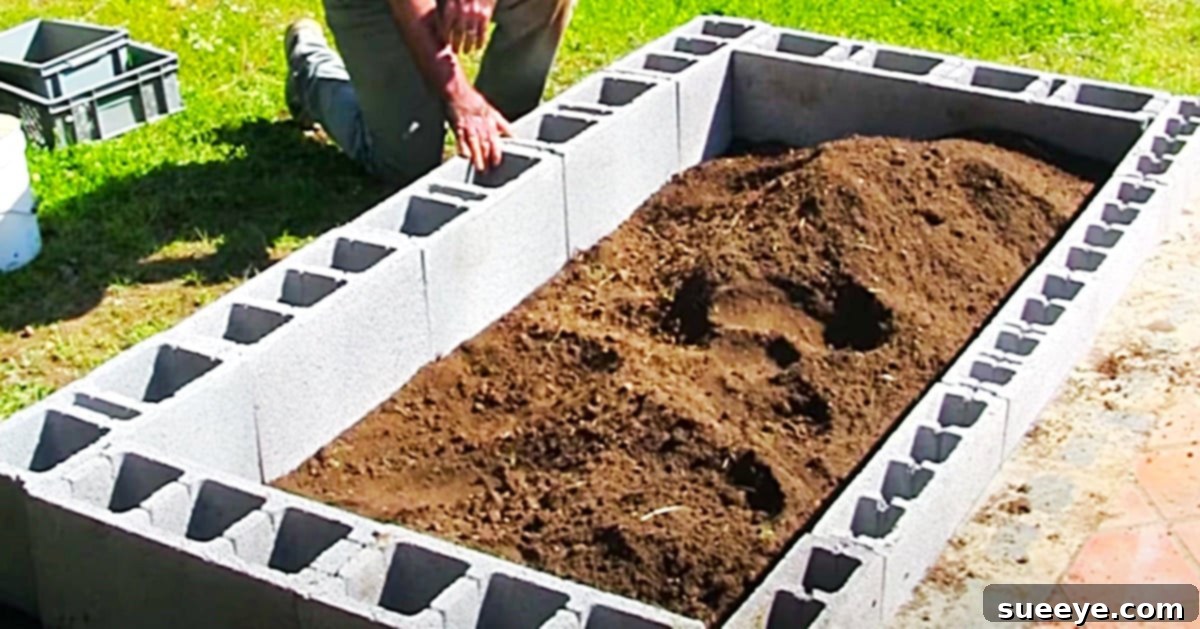
Carefully place your first layer of cinder blocks along the marked perimeter. Arrange them tightly together, end-to-end, forming the desired rectangular or square shape. Ensure the block openings face either upwards (for planting) or inwards/outwards (depending on your design choice). Use your level frequently to check that each block is level both horizontally and vertically. Make small adjustments by adding or removing soil underneath as needed. This first course is the most critical for the overall stability of your raised bed, so take your time to get it right.
Step 3: Stack Additional Courses (Optional)
If you desire a taller raised bed, continue stacking additional layers of cinder blocks. For maximum stability, it’s generally recommended to stagger the blocks like bricks, so the vertical joints of one course are offset from the course below it. This interlocking pattern significantly increases structural integrity. Dry stacking (without mortar) is common for non-permanent beds, but for added strength and a more permanent structure, you could use construction adhesive between layers, particularly if building a very tall bed or in areas prone to seismic activity. Always check for levelness with each new course to maintain a consistent height and appearance.
Step 4: Line the Bed (Optional but Recommended)
Once your cinder block structure is complete, you can line the inside. Lay heavy-duty landscape fabric or thick plastic sheeting along the bottom of the bed and up the inner sides of the blocks. The bottom liner helps suppress weeds from growing up from the ground below. The side liner (if used) can help prevent soil from eroding through the block openings and maintain moisture levels within the main bed. If using plastic on the bottom, be sure to poke a few small drainage holes to prevent water from pooling, especially if your native soil drains poorly. Alternatively, you can layer cardboard or newspaper at the bottom to suppress weeds and slowly decompose, adding organic matter.
Step 5: Fill with Premium Soil
Now comes the exciting part: filling your bed with nutrient-rich soil! Start by adding a layer of coarse material (like small branches, wood chips, or gravel) at the very bottom for drainage, particularly if you didn’t use a liner with drainage holes or if you anticipate heavy rainfall. Then, layer in cardboard or newspaper if desired. Follow this with your main soil mix. A good blend usually consists of about 60% high-quality topsoil, 30% organic compost, and 10% perlite or vermiculite for aeration and moisture retention. Fill the bed to within a few inches of the top, leaving room for mulch and ensuring the soil doesn’t spill over when watered.
Step 6: Install the Soaker Hose Irrigation System
An integrated soaker hose system is a game-changer for a cinder block raised bed, offering efficient and deep watering. Lay the soaker hose in a coil or zigzag pattern just inside the circumference of the cinder block bed. Ensure it covers the main planting area effectively. If you have a very long bed, you might consider two parallel runs. Connect one end of the soaker hose to your outdoor water spigot using a standard garden hose connector and a pressure reducer if needed. This system delivers water slowly and directly to the plant roots, minimizing evaporation and runoff, ensuring efficient hydration. It’s like having a professional irrigation system without the complex setup!
Step 7: Planting Your Garden
With your bed built and irrigated, it’s time to plant! You have two primary planting areas: the main soil bed and the hollow openings of the cinder blocks themselves. In the main bed, plant your desired vegetables, herbs, or flowers, spacing them appropriately according to their mature size. For the cinder block openings, these are perfect for smaller plants that don’t require deep roots, such as individual herbs (basil, thyme, oregano), succulents, strawberries, or even some leafy greens. Fill the openings with potting mix before planting. This unique feature maximizes your growing space and adds a charming aesthetic, transforming the functional blocks into additional planting pockets.
Maximizing Your Cinder Block Garden
To get the most out of your new raised bed, consider these additional tips for planting and maintenance:
What to Plant
Cinder block raised beds are ideal for a wide variety of plants due to their excellent drainage and controlled soil environment. Popular choices include:
- Vegetables: Tomatoes, peppers, lettuce, spinach, kale, bush beans, radishes, carrots (choose shorter, rounder varieties for block openings like ‘Paris Market’ or ‘Danvers Half Long’).
- Herbs: Basil, rosemary, thyme, oregano, chives, mint (consider planting aggressive spreaders like mint in block openings to contain their growth).
- Flowers: Marigolds (known for deterring pests), nasturtiums (edible flowers and leaves), calendula, or other compact ornamental plants that add beauty and attract pollinators.
Consider companion planting strategies to improve growth, deter pests naturally, and make the most of your space.
Maintenance Tips
- Watering: Regularly check your soil moisture. The soaker hose makes watering efficient by delivering water directly to the roots, but adjust frequency based on weather conditions, plant types, and the moisture retention of your soil mix.
- Fertilizing: Supplement your rich soil with organic fertilizers or compost tea throughout the growing season, especially for heavy feeders like tomatoes and corn. A soil test kit can help you determine specific nutrient needs.
- Weeding: While raised beds significantly reduce weeds, some will inevitably appear. Pull them promptly to prevent competition with your cultivated plants for water and nutrients.
- Pest Management: Monitor your plants regularly for any signs of pests. Address them with organic solutions like neem oil, insecticidal soap, or by introducing beneficial insects if necessary.
- Mulching: Apply a 2-4 inch layer of organic mulch (straw, wood chips, shredded leaves, or grass clippings) over the soil surface. This conserves moisture, regulates soil temperature, suppresses weeds, and adds organic matter as it decomposes.
Winterizing Your Bed
Before winter sets in, clear out spent annual plants. You can add a fresh layer of compost and cover the bed with leaves, straw, or a winter cover crop to enrich the soil over the colder months. This ‘no-till’ approach builds soil health. If you’re in a very cold climate and wish to extend your growing season for cool-weather crops, consider building a simple cold frame or hoop house over your raised bed.
Conclusion
Building a cinder block raised garden bed is a rewarding project that combines simplicity, durability, and high functionality. From its cost-effective construction to its versatile planting options and efficient irrigation system, this type of garden bed is truly an exceptional choice for anyone looking to grow their own food, maximize space, and minimize gardening effort. It’s a fantastic way to improve soil health, minimize weeds and pests, and enjoy an extended growing season, all while being gentle on your back and easy to manage.
Embark on your gardening journey with confidence, knowing you’ve created a sturdy and sustainable foundation for bountiful harvests. This DIY approach not only saves you money but also gives you the immense satisfaction of creating something beautiful and productive with your own hands. Get ready to cultivate a thriving garden and enjoy fresh, delicious produce right from your backyard – your journey to sustainable, homegrown food starts now!