
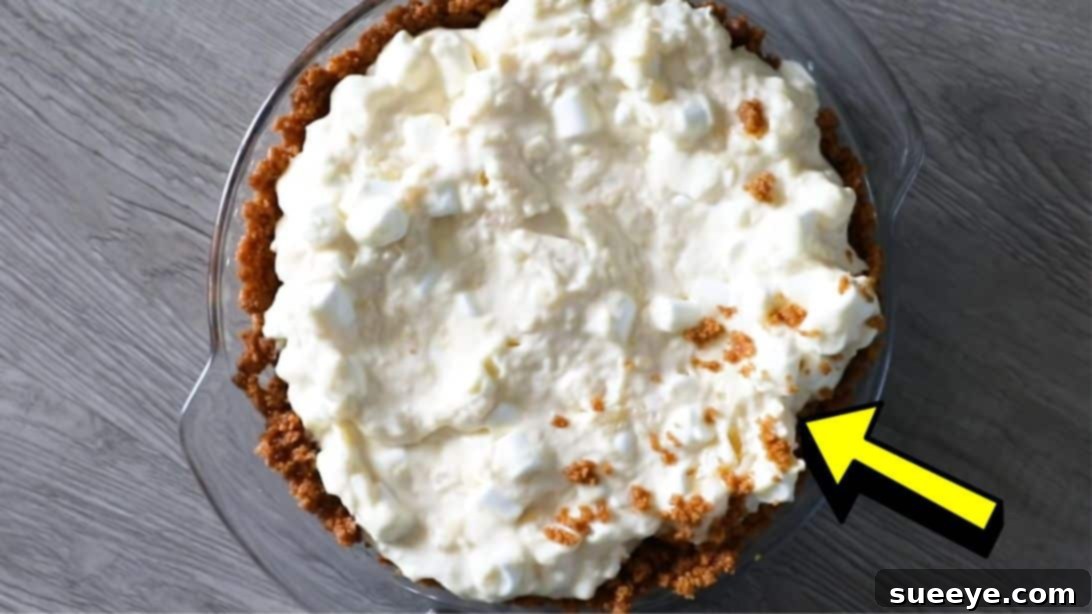
Prepare to discover your new go-to dessert: the irresistible Marshmallow Fridge Tart. This delightful no-bake creation, inspired by Woolworths TASTE Magazine, shares a similar dreamy quality with other popular no-bake treats, like the Pineapple Dream Dessert. While both offer a refreshing escape, our Marshmallow Fridge Tart distinguishes itself with a unique blend of coconut cookies and fluffy marshmallows, creating a flavor profile that’s simply unforgettable. It’s a true classic in South African kitchens, traditionally made with beloved Tennis Biscuits. However, if these aren’t readily available in your area, don’t fret! Any delicious coconut cookie, such as Voortman Bakery coconut cookies or your preferred brand, will serve as an excellent base for this heavenly treat.
RELATED: Old-Fashioned Coconut Cream Pie
Why This Marshmallow Fridge Tart Will Be Your Next Obsession
This Marshmallow Fridge Tart isn’t just a dessert; it’s an experience. Imagine a warm, sunny day, and you reach for a slice of something cool, sweet, and incredibly light. That’s exactly what this tart delivers. Its no-bake nature makes it an absolute hero in the kitchen, especially when you want to avoid turning on the oven. The combination of sweet, refreshing, and creamy textures makes it an ideal dessert for warmer weather, family gatherings, or simply a delightful treat to brighten your day. With just a few staple ingredients – butter, condensed milk, coconut cookies, cream, crushed pineapple, vanilla extract, marshmallows, and fresh lemon – you can whip up a dessert that tastes far more complex than it is to prepare. The subtle, aromatic coconut notes from the cookie crust perfectly complement the rich vanilla and tangy pineapple in the filling, resulting in a balanced and utterly delicious flavor profile. Get ready to impress your loved ones with this effortlessly elegant dessert!
Essential Ingredients for Your Marshmallow Fridge Tart
Crafting this simple yet spectacular tart requires a careful selection of ingredients, each playing a crucial role in achieving its signature taste and texture. Here’s a closer look at what you’ll need:
- Melted Butter: The binding agent for our glorious cookie crust, ensuring it holds its shape beautifully.
- Sweetened Condensed Milk: This provides the creamy sweetness and helps set the filling, giving it that delightful, smooth consistency.
- Coconut Cookies: The star of our base! While Tennis Biscuits are traditional, any crisp, flavorful coconut cookie will create a fantastic foundation. These cookies infuse the crust with a tropical aroma and a satisfying crunch.
- Fresh Cream: Whipped to perfection, cream forms the airy, luxurious backbone of our tart’s filling, adding a wonderful lightness.
- Crushed Pineapple: A vital component for tanginess and a burst of fruity freshness. It cuts through the sweetness, balancing the flavors perfectly.
- Vanilla Extract: A touch of pure vanilla elevates the entire dessert, adding a warm, aromatic depth to the creamy filling.
- Marshmallows: These delightful morsels provide a chewy texture and an extra layer of sweetness, making the tart truly irresistible.
- Fresh Lemon: A squeeze of lemon juice is essential. It brightens the flavors, adds a subtle zing, and helps to balance the richness of the other ingredients.
Step-by-Step Guide to Crafting Your Marshmallow Fridge Tart
Making this Marshmallow Fridge Tart is a journey of simple steps, culminating in a dessert that looks and tastes like it took hours. Follow these instructions carefully for the best results:
Step 1: Preparing the Perfect Cookie Crust
The foundation of any great tart is its crust. Begin by carefully placing your chosen coconut cookies into a sturdy ziploc bag. For crushing, you have a couple of options: a rolling pin or any heavy object works wonderfully to create fine crumbs. Apply even pressure and crush until no large chunks remain. Alternatively, for a quicker and more uniform result, a food processor can pulverize the cookies in mere seconds. Once crushed, transfer the cookie crumbs into a medium-sized mixing bowl. Ensure the crumbs are as fine as possible, as this will result in a more cohesive and delicious crust.
Step 2: Forming and Chilling the Crust
Into your bowl of crushed cookie crumbs, pour in the melted butter. Mix thoroughly until the crumbs are evenly coated and resemble wet sand. This butter acts as the crucial binder that will hold your crust together. Next, transfer this mixture into a pie dish or a loose-bottomed tart tin. Using the back of a spoon or your fingertips, press the mixture firmly and evenly onto the bottom and up the sides of the dish. The firmer you press, the more stable your crust will be. Once shaped, place the pie dish into the refrigerator for at least 30 minutes to an hour. This chilling time is vital for the butter to solidify, creating a firm and durable crust that won’t crumble when sliced.
Step 3: Crafting the Creamy Pineapple Filling
In a separate large mixing bowl, add the fresh cream. Using an electric mixer, whip the cream for a few minutes until it forms soft peaks. Be careful not to over-whip, as this can result in a grainy texture. Once the cream is lightly whipped, gently fold in the vanilla extract, sweetened condensed milk, and the crushed pineapple. If your crushed pineapple comes in juice, consider draining it slightly to prevent your filling from becoming too watery. The key here is to fold the ingredients rather than vigorously mix them, preserving the airy texture of the whipped cream and ensuring a light, fluffy filling. The condensed milk provides the perfect amount of sweetness and helps the filling set beautifully, while the pineapple introduces a refreshing tang that cuts through the richness.
Step 4: Incorporating Marshmallows and Lemon Zest
With your creamy base ready, it’s time to add the star ingredients. Carefully add the marshmallows to the mixture. Whether you use mini marshmallows or cut larger ones into smaller pieces, ensure they are distributed evenly. Gently fold them into the cream mixture; this prevents them from breaking down too much and helps maintain their delightful chewiness. Next, add a generous squeeze of fresh lemon juice to the mixture. The lemon juice is crucial not just for flavor, adding a bright, zesty note that perfectly complements the pineapple, but also for its ability to help balance the sweetness and contribute to the filling’s setting process. Mix everything well, ensuring all ingredients are thoroughly combined without deflating the cream.
Step 5: Assembling, Chilling, and Serving Your Delicious Tart
Retrieve your chilled cookie crust from the refrigerator. Carefully spoon the creamy marshmallow and pineapple filling into the crust, spreading it evenly with a spatula to create a smooth, inviting surface. Once the filling is perfectly settled in its crust, return the entire tart to the fridge. This final chilling period is arguably the most important step. Allow the tart to chill for a minimum of 1 hour, or preferably 2-3 hours, before serving. This allows the filling to firm up completely, ensuring clean slices and a wonderfully set texture. The longer it chills, the better it will hold its shape. When ready to serve, you can garnish it with a sprinkle of toasted coconut flakes, a few fresh mint leaves, or extra marshmallows for an extra touch of elegance. Slice into generous portions and enjoy the refreshing, sweet, and tangy flavors of your homemade Marshmallow Fridge Tart!
Tips for the Perfect Marshmallow Fridge Tart Every Time
Achieving a consistently perfect Marshmallow Fridge Tart is easy with these expert tips:
- Cookie Selection: While Tennis Biscuits are traditional, any crisp, plain, or coconut-flavored biscuit works well. Graham crackers or digestive biscuits are also great alternatives if you’re not keen on coconut.
- Crust Consistency: Ensure your cookie crumbs are fine and mixed thoroughly with melted butter. Pressing the crust firmly into the pan is key to preventing it from crumbling when sliced.
- Whipping Cream Wisely: Use very cold cream for the best results. Whip until soft peaks form; over-whipping can lead to a grainy texture.
- Pineapple Preparation: If using canned crushed pineapple, make sure to drain it very well. Excess liquid can thin your filling and prevent it from setting properly.
- Gentle Folding: When incorporating marshmallows and other ingredients into the whipped cream, always use a gentle folding motion. This maintains the airiness of the cream and results in a lighter, fluffier filling.
- Lemon Freshness: Always use fresh lemon juice. Bottled lemon juice lacks the vibrant flavor and zest that fresh lemon provides, which is crucial for balancing the sweetness of the tart.
- Adequate Chilling Time: Do not rush the chilling process. A minimum of 1-2 hours is essential for the tart to set properly, ensuring clean slices and a delightful texture. For best results, chill overnight.
- Garnishing Ideas: Elevate your tart with simple garnishes. Toasted coconut flakes, fresh pineapple chunks, lime zest, or even a few extra mini marshmallows make for beautiful and tasty additions.
Creative Variations to Explore
While the classic Marshmallow Fridge Tart is a winner, feel free to experiment and make it your own:
- Fruitful Flavors: Replace crushed pineapple with other drained canned fruits like mandarin oranges or finely diced peaches. For a more tropical twist, consider mango puree or passion fruit pulp.
- Cookie Base Swaps: Experiment with different cookie bases. Vanilla wafers, shortbread cookies, or even chocolate digestive biscuits could offer exciting new flavor dimensions.
- Chocolate Drizzle: For chocolate lovers, a light drizzle of melted dark or milk chocolate over the top before serving adds a luxurious touch.
- Nutty Crunch: Sprinkle a layer of finely chopped toasted nuts (like pecans or macadamias) over the crust before adding the filling for an extra layer of texture and flavor.
- Spice It Up: A tiny pinch of ground ginger or cinnamon can add a subtle warmth and complexity to the pineapple filling, especially if you enjoy spiced desserts.
- Cream Cheese Kick: For an even richer, tangier filling, consider adding 1/2 block of softened cream cheese to your whipped cream mixture before folding in the other ingredients.
Storage and Serving Suggestions
To ensure your Marshmallow Fridge Tart remains as delicious as the day you made it, proper storage is key. Store any leftovers in an airtight container in the refrigerator for up to 3-4 days. While it’s best enjoyed fresh, the flavors can sometimes meld and deepen beautifully on the second day. When serving, ensure your knife is clean for each slice to achieve neat, attractive portions. This tart is a fantastic dessert for picnics, potlucks, or any occasion where you need a refreshing, crowd-pleasing treat that requires no oven time. Its vibrant flavors and delightful texture are sure to be a hit with everyone!
Final Thoughts: Your Easy Path to Dessert Bliss
This Marshmallow Fridge Tart is more than just a recipe; it’s an invitation to create joy with minimal effort. Its blend of convenience, refreshing taste, and delightful texture makes it a standout dessert for any occasion. Whether you’re a seasoned baker or new to the world of desserts, this no-bake wonder promises a satisfying and delicious experience. So, gather your ingredients, follow these simple steps, and prepare to indulge in a slice of pure, creamy bliss. We are confident that this easy Marshmallow Fridge Tart will become a cherished recipe in your home, bringing smiles and sweet memories to all who try it. Enjoy crafting and savoring this fantastic treat!