
Mastering Seam Ripping: Essential Techniques for Flawless Sewing Projects
Every journey in sewing, regardless of skill level, inevitably includes moments where stitches must be undone. Far from being a setback, efficient and precise seam ripping is a cornerstone skill that transforms good projects into truly excellent ones. It’s natural to feel a surge of frustration when faced with unpicking a carefully sewn line, especially for beginners. I vividly recall my early days of sewing, where the need to remove stitches would often lead to aggressive, hurried attempts that sometimes caused more damage than the original mistake. This changed dramatically for me when I began to view seam ripping not as a punishment, but as a critical part of the problem-solving process, inspired by methodical approaches shared in resources like the invaluable tutorial by Missouri Star Quilt Company on YouTube. Adopting a deliberate, calm approach not only saved my fabric from unnecessary damage but also significantly enhanced my overall enjoyment and patience in sewing.
This comprehensive guide aims to demystify the art of seam ripping, providing you with the knowledge and confidence to tackle it effectively. We will explore the essential tools required, walk through detailed step-by-step techniques, highlight common mistakes to avoid, and offer expert tips tailored for various fabric types. By mastering this often-underestimated aspect of sewing, you’ll ensure cleaner finishes, prevent costly fabric damage, and ultimately achieve a consistently higher standard in all your creative sewing and quilting endeavors.
The Indispensable Tools for Effective Seam Removal
Successfully removing stitches without harming your fabric begins with having the right tools. While seemingly simple, the quality and condition of these instruments are paramount for precision and ease.
- A Sharp Seam Ripper: This is your most vital tool. Its sharpness cannot be overstated. A dull seam ripper will snag threads, pull at fabric fibers, and make the entire process more arduous and prone to errors. Seam rippers come in various forms: standard models with a protective ball on the longer prong (designed to slide between fabric layers and prevent accidental cuts), ergonomic designs for comfortable extended use, and even advanced versions featuring built-in LED lights and magnifying glasses. These illuminated and magnified options are particularly beneficial for intricate work, dark fabrics, or for sewists who need extra visual assistance. Always choose a ripper that feels balanced and comfortable in your hand, allowing for controlled, precise movements.
- Small, Sharp Scissors or Thread Snips: These are crucial for snipping individual, stubborn stitches, particularly at the beginning or end of a seam, or for threads that are too tightly embedded for the seam ripper alone. Embroidery scissors, with their fine, sharp points, are ideal for this delicate task. Ensure they are kept sharp and used only for fabric or thread to maintain their edge.
- Fine-Tipped Tweezers: After a seam has been ripped, numerous tiny thread fragments invariably cling to the fabric. Tweezers are invaluable for meticulously picking out these minute pieces, especially from napped or textured fabrics. A clean surface, free of residual threads, is essential for a smooth re-sew and to prevent future machine issues.
- Lint Roller or Fabric Brush: Once the major thread fragments have been removed with tweezers, a lint roller or a dedicated fabric brush offers an efficient way to sweep away any remaining fuzz and debris. This final cleaning step ensures your fabric is pristine and ready for its next round of stitching, preventing stray threads from being caught in your new seam.
- Excellent Lighting: Although not a physical tool, optimal lighting is perhaps the most critical element for successful seam ripping. A well-lit workspace allows you to clearly distinguish between stitch threads and fabric fibers, minimizing the risk of accidentally cutting your material. Consider a dedicated task lamp or an illuminated magnifying lamp for enhanced visibility.
Step-by-Step Guide to Properly Ripping a Seam Without Damage
Approaching seam removal with a systematic method not only ensures efficiency but, more importantly, prevents damage to your cherished fabric. Follow these steps for a clean and effective unpicking process:
1. Prepare Your Workspace for Clarity
Set up your work area in a brightly lit space. A clean, flat surface is ideal for laying out your fabric, providing a stable foundation for precise work. Gather all your tools – a sharp seam ripper, snips, tweezers, and a lint roller – and arrange them within easy reach. Good lighting is paramount to clearly see stitches and avoid mistakes.
2. Assess the Mistake and Plan Your Strategy
Before making any cuts, take a moment to identify the exact section of the seam that needs to be removed. Determine if it’s a short segment or an entire seam. This assessment will help you decide whether to use a slow, stitch-by-stitch method or a faster, more continuous ripping technique for longer seams. Understanding the fabric type is also crucial here.
3. Starting the Rip: The Safe and Controlled Approach
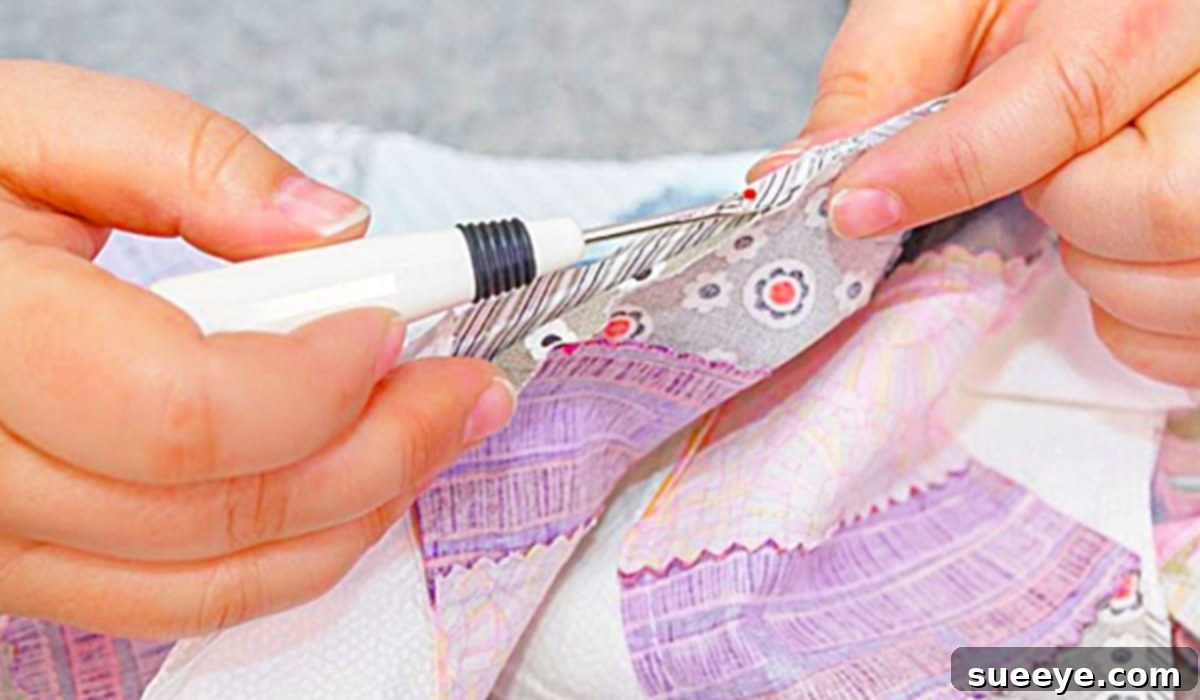
Gently slip the sharp point of your seam ripper under one or two stitches at the beginning of the problematic seam. Push the blade upwards, away from the fabric, to cleanly cut the thread. The small, rounded ball on the longer prong of most seam rippers is a critical safety feature. Position your fabric so that the blade travels between the two layers of fabric, with the ball end sliding along the underside of the top fabric layer. This protects the fabric from accidental cuts by the sharp point, ensuring only the thread is severed.
4. The Continuous Method for Longer Seams
Once you’ve released the initial few stitches, you can often employ a quicker method for longer, straight seams. Gently pull the two fabric layers apart slightly, creating a slight tension on the stitches. With the ball end of your seam ripper pointing towards the fabric and the blade facing the stitches, carefully slide the sharp point into the stitches from the side. You can then push the seam ripper along the seam line, allowing the blade to cut multiple stitches at once. Work in short, controlled segments, rather than attempting to rip an entire long seam in one continuous motion. This maintains better control and significantly reduces the risk of accidental fabric damage. Periodically, gently pull the fabric layers apart to release the severed threads.
5. The Stitch-by-Stitch Method for Delicate or Intricate Areas
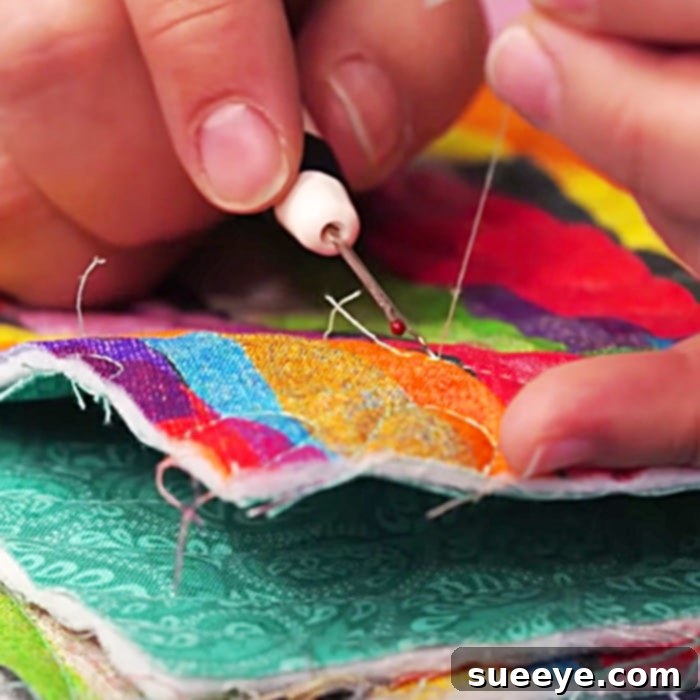
For more delicate fabrics, curved seams, topstitching, or very short sections where absolute precision is necessary, the stitch-by-stitch method is safest. Carefully snip individual stitches using the very tip of your seam ripper or fine-pointed scissors. This meticulous approach provides maximum control and virtually eliminates the risk of cutting the fabric itself. Always ensure you are targeting only the thread, being mindful of the fabric weave.
6. Meticulous Removal of Loose Threads
Once the seam is fully unpicked, you will be left with countless tiny thread fragments. This step is crucial for a clean and professional finish. Use your fine-tipped tweezers to carefully extract any stubborn threads that are embedded in the fabric. After this, run a lint roller or a fabric brush over the entire area to pick up all remaining debris. Neglecting to remove these threads can lead to lumps and bumps when you re-sew the seam, or they might even interfere with your sewing machine’s performance.
7. Pressing Out the Old Seam Line for a Fresh Start
The final, yet frequently overlooked, step is pressing. The needle perforations and impressions from the original seam will likely still be visible on your fabric. Lightly dampen the area with a spray bottle (if the fabric content allows) and press it thoroughly with an iron, using the appropriate heat setting for your fabric. The combination of steam and heat helps the fabric fibers relax, closing up the needle holes and removing any ghost lines or creases from the previous seam. This vital step ensures your fabric has a truly clean slate, preventing the old seam line from distorting your new stitches and contributing to a flawless finished product.
Why Seam Ripping is a Skill, Not a Failure in Sewing
The act of unpicking stitches is often met with dread and a sense of failure. However, shifting this perspective is crucial for growth as a sewist. Seam ripping is not a sign of incompetence; it is an undeniable and fundamental skill in the sewing repertoire. Even the most seasoned professional sewers, tailors, and quilters regularly unpick seams. The true hallmark of a skilled artisan isn’t someone who never makes mistakes, but rather someone who knows how to correct them effectively, gracefully, and without compromising the integrity or final appearance of their work.
Embracing seam ripping cultivates patience, precision, and an eye for detail. It provides an invaluable opportunity to slow down, critically examine your work, and understand where an error occurred. This reflective process not only helps prevent similar mistakes in future projects but also deepens your understanding of garment construction, fabric behavior, and quilting principles. Consider it a built-in quality control measure – a chance to refine your technique, improve your accuracy, and ensure that every stitch contributes positively to the overall aesthetic and durability of your creation. Far from being a frustrating chore, proper seam ripping is an act of meticulous craftsmanship, leading to superior results and a more rewarding sewing experience.
Common Seam Ripping Mistakes to Avoid for Optimal Results
Even with good intentions, it’s easy to fall prey to common errors when unpicking stitches. Being mindful of these pitfalls can save you significant time, frustration, and potential damage to your fabric:
- Using a Dull Seam Ripper: This is arguably the most common mistake. A dull blade won’t cut cleanly; it will snag, pull, and potentially tear your fabric. This is especially true for delicate or loosely woven materials. If your seam ripper feels like it’s dragging or requiring excessive force, it’s time to replace it. A sharp tool ensures clean cuts and minimizes effort.
- Rushing the Process: Impatience is the arch-nemesis of effective seam ripping. Hurrying leads to a loss of control, significantly increasing the likelihood of accidentally cutting into your fabric. Fabric cuts are often irreparable or require complex, visible patching. Take deep breaths, work at a deliberate pace, and focus on each segment of the seam.
- Insufficient Lighting: Attempting to rip seams in poor or insufficient light is a recipe for disaster. It makes it difficult to distinguish between the thread and the fabric fibers, leading to missed stitches, incorrect cuts, or worse, cutting your material. Always work in a brightly lit area, using a task lamp if necessary.
- Pulling Threads Too Forcefully: Aggressively yanking at threads can distort the fabric weave, particularly with stretchy knits or delicate wovens. Gentle manipulation and controlled cuts are always more effective and safer for your fabric.
- Neglecting to Remove All Thread Fragments: Leaving tiny bits of severed thread embedded in the fabric can cause several issues. These fragments can create noticeable bumps or shadows under your new seam, make the area look messy, or even get caught in your sewing machine’s feed dogs or needle, leading to new stitching problems. Be diligent with tweezers and a lint roller.
- Skipping the Pressing Step: Ignoring the final pressing step leaves visible needle perforations and impressions from the old seam. These “ghost lines” can telegraph through your new stitching, affecting the final appearance of your project. Pressing with steam helps the fabric fibers relax and close up, creating a clean, unblemished surface for re-sewing.
Advanced Tips for Ripping Seams on Various Fabric Types
Different fabrics respond uniquely to seam ripping. Adapting your technique to the fabric type is crucial to prevent damage and achieve optimal results:
- Delicate Fabrics (e.g., Silks, Chiffons, Rayons, Organza): These fabrics are highly prone to snags, runs, and permanent holes. For these materials, exclusively use the slow, stitch-by-stitch method. Ensure your seam ripper is exceptionally sharp, and handle the fabric with extreme care. You might find it helpful to place a piece of tissue paper or lightweight stabilizer underneath the seam to provide extra support and prevent the fabric from shifting or tearing during the process.
- Stretchy Fabrics (e.g., Knits, Lycra, Jersey): The elasticity of these fabrics can make them challenging. Avoid stretching the fabric while ripping, as this can distort its shape or create permanent waves. Support the fabric firmly but gently, and use slow, deliberate cuts. If available, a seam ripper with a ball point (or using the ball end very carefully) might be beneficial to push fabric fibers aside rather than piercing them.
- Thick or Dense Fabrics (e.g., Denim, Canvas, Upholstery Fabric): These sturdy materials can be tough on your seam ripper and often require more pressure. However, always ensure you are cutting only the thread, not the dense fabric fibers. For very thick or tightly woven seams, it may be easier to snip every 3-4 stitches with fine-tipped scissors and then gently pull the remaining threads out.
- Quilting Cotton: Generally forgiving, quilting cotton still benefits from careful handling. The continuous, faster method often works well here, but always ensure the ball end of your seam ripper is properly protecting the lower fabric layer. Pay attention to the fabric grain to avoid distorting straight lines, which is crucial for precise piecing.
- Topstitching or Decorative Stitches: These stitches often use thicker thread and are very visible on the right side of the fabric. Approach these with extreme caution, utilizing the slow, stitch-by-stitch method. You may need to snip the threads from both sides of the seam to fully release the thicker threads without stressing the fabric.
- Napped Fabrics (e.g., Corduroy, Velvet, Fleece): These fabrics have a directional pile that can easily be damaged or distorted. Use a very sharp seam ripper and work slowly, always following the direction of the nap. Be extra meticulous with thread removal, as fibers can easily get entangled.
Maintaining Your Seam Ripper for Optimal Performance
A well-maintained seam ripper is a long-lasting and reliable tool. Proper care ensures its sharpness and extends its lifespan:
- Keep it Clean: Regularly remove any lint, fuzz, or thread debris from the blade and around the handle. Accumulation can dull the blade and hinder its smooth operation.
- Store Safely: Always place the protective cap back on the blade when the seam ripper is not in use. This crucial step prevents accidental injury, shields the sharp blade from impact that could dull or damage it, and keeps it ready for your next project. Store it in a designated place in your sewing kit to avoid misplacing it.
- Replace When Dull: Seam rippers are consumables; they are not designed to last indefinitely. If you notice your seam ripper is pulling, snagging fabric, or requiring excessive force to cut threads, it means the blade has become dull. Do not hesitate to replace it. An inexpensive, sharp new tool is always preferable to struggling with a dull one, which can lead to frustration and fabric damage.
Conclusion: Embracing the Art of Unpicking for Sewing Excellence
Seam ripping, though sometimes daunting, is an absolutely indispensable part of the sewing journey. Far from being a chore to be avoided, mastering this skill is a true testament to a dedicated and meticulous sewist. By approaching this task with the right tools, a methodical technique, and a patient, problem-solving mindset, you transform a potential frustration into an invaluable opportunity for learning and refinement. Remember, every undone seam is not a step backward, but a precise adjustment that brings you closer to a beautifully finished project. It’s an integral part of the creative process, allowing you to achieve the highest standards of craftsmanship. So, the next time you encounter a sewing mishap, don’t despair – arm yourself with your sharp seam ripper, embrace the process, and enjoy the profound satisfaction of creating truly flawless and professional-quality work.