
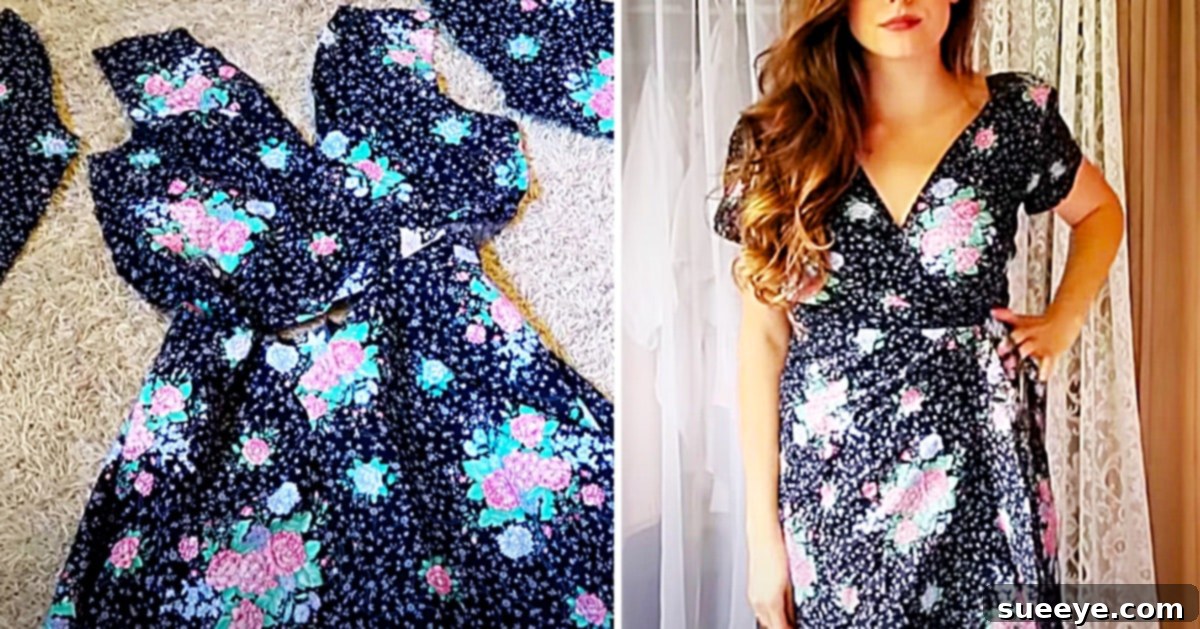
How To Sew A Wrap Dress: Your Ultimate DIY Guide
There’s an undeniable charm and elegance to a wrap dress. Renowned for its unparalleled comfort and universally flattering silhouette, it’s a wardrobe staple that effortlessly transitions from casual daytime wear to chic evening attire. What makes the wrap dress truly exceptional is its adjustable nature – a perfect choice for days when you might feel a little bloated or simply desire a more relaxed fit without compromising on style. For years, I’ve grappled with the common frustration of finding clothes that fit just right, leading me down the rewarding path of making my own garments. This journey has not only solved my fitting dilemmas but has also unleashed a creative passion.
My quest for the next satisfying sewing project led me to a truly brilliant resource: a wrap dress video tutorial by Jessica Shaw on YouTube. Her clear and concise instructions immediately inspired me to get started. The appeal of a project requiring minimal fabric, just two yards, was particularly enticing. I embarked on my fabric hunt at JoAnn’s Fabric in South Park Meadows, Austin, where I discovered a stunning white eyelet fabric nestled within their specialty cotton section. The delicate texture and timeless appeal of eyelet instantly captivated me. Always one to appreciate a good deal, I checked the JoAnn’s app and found a fantastic 60 percent off coupon, making my fabric purchase an even greater triumph. Smart shopping for fabric is not just about saving money; it’s about making your creative projects more accessible and enjoyable.
Why Sew Your Own Wrap Dress?
Beyond the simple joy of creating something with your own hands, sewing a wrap dress offers numerous advantages:
- Perfect Custom Fit: Say goodbye to ill-fitting off-the-rack clothes. When you sew your own, you can tailor every measurement to your unique body shape, ensuring a comfortable and flattering fit every time.
- Unique Style Expression: Choose your favorite fabric, pattern, and details to create a dress that truly reflects your personal style. No more showing up to an event in the same dress as someone else!
- Cost-Effective Fashion: High-quality garments can be expensive. By purchasing fabric and making it yourself, you can often create a designer-look dress at a fraction of the cost.
- Sustainable Choice: Embrace slow fashion by making clothes that last. Sewing your own garments reduces waste and encourages a more thoughtful approach to your wardrobe.
- Skill Development: Each sewing project hones your skills, builds confidence, and opens up a world of creative possibilities. A wrap dress is an excellent project for both beginners and intermediate sewers looking to expand their repertoire.
Choosing The Perfect Fabric For Your Wrap Dress
The success of your wrap dress largely depends on your fabric choice. While I opted for a beautiful white eyelet, there’s a world of options available, each offering a different drape and feel. For a wrap dress, you generally want a fabric that has some drape but isn’t too slippery or difficult to handle, especially if you’re a beginner. Here are some popular choices:
- Rayon Challis: Known for its beautiful drape and soft feel, rayon challis is a fantastic choice for a flowy, elegant wrap dress. It can be a little shifty to cut, so take your time.
- Cotton Lawn/Voile: These lightweight cottons offer a crisp yet soft feel with good drape, perfect for summer dresses. They are generally easy to work with.
- Linen Blends: Linen provides a beautiful texture and breathability, ideal for warm weather. Blends often reduce wrinkling while retaining the linen look.
- Knit Fabrics (Jersey, Interlock): If you want a dress with stretch for ultimate comfort, knit fabrics are excellent. Just ensure your sewing machine has a stretch stitch setting and use a ballpoint needle.
- Poplin/Broadcloth: For a more structured wrap dress, these cottons can work, offering a crisp finish. They are also very beginner-friendly.
Remember, the recommendation of “2 yards of fabric” is a good starting point, but always check the pattern’s fabric requirements, especially considering fabric width. Most patterns assume a standard width of 44-45 inches or 58-60 inches. Always pre-wash and dry your fabric before cutting to prevent shrinkage after your dress is completed.
Essential Materials and Tools:
Before you dive into sewing, gather your tools. Having everything ready saves time and frustration. While some items are absolute necessities, others simply make the process smoother.
- 2 yards of fabric: As discussed, choose a fabric that suits your style and the drape you desire for your dress. Consider its width when planning your pattern layout.
- Matching Thread: Select a high-quality polyester all-purpose thread that matches your fabric color as closely as possible. Good quality thread prevents breakage and ensures durable seams.
- A Sewing Machine: Any working sewing machine capable of a straight stitch and a zigzag stitch (for finishing seams) will suffice. Familiarize yourself with its basic functions, like threading and bobbin winding.
- Sharp Fabric Scissors: Invest in a pair of scissors exclusively for fabric. Using them on paper or other materials will dull them quickly, making cutting fabric a challenge.
- A Rotary Cutter (Optional but Recommended): A rotary cutter, combined with a self-healing cutting mat and a quilting ruler, allows for incredibly precise and fast fabric cutting, especially for straight lines and larger pieces. If you don’t have one, sharp fabric scissors will work just fine.
- Pattern Paper: Large sheets of paper (kraft paper, tracing paper, or even several taped-together newspaper sheets) are essential for drafting or tracing your pattern pieces.
- Measuring Tape: For accurate body measurements and fabric marking.
- Sewing Pins or Fabric Clips: To hold fabric pieces together before sewing.
- Iron and Ironing Board: Pressing seams as you go is crucial for a professional finish.
- Seam Ripper: Every sewer needs one for inevitable mistakes – consider it your best friend!
- Tailor’s Chalk or Fabric Marker: For marking pattern pieces onto your fabric.
Getting Started: Understanding the Wrap Dress Construction
Before diving into the steps, it’s helpful to visualize the basic components of a wrap dress. Most wrap dresses consist of:
- Bodice Fronts: These are usually two pieces that cross over each other, forming the characteristic V-neckline.
- Bodice Back: A single back piece that connects the two front pieces at the shoulders.
- Skirt Panels: These can be simple A-line panels, gathered, or flared, attaching to the bottom of the bodice.
- Waist Ties: Essential for tying the dress closed, these are usually attached to the side seams or front panels.
- Sleeves (Optional): Can range from simple cap sleeves to longer styles, or the dress can be sleeveless.
- Neckline Facing/Binding: Used to finish and stabilize the V-neckline.
Understanding these elements will make following any pattern or tutorial much easier, as you’ll know where each piece fits into the overall design.
Step-by-Step Directions to Sew Your Wrap Dress:
This wrap dress video tutorial by Jessica Shaw on YouTube offers exceptional visual guidance, taking you through each stage of this sewing project. While the tutorial is your primary guide, here’s an expanded breakdown of the steps you’ll generally follow, along with additional tips for success.
1. Preparation and Pattern Creation:
- Pre-wash and Press Fabric: Always start by washing and drying your fabric according to its care instructions. This preshrinks the fabric, preventing your finished dress from shrinking later. Then, press it thoroughly to remove any wrinkles, ensuring accurate cutting.
- Take Measurements: Measure your bust, waist, hips, and the desired length of your dress from your shoulder or natural waist. These measurements are crucial for a custom fit.
- Draft or Trace Your Pattern: Based on the tutorial’s instructions (or a commercial pattern), draw out your pattern pieces onto your pattern paper. Ensure all markings, such as grainlines, notches, and dart placements, are clearly transferred. Double-check all measurements.
- Lay Out and Cut Fabric: Carefully lay your fabric flat, ensuring it’s on grain. Pin your paper pattern pieces onto the fabric, paying close attention to the grainline arrows. Cut out each fabric panel precisely using your sharp fabric scissors or rotary cutter. Accuracy in cutting directly impacts the final fit and drape of your dress.
2. Constructing the Bodice:
- Sew Shoulder Seams: Place the front bodice pieces right sides together with the back bodice piece at the shoulder seams. Pin, stitch, and press the seams open.
- Finish the Neckline: The tutorial will guide you on how to finish the V-neckline. This typically involves attaching a facing or bias binding, stitching it in place, trimming, clipping curves, and understitching for a clean finish that prevents the facing from rolling out.
- Attach Sleeves (if applicable): If your design includes sleeves, you’ll attach them now. Pin the sleeve right sides together with the armhole, matching notches, and stitch. Press seams.
- Sew Side Seams: With right sides together, stitch the side seams of the bodice from the underarm down to the waist. Press seams open.
3. Assembling the Skirt and Joining Bodice:
- Sew Skirt Side Seams: If your skirt consists of multiple panels, sew them together at the side seams, right sides together. Press seams open.
- Gather or Pleat Skirt (if needed): Some wrap dress patterns may require gathering or pleating the skirt at the waistline to fit the bodice. Follow your pattern’s instructions carefully.
- Attach Skirt to Bodice: Pin the assembled skirt to the bottom edge of the bodice, right sides together, matching side seams and any notches. Stitch firmly at the waistline, securing the two main sections of your dress. Press the seam allowance upwards towards the bodice.
4. Creating and Attaching Waist Ties:
This step is crucial for the functionality and signature look of the wrap dress.
- Prepare Waist Ties: Cut the fabric strips for your waist ties according to the pattern. Fold them lengthwise, right sides together, and stitch along the raw edges, leaving one end open for turning. Trim seam allowances and clip corners, then turn the ties right side out using a loop turner or safety pin. Press them flat.
- Attach Waist Ties: The tutorial will demonstrate precisely where to attach the waist ties. Typically, one tie is sewn into the right side seam of the dress, while the other is attached to the edge of the left front bodice panel, allowing it to wrap around the back. Ensure they are securely stitched.
5. Finishing the Hems:
- Hem Sleeves (if applicable): Turn up the raw edge of the sleeve opening by the recommended seam allowance (usually twice for a double-fold hem), press, and stitch.
- Hem the Skirt: This is the final step to give your dress a polished look. Try on the dress to determine the desired length. Turn up the raw edge of the skirt hem twice by a small amount (e.g., ¼ inch then another ¼ inch for a narrow hem) or by a larger amount for a deeper hem. Press thoroughly before stitching all the way around. An even hem makes a huge difference in the overall quality of your finished garment.
Tips for Sewing Success:
- Press, Press, Press: Ironing seams as you go is not an optional step; it’s critical for achieving a professional finish and helps your garment lie flat and look crisp.
- Take Your Time: Rushing leads to mistakes. Enjoy the process, and don’t be afraid to take breaks.
- Test Stitches: Always test your machine’s tension and stitch settings on a scrap piece of your fabric before sewing on your actual garment.
- Use Good Quality Notions: Quality thread, sharp needles, and sturdy pins make a significant difference in your sewing experience and the durability of your dress.
- Don’t Fear the Seam Ripper: Mistakes happen! A seam ripper is your friend. It’s better to unpick a seam and re-sew it correctly than to leave an error.
- Stay Organized: Keep your workspace tidy, and your pattern pieces organized to avoid confusion.
Care and Maintenance of Your Handmade Wrap Dress:
To ensure your beautiful handmade wrap dress lasts for years to come, proper care is essential. Always refer to the care instructions for the specific fabric you used. Generally:
- Washing: Most cottons, rayons, and linen blends can be machine washed on a gentle cycle with cold water. If using a delicate fabric like silk, hand washing or dry cleaning might be necessary. Avoid harsh detergents.
- Drying: Air drying is often best to prevent shrinkage and preserve fabric integrity. If using a machine dryer, use a low heat setting.
- Ironing: Iron on a suitable heat setting for your fabric type. For eyelet or delicate fabrics, use a pressing cloth to protect the fabric.
- Storage: Hang your wrap dress on a padded hanger to maintain its shape and prevent wrinkles.
This wrap dress is truly one of the cutest and most versatile garments you can add to your wardrobe. It’s a project that gets a lot of attention, not just because of its lovely design, but because there’s a unique satisfaction in wearing something you’ve created with your own hands. The timeless style, combined with the personalized fit, makes it an absolute showstopper. Don’t hesitate to embark on this rewarding sewing adventure. You’ll be amazed at what you can achieve!