
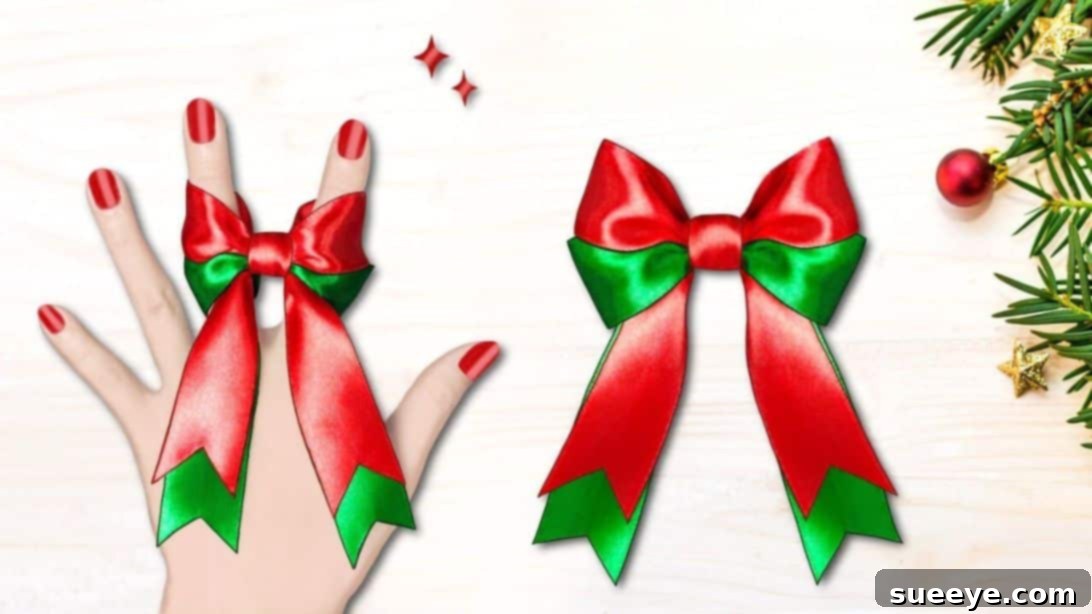
There’s a special kind of satisfaction that comes with crafting something beautiful by hand, and a perfectly tied bow is no exception. For a long time, my attempts at making a bow resulted in sad, lopsided creations that lacked the elegant flair I envisioned. This year, as I planned to adorn our Christmas tree with an array of charming bows, I knew it was time to master the art of bow making once and for all. I embarked on a quest for the ultimate tutorial, and that’s when I discovered a fantastic video from Gift Wrapping Land.
Initially, I admit, the steps seemed a tad intricate, and my first bow was far from perfect. However, with a little persistence and two more attempts, the technique clicked, and I finally got the hang of it. Trust me, the learning curve is surprisingly quick; after making just two or three bows, the process becomes second nature. If you’ve been dreaming of crafting your own stunning bows for gifts, decorations, or personal accessories, this method is truly a game-changer. It transforms a seemingly complex task into an enjoyable and rewarding craft.
RELATED: Turn a Hair Tie into a Teddy Bear Keychain
Before we dive into the step-by-step instructions, let’s explore why mastering the art of bow making is such a valuable skill and how it can elevate your creative projects. Whether it’s adding a luxurious touch to a present, enhancing your holiday decor, or creating unique hair accessories, a well-made bow speaks volumes about attention to detail and personal care. This guide aims to demystify the process, ensuring you can consistently create beautiful, professional-looking bows.
Here’s another tutorial for you: Easy No-Sew DIY Hair Bow Tutorial
Why Master the Art of Bow Making?
Making your own bows offers a myriad of benefits beyond just saving a few dollars. It allows for unparalleled customization, giving you complete control over the color, texture, size, and style to perfectly match any occasion or aesthetic. Store-bought bows, while convenient, often lack the personal touch and unique character of a handmade creation. Imagine crafting bespoke bows for every holiday, special event, or even just to add a splash of elegance to your everyday items.
Beyond the visual appeal, the process of creating a bow can be incredibly therapeutic. It’s a mindful activity that encourages focus and precision, offering a welcome break from the digital world. Plus, the sense of accomplishment you feel when you present a gift adorned with a perfectly tied bow – or display it proudly on your Christmas tree – is truly unparalleled. It adds a layer of warmth and thoughtfulness that prefabricated bows simply cannot replicate. Learning this skill opens up a world of creative possibilities, making your gifts and decorations truly stand out.
Choosing the Right Ribbon for Your Bow
The foundation of a magnificent bow lies in the ribbon you choose. Not all ribbons are created equal, and understanding the different types and their properties can significantly impact the final look and feel of your bow. For this particular method, and for achieving full, structured bows, the ribbon’s material and width play crucial roles.
-
Material Matters:
- Satin Ribbons: Known for their glossy finish and soft drape, satin ribbons create elegant, flowing bows. They can be a bit more slippery to work with but yield a luxurious result.
- Grosgrain Ribbons: These ribbons feature a distinctive ribbed texture, offering more stiffness and structure. They hold their shape exceptionally well, making them ideal for bows that need to maintain their form, like hair bows or those on wreaths.
- Wired Ribbons: A favorite for decorators, wired ribbons have thin wires along their edges, allowing them to be shaped and reshaped with ease. They are perfect for creating voluminous, sculptural bows that stay put. While not explicitly required for this tutorial, understanding wired ribbons can enhance your general bow-making repertoire.
- Velvet Ribbons: Offering a rich, opulent feel, velvet ribbons are perfect for festive occasions, especially during the holidays. They tend to be thicker and can add a luxurious texture to your bows.
- Width is Key: The tutorial specifically calls for ribbons that are 2.5 cm (approximately 1 inch) wide. This width is versatile, striking a good balance between being easy to handle and creating a bow with sufficient presence. Wider ribbons (e.g., 5-7 cm or 2-3 inches) create grander, more dramatic bows, often used for wreaths or large gifts. Thinner ribbons (e.g., 1-1.5 cm or 0.4-0.6 inches) are delicate and suitable for smaller embellishments or stacking.
- Length Requirements: The recommended length of 50 cm (approximately 20 inches) per piece ensures ample material for forming substantial loops and tails. If you desire longer tails or more voluminous loops, you can adjust this length, but be mindful of the material usage. For beginners, sticking to the suggested dimensions is advisable to get a feel for the technique.
For the bow demonstrated here, a ribbon with a bit of body, like a quality grosgrain or a slightly stiff satin, will work wonderfully. The two pieces of ribbon specified can be the same color for a classic look, or different colors/textures to add depth and interest to your final design. Experimenting with different ribbon combinations is part of the fun!
Gather Your Essentials: What You Need to Make a Bow
To embark on your bow-making journey, you’ll need just a few simple tools and materials. Having these readily available will ensure a smooth and enjoyable crafting process:
- 2 pieces of ribbon (2.5 cm x 50 cm each): As discussed, the quality and type of ribbon will influence your bow. Ensure both pieces are cut cleanly and precisely to the specified dimensions.
- Scissors: A sharp pair of fabric scissors is crucial for making clean, crisp cuts. Dull scissors can fray your ribbon edges, making the bow look messy.
- Lighter: This is an essential tool for sealing the ends of synthetic ribbons (like satin or grosgrain made from polyester) to prevent fraying. Use it carefully and quickly, just enough to melt the fibers slightly without burning the ribbon. Always exercise caution when working with open flames.
With these few items gathered, you’re ready to transform simple ribbons into a beautiful, handcrafted bow.
How to Make a Bow: Step-by-Step Guide
Creating a beautiful bow is a process that relies on careful measurement, gentle handling, and precise folding. Follow these detailed steps to achieve a perfectly symmetrical and elegant bow every time:
Step 1: Prepare Your Ribbons and Initial Placement
Begin by taking your two carefully cut pieces of ribbon. Place one ribbon directly on top of the other, ensuring their edges are perfectly aligned. This creates a double-layered ribbon, which will give your bow a fuller and more luxurious appearance. Next, from one end of this stacked ribbon, measure precisely 10 cm (approximately 4 inches). This measurement is crucial as it determines the length of one of your bow’s tails. Once you’ve marked the 10 cm point, securely hold the ribbons together at this mark using your thumb and ring finger. Maintain a firm but gentle grip to prevent the ribbons from slipping, as the stability of this initial hold is key to the entire process.
Step 2: Forming the Initial Loops and Crossover
Now, with the ribbons held between your thumb and ring finger, take the longer “working” end of the ribbon and wrap it around your index and middle fingers. The goal here is to create a loop. After wrapping, carefully insert the working end of the ribbon *between* your middle and ring fingers, ensuring it passes underneath the existing ribbon held there. This establishes the first crucial intersection. Next, fold the front part of the ribbon over, creating an ‘x’ shape across the center of your fingers. Finally, take the working end once more and insert it *between* your index and middle fingers, passing it underneath the ribbon you just folded over. This intricate maneuver sets up the structure for your knot and the first set of loops. Patience and practice here will make the subsequent steps much easier.
Step 3: Securing the Knot and Initial Shape
With the ‘x’ shape formed and the working end positioned correctly, gently pinch the entire structure you’ve created. While pinching, carefully fold the ribbons in half lengthwise at the point where they cross. This action will create a small opening or loop. Take the working end of the ribbon (the one you manipulated in Step 2) and insert it into this newly formed loop, coming in from the front right side. Once inserted, pull the working end firmly and steadily. As you pull, the ribbons will tighten, forming a secure knot at the center of your bow. This knot is the heart of your bow, providing its structural integrity. Ensure it’s tight enough to hold everything in place, but not so tight that it distorts the ribbon or prevents you from adjusting the loops.
Step 4: Shaping and Fluffing Your Bow
Once the knot is secure, it’s time to bring your bow to life. First, take a moment to adjust the center knot if it appears off-kilter. Gently slide and position it until it sits perfectly in the middle. Next, carefully separate the two layers of ribbon on each side of the bow, pulling them apart to create volume. This is where your bow starts to gain its characteristic fullness. For each separated ribbon, give it a slight twist at its base. This twisting action helps the ribbon loops lay correctly and prevents them from appearing flat or collapsing. Finally, use your thumb to gently stretch and fluff each loop, shaping them to achieve the desired roundness and symmetry. Continue adjusting and fluffing until you are satisfied with the bow’s overall shape and fullness. This step is all about artistic expression and ensuring your bow looks vibrant and dynamic.
Step 5: Tailoring the Tails and Finishing Touches
The tails of your bow are just as important as the loops for a polished finish. Take one of the front ribbon tails and fold it in half lengthwise. With sharp scissors, cut diagonally from the folded edge towards the raw edge, creating a classic “V” or “swallowtail” shape. This gives the tails a professional, decorative finish. Repeat this process for the back ribbon tail on the same side, but make sure to cut it slightly longer than the front tail for a layered effect. Do the exact same tailoring on the other side of the bow, ensuring symmetry and varying lengths for visual appeal. Once your tails are perfectly shaped, it’s crucial to prevent fraying. Take your lighter and, with extreme caution, lightly and quickly run the flame along the cut edges of each ribbon tail. The heat will melt the synthetic fibers, sealing the edges and preventing them from unraveling. Be very swift to avoid burning or discoloring the ribbon. This final step adds durability and a professional touch to your handmade bow.
Troubleshooting Common Bow-Making Hurdles
Even with clear instructions, crafting the perfect bow can present a few challenges, especially for beginners. Don’t get discouraged if your first few attempts aren’t flawless! Here are some common issues you might encounter and how to overcome them:
-
Uneven Loops: This is perhaps the most frequent problem. Often, it’s due to inconsistent tension when wrapping the ribbon or uneven lengths of the initial loops.
- Solution: Pay close attention in Step 2 to ensure both sides of the “x” are of similar size. In Step 4, be very diligent with adjusting and fluffing; you can gently pull on the loops from the knot to even them out. Practice helps tremendously with developing an intuitive feel for tension.
-
Loose or Shifting Knot: If your bow feels flimsy or the center slips, the knot wasn’t tightened enough in Step 3.
- Solution: When pulling the working end to form the knot, apply firm, steady pressure. Ensure the ribbons are truly secure before moving to the next step. If it feels loose, you might need to carefully undo it and re-tie, focusing on that initial tightness.
-
Fraying Edges (Before Sealing): If your ribbon is fraying even before you get to the lighter, your scissors might not be sharp enough or your ribbon quality could be low.
- Solution: Always use sharp, dedicated fabric scissors for clean cuts. If using a delicate ribbon, handle it minimally before the final sealing step.
-
Flat or Lifeless Bow: Sometimes, bows don’t achieve that desired plumpness. This can happen if the ribbon material is too thin, or if Step 4 (shaping and fluffing) is rushed.
- Solution: Choose ribbons with good body and structure (as discussed in the “Choosing the Right Ribbon” section). In Step 4, take your time to separate the layers, twist each side, and gently stretch the loops with your thumb. Don’t be afraid to really work the ribbon to give it volume.
Remember, every expert was once a beginner. Each bow you make is a step towards perfection. Embrace the learning process, and soon you’ll be creating stunning bows with confidence.
Beyond the Gift Box: Creative Uses for Your Handmade Bows
Once you’ve mastered the art of tying the perfect bow, a world of creative possibilities opens up. These versatile embellishments can be used for so much more than just adorning gifts. Here are some inspiring ideas to put your newly acquired skill to good use:
- Christmas Tree Decorations: As initially inspired, handmade bows add a charming, personalized touch to your holiday tree. Use a variety of sizes and colors to create a cohesive and elegant look. They can also be tied onto wreaths, garlands, or even hung individually as ornaments.
- Home Decor Accents: Elevate your interior design by incorporating bows into your home decor. Tie them around curtain tie-backs, secure them to the backs of dining chairs for special occasions, or use them to embellish throw pillows. A well-placed bow can instantly add a touch of sophistication or whimsy to any room.
- Hair Accessories: Small to medium-sized bows make exquisite hair clips, headbands, or ponytail holders. Simply attach your finished bow to a blank hair clip or elastic with hot glue for a unique, handmade accessory. These are fantastic for both children and adults.
- Fashion Embellishments: Give an old garment a new lease on life by adding a decorative bow. Sew one onto a plain dress, attach it to a belt, or use it to adorn a handbag. Custom bows can transform ordinary items into statement pieces.
- Party and Event Decor: Handmade bows are perfect for adding festive touches to celebrations. Use them to decorate party favors, tie around cutlery, embellish centerpieces, or create charming chair sashes for weddings and showers.
- Craft Projects: Incorporate bows into scrapbooking, card making, or other DIY craft projects. They add dimension and a finished look to handmade cards, gift tags, or photo album covers.
- Seasonal Wreaths and Garlands: Create stunning seasonal decor by attaching your bows to wreaths, garlands, or swags. Wired ribbons work especially well for outdoor use, as they maintain their shape against the elements.
The beauty of making your own bows is the endless potential for customization. You’re no longer limited by what’s available in stores, but can create the exact accent you need to bring your vision to life.
The Perfect Bow, Unleashed: Your Creative Journey
From wonky and messy to perfectly structured and elegant, the journey to mastering bow making is both rewarding and enjoyable. What started as a simple desire to decorate a Christmas tree beautifully has evolved into a skill that can enhance countless aspects of your creative life. This detailed guide, inspired by the clear instructions from Gift Wrapping Land, provides you with all the knowledge and tips you need to craft stunning bows with confidence.
Remember, the key ingredients are patience, practice, and a willingness to experiment with different ribbons and colors. Don’t be afraid to try new combinations or adjust the technique slightly to find what works best for you. Each bow you make will refine your technique and deepen your understanding of ribbon manipulation. So, gather your materials, follow these steps, and prepare to impress yourself and others with your beautiful, handcrafted bows. The perfect bow is not just a decoration; it’s a testament to your creativity and attention to detail. Happy bow making!