
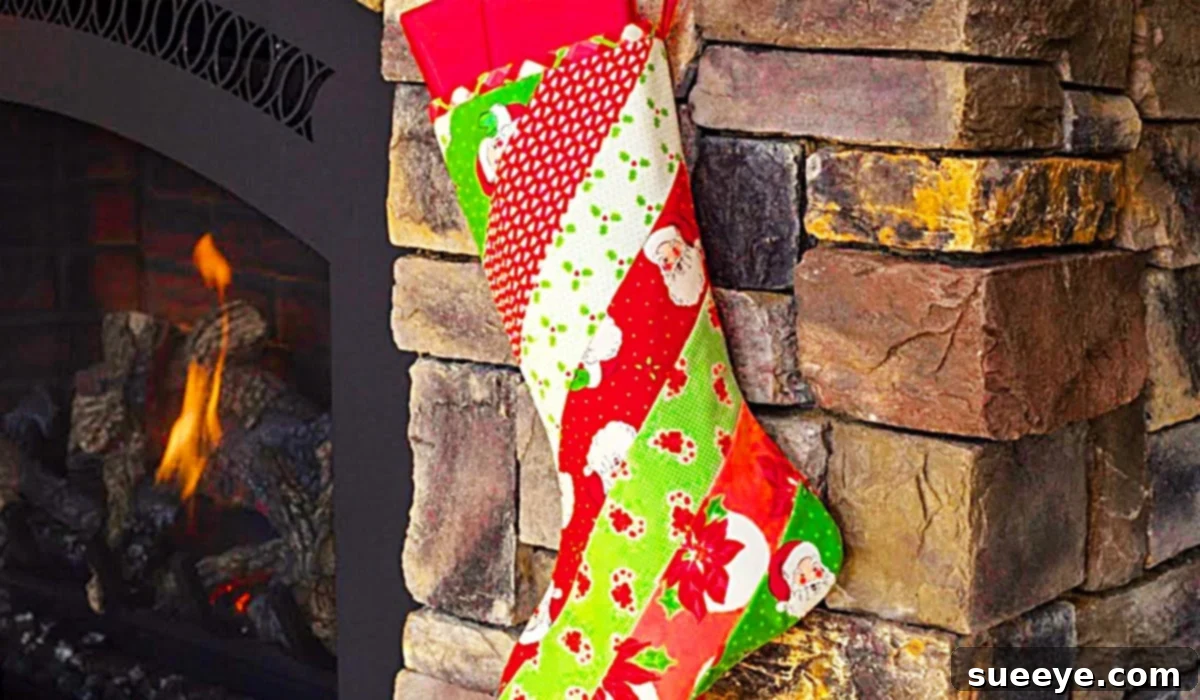
The magic of Christmas is often found in the personal touches and cherished traditions we create. What could be more special than waking up on Christmas morning to a beautifully handmade stocking, brimming with festive surprises? When I stumbled upon the incredible Quilt-As-You-Go Christmas Stocking video tutorial by Shabby Fabrics on YouTube, I instantly knew I had discovered the ideal project to adorn my mantelpiece this holiday season. This particular method offers a delightful blend of simplicity and stunning results, making it accessible even for those relatively new to quilting. The accompanying pattern from Shabby Fabrics is remarkably straightforward, guiding you through each step with clarity and ease. Imagine the joy and excitement when your loved ones discover these lovely, personalized stockings filled with goodies – a true testament to the warmth and care of handmade holiday decor. This design stands out as one of the cutest and most satisfying stocking patterns I’ve encountered in a long while, and the anticipation of crafting these festive treasures is truly exciting.
How To Make A Quilt-As-You-Go Christmas Stocking: A Detailed Guide
Creating your own quilted Christmas stockings using the Quilt-As-You-Go (QAYG) method is an incredibly rewarding experience. Not only does it allow you to infuse your unique style into your holiday decorations, but it also results in a durable, beautiful keepsake that can be enjoyed for generations. The QAYG technique is celebrated for its efficiency and the professional finish it yields, making it an excellent choice for projects like stockings where individual quilted panels are later joined. This guide will walk you through everything you need to know, from gathering your materials to the final finishing touches, ensuring your handmade stockings are a highlight of your festive display.
Why Choose the Quilt-As-You-Go Method for Your Christmas Stockings?
The Quilt-As-You-Go technique has gained immense popularity among quilters for several compelling reasons, especially when applied to projects like Christmas stockings. Understanding these benefits will enhance your appreciation for this craft and motivate you through the creative process:
- Efficiency and Speed: Unlike traditional quilting where you piece a top, layer it with batting and backing, and then quilt it, QAYG allows you to quilt smaller sections as you go. This can feel less daunting and significantly speeds up the overall process, especially for complex designs. You create quilted fabric panels that are ready for assembly almost immediately.
- Manageability: Handling a large quilt sandwich through your sewing machine can be cumbersome. With QAYG, you’re only working with smaller, manageable pieces, making it ideal for home sewing machines and reducing physical strain. This is particularly advantageous for projects with intricate shapes like stockings.
- Reduced Bulk: By quilting panels individually, you avoid the bulk of a fully assembled, layered quilt during the quilting phase. This allows for smoother sewing and more precise quilting lines, contributing to a neater finished product.
- Versatility in Design: QAYG opens up a world of design possibilities. You can easily incorporate different fabric strips, create intricate patterns, or even use scraps from other projects to achieve a unique, patchwork aesthetic. Each stocking can be a distinct piece of art, perfectly reflecting individual personalities or coordinating with your festive theme.
- Durability and Longevity: The act of quilting adds an extra layer of structural integrity to your fabric. Your QAYG stockings will be sturdier and more resilient than unquilted fabric stockings, ensuring they withstand years of joyous Christmas mornings and become cherished family heirlooms.
- Beginner-Friendly: While it might sound advanced, QAYG is surprisingly accessible for beginners. The core technique involves sewing fabric strips onto batting, flipping, and pressing, which are fundamental sewing skills. The repetitive nature helps build confidence and proficiency quickly.
Gathering Your Essential Materials for a Quilted Christmas Stocking
Before diving into the creative process, it’s crucial to gather all your materials. High-quality supplies not only make the sewing experience more enjoyable but also contribute significantly to the professional look and durability of your finished stocking. Here’s a detailed list of what you’ll need:
- Pattern Kit Download: The foundation of your project! A well-designed pattern, like the one from Shabby Fabrics, provides precise templates and instructions, ensuring your stocking takes the correct shape and size. Ensure you print it accurately to scale.
- Assorted Fabrics: This is where your creativity truly shines!
- Main Fabric (for strips): Choose 3-5 coordinating festive fabrics (quilting cotton is ideal) for the QAYG strips. Consider a mix of prints and solids that complement each other. Approximately 1/4 yard of each fabric will likely be sufficient, depending on the desired strip width and stocking size.
- Backing Fabric: A single piece of fabric for the back of the stocking. This can be a coordinating solid or a subtle print. About 1/2 to 3/4 yard will be needed for a standard-sized stocking, allowing for seam allowances.
- Lining Fabric (Optional but Recommended): For a truly polished finish and added durability, a lining fabric is excellent. Choose a complementary color or simple holiday print. Same yardage as backing.
- Cuff Fabric: A special fabric for the top cuff. Faux fur, a contrasting velvet, or a luxurious solid quilting cotton can add a touch of elegance. A fat quarter or 1/4 yard is usually plenty.
- Hanging Loop Fabric: A small scrap of sturdy fabric that matches or coordinates with your stocking.
- Batting: This provides the classic quilted puffiness and structure. A good quality cotton or cotton-blend batting (like Warm & Natural) is recommended. You’ll need enough to cut two stocking shapes, slightly larger than your pattern pieces.
- A Reliable Sewing Machine: Any standard home sewing machine capable of a straight stitch will work perfectly. Ensure it’s in good working order and has a fresh needle suitable for quilting (e.g., a universal 80/12 or 90/14 needle).
- High-Quality Thread: Choose a strong polyester or cotton thread that matches your main fabrics. Having a neutral color (like white or cream) for basting and a coordinating color for topstitching is often helpful.
- Rotary Cutter: Essential for precise and efficient cutting of fabric strips and shapes. A sharp blade is key for clean edges.
- A Large Cutting Mat: Provides a protected surface for using your rotary cutter and helps with accurate measurements.
- An Iron and Ironing Board: Absolutely critical for crisp seams and a professional finish. Pressing as you go is non-negotiable in quilting.
- Fabric Scissors: Sharp shears specifically for fabric will ensure clean cuts when your rotary cutter isn’t suitable, especially for trimming curves.
- Quilting Ruler: A clear acrylic ruler (6″x24″ or similar) is invaluable for precise measuring and cutting of strips.
- Pins or Fabric Clips: To hold layers of fabric securely in place while sewing.
- Fabric Marker or Chalk: For transferring pattern markings or drawing lines on your fabric.
Step-by-Step Directions: Crafting Your Beautiful Quilted Christmas Stocking
This detailed guide will walk you through each phase of creating your Quilt-As-You-Go Christmas stocking, ensuring a delightful and successful crafting experience. We’ll start with preparation and move through the quilting process, assembly, and finishing touches.
Part 1: Preparation and Cutting
Accuracy in this initial stage sets the foundation for a perfectly shaped stocking.
- Print and Prepare Your Pattern: Download and print your Shabby Fabrics pattern. Carefully tape together any pattern pieces if required, ensuring all registration marks align perfectly. Cut out the stocking body, cuff, and hanging loop templates.
- Pre-Wash and Press Fabrics: To prevent future shrinkage and ensure colors don’t bleed, pre-wash all your quilting cotton fabrics. Once dry, press them thoroughly to remove all wrinkles. This step is often overlooked but is crucial for professional results.
- Cut Batting Pieces: Lay your batting flat. Using your stocking body pattern piece, cut two mirrored stocking shapes from the batting. For ease of QAYG, it’s often recommended to cut the batting slightly larger (about 1/2 inch to 1 inch extra around all edges) than the pattern piece. This gives you some wiggle room for trimming later.
- Cut Backing and Lining Fabrics: If using a separate backing and lining, cut two mirrored stocking shapes from your chosen backing fabric and two mirrored stocking shapes from your lining fabric, using your stocking body pattern.
- Prepare Fabric Strips for QAYG: From your chosen main fabrics, cut various widths of strips (e.g., 1.5″, 2″, 2.5″) that are long enough to span the widest part of your stocking pattern when laid diagonally. You will need enough strips to cover the entire batting piece for one side of the stocking. You might cut some straight, some at a 30 or 45-degree angle for visual interest.
- Cut Cuff and Hanging Loop Pieces: Using your pattern pieces, cut the cuff fabric and the small strip for the hanging loop.
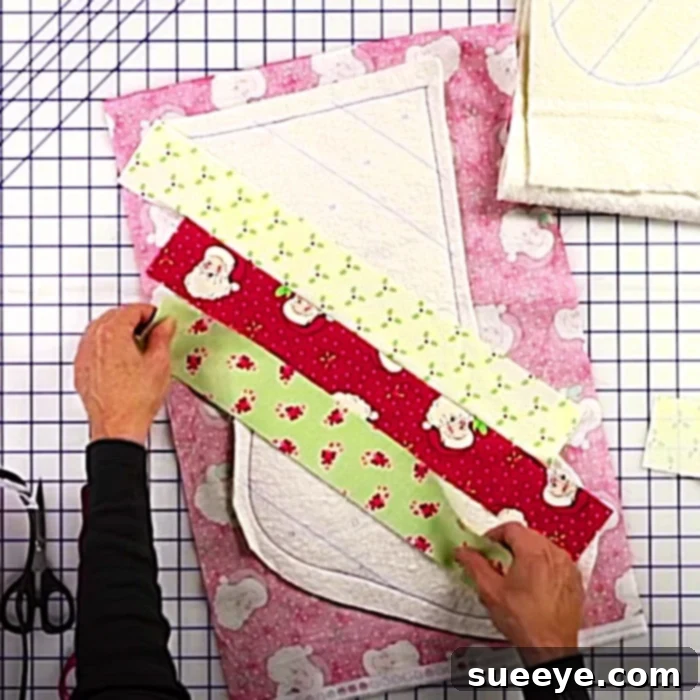
Part 2: The Quilt-As-You-Go Process for the Stocking Front
This is the heart of the project, where your flat batting transforms into a beautifully textured quilted panel.
- Lay Your Foundation: Take one of your cut batting stocking shapes. This will serve as your base. Place it flat on your cutting mat or ironing board.
- Position the First Fabric Strip: Choose your first fabric strip. Place it centrally and diagonally across the batting, right side up. Ensure it extends beyond the edges of the batting on both sides. Pin it lightly if needed, but often gravity holds it.
- Add the Second Strip: Take your second fabric strip. Place it right side down, aligning one long edge with the long edge of the first strip.
- Sew and Flip: Stitch along the aligned edge using a 1/4-inch seam allowance. Use a slightly longer stitch length than normal (e.g., 2.5-3.0mm) for quilting. Once sewn, flip the second strip open so it lays flat, right side up, covering part of the batting. Press the seam flat with your iron. This is the “sew, flip, and press” method.
- Continue Adding Strips: Repeat step 10, adding strips alternately to one side and then the other side of your central strip. Each new strip will be placed right sides together with the previous strip, sewn, flipped open, and pressed. Continue until the entire batting piece is covered with fabric strips. Ensure all strips extend beyond the edges of the batting.
- Create the Second Quilted Panel (Optional): If you desire both sides of your stocking to be quilted, repeat steps 7-11 to create a second quilted panel using the other batting piece. Alternatively, you can use a single piece of backing fabric for the back of the stocking.
- Trim the Quilted Panels: Once your batting pieces are fully covered with fabric, place your original stocking pattern piece on top of each quilted panel. Carefully cut around the pattern piece with your rotary cutter or fabric scissors to trim the excess fabric and batting, creating your final quilted stocking front(s).
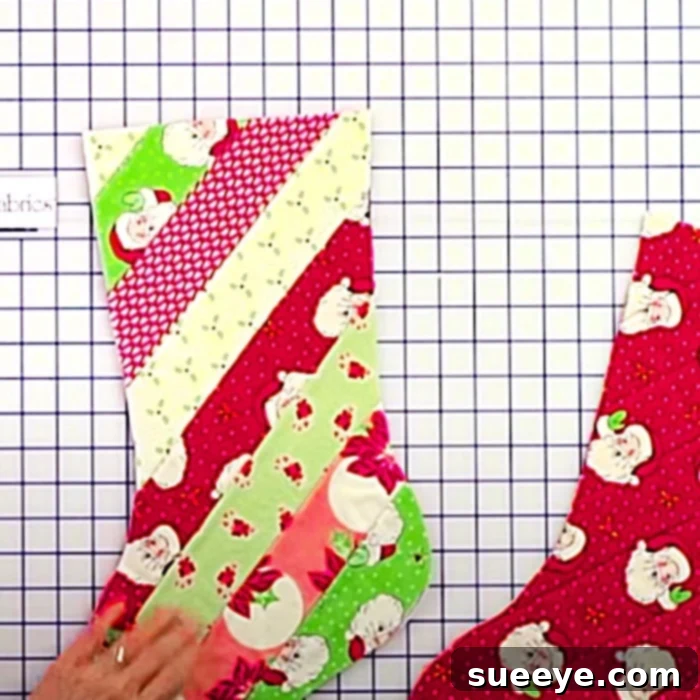
Part 3: Assembling the Stocking Body
Now that your quilted panels are ready, it’s time to bring your stocking to life.
- Prepare the Hanging Loop: Take your hanging loop fabric strip. Fold it in half lengthwise, right sides together, and press. Stitch along the raw edge with a 1/4-inch seam allowance. Turn it right side out (a loop turner can help) and press flat.
- Layer the Stocking Pieces: Place one quilted stocking panel right side up. If using a lining, place one lining fabric piece right side up on top of the quilted panel. Place the other quilted stocking panel right side down on top of the lining (or directly on the first quilted panel if not lining). Position the hanging loop on the top back seam of the stocking, with the raw ends aligned with the top raw edge and the loop pointing inwards towards the toe.
- Sew the Stocking Halves: Pin all layers securely around the perimeter of the stocking, leaving the top opening unsewn. Stitch around the entire edge with a 1/4-inch seam allowance. Be sure to backstitch at the beginning and end, and especially over the hanging loop for extra reinforcement.
- Clip Curves and Turn: Carefully trim the seam allowance around the curves of the stocking (toe and heel) without cutting through your stitches. This helps the curves lie smoothly when turned. Turn the stocking right side out and gently push out the curves. Press well.
Part 4: Creating and Attaching the Cuff
The cuff provides a beautiful finishing touch and often a place for personalization.
- Prepare the Cuff: Take your cuff fabric piece. Fold it in half widthwise, right sides together, and stitch along the short raw edge to form a loop. Press the seam open or to one side.
- Fold and Press Cuff: Fold the cuff loop in half lengthwise, wrong sides together, aligning the raw edges. Press firmly.
- Attach the Cuff to Stocking: With the stocking still right side out, slide the cuff over the top opening of the stocking, aligning the raw edges of the cuff with the raw edge of the stocking opening. Ensure the seam of the cuff aligns with the back seam of the stocking (or your chosen placement for the hanging loop). Pin securely all around.
- Sew the Cuff: Stitch the cuff to the stocking with a 1/4-inch seam allowance. Backstitch at the beginning and end.
- Finish the Cuff Seam: You can either serge this seam, zigzag over it, or press it upwards into the cuff. For a very neat finish, you might turn the seam allowance of the cuff inwards and topstitch it, or add a lining layer to enclose the seam completely (if you opted for a full lining).
Part 5: Finishing Touches and Embellishments
The final steps transform your project into a true masterpiece.
- Final Pressing: Give your entire stocking a good final press, paying attention to the cuff and seams, to ensure everything lies flat and crisp.
- Embellish (Optional): This is your chance to add even more personal flair! Consider adding embroidered monograms, festive appliques, decorative buttons, or even a name tag to each stocking.
Tips for Success and Customization
To ensure your Quilt-As-You-Go Christmas stockings are not only beautiful but also a joy to create, consider these extra tips:
- Fabric Selection is Key: Don’t be afraid to experiment with different fabric collections and themes. While traditional reds and greens are classic, consider blues and silvers for a frosty look, or even whimsical prints for a child’s stocking. Coordinating various prints and solids adds depth and visual interest.
- Precision Pays Off: In quilting, accurate cutting and consistent seam allowances are paramount. Take your time with the rotary cutter and ruler, and always use a 1/4-inch seam allowance unless otherwise specified. Pressing after every seam helps keep everything neat and square.
- Don’t Rush the Process: Crafting is meant to be enjoyed. Allow yourself ample time for each step, especially the QAYG quilting, which can be meditative. Rushing can lead to mistakes and frustration.
- Personalize Every Stocking: Make each stocking unique for its recipient. Use their favorite colors, add their initial through embroidery or appliqué, or even incorporate a small charm related to their hobbies. These small details make them truly special.
- Batch Sewing for Multiple Stockings: If you’re making several stockings for the whole family, consider a “production line” approach. Cut all your batting pieces, then all your fabric strips, then quilt all the fronts, and so on. This can be more efficient than completing one stocking from start to finish before starting the next.
- Care and Maintenance: Quilted items are often machine washable on a gentle cycle with cold water. Tumble dry on low or air dry flat to maintain their shape and vibrant colors. Always check your fabric manufacturer’s recommendations.
I have now had the immense pleasure of making one of these beautiful stockings for every member of my family, and the response has been overwhelmingly positive. They truly adore them! These brightly colored, uniquely textured stockings bring a sense of handmade warmth and joy to our home. They are incredibly versatile, matching almost any existing Christmas decor, and are sure to bring delight to all who see them hanging by the fireplace. Embark on this wonderful crafting journey and create lasting memories, one stitch at a time. Your mantelpiece will thank you!