
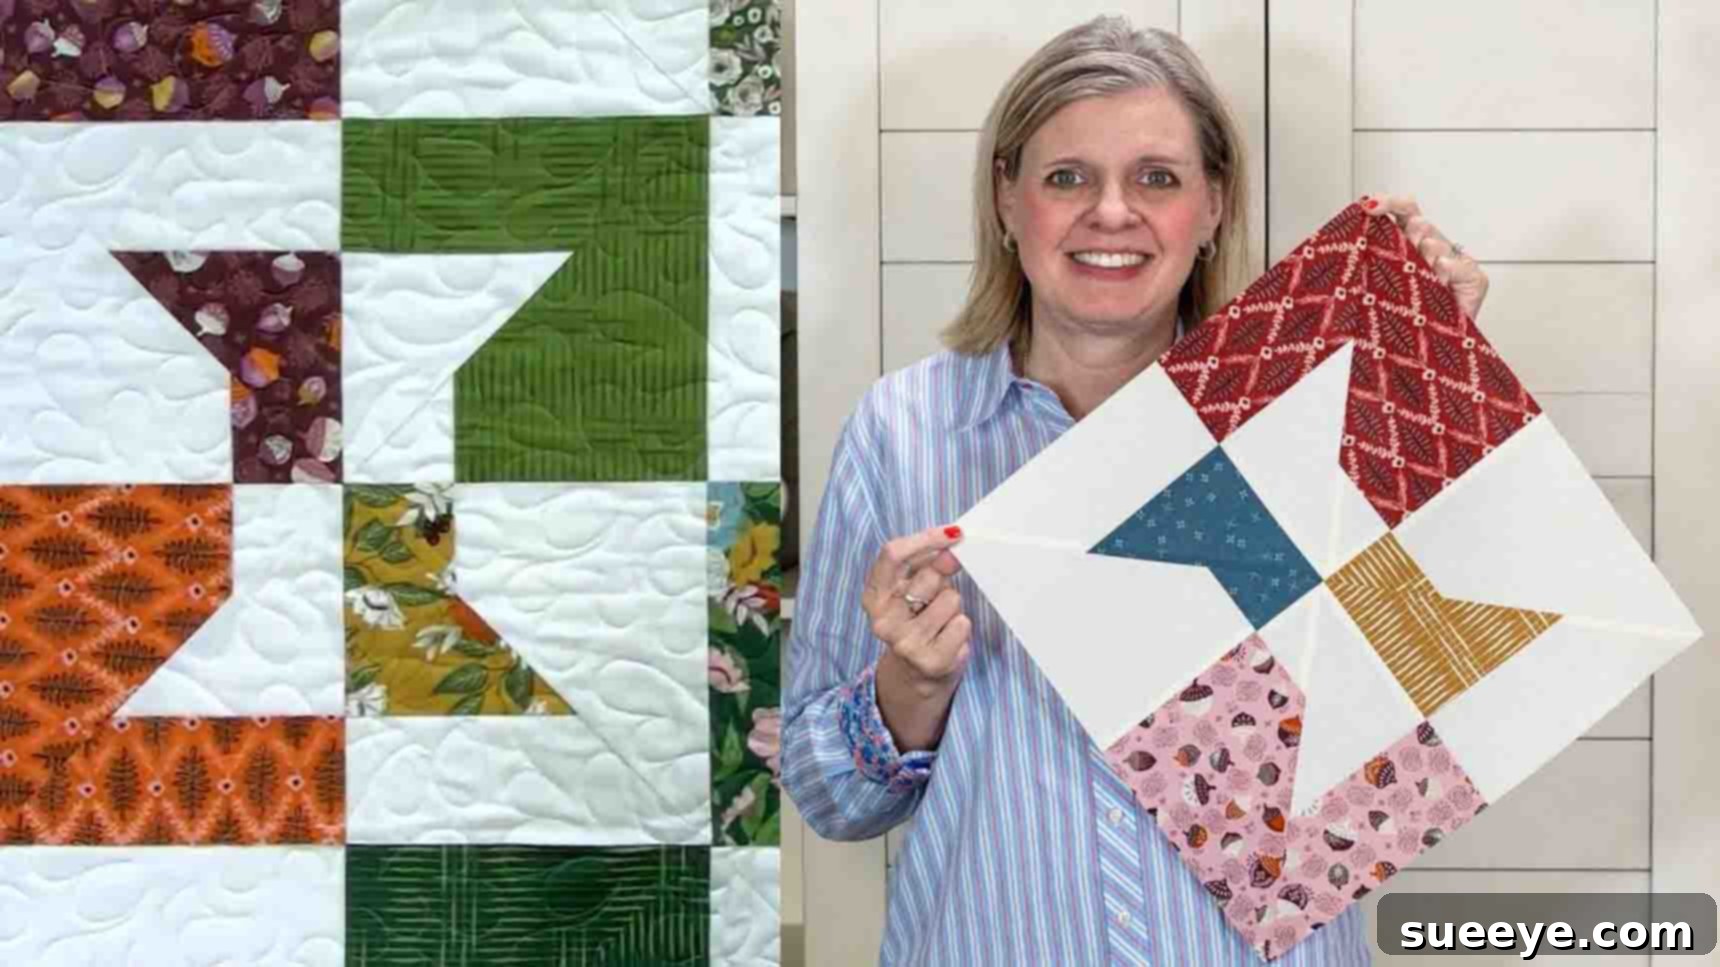
Layer Cake Spools Quilt: A Beginner-Friendly Guide to Crafting Charming Fabric Spools
Embark on a delightful quilting journey with the enchanting Layer Cake Spools Quilt! This popular pattern, demonstrated by the experts at Fat Quarter Shop, might appear intricate at first glance, but it’s remarkably simple and incredibly rewarding to construct. Whether you’re a seasoned quilter or picking up your first rotary cutter, this tutorial is designed to guide you through each step, making the process enjoyable and accessible. Get ready to impress your loved ones with a stunning, unique quilt that combines classic charm with modern convenience. Follow this comprehensive guide to transform pre-cut fabric layer cakes into a beautiful quilt featuring whimsical spool motifs.
Why Choose the Layer Cake Spools Quilt?
The Layer Cake Spools Quilt offers a perfect blend of aesthetic appeal and quilting practicality. It’s an ideal project for those looking to expand their skills without feeling overwhelmed.
The Allure of Spools
The spool design is a timeless classic in the quilting world. It evokes a sense of nostalgia, reminiscent of old sewing notions and the intricate craft of fabric arts. Each spool block, when pieced together, creates a dynamic and captivating pattern that draws the eye, making your finished quilt a true focal point in any room. The repetition of the spool motif offers a comforting rhythm, resulting in a quilt that is both visually engaging and harmonious.
Simplicity with Layer Cakes
One of the greatest advantages of this pattern is its use of fabric layer cakes. These pre-cut 10-inch squares eliminate the need for extensive initial cutting, saving you valuable time and ensuring consistency. This convenience makes the project move faster and reduces the chances of errors, making it particularly appealing for beginners. Layer cakes also offer a curated collection of coordinating fabrics, taking the guesswork out of fabric selection and ensuring a cohesive and beautiful final product.
Essential Materials for Your Spools Quilt
Gathering your materials before you begin will ensure a smooth and enjoyable quilting experience. Here’s what you’ll need to create your captivating Layer Cake Spools Quilt:
- One Print Layer Cake (Fabric A): This typically consists of 42 pre-cut 10-inch print squares. If purchasing individual squares, you will need approximately 32 – 10″ print squares for the spool ends and connectors.
- One Solid Layer Cake (Fabric B): Similar to the print layer cake, this will provide 42 pre-cut 10-inch solid squares. If buying individually, aim for 32 – 10″ solid squares to serve as the background elements of your spools.
- 5/8 Yard Binding Fabric (Fabric C): This fabric will be used to create the finished edge of your quilt, giving it a polished and professional look. Choose a color that complements your main fabrics.
- 4 Yards Backing Fabric: This will form the underside of your quilt, providing warmth and stability. It’s an opportunity to use a coordinating print or a soft solid for added comfort.
- Queen Size Batting (approximately 90″ x 108″): The batting provides the warmth and loft to your quilt. A cotton or cotton-blend batting is often recommended for its drape and ease of quilting.
Tools You’ll Need
Having the right tools is just as important as having the right fabric. These standard quilting tools will make the process much smoother:
- Sewing Machine: A reliable sewing machine with a quarter-inch foot is essential for consistent seam allowances.
- Rotary Cutter: A sharp rotary cutter (45mm or 60mm) is crucial for precise and efficient fabric cutting.
- Self-Healing Cutting Mat: Protect your work surface and prolong the life of your rotary blade with a good quality cutting mat.
- Quilting Rulers: A few essential rulers, including an 8½” square ruler, a 3½” square ruler, and a longer rectangular ruler (e.g., 6″ x 24″), will be invaluable for accurate measurements and trimming.
- Fabric Scissors: For snipping threads and other small cuts.
- Iron and Ironing Board: Crucial for pressing seams flat and setting stitches, which ensures accurate block assembly.
- Straight Pins or Fabric Clips: To secure fabric layers before sewing.
- Matching Thread: High-quality 50wt cotton thread that blends with or complements your fabrics.
- Fabric Marker or Pencil: For drawing diagonal lines on your fabric.
- Seam Ripper: Every quilter needs one for occasional corrections!
Precise Cutting Guidelines
Accurate cutting is the foundation of a successful quilt. Take your time with this step to ensure all your pieces are perfectly sized.
- Binding Fabric (Fabric C): Cut 7 strips, each measuring 2½ inches wide by the width of the fabric (WOF). These strips will be joined together later to create your continuous binding.
Step-by-Step Directions: Crafting Your Spools Quilt
Let’s begin the exciting process of creating your Layer Cake Spools Quilt. Follow these detailed steps carefully for the best results.
Step 1: Preparing Your Fabric Blocks for the Spools
The first step involves preparing your 10-inch squares from both the print and solid layer cakes into smaller, specific units. This precise preparation sets the stage for accurate spool construction.
- Initial Trimming and Labeling: Take one 10-inch print square (Fabric A) and one 10-inch solid square (Fabric B). Using your 3½-inch square ruler, trim a smaller square from each.
- From your print square, you will get a small print piece (label this A1) and a larger print piece (label this A2).
- From your solid square, you will get a small solid piece (label this B1) and a larger solid piece (label this B2).
Repeat this trimming process for all 32 of your print squares and all 32 of your solid background squares. This ensures you have matching sets of large and small pieces from both fabric types.
- First Block Assembly: Now, for your initial block units, select one large print piece (A2) and one small solid piece (B1). Arrange them so the small solid piece is on the left and the large print piece is on the right.
- Second Block Assembly: For a matching, complementary block, select one large solid piece (B2) and one small print piece (A1). Arrange them so the small print piece is on the left and the large solid piece is on the right.
- Sewing the Initial Pairs: With right sides together, sew these pairs along their shared edge using a precise ¼-inch seam allowance.
- For the A2 + B1 pair, press the seam allowance towards the print fabric (A2).
- For the B2 + A1 pair, press the seam allowance towards the solid fabric (B2).
You will create 32 of each of these two types of pairs, ensuring you have two complementary units for each future spool block.
- Trimming the Combined Units: Take an 8½-inch square ruler. Carefully place the 3-inch line of the ruler directly onto the seam of your sewn pair. Trim away any excess fabric around all four edges, squaring up the block to an 8½-inch square.
- You will create 32 of these 8½-inch squares with the print on the left (A2 + B1 units).
- You will also create 32 of these 8½-inch squares with the background (solid) on the left (B2 + A1 units).
This step is critical for achieving consistent block sizes and sharp, clean spools.
Step 2: Constructing the Individual Spool Units
This step involves transforming your prepared 8½-inch squares into the distinctive spool shape using a clever technique of diagonal stitching and cutting. Precision here is key for crisp spool edges.
- Pairing the Units: Take one of the 8½-inch squares where the large solid is on the left and the small print is on the right (B2+A1 unit). This will be your bottom piece. Now, select a matching 8½-inch square where the large print is on the left and the small solid is on the right (A2+B1 unit). This will be your top piece. Ensure these two pieces complement each other in terms of fabric pattern and color as they will form one complete spool block.
- Securing the Layers: Place the two matching 8½-inch units right sides together. Align all edges carefully. Pin them securely in place to prevent any shifting during stitching.
- Marking Diagonal Lines: Using a fabric marker or pencil, draw a diagonal line from one corner to the opposite corner across the entire 8½-inch square. Then, draw another line ¼-inch away from your first drawn line, on one side. Rotate the block 180 degrees and repeat this process, drawing another line ¼-inch away from the *original* diagonal line on the *other* side. You should now have three parallel lines across your block: a center line, and two lines ¼-inch on either side of it.
- Stitching the Outer Lines: Carefully stitch along the two outer lines you just drew. Do NOT stitch on the center line. Use a consistent stitch length and ensure your seams are straight.
- Cutting the Center Line: Once both outer lines are stitched, use your rotary cutter and ruler to cut directly on the center diagonal line. This will yield two half-square triangle (HST) units.
- Pressing and Trimming “Dog Ears”: Press each HST unit open. For best results, press the seam allowance towards the darker fabric to prevent shadowing through lighter areas. Once pressed, you will notice small triangles of excess fabric at the corners – these are often called “dog ears.” Carefully trim these off using your rotary cutter and ruler for a clean finish.
- Squaring Up Blocks: Each of these newly formed spool units should now be squared up to a consistent size, usually 6½ inches or as indicated in the free pattern. This ensures all your blocks are uniform, which is essential for a flat and smooth quilt top.
- Repeat for All Spools: Continue this process to create 32 individual spool blocks. This means you will have 32 blocks with the spool end facing one direction and 32 with the spool end facing the opposite direction. Consistency in this step is crucial for the overall success of your quilt.
Step 3: Assembling Your Quilt Top
Once all your individual spool blocks are created and squared up, it’s time to bring them together to form the captivating quilt top. This stage requires careful arrangement and precise sewing to ensure the spool pattern aligns beautifully.
- Layout Design: Before sewing, lay out all 32 spool blocks on a design wall or a large flat surface. Experiment with different arrangements to achieve your desired pattern. The beauty of the spools quilt lies in how these blocks interact, creating a sense of movement and depth. Ensure that the ‘spool’ elements are consistently oriented according to the pattern’s design, often creating a diagonal flow.
- Sewing Blocks into Rows: Once you are satisfied with your layout, begin sewing the blocks together into horizontal rows. Take the first two blocks in a row, place them right sides together, and sew along one edge using a ¼-inch seam allowance. Continue adding blocks to form each full row.
- Pressing Seams within Rows: After completing each row, press the seam allowances. A common practice is to alternate the direction of pressing seams in adjacent rows (e.g., press seams to the left in row 1, to the right in row 2, etc.). This “nesting” technique helps reduce bulk and makes it easier to match seam intersections when joining rows.
- Joining the Rows: With your rows prepared, it’s time to sew them together to form the complete quilt top. Place two adjacent rows right sides together, carefully matching all seam intersections. Use pins generously at these points to ensure alignment. Sew along the long edge using a ¼-inch seam allowance.
- Final Pressing of the Quilt Top: Once all rows are joined, give your entire quilt top a final, thorough press. This flattens all seams, removes any wrinkles, and prepares it for the next stages of basting and quilting. Measure your finished quilt top to ensure it matches the pattern’s expected dimensions.
Step 4: Basting the Quilt Layers
Basting is the crucial step of temporarily securing the three layers of your quilt – the quilt top, batting, and backing – together before quilting. Proper basting prevents shifting and puckering during the quilting process.
- Prepare Your Space: Clear a large, clean, flat surface (a dining table, clean floor, or design wall works well).
- Lay the Backing: Place your backing fabric wrong side up on your prepared surface. Smooth it out completely, ensuring there are no wrinkles or creases. Use masking tape to secure the edges of the backing to your surface, pulling it taut but not stretched.
- Add the Batting: Lay the batting evenly over the backing fabric. Smooth it out gently from the center outwards, ensuring it extends beyond the backing by a few inches on all sides. Avoid stretching the batting.
- Position the Quilt Top: Carefully center your finished quilt top over the batting, right side up. Again, smooth it out from the center to the edges, ensuring it is flat and free of wrinkles. The quilt top should be entirely within the batting and backing layers, with batting and backing extending beyond its edges.
- Basting Method: Choose your preferred basting method:
- Safety Pins: Use curved safety pins (designed for quilting) to secure the layers. Start from the center and work your way out, placing pins approximately every 4-6 inches in a grid pattern.
- Basting Spray: Follow the manufacturer’s instructions for your basting spray. Typically, you’d fold back sections of the quilt top, spray the batting, and then smooth the quilt top back into place. Repeat for the backing and batting.
- Hand Basting: Use a long needle and contrasting thread to create large, loose stitches through all three layers in a grid pattern.
The goal is to keep all three layers from shifting during the quilting process.
Step 5: Quilting Your Masterpiece
Quilting is the process of stitching through all three layers of the basted quilt, which gives it structure, texture, and keeps the batting from shifting. For a beginner-friendly project like the Spools Quilt, simple quilting designs can be very effective.
- Choose Your Quilting Design:
- Stitch in the Ditch: This involves quilting precisely in the seam lines of your pieced blocks. It’s a great option for beginners as it follows existing lines and helps define the piecing.
- Straight Line Quilting: You can quilt parallel lines across the entire quilt, either diagonally, horizontally, or vertically. Use a walking foot on your machine for best results to help feed all layers evenly.
- Simple Free-Motion Quilting: If you’re feeling adventurous, basic free-motion designs like stippling (a meandering, non-overlapping design) can add texture. This requires lowering your feed dogs and using a darning foot.
- Set Up Your Machine: Use a fresh needle (quilting needle recommended) and high-quality thread that matches or complements your quilt top fabrics. Wind a bobbin with the same thread. Attach a walking foot if you’re doing straight-line quilting.
- Start Quilting: Begin quilting from the center of your quilt and work your way outwards. This helps to push any excess fabric towards the edges and prevent puckering. Take your time, maintain an even speed, and guide the quilt gently rather than forcing it.
- Trim Excess Batting and Backing: Once all your quilting is complete, lay the quilt flat and use your rotary cutter and a long ruler to trim the excess batting and backing, squaring up the edges of your quilt so they are even with the quilt top.
Step 6: Adding the Perfect Binding
The binding is the final border that encases the raw edges of your quilt, providing a clean, durable, and attractive finish. It frames your Spools Quilt beautifully.
- Prepare Binding Strips: Take your 7 – 2½” x WOF (width of fabric) binding strips (Fabric C). Sew them together end-to-end using diagonal seams to create one long continuous strip. Press these diagonal seams open to reduce bulk.
- Fold and Press Binding: Fold the entire long binding strip in half lengthwise, wrong sides together, and press thoroughly. This creates a double-layer binding strip.
- Attach Binding to Quilt Front: Starting along one edge of the quilt, align the raw edges of your folded binding strip with the raw edges of your quilted project. Begin about 6-8 inches from the end of the binding strip (leave a tail for joining later). Stitch the binding to the quilt top using a ¼-inch seam allowance.
- Mitered Corners: When you reach a corner, stop ¼-inch from the edge, backstitch, and cut your thread. Fold the binding strip straight up (creating a 45-degree angle), then fold it back down along the next edge, creating a mitered corner. Start sewing again from the very edge of the quilt.
- Join Binding Ends: When you’ve sewn all four sides and returned to your starting point, stop about 10-12 inches from where you began. Leave a tail. Lay the two raw ends of the binding flat. Overlap them by the width of your binding strip (2½ inches) and mark. Trim one end. Join the two ends with a diagonal seam (often by creating a little loop, sewing, and trimming excess). Press the seam open, then fold the joined binding in half lengthwise and finish sewing it to the quilt.
- Secure Binding to Quilt Back: Flip the quilt over. Wrap the folded binding strip around to the back of the quilt, covering the raw seam line. You can secure the binding by hand-stitching it with a needle and thread for a nearly invisible finish, or by machine-stitching it from the front (“stitch in the ditch” or a decorative stitch) if you prefer a quicker method. Ensure your stitches catch the back of the binding securely.
Tips for Quilting Success
- Accurate Seams: Always use a consistent ¼-inch seam allowance. A quarter-inch foot for your sewing machine can be incredibly helpful.
- Pressing Matters: Pressing is not ironing. Gently lift and set your iron down, don’t slide it. Pressing seams in consistent directions helps your blocks lay flat and align better.
- Square Up Your Blocks: After each major step of piecing, use your square ruler to trim your blocks to the correct size. This is crucial for blocks fitting together accurately later.
- Chain Piecing: To save time, sew multiple identical units one after another without cutting the thread in between. This speeds up assembly, especially for many small units.
- Take Breaks: Quilting can be intense! Step away if you feel frustrated. A fresh perspective often helps.
- Don’t Fear Mistakes: Even experienced quilters use their seam ripper. It’s part of the process!
Final Thoughts: Enjoying Your Handmade Spools Quilt
Congratulations! You’ve successfully navigated the wonderful world of quilting and created a stunning Layer Cake Spools Quilt. This project not only enhances your quilting skills but also leaves you with a beautiful, handcrafted item that carries your personal touch. Whether draped over a sofa, spread on a bed, or given as a cherished gift, your spool quilt is a testament to your creativity and patience. Enjoy the warmth and beauty of your unique creation, and remember, every stitch tells a story!