
Transform Your Home with Elegant DIY Fabric Cornice Boards
Imagine a home where every detail reflects your unique style, a space that feels both luxurious and inviting. It’s often the smaller, thoughtful touches that make the biggest difference, and when it comes to interior design, few elements offer such a dramatic transformation as a beautifully crafted window treatment. We’re talking about the magnificent fabric cornice board – a design feature so impactful, yet surprisingly simple to create. This isn’t just another home improvement project; it’s an opportunity to inject personality and sophistication into your living spaces with results you’ll see almost instantly. Get ready to fall in love with your windows all over again and discover just how easy it is to achieve a high-end look on a DIY budget!
There’s an undeniable joy in completing a project that not only looks professional but also profoundly changes the ambiance of a room. Installing a custom cornice board in my living room, for example, utterly transformed its aesthetic, lending an air of polished elegance that was previously missing. If you’re pondering ways to refresh your home’s interior, this project deserves to be at the very top of your list. It’s a versatile solution that addresses both aesthetic desires and practical needs, making it a truly smart addition to any room seeking a style upgrade.
Window treatments are the jewelry of your home, and a well-chosen treatment can make your rooms truly pop. While drapes and blinds serve their purpose, a fabric cornice board offers a distinct level of architectural interest and softness that can complete a room’s decor. This fabulous decorative element works wonders by adding visual height, concealing unsightly curtain hardware, and creating a cohesive, finished look for your windows. It’s the perfect blend of form and function, providing an elegant frame for your views while enhancing the overall design scheme of your home. You’ll be amazed at the sophisticated touch it brings!
What Exactly is a Fabric Cornice Board?
Before we delve into the exciting DIY process, let’s clarify what a fabric cornice board is. Essentially, a cornice is a rigid top treatment for windows, typically constructed from wood, MDF (medium-density fiberboard), or even heavy-duty foam, and then beautifully upholstered with fabric and often padded for a softer, more luxurious feel. Unlike a fabric valance, which is often soft and draped, a cornice provides a structured, box-like appearance that adds architectural weight and a custom-built feel to your windows. They are mounted above the window frame, extending beyond its width, to create an illusion of larger windows and draw the eye upwards, thereby enhancing the perception of ceiling height. This structured design makes them a focal point, drawing attention to your windows in the most elegant way possible.
Why Choose a DIY Fabric Cornice Board for Your Home?
The decision to undertake a DIY project often comes with a desire for both personalization and practicality. Creating your own fabric cornice boards offers a myriad of benefits that extend beyond simply covering a window. It’s an empowering venture that allows you to control every aspect of the design, ensuring the final product is perfectly tailored to your taste and your home’s unique character. Let’s explore some compelling reasons why a DIY cornice board is an excellent choice for your next home improvement endeavor.
Unbeatable Cost Savings
One of the most attractive advantages of crafting your own cornice board is the significant cost savings compared to purchasing custom-made options. Professional fabricators and interior designers often charge a premium for bespoke window treatments, factoring in labor, materials, and design expertise. By choosing the DIY route, you dramatically reduce these expenses. You have the freedom to source materials at more affordable prices, utilize remnant fabrics, or repurpose existing textiles, all while investing your own time and effort. This financial prudence allows you to achieve a high-end, designer look without breaking the bank, freeing up your budget for other home decor aspirations.
Unleash Your Personal Style and Creativity
The beauty of DIY lies in the complete creative control it offers. When you make your own cornice board, you are not limited by showroom selections or standardized designs. You can meticulously choose the exact fabric that complements your existing decor, whether it’s a vibrant pattern, a subtle texture, or a rich solid color. You can experiment with different shapes, sizes, and depths, ensuring the cornice perfectly fits your window and architectural style. This level of personalization means your window treatment will be a true reflection of your individual taste, creating a cohesive and uniquely curated aesthetic that store-bought options simply cannot match. It’s an opportunity to transform a functional element into a statement piece.
Enhanced Aesthetic Appeal and Home Value
A well-designed cornice board elevates the aesthetic appeal of any room, adding a layer of sophistication and finish that instantly makes a space feel more polished and complete. They effectively frame your windows, drawing attention to the views outside while concealing hardware and the top portion of drapes or blinds, resulting in a cleaner, more streamlined look. Beyond just beauty, custom window treatments can also subtly increase your home’s perceived value. Potential buyers often appreciate homes with thoughtful, integrated design elements, and bespoke cornices signal attention to detail and quality, making your property stand out.
Practical and Functional Benefits
Beyond their stunning visual impact, fabric cornice boards offer practical advantages. They can help block out light seepage from the top of your window treatments, contributing to better room darkening and privacy. Furthermore, by covering the gap between the window frame and the top of your existing blinds or shades, cornices can improve energy efficiency by preventing drafts and heat loss or gain. This subtle insulation can lead to more consistent indoor temperatures and potentially lower utility bills. They also serve as an excellent way to hide any imperfections in the wall above your window or to simply provide a neat, tidy finish to your window dressings.
Planning Your DIY Fabric Cornice Board Project
A successful DIY project always begins with meticulous planning. Before you grab your tools and fabrics, taking the time to measure accurately, select the right materials, and gather your supplies will ensure a smoother process and a professional-looking result. Thoughtful preparation is the cornerstone of any rewarding creative endeavor, especially when aiming for precision and elegance in your home decor.
Measuring for Success: Precision is Key
Accurate measurements are paramount to creating a cornice board that fits perfectly and looks proportional. You’ll need to determine the desired width, depth, and height of your cornice. Typically, a cornice should extend 2-4 inches beyond the window frame on each side (totaling 4-8 inches wider than the window opening) to ensure it effectively covers hardware and gives the illusion of a grander window. The depth (how far it projects from the wall) is usually between 3-6 inches, depending on whether you have existing blinds or drapes to clear. The height is a stylistic choice, often ranging from 12-18 inches, but it should be proportionate to your window and ceiling height. Always use a metal tape measure and double-check all your figures to avoid costly mistakes. Consider the space above your window and any crown molding for optimal placement.
Choosing Your Materials: Foundations of Style
The core material for your cornice board will dictate its durability and ease of construction. Plywood or MDF are popular choices for their sturdiness and smooth surface, ideal for painting or upholstering. For a lighter, easier-to-cut option, heavy-duty foam insulation boards can also be used, though they may require additional reinforcement. Beyond the base, you’ll need:
- Fabric: Select a durable upholstery fabric that complements your room’s decor. Consider patterns, textures, and solids. You’ll need enough to cover the front, sides, and top, plus extra for wrapping.
- Batting or Foam Padding: This provides a soft, padded look and feel. Polyester batting is common, or you can use thin foam for a more structured softness.
- Wood Glue and Screws/Brackets: For assembling the frame and mounting.
- Staple Gun and Staples: Essential for securing the fabric and batting.
- Spray Adhesive: Helpful for initially positioning the batting and fabric.
Essential Tools for the Job
Having the right tools makes all the difference in a DIY project. For your cornice board, you’ll likely need:
- Measuring Tape and Ruler
- Pencil
- Miter Saw or Jigsaw (for cutting wood/MDF)
- Drill and Drill Bits
- Screwdriver
- Staple Gun (manual or electric)
- Fabric Scissors or Rotary Cutter
- Utility Knife (for foam or batting)
- Iron and Ironing Board (for fabric preparation)
- Level
- Stud Finder (for mounting)
Step-by-Step DIY Fabric Cornice Board Tutorial
Now for the exciting part – bringing your vision to life! This comprehensive step-by-step guide will walk you through the process of constructing and upholstering your elegant fabric cornice board. While the specific details might vary slightly based on your chosen materials and design, the core principles remain the same. Follow these instructions carefully, and you’ll soon be admiring your handiwork.
Step 1: Cut the Base Pieces
Using your precise measurements, cut the main pieces for your cornice frame. You’ll need one front piece and two side pieces. For a standard straight cornice, the front piece will be your total desired width, and the side pieces will be your desired depth. Ensure all cuts are straight and clean for a professional finish. If using wood or MDF, a miter saw or jigsaw will be indispensable here. For foam boards, a sharp utility knife with a straight edge will work perfectly. Precision in this step is crucial for a symmetrical and well-fitting cornice.
Step 2: Assemble the Frame
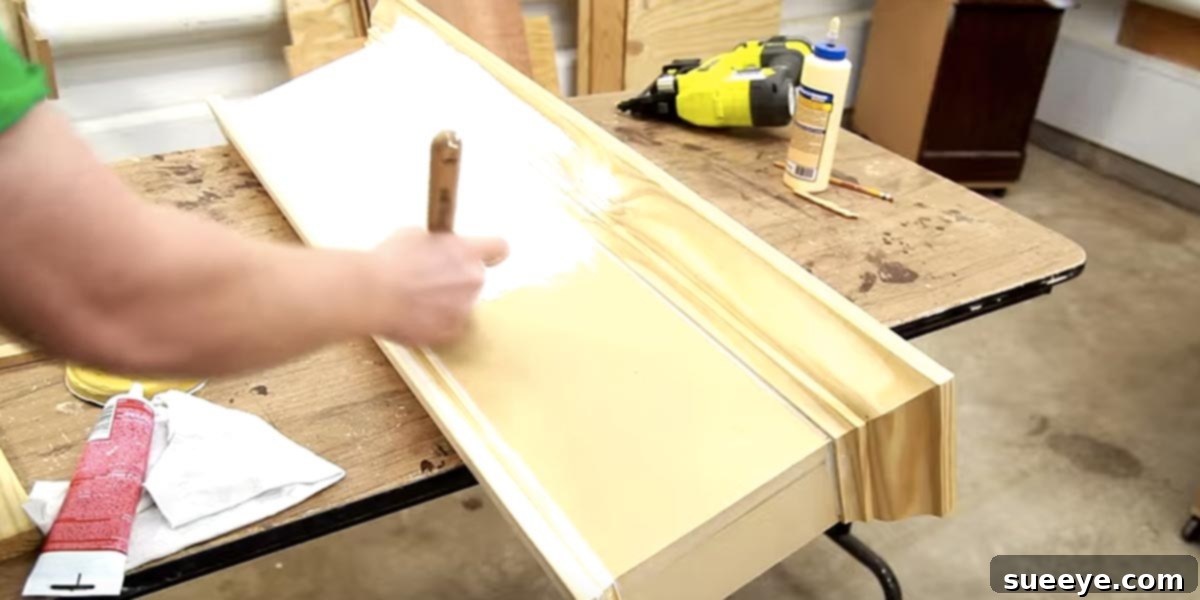
Once your pieces are cut, it’s time to assemble the basic frame. Apply a strong wood glue along the edges where the side pieces will meet the front piece. Attach the side pieces perpendicularly to the ends of the front piece, forming a “U” shape. Secure them further with screws, pre-drilling pilot holes to prevent splitting if you’re working with wood. Ensure the corners are square and the frame is sturdy. Some designs might include a top piece for added rigidity or if you plan to place items on top, but for most fabric cornices, an open top is sufficient.
Step 3: Add Padding/Batting
This step gives your cornice its soft, luxurious feel and helps the fabric lay smoothly. Lay your batting or foam padding over the front and side pieces of your assembled frame. Cut the batting to extend a few inches beyond all edges, allowing you to wrap it around the back. Use spray adhesive to initially secure the batting to the wood, ensuring it’s taut and wrinkle-free. Then, use your staple gun to firmly attach the batting to the back edges of the frame, pulling it gently as you go to maintain an even, smooth surface on the front. Trim any excess batting for a clean edge.
Step 4: Fabric Application
Now, the transformation truly begins! Lay your chosen fabric face down on a clean, flat surface. Center your padded cornice frame on top of the fabric. Cut the fabric, leaving at least 3-4 inches of excess beyond all edges of the batting – this will give you enough material to wrap and staple securely. Start by stapling the fabric to the back top edge of the cornice, pulling it taut and straight as you go. Then, move to the bottom edge, pulling firmly to eliminate any wrinkles on the front. Continue with the side edges, carefully folding the corners for a crisp, mitered look before stapling. Take your time to ensure the pattern (if any) is straight and the fabric is smooth and free of puckers. This is where attention to detail really pays off.
Step 5: Finishing Touches and Embellishments
To give your cornice a truly custom and professional appearance, consider adding finishing touches. You can glue decorative trim, piping, or cording along the bottom edge, or around the corners, to hide staples and add visual interest. Fringe, tassels, or buttons can also be incorporated to enhance the design and complement your room’s style. These small details can elevate your DIY cornice from good to absolutely stunning, making it look like it came straight from a high-end designer showroom. Always use a strong fabric adhesive for attaching trims.
Step 6: Mounting Your Cornice
The final step is to securely mount your beautiful cornice board above your window. Typically, L-brackets or corner braces are used for mounting. Attach these brackets to the inside top corners of your cornice frame first. Then, hold the cornice in place above your window, using a level to ensure it’s perfectly straight. Mark the positions for your screws on the wall. It’s highly recommended to screw into wall studs for maximum support, so use a stud finder. If studs aren’t available, use appropriate wall anchors suitable for the weight of your cornice. Carefully drill pilot holes and secure the cornice to the wall. Step back and admire your magnificent new window treatment!
Design and Styling Tips for Your Fabric Cornice
Creating the physical cornice is only half the battle; styling it to perfection is what truly brings your room to life. A well-designed cornice can serve as a powerful focal point, enhancing the visual flow and overall harmony of your interior. Here are some tips to help you make the most of your new window feature.
Fabric Selection: The Heart of Your Cornice
The fabric you choose is arguably the most critical design decision for your cornice board. It sets the tone and directly impacts the room’s aesthetic. Consider the existing color palette, patterns, and textures in your room. Do you want the cornice to blend in seamlessly or stand out as a bold statement?
- Patterns: A large-scale pattern can be striking in a spacious room, while smaller, delicate patterns might suit a cozier setting. Ensure the pattern direction is consistent.
- Solids: Solid colors offer versatility and timeless elegance, especially when paired with textured fabrics or embellished with trim.
- Textures: Velvet, linen, silk, or even durable cottons can add depth and tactile appeal. Consider how light interacts with the fabric.
Always purchase a fabric sample to see how it looks in your room’s lighting conditions before committing to a larger quantity.
Coordinating with Existing Decor
Your cornice board should feel like an integrated part of your room, not an afterthought. Consider how it will interact with other elements:
- Color: Match or complement colors found in throw pillows, rugs, artwork, or upholstery.
- Style: Ensure the style of the cornice (e.g., modern, traditional, rustic) aligns with your furniture and overall decor theme.
- Balance: If your room is busy with patterns, a solid or subtly textured cornice can provide a calming visual break. Conversely, in a minimalist room, a patterned cornice can add much-needed vibrancy.
Adding Embellishments and Hardware
Don’t shy away from adding custom touches that reflect your personality.
- Trim and Cording: Braids, tassels, fringe, or decorative cording can be glued along the bottom edge or around the corners to add a professional, tailored look.
- Nailhead Trim: For a more masculine or industrial-chic vibe, decorative nailhead trim can be applied along the edges.
- Buttons or Appliques: These can add whimsical or sophisticated accents, depending on their style.
Remember that less can often be more; choose embellishments that enhance rather than overpower the fabric and design.
Considering Height and Depth for Optimal Impact
The dimensions of your cornice play a crucial role in its visual impact.
- Height: Mounting your cornice several inches above the actual window frame can make the window appear taller, creating an illusion of higher ceilings.
- Depth: Ensure the depth is sufficient to clear any existing blinds, shades, or curtain rods, typically 3-6 inches. A deeper cornice can also provide a more substantial, architectural feel.
These considerations will help you achieve the most aesthetically pleasing and functional outcome.
Beyond the Living Room: Where Else Can Cornices Shine?
While often associated with living rooms and dining areas, the versatility of fabric cornice boards extends to almost any room in your home. They are a fantastic solution for adding warmth, style, and a custom touch wherever windows are present.
- Bedrooms: Create a serene and cohesive look by coordinating cornice fabric with bedding or throw pillows. They can enhance privacy and block unwanted light, contributing to a better night’s sleep.
- Kitchens: A cornice can add a touch of softness and color to a typically hard-surfaced kitchen. Choose a durable, easy-to-clean fabric.
- Nurseries and Children’s Rooms: Use playful patterns and colors to create a whimsical and cheerful atmosphere, while still providing light control.
- Bathrooms: In larger bathrooms, a small, elegant cornice can add a spa-like touch, especially if fabric coordinates with towels or bath mats.
- Home Offices: A tailored cornice can lend a professional and organized feel to your workspace, minimizing distractions and enhancing focus.
Don’t limit your imagination; wherever a window needs a touch of elegance and structure, a DIY cornice board is an excellent option.
Maintenance and Care for Your Fabric Cornice
Once your beautiful fabric cornice board is installed, a little care will ensure it remains a stunning feature in your home for years to come. Because cornices are generally stationary and not frequently handled, they typically require minimal maintenance.
- Regular Dusting: Periodically dust the surface of your cornice with a soft cloth or a vacuum cleaner brush attachment to prevent dust buildup.
- Spot Cleaning: For small spills or marks, refer to your fabric’s care instructions. Many upholstery fabrics can be spot cleaned with a mild detergent and a damp cloth. Always test on an inconspicuous area first.
- Deep Cleaning: For more extensive cleaning, or if your fabric is delicate, professional upholstery cleaning may be advisable.
- Protect from Sun: If your window receives intense direct sunlight, consider a UV-resistant fabric or lining to prevent fading over time.
By following these simple care tips, your DIY cornice board will continue to enhance your home’s beauty and functionality, looking as fresh and inviting as the day you installed it.
Transform Your Home Today with DIY Elegance!
You’ve seen the potential, learned the steps, and gathered the inspiration. Now, it’s your turn to unleash your inner interior designer and bring this magnificent project to life. A DIY fabric cornice board is more than just a window treatment; it’s a statement of style, a testament to your creativity, and a rewarding endeavor that will leave you with a profound sense of accomplishment. The transformation it brings to any room is immediate and undeniable, elevating your home decor with a custom touch that looks expensive but is incredibly budget-friendly.
Stop dreaming about that perfectly curated home and start creating it. Watch this comprehensive step-by-step tutorial (imagine a link here to a video, though I’m just writing the article text) and get ready to get busy making at least one, if not several, of these stunning pieces. The satisfaction of standing back and admiring a window treatment you crafted with your own hands is truly unparalleled. So, gather your materials, clear your workspace, and embark on a journey to transform your windows and your entire living space. And remember, the joy of creation is best when shared – make sure to SHARE this guide with your friends on Facebook and inspire them to embark on their own DIY home decor adventures!