
There are few things as frustrating during a relaxing shower as feeling dirty water rising around your ankles, refusing to go down the drain. A slow-draining or completely clogged bathtub is more than just an annoyance; it can make you feel unclean, disrupt your daily routine, and lead to more significant plumbing issues if left unaddressed. While the immediate impulse might be to call a professional plumber, many common bathtub clogs, especially those caused by the inevitable accumulation of hair and soap scum, can be resolved quickly and efficiently with some simple household tools and a bit of practical knowledge.
Imagine being able to tackle this common household problem yourself, saving both time and the expense of a plumber. This comprehensive guide is designed to empower you with the skills to effectively unclog your bathtub drain, often in as little as 5 minutes. We’ll walk you through the essential tools, provide clear step-by-step instructions, and share crucial tips for not only clearing existing blockages but also preventing them from recurring. Say goodbye to standing in murky water and hello to a perfectly draining, stress-free tub!
How to Unclog a Bathtub Drain Fast: Your Ultimate 5-Minute DIY Solution
The Common Culprits Behind Bathtub Drain Clogs
Before diving into the solution, it’s helpful to understand why bathtub drains clog in the first place. Knowing the causes can significantly aid in both clearing current blockages and preventing future ones. The vast majority of bathtub clogs stem from a few primary sources:
- Hair Accumulation: This is, without a doubt, the leading cause. Daily showering inevitably leads to hair shedding. These strands, often long and resilient, easily intertwine to form dense, matted balls that act like nets, trapping other debris and creating a stubborn blockage within the drainpipe.
- Soap Scum and Mineral Deposits: The combination of soap (especially bar soap), body oils, and minerals present in hard water creates a sticky, greasy film known as soap scum. This scum adheres to the inner walls of your drainpipes, narrowing the passageway and providing a perfect surface for hair and other particles to cling to, accelerating clog formation.
- Grease and Oils: While more prevalent in kitchen sinks, bath oils, certain hair conditioners, and lotions can contribute to a greasy buildup in your bathtub drain. Over time, this grease hardens and mixes with other debris, creating a formidable barrier to water flow.
- Foreign Objects: Accidentally dropped items such as small toys, shampoo caps, razor covers, or even jewelry can immediately cause a blockage or provide a base around which hair and soap scum can rapidly accumulate, leading to a complete clog.
By understanding these common culprits, you gain a clearer picture of what you’re dealing with and how best to address it, setting the stage for effective drain maintenance.
Essential Supplies for a Quick Drain Unclog
You don’t need a professional’s toolkit to clear most bathtub clogs. Gather these simple, often readily available items before you begin to ensure a smooth and efficient process:
- Plunger: A standard cup plunger, the kind used for toilets, is generally effective for bathtub clogs. Ensure it’s clean and has a good, flexible rubber cup that can form a tight seal around your drain opening.
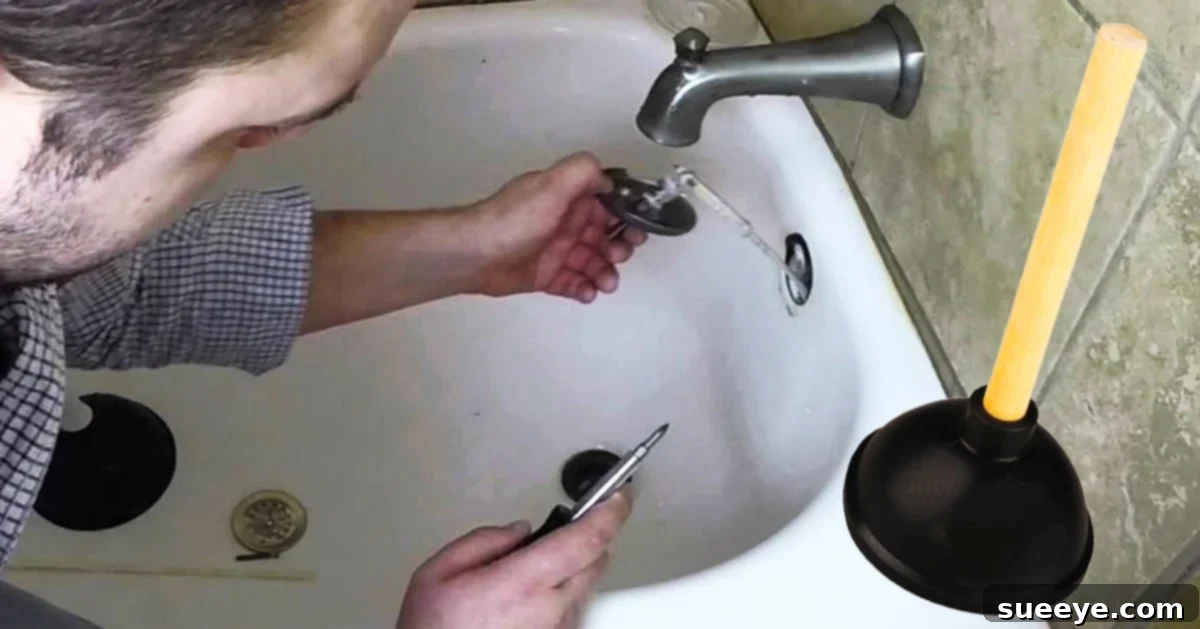
- Screwdriver Set: You’ll likely need a Phillips-head or flathead screwdriver to remove the drain stopper or cover plate, and potentially the overflow plate under the faucet.
- Drain Snake Hair Clog Remover Cleaning Tool: These come in various forms. A flexible plastic drain snake with barbed edges is incredibly effective for pulling out hair clogs and is very user-friendly. A slightly more robust metal drain auger can be used for deeper or tougher clogs but requires a bit more care.
- Rag and Plastic Bag: These are crucial for creating a temporary seal over the overflow drain, which is essential for successful plunging. The plastic bag keeps the rag clean and provides a better seal.
- Old Towels or Rags: Lay these down around the tub area to protect your floor from any dirty water or debris that might come out of the drain during the unclogging process.
- Rubber Gloves: Highly recommended for hygiene, as you will be dealing with slimy, possibly foul-smelling clogs.
- Bucket: Useful for collecting any standing water in the tub or for catching debris.
- Flashlight: A small flashlight can be helpful for peering into the drain opening to assess the situation or confirm the clog’s removal.
With these basic supplies in hand, you are well-prepared to tackle most common bathtub drain blockages effectively and without professional assistance.
Step-by-Step Guide to Unclogging Your Bathtub Drain Fast
Follow these detailed instructions to clear your clogged bathtub drain quickly and efficiently. This method focuses on the most prevalent types of clogs and can often be completed within minutes once your tools are ready.
Step 1: Initial Preparation and Safety
Begin by ensuring your workspace is clear. Remove any bath toys, bottles, or other items from the tub and its immediate vicinity. Lay down old towels or rags on the bathroom floor to catch any splashes or spills. Put on your rubber gloves. If there’s a significant amount of standing water in the tub, use a bucket to scoop out most of it, leaving just enough to cover the rim of your plunger in a later step. This step makes the process cleaner and more manageable.
Step 2: Remove the Drain Stopper and Overflow Plate for Access
Accessing the drain opening is crucial. Locate your bathtub drain stopper or cover plate at the bottom of the tub. Depending on its design, you might need to unscrew it with a screwdriver, twist it counter-clockwise, or simply pull it straight up. For tubs with pop-up stoppers that are controlled by a lever on the overflow plate, you’ll need to remove the overflow plate itself. This plate is typically located on the tub wall, directly under the faucet. Use your screwdriver to remove the screws holding it in place, then gently pull out the plate along with the attached linkage that operates the stopper. This provides a wider opening and easier access to the drainpipe.
For a visual aid on how to remove various types of drain stoppers and overflow plates, you may find the detailed tutorial by Jreshow on YouTube particularly helpful for a clear demonstration of these initial disassembly steps.
Step 3: Employ the Drain Snake or Hair Clog Remover
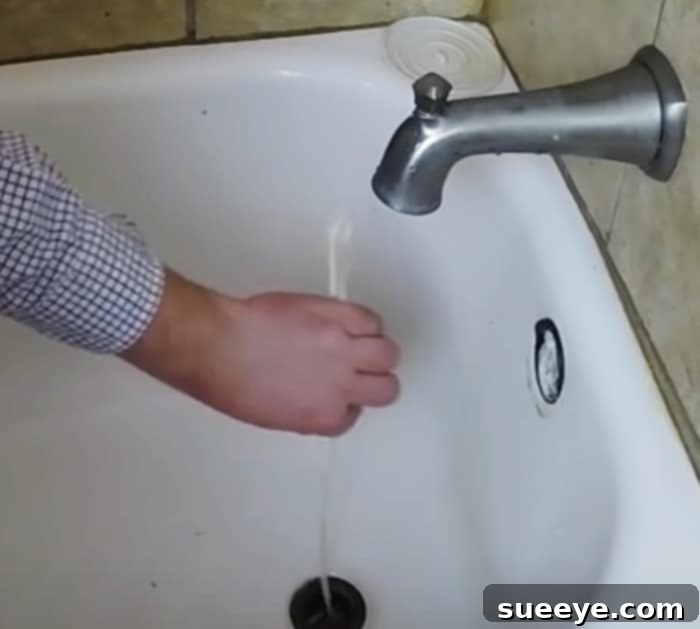
Now, it’s time to physically engage with the clog. Take your flexible plastic drain snake (the type with small barbs or hooks is excellent for hair) and slowly feed it down the exposed drain opening. Gently push and twist the snake as you insert it, allowing it to navigate the bends and curves of the drainpipe. You will likely feel resistance as the snake encounters the clog. Once you hit the blockage, try to hook onto it by twisting and wiggling the snake. When you feel it grab, slowly pull the snake back out of the drain. You will often be surprised by the dense, slimy mass of hair, soap scum, and other debris that emerges. Dispose of this immediately into a plastic bag to maintain hygiene. Repeat this process several times until you no longer retrieve significant amounts of material, indicating that the bulk of the clog has been removed.
Step 4: Securely Plug the Overflow Hole
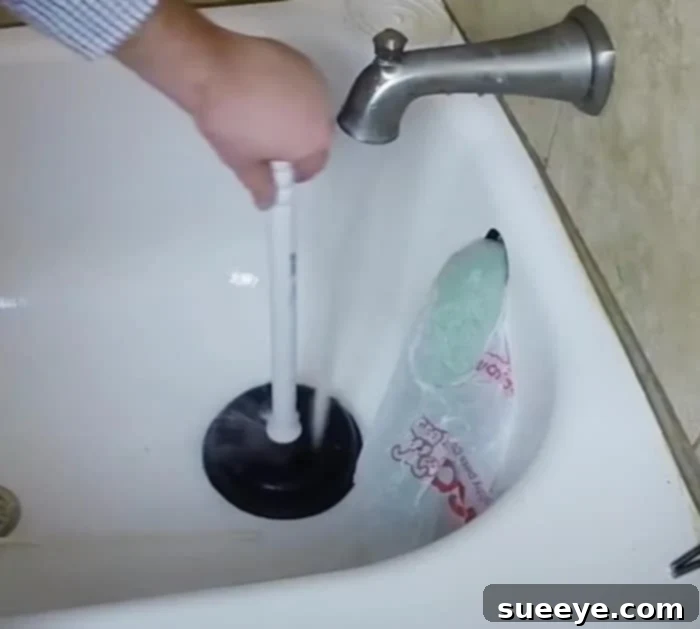
This step is absolutely critical if you plan to use a plunger, as the overflow hole (the opening on the tub wall beneath the faucet) acts as an air vent. If it’s not sealed, your plunger won’t be able to create the necessary suction and pressure to dislodge the clog effectively. Take a rag, wrap it tightly in a plastic bag (this helps create a better seal and keeps your rag clean), and firmly stuff it into the overflow opening. Ensure it creates a tight, airtight seal. If possible, have a helper hold it in place during the plunging process for added security.
Step 5: Plunge the Drain Vigorously
With the overflow hole securely plugged, position your plunger directly over the main drain opening. Ensure the plunger’s cup completely covers the drain and forms a tight seal around it. If there isn’t enough water in the tub to cover the plunger’s cup, add a small amount of hot water. Hot water can help to soften and loosen any remaining soap scum or greasy residue, making the clog easier to dislodge. Begin plunging with strong, rhythmic up-and-down motions. Focus on creating both suction (pulling up) and pressure (pushing down) to agitate and break apart the clog. After approximately 10-15 vigorous plunges, quickly pull the plunger straight up to break the seal. Listen for a distinct gurgling sound and observe if the water level in the tub begins to drop. Repeat this plunging process several times. You might need to plunge for a minute or two until you notice the water freely flowing down the drain.
Step 6: Flush with Hot Water to Clear Debris
Once you are confident that the clog has been dislodged and the water is draining, remove the rag and plastic bag from the overflow hole. Turn on your hot water tap to its maximum setting and let it run down the drain for several minutes. The continuous flow of hot water will help to flush away any remaining small particles or loosened debris that might still be clinging to the pipes. This step also allows you to confirm that the clog is completely gone and that the water is draining freely and quickly without any signs of backing up.
Step 7: Reassemble and Final Check
Finally, carefully reattach the drain stopper or cover plate and the overflow plate. When replacing the overflow plate, pay careful attention to the rubber gasket or seal behind it. Ensure this rubber seal is correctly seated and intact before tightening the screws. This seal is vital for preventing water and moisture from seeping behind your tub walls, which could lead to significant water damage, mold growth, and structural issues over time. Once everything is securely reassembled, run water down the drain one last time to confirm that it’s draining perfectly and that all components are tightly in place. Congratulations, you’ve successfully unclogged your bathtub drain!
Troubleshooting: What If It Doesn’t Work?
While the methods described above are highly effective for most common clogs, some blockages can be particularly stubborn or indicate a deeper issue. If your drain remains slow or completely clogged after attempting these steps:
- Repeat the Process: Sometimes, a very dense clog simply requires multiple attempts with both the drain snake and the plunger. Don’t give up after one try.
- Consider a More Robust Snake: If you used a plastic hair remover, a longer, metal drain auger (also known as a plumber’s snake) might be necessary to reach deeper clogs. These are available at most hardware stores and can extend much further into your plumbing system.
- Chemical Drain Cleaners (Use with Extreme Caution): As a last resort before contacting a professional, you might consider a chemical drain cleaner. However, these products can be harsh on pipes (especially older ones), harmful to the environment, and dangerous if not used correctly. Always follow the manufacturer’s instructions precisely, wear protective gear, and never mix different types of chemical cleaners, as this can create dangerous fumes.
- Wet/Dry Shop Vacuum: A powerful wet/dry shop vacuum can sometimes suction out stubborn clogs. Create a tight seal around the drain opening with the vacuum hose and turn it on. Be prepared for a potentially messy process.
- When to Call a Plumber: If you’ve exhausted all DIY options, or if you suspect a more serious issue such as a main line clog (indicated by multiple slow drains throughout your home, gurgling toilets, or sewage odors), it’s time to call a professional plumber. They possess specialized equipment like industrial-grade augers and video inspection cameras to accurately diagnose and resolve complex plumbing problems safely and efficiently.
Preventative Measures to Keep Your Drain Flowing Freely
An ounce of prevention is worth a pound of cure, especially when it comes to plumbing. Adopting a few simple habits can drastically reduce the likelihood of future clogs and keep your bathtub drain running smoothly for years to come:
- Install a Hair Catcher or Drain Strainer: This is arguably the most effective preventative measure. Place an inexpensive hair catcher or drain screen over your bathtub drain. These devices are designed to trap hair and larger debris before they enter your pipes. Remember to clean them after every shower or bath.
- Regular Hot Water Flushes: After each shower or bath, let the hot water run for an extra minute or two. This helps to wash down any residual soap scum and small particles that might be clinging to the pipe walls, preventing buildup.
- Weekly Boiling Water Treatment: Once a week, carefully pour a pot of boiling water down your drain. The heat helps to melt away accumulated grease, oil, and soap scum before they can harden and form a substantial clog.
- Baking Soda and Vinegar Treatment: For a gentle, eco-friendly preventative cleaning, pour half a cup of baking soda down the drain, followed by half a cup of white vinegar. The fizzing reaction helps to break down minor organic buildups. Let it sit for 30 minutes to an hour (or even overnight for more thorough cleaning), then flush thoroughly with hot water.
- Be Mindful of What Goes Down the Drain: Avoid pouring bath oils, excessive amounts of thick lotions, or any non-liquid substances down your bathtub drain. Even small objects can become the nucleus around which a large clog forms.
- Occasional Drain Snaking: Every few months, consider using your plastic drain snake as a preventative measure, even if your drain isn’t fully clogged. This can help clear out nascent buildups of hair and gunk before they become a problem.
The Manifold Benefits of Mastering DIY Drain Unclogging
Taking the initiative to unclog your own drain offers several compelling advantages beyond just a functioning bathtub:
- Significant Cost Savings: Professional plumbing services come with a hefty price tag, including call-out fees and labor costs. By resolving the issue yourself, you save a substantial amount of money that can be put to better use.
- Time Efficiency and Convenience: A clogged drain is an urgent problem. Being able to fix it immediately means no waiting for a plumber’s appointment, allowing you to quickly get back to your routine and enjoy your home without interruption.
- Enhanced Self-Reliance and Empowerment: Learning practical home maintenance skills like this fosters a sense of accomplishment and self-sufficiency. It builds your confidence in handling minor household emergencies.
- Reduced Reliance on Harsh Chemicals: Mechanical methods like plungers and drain snakes are often more effective and safer than corrosive chemical drain cleaners. This is better for your pipes, your health, and the environment.
- Immediate Gratification: There’s immense satisfaction in successfully tackling a problem and seeing that stubborn standing water swiftly disappear down a now-clear drain, knowing you fixed it yourself.
Conclusion: Enjoy a Free-Flowing Bathtub
A clogged bathtub drain does not have to be a major headache or an expensive call to a plumber. With the right tools and a bit of patience, you now possess the knowledge to effectively clear most common clogs in your bathtub in often under 5 minutes. Remember the combined power of the drain snake and the plunger, and critically, don’t forget the importance of properly sealing that overflow hole for maximum plunging effectiveness.
More importantly, consistent preventative measures – such as using a simple hair catcher, performing regular hot water flushes, and occasional baking soda and vinegar treatments – will be your best defense against future blockages. Embrace these DIY plumbing tips, and look forward to a consistently free-flowing drain and a hassle-free, enjoyable bathing experience every single time!